▶
Place the cover onto the HDD cage.
▶
Fasten the HDD cage with four screws and tighten them in a cross diagonal
pattern (see circles).
4.12
Handling the HDD fan modules
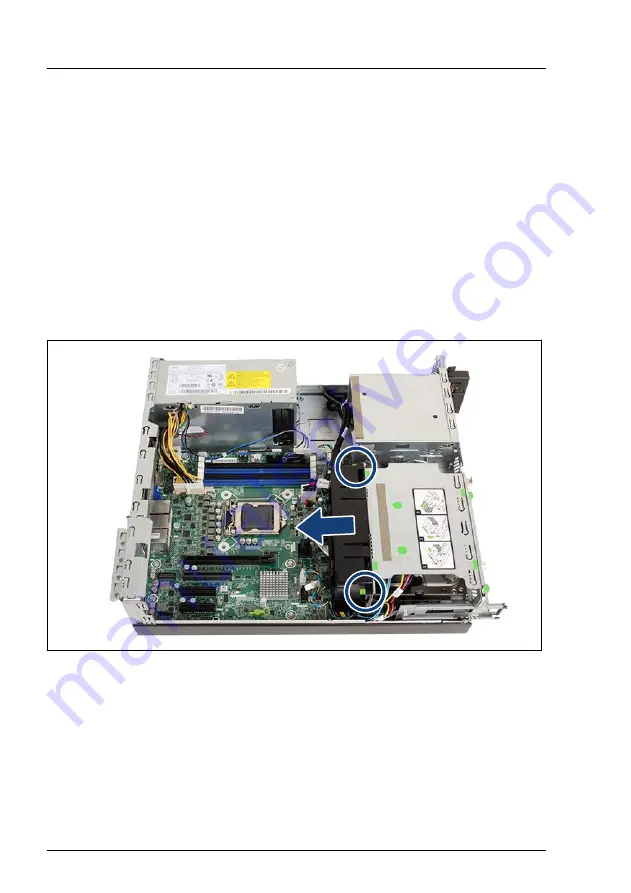
4.12.1 Removing the HDD fan module (3.5-inch HDD
variant)
▶
Disconnect the fan cables from the system board.
Figure 21: Removing the HDD fan module
▶
Press the two release latches (see circles).
▶
Remove the HDD fan module from the HDD cage.
▶
Lift up the HDD fan module.
Basic hardware procedures
64
Upgrade and Maintenance Manual
TX1320 M5
Содержание PRIMERGY TX1320 M5
Страница 70: ...Basic hardware procedures 70 Upgrade and Maintenance Manual TX1320 M5 ...
Страница 126: ...Figure 48 Removing the power distribution board A Power supply unit PSU 126 Upgrade and Maintenance Manual TX1320 M5 ...
Страница 132: ...Power supply unit PSU 132 Upgrade and Maintenance Manual TX1320 M5 ...
Страница 179: ... Switching on the server on page 60 Performing a fan test on page 100 Fans TX1320 M5 Upgrade and Maintenance Manual 179 ...
Страница 180: ...Fans 180 Upgrade and Maintenance Manual TX1320 M5 ...
Страница 266: ...Accessible drives 266 Upgrade and Maintenance Manual TX1320 M5 ...
Страница 272: ...Front panel 272 Upgrade and Maintenance Manual TX1320 M5 ...
Страница 280: ...Front USB connector 280 Upgrade and Maintenance Manual TX1320 M5 ...
Страница 298: ...Dust cover 298 Upgrade and Maintenance Manual TX1320 M5 ...
Страница 346: ...System board and components 346 Upgrade and Maintenance Manual TX1320 M5 ...
Страница 376: ...FUJITSU Server PRIMERGY TX1320 M5 Reference Manual Reference Manual English Cable Plan for October 2021 ...
Страница 402: ...List of all used screws for PRIMERGY Servers Assembled in Germany and Japan February 2019 ...


