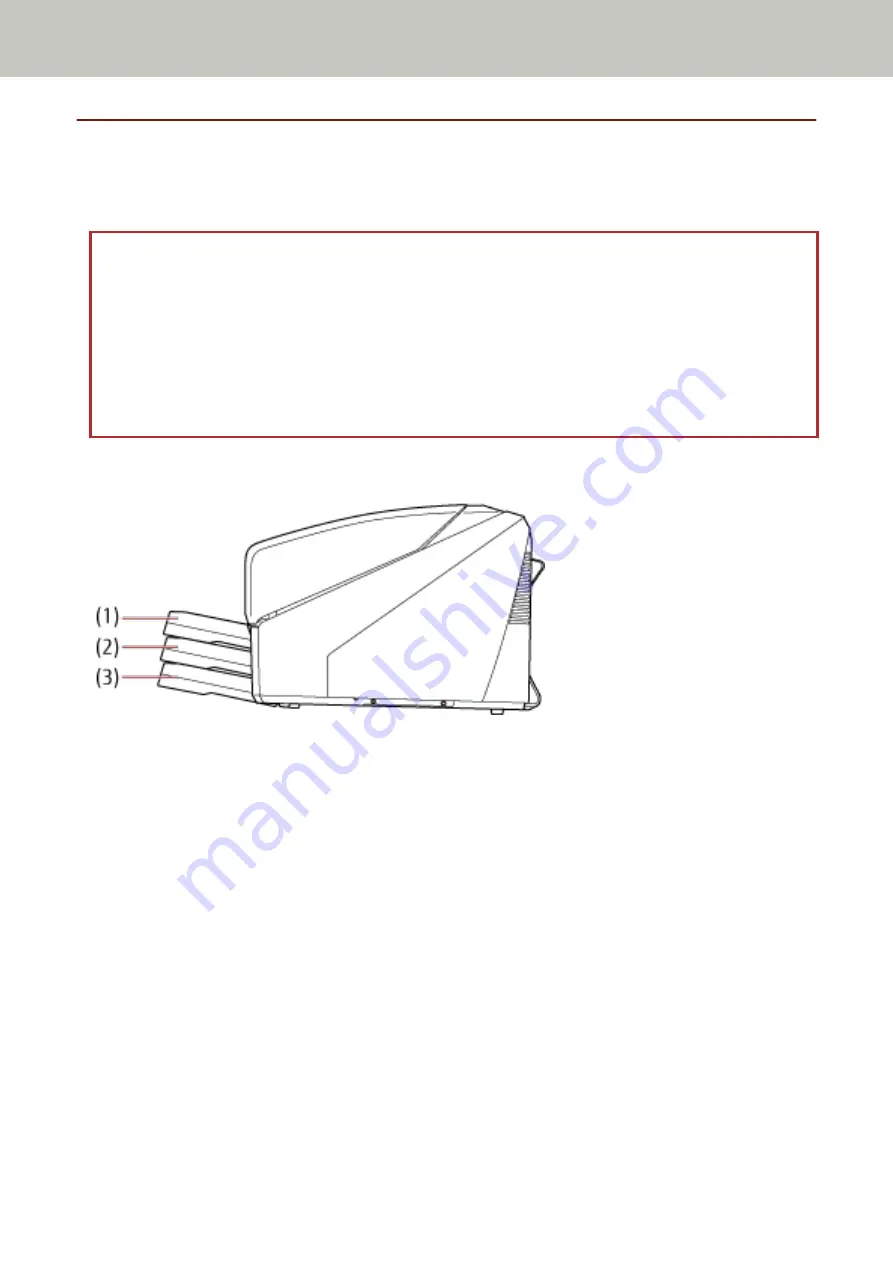
Setting the Loading Capacity of the Hopper
If there are only a few documents, you can set the hopper to a higher position and shorten the time to get to the
feeding position.
ATTENTION
●
To avoid the risk of jamming your fingers, do not touch the hopper while it is moving up/down.
●
Do not place anything on top of the hopper while it is moving. The scanner may be damaged if any object is
caught inside.
●
To avoid any contact that may damage the scanner, do not place anything beneath the hopper.
●
Do not adjust the hopper height from the operator panel when the hopper is closed, as it may damage the
hopper.
This function is only available when [Ready] is displayed on the operator panel LCD.
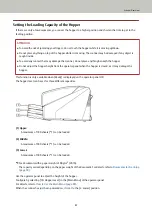
The hopper level can be set for three different capacities.
(1) Upper:
A maximum of 100 sheets (*1) can be loaded.
(2) Middle:
A maximum of 300 sheets (*1) can be loaded.
(3) Lower:
A maximum of 500 sheets (*1) can be loaded.
*1:For documents with a paper weight of 80 g/m
2
(20 lb).
The capacity varies depending on the paper weight of the document. For details, refer to
.
Use the operator panel to adjust the height of the hopper.
Configure by selecting [10: Hopper Level] in the [Main Menu] of the operator panel.
For details, refer to
How to Use the Main Menu (page 80)
When the scanner has just been powered on, it is set to the [4: Lower] position.
Scanner Overview
31
Содержание fi-7800
Страница 1: ...P3PC 6502 01ENZ2 FUJITSU Image Scanner fi 7800 fi 7900 Operator s Guide ...
Страница 25: ...Make sure to push the hopper until it locks Scanner Overview 25 ...
Страница 54: ... Good example Bad example 3 Adjust the hopper side guides to the document width How to Load Documents 54 ...
Страница 65: ...Fig 1 How to Load Documents 65 ...
Страница 71: ...ATTENTION A8 size cannot be scanned in a mixed batch How to Load Documents 71 ...
Страница 105: ...Put your finger on the tab in the center and push it down Various Ways to Scan 105 ...
Страница 130: ... Inside the top cover sensors 2 units Paper path upper side sensors 9 units Daily Care 130 ...
Страница 132: ... Inside the top cover rollers 2 locations 2 units Paper path lower side rollers 5 locations 2 units Daily Care 132 ...
Страница 143: ...4 Remove the separator roller from the scanner Replacing the Consumables 143 ...
Страница 145: ...5 Install a new separator roller on the scanner Replacing the Consumables 145 ...
Страница 148: ...5 Remove the brake roller from the scanner Replacing the Consumables 148 ...
Страница 150: ...6 Install a new brake roller on the scanner Replacing the Consumables 150 ...
Страница 179: ...For details refer to Adjusting the Paper Separation Force page 37 Troubleshooting 179 ...
Страница 201: ...The password is set Operational Settings 201 ...
Страница 204: ...The password is set Operational Settings 204 ...
Страница 220: ...For details about cleaning refer to Daily Care page 115 Operational Settings 220 ...
Страница 251: ...HINT This setting can also be configured from the operator panel Operational Settings 251 ...
Страница 272: ... 1 The depth excludes the hopper stacker and tabs 2 Includes the package weight Appendix 272 ...
Страница 273: ...Outer Dimensions The outer dimensions are as follows Unit mm in Appendix 273 ...
Страница 274: ...The outer dimensions when the Back Side Imprinter is installed are as follows Unit mm in Appendix 274 ...


