25
FinePix4800Zoom(U/E/EG) SERVICE GUIDE
4. Adjustment and Inspection
4-3-9. [ P ]: Picture Adjustment
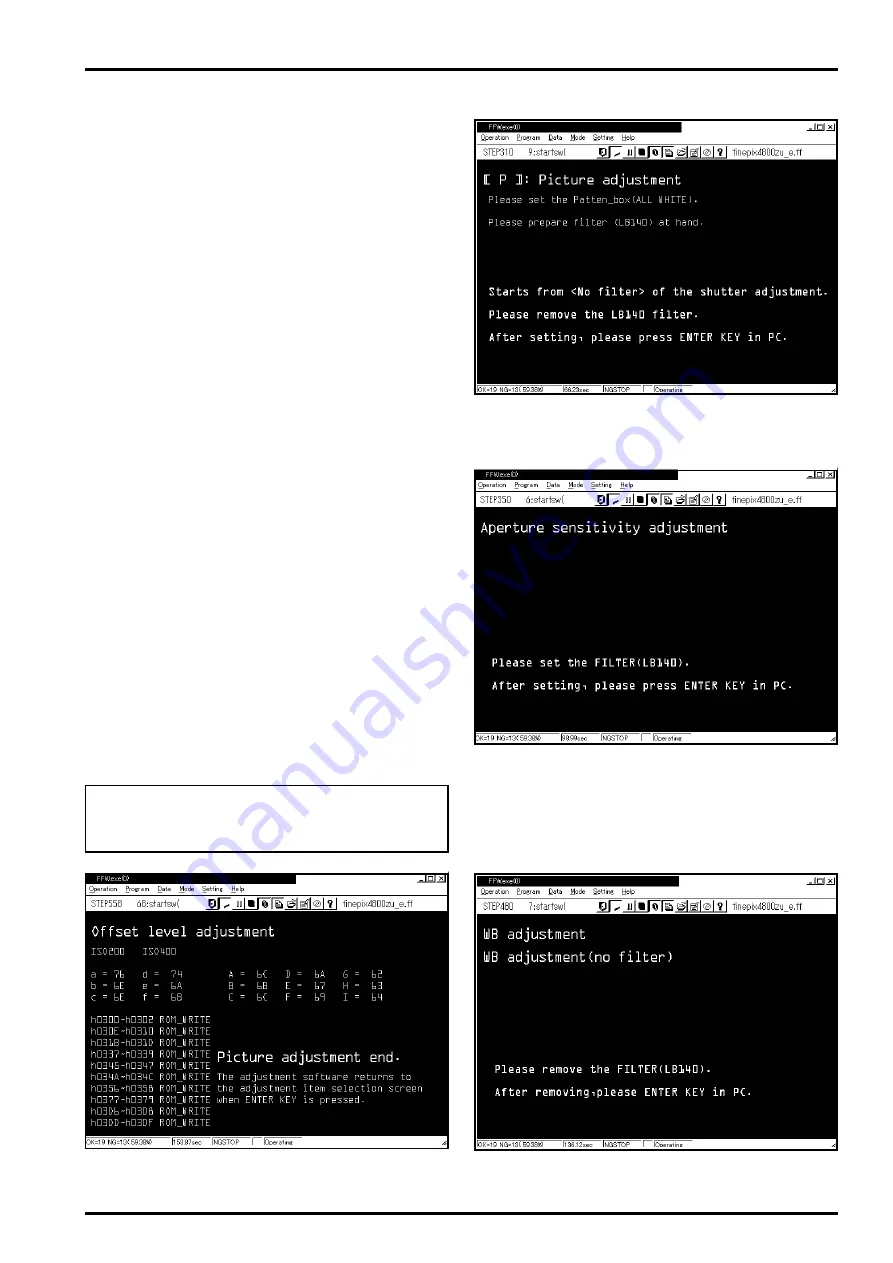
Select P on the Adjustment Items menu. When the P
key is pressed on the PC keyboard the Picture Ad-
justment Screen (Fig.12) appears. Proceed with the
adjustment in accordance with the instructions on
the screen. The adjustment procedure and descrip-
tion are given below.
<Step 1>
Picture adjustment proceeds in the following se-
quence.
Shutter adjustment--->exposure sensitivity adjustment
--->adjustment of rate of degradation in ISO sensitivity
--->white balance adjustment--->AE adjustment--->off-
set level adjustment
Prepare the pattern box and filter (LB140) before
beginning adjustment.
<Step 2>
First adjust without the filter. Place the camera in the
required position (Fig.A on P14), and press the En-
ter key. The PC then automatically begins Picture
adjustment.
<Step 3>
When adjustment without the filter is complete, a
message requiring insertion of the LB140 filter ap-
pears on the screen (Fig.13). Insert the filter and
press the Enter key. The PC then automatically re-
commences Picture adjustment.
<Step 4>
When adjustment with the filter is complete, a message re-
quiring removal of the LB140 filter appears on the screen
(Fig.14). Remove the filter and press the Enter key. The PC
then automatically recommences Picture adjustment.
<Step 5>
After pressing the Enter key in Step 4 the PC runs the
final Picture adjustment, and the Picture Adjustment
Completion Screen (Fig.15) appears. Proceed with
any other necessary adjustments.
<Important!>
Always run [S]: Flash Adjustment after running
Picture Adjustment. See Adjustment on P27.
<Fig.12> Picture Adjustment Start Screen
<Fig.13> LB140 Filter Insertion Message Screen
<Fig.14> LB140 Filter Removal Message Screen
<Fig.15> Picture Adjustment Completion Screen


