79
5. Inspection
FinePix S3Pro Service Manual
5-5-2.
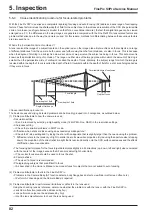
CCD Cleaning Using Test Photography to Detect Dusting
<Step 1>
Supply power to the camera. (AC power adapter of batteries
can be used.)
<step 2>
Mount an inspection lens on the camera and set the camera
up as described below.
[Camera settings]
(1) Set the camera’s exposure mode dial to “A”.
(2) Set the focusing ring on the lens to infinity (\).
(3) Set the lens aperture to the smallest aperture size.
(If this is not set, the aperture cannot be specified on the
camera.)
Set the camera aperture to F16.
(4) Set the number of recorded pixels to 3024x 2016 (6M).
(5) Set the compression rate to Normal.
(6) Set the ISO sensitivity to 200
(7) Set the white balance to Incandescent lamp.
<Step 3>
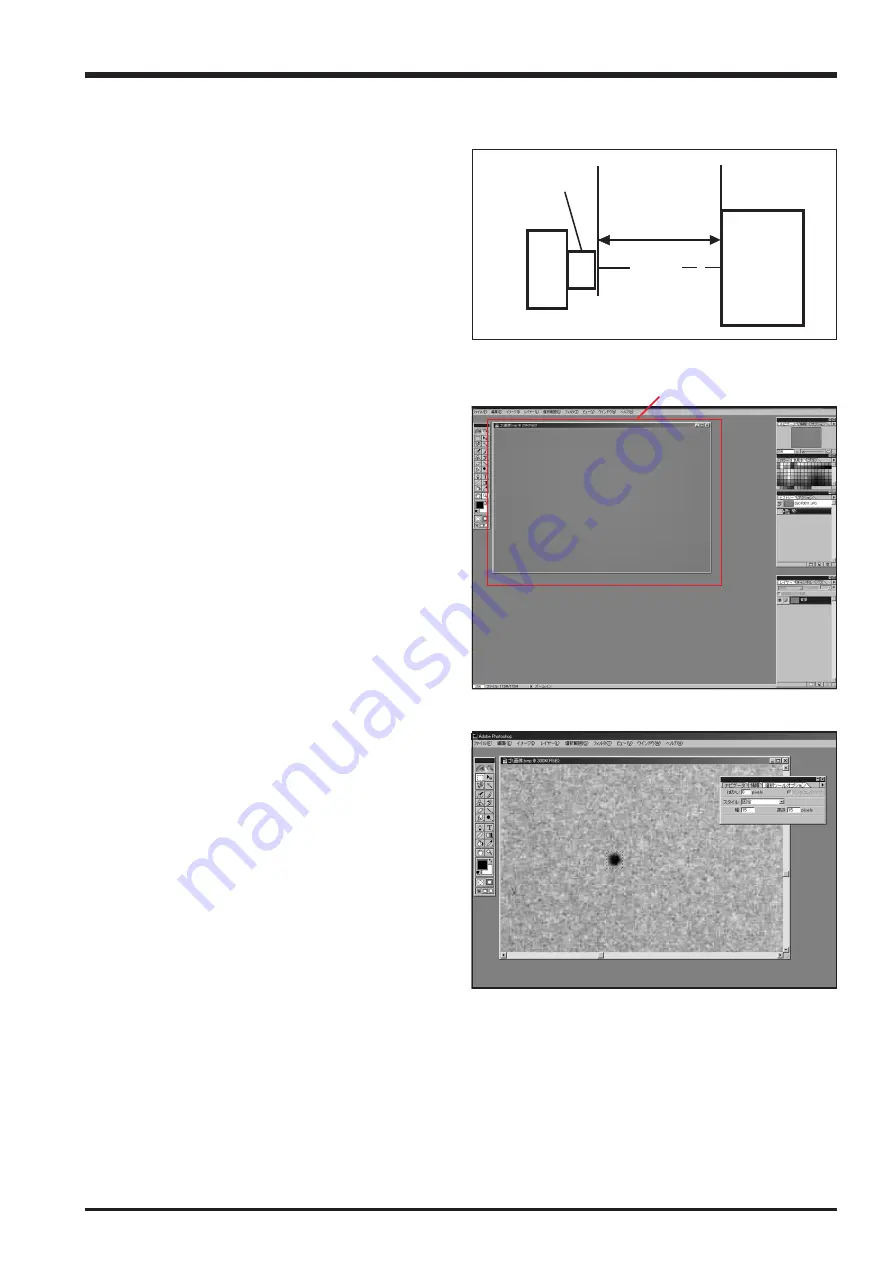
Take a picture of the white screen shown at right and record
the image on an xD picture card.
--> A CCD dust check image (Fig. 5-5-4) is recorded.
<Step 4>
Open the image on your computer using Photoshop and
measure the size of any soiling.
The selection tool for the enlarged CCD dusting check image
(Fig. 5-5-5) is useful for checking individual pixels.
<Step 5>
If the dusting is 12 pixels or larger, it can be regarded as CCD
(OLPF) dusting and the CCD should be cleaned again. (At
shipment from the factory, soiling smaller than 12 pixels is
regarded as OK.)
[Note]
In a normal environment, there will be considerable dusting of
the CCD (OLPF) surface. Consequently, there is a possibility
that the CCD of a cleaned camera will again become dusted
when used by the customer and a request for re-cleaning or
some other claim may be made.
Accordingly, to reduce the likelihood of such returns or claims
to a minimum, images should be printed before and after
cleaning
(*1)
so that these can be passed on to the customer if
necessary.
(*1) Take a picture before and after cleaning and print the
images on a printer such as a consumer-model TA printer.
(dusting can readily be seen even on prints produced by
a TA printer.)
<Fig. 5-5-3> Environment for CCD dust inspection
Pattern box
Center
Maximum 20mm
Lens for inspection
Camera
(1)
<Fig. 5-5-4> CCD dust confirmation image
<Fig. 5-5-5> CCD dust expansion confirmation image
Содержание FinePix S3Pro
Страница 27: ...27 3 Schematics FinePix S3Pro Service Manual 3 6 Circuit Diagrams 3 6 1 CCD BLOCK ...
Страница 28: ...28 3 Schematics FinePix S3Pro Service Manual 3 6 2 DCDC BLOCK ...
Страница 29: ...29 3 Schematics FinePix S3Pro Service Manual 3 6 3 IEEE1394 BLOCK ...
Страница 30: ...30 3 Schematics FinePix S3Pro Service Manual 3 6 4 PROCESS BLOCK ...
Страница 31: ...31 3 Schematics FinePix S3Pro Service Manual 3 6 5 CARD BLOCK 3 6 6 DCDC BLOCK CAMERA BODY ...
Страница 32: ...32 3 Schematics FinePix S3Pro Service Manual 3 6 7 PARTNER CHIP BLOCK ...
Страница 33: ...33 3 Schematics FinePix S3Pro Service Manual 3 6 8 PWON BLOCK ...
Страница 34: ...34 3 Schematics FinePix S3Pro Service Manual 3 6 9 USB2 0 BLOCK ...
Страница 35: ...35 3 Schematics FinePix S3Pro Service Manual 3 6 10 LCD BLOCK ...
Страница 36: ...36 3 Schematics FinePix S3Pro Service Manual 3 6 11 SW BLOCK ...
Страница 37: ...37 3 Schematics FinePix S3Pro Service Manual 3 7 Mounted Parts Diagrams 3 7 1 CCD PWB ASSY SIDE A SIDE B ...
Страница 38: ...38 3 Schematics FinePix S3Pro Service Manual 3 7 2 MAIN PWB ASSY SIDE A ...
Страница 39: ...39 3 Schematics FinePix S3Pro Service Manual SIDE B ...
Страница 40: ...40 3 Schematics FinePix S3Pro Service Manual 3 7 3 SW PWB ASSY SIDE A SIDE B ...
Страница 102: ...26 30 Nishiazabu 2 chome Minato ku Tokyo 106 8620 Japan FUJI PHOTO FILM CO LTD ...


