4. Adjustment
46
FinePix S2 Pro (U/E) SERVICE MANUAL
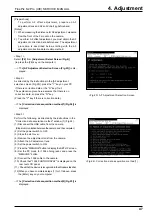
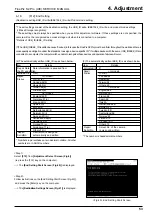
4-16.[F6]: AF offset adjustment
*1 Because the name of the adjustment gives rise to misunderstandings, it has been changed from AF adjustment to “AF
offset adjustment”.
*2 When the Nikon body and CCD HOLDER ASSY are assembled, physical variations can arise in the focal position of the
CCD surface (focal length). To compensate for these variations during AF operation, correction data is uploaded to the
Nikon body during AF offset adjustment.
*3 Together with the added AF checking, the environment for AF adjustment has been modified.
1.
Notes on making adjustments following the addition of the AF intermediate chart
(1) Because the focusing chart is split between top and bottom, it is difficult to check between the top and bottom
halves in the preview image (step 7). To overcome this problem, use an application such as Photoshop to
compare the images.
(2) Use a flat light source to illuminate the entire chart. If the light source illuminates the chart surface unevenly, the
appearance of the optimum focal point will change. To avoid this, use a light source which illuminates the top
and bottom of the chart uniformly.
2.
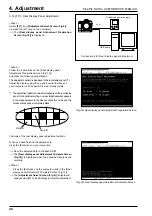
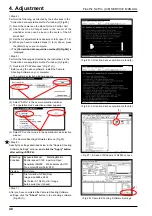
The X-Y stage used for AF adjustment is movable. Make a note of the shooting distance when making adjustments.
[NOTE]
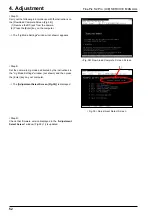
If you are unsure when selecting the best image, consider the blurring in the focus for the previous and subsequent images
and then select the optimum value.
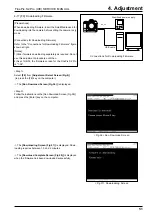
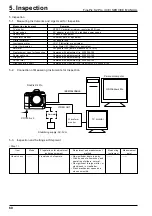
Prism
F mount side
AF sensor
Base level CCD
Sub-mirror for AF
CCD
Body
Focus mat
Superimpose
LENS
Main mirror
< Related chart of CCD and AF sensor >
Camera
Centerline
AF solid chart
F mount side
< Set up for AF offset adjustment >
1234567
1234567
1234567
1234567
953.5mm+-1.0mm
Lens for AF
Scale
Base plate
X-Y stage for AF adjustment
Fluorescent
light stand
upper-level solid chart
lower-level
solid chart
AF target for inspection
(Center chart)
Revised:24.Mar.2003


