80
A Appendix
Scan to E-mail setting screens
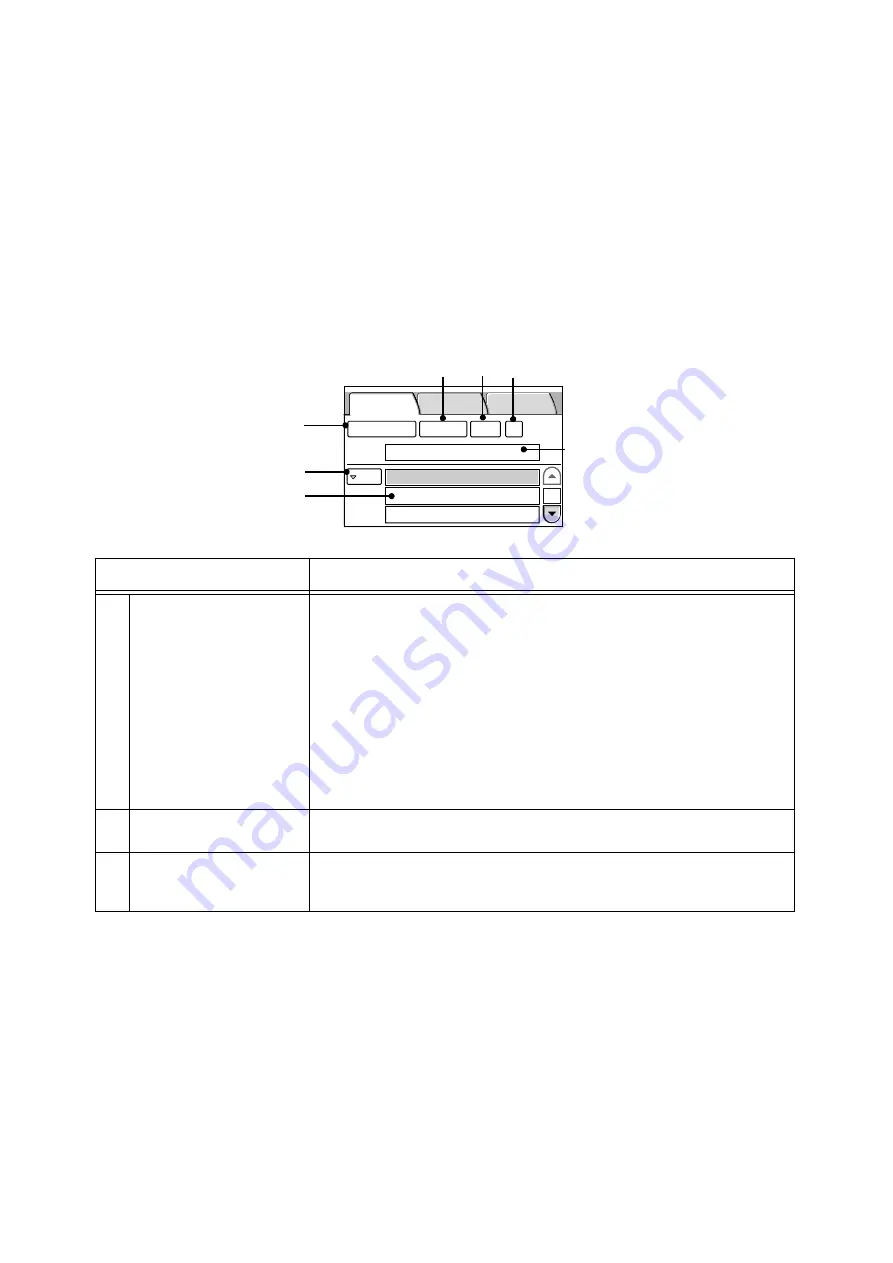
The setting screens for the Scan to E-mail feature can be displayed by pressing the <Scan to E-mail>
button.
There are three setting screens for the Scan to E-mail feature: [E-mail Address], [Basic Scanning], and
[More Scan Features] screens.
To display each screen, select the corresponding tab on the touch panel.
Refer to
• For more information about the Scan to E-mail feature, refer to "Using Scan to E-mail" (P. 42).
• For more information about the [Basic Scanning] screen, refer to "[Basic Scanning] screen" (P. 85).
• For more information about the [More Scan Features] screen, refer to "[More Scan Features] screen" (P. 86).
[E-mail Address] screen
Feature
Function
1
E-mail address entry box
(mandatory)
Sets the e-mail address of the recipient to whom scanned data is to be sent.
The recipient's address can be selected from Address Book or entered using the
numeric keypad. When selected from Address Book, the name set for [Recipient
Name] will be set as the name of the recipient's address.
• Enter this within 64 characters or symbols.
• Spaces, control characters (such as linefeeds), and the following symbols cannot
be used:
( ) < > [ ] : ; \ , "
• This can be a character string without an "@" symbol.
• More than one "@" symbols cannot be included.
• If an "@" symbol is included, one or more characters must come before and after
the symbol.
• This setting is mandatory.
2
To, CC, BCC
Sets the type of recipient to [To], [CC], or [BCC].
The button toggles between [To]/ [CC]/ [BCC] each time you touch it.
3
Address Book...
Displays the addresses registered in Address Book. The button only displays the
addresses for the Scan to E-mail feature.
Use this button when selecting addresses from Address Book.
E-mail Address Basic Scanning More Scan
Features
1/9
From
To
Address Book...
Details...
Clear
Preview
4
5
7
6
3
2
1

