


166
Printing Basics
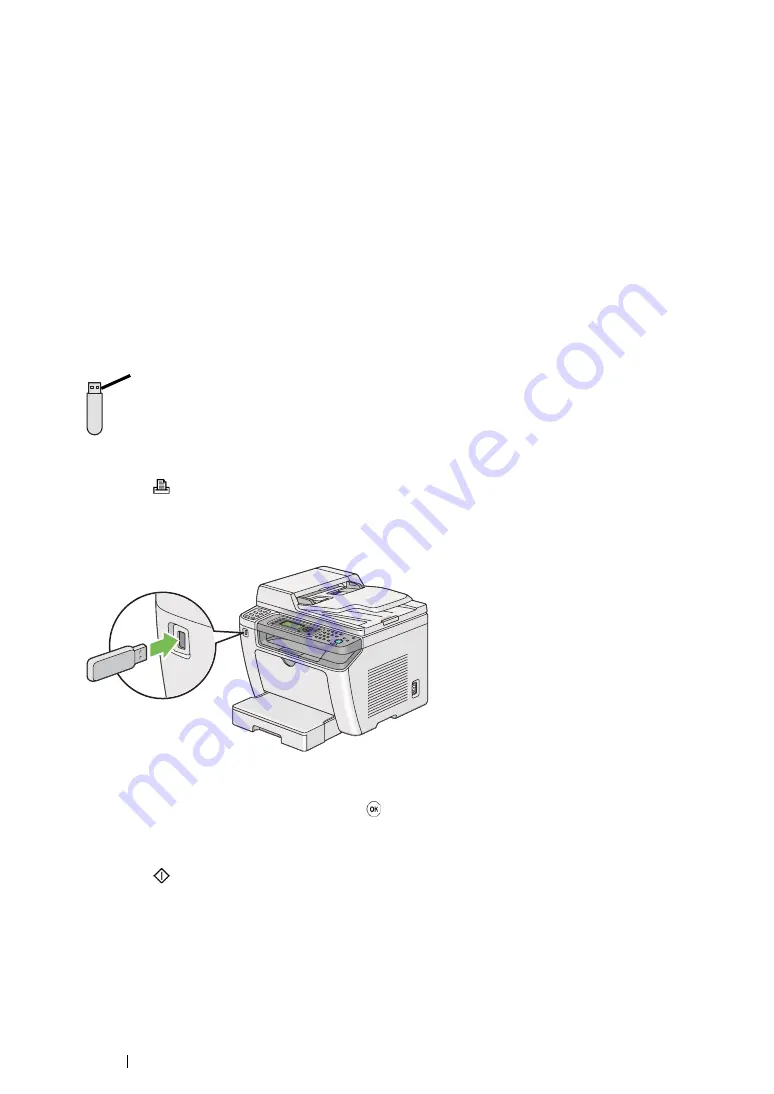
Direct Printing Using a USB Storage Device
The Print from USB Memory feature allows you to print files stored in a USB storage device by
operating on the operator panel.
IMPORTANT:
•
To prevent damage to your printer, DO NOT connect any device other than the USB storage device to the
front USB port of the printer.
•
DO NOT remove the USB storage device from the front USB port until the printer is finished with printing.
NOTE:
•
If the
Service Lock
setting for
Print from USB
is set to
Password Locked
, you need to enter the four
digit password to use the Print from USB Memory feature. If the
Service Lock
setting for
Print from
USB
is set to
Locked
, the Print from USB Memory feature is disabled and the menu is not displayed on the
LCD panel. For more information,
.
The front USB port of the printer is designed for USB 2.0 devices. You must use only an authorized
USB storage device with an A plug type connector. Use only a metal shielded USB storage device.
To print a file in a USB storage device:
1
Press the
(
) button.
2
Insert a USB storage device to the front USB port of the printer.
3
Select
Print From
.
4
Select the desired file, and then press the
button.
5
Select printing options as needed.
6
Press the
(
Start
) button to begin printing.
NOTE:
•
You can print the files scanned and stored using the Scan to USB Memory feature. Other files,
such as those created by a user, may not be printed properly.
IMPORTANT:
•
Before removing the USB storage device, ensure that the printer is not accessing the device. Removing the
USB storage device while being accessed may destroy the data in the device or the USB storage device itself.
A plug type
Содержание DocuPrint M255 df
Страница 1: ...User Guide DocuPrint M255 df M255 z ...
Страница 48: ...48 Basic Operation ...
Страница 85: ...Printer Connection and Software Installation 85 5 Select Advanced ...
Страница 180: ...180 Printing Basics ...
Страница 242: ...242 Scanning ...
Страница 280: ...280 Faxing ...
Страница 338: ...338 Using the Operator Panel Menus and Keypad ...
Страница 348: ...348 Troubleshooting 7 Close the rear cover 8 Insert the paper tray into the printer and push until it clicks into place ...
Страница 414: ...414 Maintenance 7 Place the printer at a new location and replace the paper tray ...
Страница 418: ...418 Contacting Fuji Xerox ...


