257
Maintenance
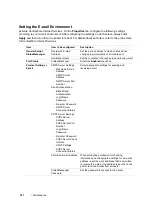
Setting the E-mail Environment
Activate CentreWare Internet Services. On the
Properties
tab, configure the following settings
according to your e-mail environment. After configuring the settings on each screen, always click
Apply
and then turn off/on the printer to reboot. For details about each item, refer to the online Help
for CentreWare Internet Services.
Item
Item to be configured
Description
General Setup >
StatusMessenger
Recipient's E-mail
Address
Set the e-mail address to which notices about
changes in printer status or errors are sent.
Notification Items
Set the contents of the notices to send in the e-mail.
Port Status
StatusMessenger
Select the
Enabled
check box.
Protocol Settings >
E-mail
SMTP Server Settings
•
Machine's E-mail
Address
•
SMTP Server
Address
•
SMTP Server Port
Number
Send Authentication
•
E-Mail Send
Authentication
•
Login Name
•
Password
•
Re-enter Password
•
SMTP Server
Connection Status
POP3 Server Settings
•
POP3 Server
Address
•
POP3 Server Port
Number
•
Login Name
•
Password
•
Re-enter Password
•
POP3 Server Check
Interval
•
APOP Settings
•
POP3 Server
Connection Status
Select appropriate settings for sending and
receiving e-mail.
Permitted E-mail Address
When setting the permission for checking
information and changing the settings for an e-mail
address, input the e-mail address that is permitted
to receive the e-mail. If no address is input here, the
printer receives e-mails from all users.
StatusMessenger
Password
Set the password for access to the printer.
Содержание DocuPrint CP205 w
Страница 1: ...DocuColor C1190 FS User Guide User Guide DocuPrint CP205 CP205 w Edition 1 December 2008 ME4326E2 1 ...
Страница 25: ...Product Features 24 ...
Страница 41: ...Basic Operation 40 ...
Страница 111: ...Network Basics 110 ...
Страница 118: ...117 Printing Basics Usable Print Media The types of print media that can be used on this printer are as follows ...
Страница 163: ...Printing Basics 162 ...
Страница 185: ...Using the Operator Panel Menus 184 ...
Страница 192: ...191 Troubleshooting 4 Lower the levers to their original position 5 Close the rear door ...
Страница 194: ...193 Troubleshooting 4 Lower the levers to their original position 5 Close the rear door ...
Страница 237: ...Troubleshooting 236 ...
Страница 242: ...241 Maintenance 11 Replace the other three toner cartridges as well 12 Close the toner access cover ...
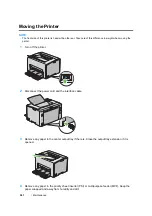
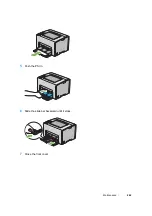
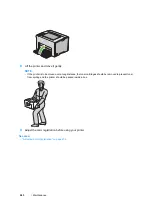
Страница 263: ...Maintenance 262 5 Push the PSI in 6 Slide the slide bar backward until it stops 7 Close the front cover ...
Страница 265: ...Maintenance 264 ...
Страница 269: ...Contacting Fuji Xerox 268 ...

