background image

Auditron Administration 

137

Auditron Mode 

Specify whether to enable or disable the Auditron feature.

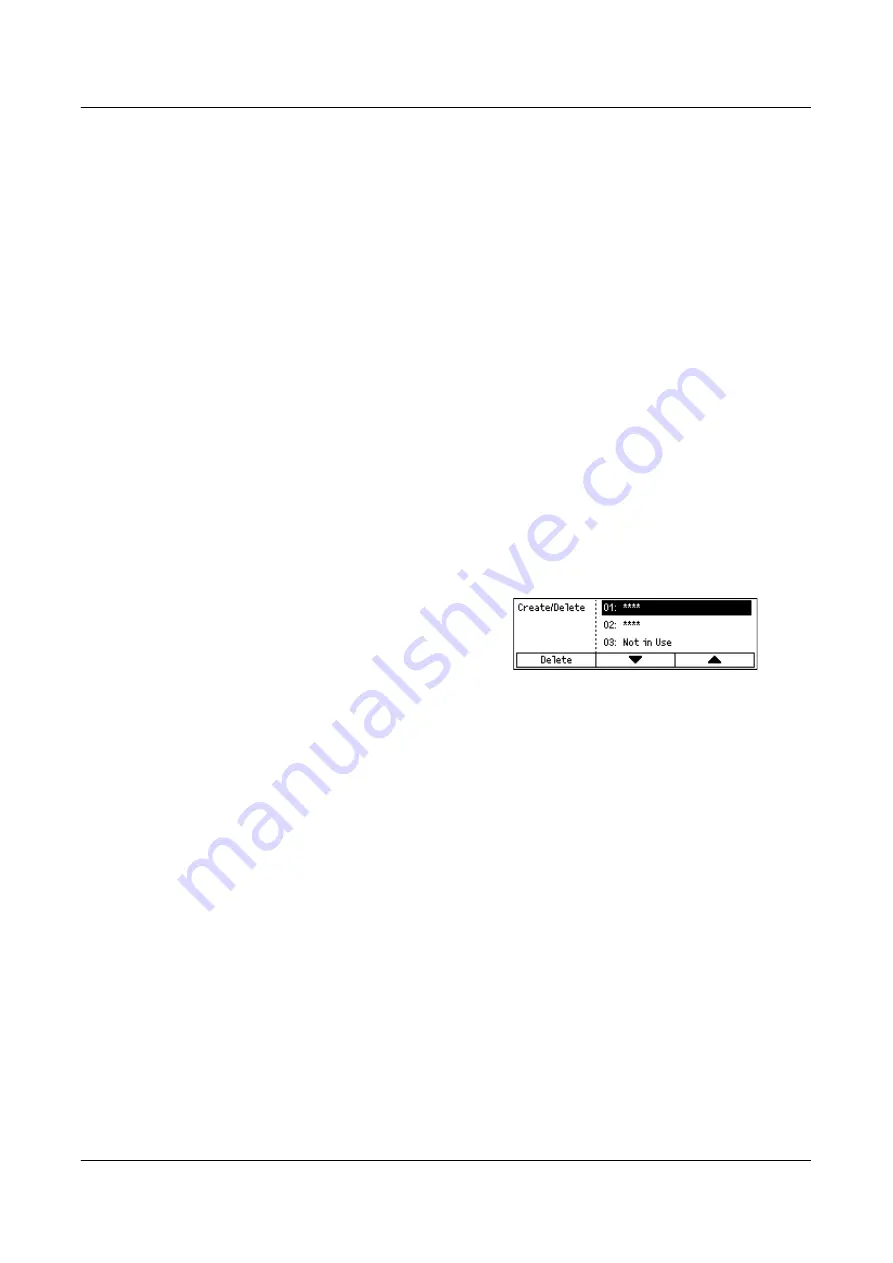
Create/Delete

Displays the [Create/Delete] screen. You can register a new account or change the 
settings for each account.

Reset Acc. Limit

Resets the upper limits imposed on the number of prints for all accounts.

Reset Impressions

Resets the total number of prints counted for all accounts.

Delete All Accounts

Deletes all registered accounts.

[Create/Delete] Screen

This screen allows you to register accounts, specify the upper limit to be imposed on 
the number of prints for each account, and reset the total number of prints counted for 
each account.

1.

Select [Create/Delete] on the [Auditron 
Administration] screen, using the 
<Select> button.

2.

Press the <Enter> button.

3.

Select an account number (01 to 50) using the <Select> buttons.

4.

Press the <Enter> button.

5.

If you are registering a new account, enter a 4-digit password to be assigned to 
the account, using the alphanumeric keypad. If you selected a registered account 
in step 3, the password entry field does not display.

6.

Select the required option.

Delete

Deletes the selected account.

Change Password

Changes the password for the selected account.

Change Account Limit

Changes the upper limit imposed on the number of prints for the selected account. 
However, if selected the number 0, it will be unlimited.

Reset Impressions

Resets the total number of prints counted for the selected account.

Содержание DocuCentre 1055

Страница 1: ...DocuCentre 1085 1055 User Guide...

Страница 2: ...rox Corporation or Fuji Xerox Co Ltd All Xerox and Fuji Xerox product names are either registered trademarks or trademarks of Xerox Corporation or Fuji Xerox Co Ltd Fuji Xerox is not responsible for a...

Страница 3: ...rning and caution labels 23 Regulation 24 Radio Frequency Emissions Class B 24 Product Safety Certification CB 24 Environment 24 About License 25 Legal Notice 27 2 Product Overview 29 Identifying the...

Страница 4: ...y 55 Reduce Enlarge 56 Lighten Darken 57 Original Type 57 Multiple Up 58 2 Sided 58 Output 60 Mixed Size Originals 61 4 Fax 63 Fax Procedure 63 1 Load the Documents 63 2 Select the Features 64 3 Speci...

Страница 5: ...in Dialing 84 On Hook 84 5 E mail 87 E mail Procedure 87 1 Load the Documents 87 2 Select the Features 89 3 Specify the Destination 89 4 Start the E mail Job 90 5 Confirm the E mail Job in the Job Sta...

Страница 6: ...08 Properties 108 Properties Features 109 Maintenance 121 Support 121 8 Paper and Other Media 123 Loading Paper 123 Preparing Paper for Loading 123 Loading Paper into the Paper Trays 123 Tray 5 Bypass...

Страница 7: ...ority 141 Customize Screens 141 Print Settings 142 Network Port 142 System Settings 147 Printer Settings 149 Allocate Memory 150 Initialize Delete Data 151 Report List 152 Software Option 152 Fax Sett...

Страница 8: ...Replacing the Drum Cartridge 175 Removing the Old Drum Cartridge 176 Inserting the New Drum Cartridge 177 Replacing the Toner Cartridge 178 Removing the Old Toner Cartridge 179 Inserting the New Tone...

Страница 9: ...2 Appendix 209 Specifications 209 Document Size Detection Table 214 When Using the Copy Feature 214 When Using the Fax Feature 216 When Using the E mail Feature 219 Possible Combination of Features 22...

Страница 10: ...10...

Страница 11: ...ct After reading this guide be sure to keep it handy for quick reference It will be useful in case you forget how to perform operations or if a problem occurs with the machine For instructions on conf...

Страница 12: ...the organization of this guide This guide was produced for users who operate the DocuCentre 1085 1055 Series on a regular basis When reading this guide refer to the chapter most relevant to the operat...

Страница 13: ...ns This section describes the conventions used throughout this User Guide In this guide you will find that some terms are used interchangeably Paper is synonymous with media Document is synonymous wit...

Страница 14: ...puter For example Select Common Settings on the System Settings screen Select Confirm Text in Angle Brackets Indicate that these are names of the hard buttons numeric or symbol buttons lights on the c...

Страница 15: ...r item that if not followed strictly can lead death or severe or fatal injuries and the possibility to do it is comparatively high Used for items that if not followed strictly can lead to severe or fa...

Страница 16: ...a branch circuit or an outlet that has larger capacity than the rated ampere and voltage of this product See the data plate on the rear panel of this product for its rated ampere and voltage Never tou...

Страница 17: ...outlet the plug is not excessively heated rusted or bent the plug and electrical outlet are free of dust and the power cord is not cracked or worn down Once you notice any unusual condition switch of...

Страница 18: ...uries Always lock the wheels of this product after installation Otherwise it may fall over or slide and cause injuries To keep this product in a good performance and condition always use it in the fol...

Страница 19: ...it breaker fuse or any other safety device is activated Any liquid is spilled into the product The product is soaked in water Any part of the product is damaged Do not insert any object into slots or...

Страница 20: ...ally activate the product and cause injuries or electric shock A ground fault interrupter is embedded in this product If current leakage occurs the ground fault interrupter automatically cuts off powe...

Страница 21: ...ic sparks inside the vacuum cleaner and cause explosion If you spill a large volume of toner contact your local Fuji Xerox representative Never throw a toner cartridge into an open flame Remaining ton...

Страница 22: ...your eyes wash it out with plenty of water for at least 15 minutes until irritation is gone Consult a physician if necessary If you inhale toner particles move to a fresh air location and rinse your m...

Страница 23: ...rning and caution labels Always follow all warning instructions marked on or supplied with this product To avoid the risk of burn injuries and electric shock never touch the area with the High Tempera...

Страница 24: ...n a circuit different from that to which the receiver is connected Consult the dealer or an experienced radio TV technician for help Changes and modifications to this product not specifically approved...

Страница 25: ...ALL THE INSTITUTE OR CONTRIBUTORS BE LIABLE FOR ANY DIRECT INDIRECT INCIDENTAL SPECIAL EXEMPLARY OR CONSEQUENTIAL DAMAGES INCLUDING BUT NOT LIMITED TO PROCUREMENT OF SUBSTITUTE GOODS OR SERVICES LOSS...

Страница 26: ...SE OF THIS SOFTWARE EVEN IF ADVISED OF THE POSSIBILITY OF SUCH DAMAGE This product includes cryptographic software written by Eric Young eay cryptsoft com This product includes software written by Tim...

Страница 27: ...CIDENTAL SPECIAL EXEMPLARY OR CONSEQUENTIAL DAMAGES INCLUDING BUT NOT LIMITED TO PROCUREMENT OF SUBSTITUTE GOODS OR SERVICES LOSS OF USE DATA OR PROFITS OR BUSINESS INTERRUPTION HOWEVER CAUSED AND ON...

Страница 28: ...1 Before Using the Machine 28...

Страница 29: ...hows the standard and optional components of the machine Configuration may vary depending on the model NOTE Depending on the configuration the Document Glass Cover is attached instead of the Document...

Страница 30: ...o make double sided copies For more information on how to make double sided copies refer to 2 Sided in the Copy chapter on page 58 Tray 1 to 4 Tray 1 is standard equipment and can hold a maximum of 25...

Страница 31: ...ter on page 79 3 Fax Transmitting Indicates that data is being transmitted or received 4 Jobs in Memory Indicates there is data stored in the machine 5 Job Status Use this button to view the progress...

Страница 32: ...nd change the default settings You can also register a destination in the Address Book a Fax Program or a bulletin board Refer to Setups chapter on page 131 13 Power Saver Green light Indicates whethe...

Страница 33: ...dress Book or the program registered in the Fax Program 32 Address Enter Next Allows you to send a fax to the multiple destinations at the same time 33 One Touch panels Displays the number of One Touc...

Страница 34: ...hat the RESET button on the side of the machine is in the reset position Entering Numbers 1 Select Numeric in Entry Mode using the Select button 2 Enter numbers using the alphanumeric keypad on the co...

Страница 35: ...matically cuts all electrical power If power is interrupted locate the RESET button on the side of the machine If the GFI has been triggered the RESET button will be in the tripped position To restore...

Страница 36: ...Saver in the Setups chapter on page 134 Sleep Mode The machine automatically switches to the Sleep Mode after the Low Power Mode continues a specified period of time The Sleep Mode has a reduced powe...

Страница 37: ...ct Timer Settings on the Common Settings screen using the Select button 8 Press the Enter button 9 Select the required option 10 Enter the value using the numeric keypad NOTE You may have to delete th...

Страница 38: ...utton to switch between screens 3 To exit the Copy mode press another mode button For more information about Copy features refer to Copy chapter on page 49 Fax Use this button to access the optional F...

Страница 39: ...a Mailbox or a Bulletin Board When the Auditron feature is enabled enter the password you need to use the account on the screen displayed after pressing the Log In Out button 1 Press the Log In Out b...

Страница 40: ...ct the required option Fax E mail You can select either Send or Receive for a fax job and Send for an e mail job Send Displays the fax and e mail out going jobs Select a job from the list using the Se...

Страница 41: ...be replaced soon For more information refer to the following Error Information page 41 Consumables page 42 Report List Non print Jobs page 42 Report List Print Jobs page 43 Billing Meter page 45 Prin...

Страница 42: ...s Report List Non print Jobs This screen allows you to print various reports and lists for each non print jobs NOTE When you print reports or lists for non print jobs the optional fax features should...

Страница 43: ...ts out the box names and F Code etc in numerical order of box number Bulletin Board List Prints out a report as a list of registered bulletin boards The list shows titles of registered documents date...

Страница 44: ...f the machine information such as hardware configuration and network information Print this report to check whether optional accessories have been correctly installed Fonts List Prints a list of fonts...

Страница 45: ...on print Jobs Indicates the total number of pages used for all jobs except print jobs Print Mode Allows you to change the default printer mode and change printer language settings 1 Select Print Mode...

Страница 46: ...e paper size for Tray 5 bypass tray Orientation The paper printing direction can be selected from Portrait and Landscape 2 Sided Print Specify whether or not to print double sided printing When On is...

Страница 47: ...copy print jobs For more information refer to Auditron Administration in the Setups chapter on page 136 1 Press the Log In Out button on the control panel 2 Select System Settings using the Select but...

Страница 48: ...2 Product Overview 48...

Страница 49: ...r For information on how to enter a password refer to Auditron Access Screen in the Product Overview chapter on page 47 1 Load the Documents Document input areas are as follows Document feeder for sin...

Страница 50: ...his feature is unavailable and use the document glass instead of the document feeder NOTE To reduce the risk of document feeder jams use the document glass to copy folded or creased documents Replace...

Страница 51: ...ace down on the document glass aligned with the tip of the registration arrow near the top left of the document glass 3 Lower the document feeder or the document glass cover Document Feeder Glass The...

Страница 52: ...ntrol panel to cancel any previous selections 3 Select an option for the required feature If necessary press the or button to switch between screens and configure the copy settings For more informatio...

Страница 53: ...s document jam or memory full is occurred while scanning multiple documents the job is canceled and the scanned data are deleted When a memory full error occurs delete all unnecessary data stored in t...

Страница 54: ...ended job Copying Features This section describes the various features available for a copy job For more information about the features available refer to the following Paper Supply page 55 Reduce Enl...

Страница 55: ...on to display Paper Supply on the Copy screen 2 Select Paper Supply using the Select button 3 Select the required option 4 Press the Enter button NOTE The Paper Supply button on the control panel prov...

Страница 56: ...g the Select button you can switch X and Y to enter the value After you have entered the values press the Enter button to display the Paper Type screen Paper Type screen Use this screen to select a pa...

Страница 57: ...rol panel Lighten Darken This feature allows you to adjust the density for copying documents in five levels Use the Select buttons to lighten or darken the density 1 Press the or button to display Lig...

Страница 58: ...button to display Multiple Up on the Copy screen 2 Select Multiple Up using the Select button 3 Select the required option 4 Press the Enter button 1 Up Disables the feature 2 Up Copies two documents...

Страница 59: ...ded documents Press the Enter button to display the Copies screen Select either Rotate Side 2 Off or Rotate Side 2 On to specify the orientation for the output images 2 1 Sided Produces single sided c...

Страница 60: ...omatically applies either Collated or Uncollated for sorting copy output The Collated option is applied when you use the document feeder When you use the document glass Uncollated is applied Collated...

Страница 61: ...of the first page will be the size for the copies NOTE When Reduce Enlarge is set to Auto the copy may be produced at an incorrect size When this function is used the enlargement ratio must be set un...

Страница 62: ...3 Copy 62...

Страница 63: ...contact the System Administrator 1 Load the Documents The following steps explain how to load documents using the document feeder or document glass When scanning a document in the form of sheet or mul...

Страница 64: ...more information on how to select the scan size refer to Scan Size on page 73 NOTE The long page scan feature is only available when using the document feeder This feature allows you to scan up to 1 0...

Страница 65: ...to Speed Dial on page 69 Using One Touch Dial refer to One Touch Dial on page 70 1 Enter the fax number using the numeric keypad on the control panel You can send a fax to multiple destinations in a s...

Страница 66: ...upted when the sixth page of the document is being sent the machine sends all seven pages when the power is restored including the first five pages that had already been sent before the interruption N...

Страница 67: ...utton 3 If the job to be canceled is displayed on the current screen select Stop Delete using the Select button If not go to step 4 4 Press the button to display the All Jobs screen 5 Select Fax E mai...

Страница 68: ...s listed at the time of transmission 1 Enter the first destination 2 Press the Address Enter Next button on the control panel 3 Enter the next destination 4 Repeat steps 2 and 3 as required NOTE You c...

Страница 69: ...tton 2 Enter an index character using the alphanumeric keypad 3 Select Confirm using the Select button or press the Enter button The list of addresses that match the entered index displays Speed Dial...

Страница 70: ...fax destination and fax sending operations to allocate one key You can always send faxes with the same settings by recalling the program using One Touch Dial Items such as serial broadcast transmissi...

Страница 71: ...using F Code For more information about relay broadcasting using F Code refer to Relay Broadcast Remote Relay Broadcast on page 76 NOTE Relay broadcasting with F Code can be used among machines that h...

Страница 72: ...ption 4 Press the Enter button Text Select this option when sending a text document Fine Scans documents using 8 7 7 lines mm resolution This option is recommended for detailed line art or small lette...

Страница 73: ...is selected documents will be scanned according to the specified size regardless of their actual size 1 Press the or button to display Scan Size on the Fax screen 2 Select Scan Size using the Select...

Страница 74: ...button 100 Scans and sends the document the same size as the original document Presets Allows you to select from the preset reduction enlargement ratios Send Header Use this feature to add the sender...

Страница 75: ...n about reports refer to Report Settings in the Setups chapter on page 161 1 Press the or button to display Trans Report on the Fax screen 2 Select Trans Report using the Select button 3 Select the re...

Страница 76: ...etin Board features refer to Bulletin Board on page 82 Recipient Print Sets Allows you to specify the number of copies the remote machine will print out Relay Broadcast Remote Relay Broadcast To send...

Страница 77: ...ith overseas calls 1 Press the or button to display Overseas Comm on the Fax screen 2 Select Overseas Comm using the Select button 3 Select On to enable the feature using the Select button Delayed Sta...

Страница 78: ...he feature using the Select button Priority Send This feature allows an urgent document to be transmitted with top priority If multiple Priority Send documents exist the one which is specified first i...

Страница 79: ...s NOTE This cannot be used during transmission or reception NOTE This cannot be used if there is no free memory capacity 1 Press the or button to display Direct Send on the Fax screen 2 Select Direct...

Страница 80: ...ng When using this feature the mark O is stamped on the scanned page The stamped pages allow you to confirm that the scanning is successful NOTE Load the document to be stamped in the document feeder...

Страница 81: ...one destination for one polling job When you select this option the Poll Receive screen displays NOTE Although the machine attempts to redial if the remote machine does not respond to a polling reque...

Страница 82: ...t or delete the documents on a bulletin board To post documents the bulletin board must be set up in advance For more information refer to Bulletin Board in the Setups chapter on page 169 NOTE You can...

Страница 83: ...e Bulletin Board screen using the Select button 2 Select the required bulletin board from the list 3 Select the required option Print Allows you to print the selected document Delete Allows you to del...

Страница 84: ...re is 192 However Speed Dial codes One Touch Dial codes and manually dialed numbers can only be entered up to 64 digits each so input may be limited even when the number of digits is less than 192 dig...

Страница 85: ...he external telephone is in use The external telephone cannot be used when the machine is in On Hook mode 1 Press the Manual Dial button on the control panel Press the Manual Dial button again or the...

Страница 86: ...4 Fax 86...

Страница 87: ...nd e mail to computers It is not able to send e mail to fax machines with Internet functions E mail Procedure This section describes how to scan documents to send them as attachments Follow the steps...

Страница 88: ...r on page 49 Scan the Documents There are two methods of scanning the documents NOTE As the machine does not support the function to scan non standard size document precisely the edge of the document...

Страница 89: ...the e mail settings For more information refer to E mail Features on page 95 3 Specify the Destination To specify an e mail destination the machine provides the following methods NOTE When sending e...

Страница 90: ...he data for one page exceeds the following size transmission processing will be aborted for lack of memory capacity Data for which transmission has been aborted will be discarded and not re sent If me...

Страница 91: ...ent After scanning the document follow the step 2 to 3 1 Press the Stop button on the control panel to cancel the current e mail job 2 If required press the Job Status button on the control panel to d...

Страница 92: ...ing steps to specify e mail destinations by entering addresses using the alphanumeric keypad on the control panel 1 Press the or button to display E mail Address on the E mail screen 2 Select E mail A...

Страница 93: ...ton on the control panel 2 Select the required option 3 Press the Enter button on the control panel Address Book Allows you to select from the list of destinations registered in Speed Dial Search by I...

Страница 94: ...how to register Speed Dial codes refer to Speed Dial in the Setups chapter on page 166 1 Press the Speed Dial button on the control panel 2 Enter a 3 digit code NOTE If the 3 digit code entered is co...

Страница 95: ...switch between screens 3 Select the required option Resolution Use this feature to select the resolution for scanning documents 1 Press the or button to display Resolution on the E mail screen 2 Sele...

Страница 96: ...ve on the screen by selecting Darken or Lighten using the Select button to select the density level 4 Press the Enter button Scan Size Using this feature the size of the document can be automatically...

Страница 97: ...button 3 Select the required option 4 Press the Enter button 100 Scans the document the same size as the original document Presets Allows you to select from the preset reduction enlargement ratios Fi...

Страница 98: ...e 165 1 Press the or button to display Trans Report on the E mail screen 2 Select Trans Report using the Select button 3 Select the required option 4 Press the Enter button Undelivered Prints a report...

Страница 99: ...o Speed Dial in the Setups chapter on page 166 1 Press the or button to display Sender on the E mail screen 2 Select Sender using the Select button 3 Select the required option 4 Press the Enter butto...

Страница 100: ...ial To search by index character follow the steps below 1 For Entry Mode switch between Alphabet for a letter and Number for a number using the Select button 2 Enter an index character using the alpha...

Страница 101: ...driver refer to the documentation contained in the CD ROM of the Driver CD Kit When you select the machine as the printer the associated print screen is displayed on the computer Select the Print men...

Страница 102: ...tor Inserts a divider page after each printed transparency Skip Blank Pages Does not print blank pages when printing documents that contain blank pages Draft Mode Prints the text and graphics in gray...

Страница 103: ...strator Guide Some of the CentreWare Internet Services features will have restricted access Contact the System Administrator for further assistance NOTE This service is not available on a machine wher...

Страница 104: ...and change the current status or settings of the machine through a web browser on a computer instead of the control panel of the machine Interface Options The CentreWare Internet Services home page co...

Страница 105: ...ive jobs or click Job History List then Job History Report to view the list of completed jobs Job List This page displays the list of active jobs being processed when you select Job List Details inclu...

Страница 106: ...e job Job Status Displays the status of the job Job Type Displays the type of job Pages Displays the number of pages printed Output Destination Displays output destination details such as address outp...

Страница 107: ...Reboot buttons Click the Refresh Status button to display the latest information Trays This page displays the status of the paper tray and output tray Paper Tray Trays Lists the available paper trays...

Страница 108: ...with a new toner cartridge Properties This page allows you to view and set the machine properties These include the machine details and configuration the CentreWare Internet Services settings the por...

Страница 109: ...he serial number of the machine This is a display only item Name Enter the name of the machine Location Enter the location of the machine Contact Person Enter the name of the System Administrator Up t...

Страница 110: ...min Address Book Allows you to make detailed settings as follows Speed Dial Displays Speed Dial code This is a display only item Address Type Allows you to select a fax number or a e mail address to r...

Страница 111: ...users whose domains are not registered in the permitted domains Next Notice Date Displays the next transmission date Mail Recipient Settings Allows you to specify up to three recipient e mail address...

Страница 112: ...rent ports used in the printer Parallel Select the check box to enable USB Select the check box to enable EtherTalk Select the check box to enable SMB Select the check box to enable You can also confi...

Страница 113: ...no data is sent to the printer Adobe Communication Protocol This is only displayed when PostScript is enabled Select one of the following options Normal Select this when the communication protocol is...

Страница 114: ...the host name and workgroup name in Unicode characters during SMB transmission Auto Master Mode Allows you to enable disable on off Auto Master Mode Enable Auto Master Mode to allow the machine to bec...

Страница 115: ...2 2 SNAP frame type Network Address Displays the network address in the xxxxxxxx xxxxxxxxxxx format SLP SLP will only be displayed when NetWare is selected in Port Status and TCP IP is selected as the...

Страница 116: ...r address via DHCP Primary WINS Server Address Enter the primary WINS address in the xxx xxx xxx xxx format Secondary WINS Server Address Enter the secondary backup WINS address in the xxx xxx xxx xxx...

Страница 117: ...stem Administrator DNS Allows you to configure whether to enable disable DNS Connection Time Out Specifies the time out period when transmission fails Port9100 This page allows you to configure the ti...

Страница 118: ...ou to configure the HTTP protocol settings Port Number Enter the port number that receives requests from the browser Maximum Sessions Enter the maximum number of sessions between 1 and 15 Connection T...

Страница 119: ...s when PCL is enabled Paper Tray Allows you to select the paper tray Output Size Allows you to select the paper size Paper Size Bypass Allows you to select the paper size for Tray 5 bypass tray Quanti...

Страница 120: ...nge of 512 KB 32 MB 32768 KB in 256 KB increments Off Enter a value within the range of 64 1024 KB in 32 KB increments NetWare Enter the print page buffer of NetWare within the range of 64 1024 KB in...

Страница 121: ...and Right Panel on this page contain the following information Left Panel Machine information is listed here Details include the Name IP Address Product Name and Status of the machine Right Panel Disp...

Страница 122: ...7 CentreWare Internet Services 122...

Страница 123: ...and Types on page 127 For information about the acceptable range of paper sizes and capacity for each tray refer to Specifications in the Appendix chapter on page 209 Preparing Paper for Loading Befor...

Страница 124: ...ever on each guide and slide the guides to their new position To secure the guides in position release the levers NOTE Tray 1 can only be loaded with plain paper Tray 2 3 and 4 can be loaded with a va...

Страница 125: ...Tray 5 bypass tray is located on the left hand side of the machine A tray extension is provided to accommodate larger sized paper After loading paper stock in the bypass tray the screen that allows yo...

Страница 126: ...is not fed into the machine apply a curl to the leading edge of the paper as shown in the figure on the right Note however that excessively bending or folder the paper might cause paper jams NOTE When...

Страница 127: ...do not open the active tray This will cause the machine to stop Storing and Handling Paper Always use high quality xerographic grade paper in the machine Damaged curled or damp paper can cause jams a...

Страница 128: ...0 SEF O O O LEF O O O B4 257 0 364 0 SEF O O O 5 5 8 5 139 7 215 9 SEF X O O LEF X O X Executive 184 2 266 7 SEF X O X LEF X O O 8 5 11 Letter 215 9 279 4 SEF O O O LEF O O O 8 5 13 Legal 215 9 330 2...

Страница 129: ...you select Label Heavyweight 1 or Heavyweight 2 load the paper LEF If loading the paper SEF the paper may not feed correctly and print quality may be affected Depending on the operating environment ce...

Страница 130: ...8 Paper and Other Media 130...

Страница 131: ...mailboxes and Address Book and configuring the Auditron settings 1 Press the Log In Out button on the control panel NOTE If the Auditron feature is enabled press the button to select System Settings 2...

Страница 132: ...ministrator password using the alphanumeric keypad on the control panel NOTE The default System Administrator password is 11111 To change the password refer to Change Password on page 132 3 Select Con...

Страница 133: ...tem Settings screen using the Select button 2 Press the Enter button 3 Select the required option using the Select button 4 Press the Enter button Screen Default Use this feature to select which scree...

Страница 134: ...control panel Scanning Timer After pressing the Start button and scanning the document using the document glass the machine displays the screen that can select whether or not to scan the next document...

Страница 135: ...is in use A Line Monitor allows you to hear call and response signals when connecting to a destination We recommended that you select Enabled when using On hook dialing Refer to On Hook in the Fax ch...

Страница 136: ...set up by System Administrator users cannot use the copy feature on the machine When the Auditron features is enabled users need to enter password to display the System Settings screen or use the copy...

Страница 137: ...prints counted for each account 1 Select Create Delete on the Auditron Administration screen using the Select button 2 Press the Enter button 3 Select an account number 01 to 50 using the Select butt...

Страница 138: ...1 Tray Priority page 141 Customize Screens page 141 1 Select Copy Settings on the System Settings screen using the Select button 2 Press the Enter button 3 Select the required option using the Select...

Страница 139: ...or copy jobs If you select Auto the machine automatically selects an appropriate tray according to the document size amount of reduction or enlargement Reduce Enlarge Use this feature to configure the...

Страница 140: ...ded Produces double sided copies from double sided documents Output Use this feature to specify the default method of sorting copy outputs when you make multiple sets of copies Auto Automatically appl...

Страница 141: ...otation Use this feature to specify whether or not to rotate the scanned data 270 degrees when the orientation of a loaded document does not match to that of loaded paper Tray Priority Use this featur...

Страница 142: ...n 4 Press the Enter button Network Port Use this feature to specify the type of interface for the machine connected to a computer or the conditions of communications NOTE If an error occurs while prin...

Страница 143: ...5 second increments Bi directional Specify whether to Enable or Disable bi directional communications IEEE 1284 on the parallel interface LPD Use to set up LPD Port Status Specify whether to Enable o...

Страница 144: ...hen Auto is selected the machine automatically detects the print language of the data received and interprets and prints the data correctly When PCL or PS is selected the data received from computers...

Страница 145: ...printing using the print driver Specify whether to Enable or Disable PJL commands that are sent from the computer Auto Eject Time Specify the time to wait until automatically ejecting the remaining da...

Страница 146: ...cters Community R W 1 Enter the community name for configure the manage information on base MIB of the printer up to 12 characters Community Trap 1 Enter the community name used for trap up to 12 char...

Страница 147: ...g by the IP address When On is selected only printing from registered address is accepted IP Address When restricting acceptance of printing by the IP address register the IP address for acceptance of...

Страница 148: ...ided or double sided Print Area Specify whether or not to extend the print area This feature is enabled when printing using the optional emulation except for ESC P or PostScript Banner Sheet Settings...

Страница 149: ...per type loaded in the tray specified with the auto tray selection feature Select the priority of each paper type from Not Selected and 1 to 9 You can specify the same priority for different paper typ...

Страница 150: ...cified paper Allocate Memory Use this feature to specify memory capacities required for printing and for receive buffer for each interface NOTE The maximum value that can be specified varies according...

Страница 151: ...pool processing If you select this option specify the receive buffer memory capacity for spool processing within 0 5 to 32 MB in 0 25 MB increments Initialize Delete Data Use this feature to initializ...

Страница 152: ...pecify refers to each optional kit For information on activating the e mail features refer to Scan to Email Kit Instruction Fax Settings This screen allows you to configure and change the default sett...

Страница 153: ...D M Y day year month Daylight Savings With this feature enabled the machine automatically adjust the current time by one hour when a summer time period begins and ends NOTE Dates which are inapplicabl...

Страница 154: ...sition is outside the area of the document so printing will never be superimposed on the letters of the document However depending on the settings of the counterpart machine the added information may...

Страница 155: ...When On is selected you can select the fax number of the System Administrator from Address Book When Enter Speed Dial is selected you can specify the fax number of the System Administrator using the...

Страница 156: ...The reception time and date time log are the times for each page not the time when reception of the whole document began Paper Supply Specify the default settings relating to paper supply to print rec...

Страница 157: ...ch you will not select as the paper for printing received documents NOTE Paper trays which are set as Unavailable Tray will not be used to print received documents Even if the tray contains the optimu...

Страница 158: ...ceived fax to a specified destination You can select the fax number of the destination from the Address Book When Enter Speed Dial is selected you can specify the fax number of the destination using t...

Страница 159: ...ut a received fax immediately F Code Enter an F Code up to 20 digits using 0 to 9 and using the alphanumeric keypad on the control panel Check Password Specify whether or not to have password control...

Страница 160: ...inadequate available memory on the machine When you use the feature the Direct Send green light illuminates Specify On or Off as the default value of this feature Fax Receiving Mode Specify whether th...

Страница 161: ...ents with a report NOTE Even if Original Image is set to On the document may be printed without images for reasons such as insufficient memory direct transmission and manual transmission NOTE When Ori...

Страница 162: ...efer to the following Resolution page 162 Lighten Darken page 163 Reduce Enlarge page 163 Scan Size page 164 File Format page 164 Transmission Report page 165 Customize Screens page 165 1 Select E mai...

Страница 163: ...ain photographs only 400dpi Text Photo Specifies a 400 dpi resolution for documents that contain both text and photographs 600dpi Text Photo Specifies a 600 dpi resolution for documents that contain b...

Страница 164: ...ected Non standard size document is scanned as a standard size nearest to the scanned document For more information about the size that can be automatically detected refer to When Using the E mail Fea...

Страница 165: ...to print out scanned documents with a report NOTE When Original Image is On and the report is printed on A4 paper the orientation of the printed report may not match that of the paper This occurs bec...

Страница 166: ...the destination of fax or e mail in Speed Dial You can search the registered destination using Address Book NOTE When the content of a Speed Dial code is changed check that the change has not introduc...

Страница 167: ...ect or using the Select button to increase or decrease the value Overseas Comm Select for transmitting with the Overseas Communication feature Use this feature to minimize errors on telephone lines Th...

Страница 168: ...ess a transmission error will be issued when a message is sent to that destination 1 Select a program number p01 to p30 selecting or using the Select button or select to search a program number using...

Страница 169: ...box it is counted as one document scheduled for transmission Delete Delete the registered Fax Program 1 You can also use symbols as well as text and numbers Select Alphabet for Entry Mode press the bu...

Страница 170: ...tton to display a list of symbols then select a symbol using the Select button Mailbox This feature allows you to create mailboxes for saving confidential incoming fax documents Up to 10 mailboxes can...

Страница 171: ...cation when receiving the document from remote machine to the mailbox Delete Deletes the selected mailbox 1 You can also use symbols as well as text and numbers Select Alphabet for Entry Mode press th...

Страница 172: ...9 Setups 172...

Страница 173: ...te tabs located on the under side of the document glass cover and in the document feeder to remove dry ink smudges and other marks 3 Wipe the wet surface with a dry clean cloth The Control Panel and S...

Страница 174: ...a toner cartridge into an open flame Remaining toner in the cartridge may catch fire and cause burn injuries or explosion If you have a used toner cartridge no longer needed contact your local Fuji Xe...

Страница 175: ...t using the toner cartridge or the drum cartridge recommended by our company the performance of the machine may not be at its optimum level Use the toner cartridge and the drum cartridge recommended f...

Страница 176: ...Cover A while lifting up the release lever 3 Lift up the colored lever and slide the drum cartridge out until you can lift the handle on top of the cartridge 4 Hold the handle and remove the cartridg...

Страница 177: ...ull out in the direction of the arrow to remove the black protective sheet from the cartridge 3 Place the cartridge in position as shown and slide it into the machine with the handle until it clicks 4...

Страница 178: ...1 The page yield after each message is displayed is for when A4 size paper LEF is used The value is an estimate and varies depending on conditions such as the print contents dot coverage area coverag...

Страница 179: ...it out slowly NOTE Hold the empty cartridge away from you to avoid spilling any toner residue Inserting the New Toner Cartridge 1 Remove the new toner cartridge from the box 2 Shake the cartridge up...

Страница 180: ...art to fade replace the stamp cartridge NOTE Do not touch the ink pad of the stamp cartridge If ink comes into contact with your skin wash immediately Removing the Old Stamp Cartridge 1 Pull up the kn...

Страница 181: ...o extract the stamp cartridge NOTE Make sure to remove the whole cartridge Inserting the new Stamp Cartridge 1 Remove the new stamp cartridge from the package 2 Insert the new stamp cartridge in the m...

Страница 182: ...10 Maintenance 182...

Страница 183: ...ponding corrective actions Contact the System Administrator for assistance In some cases it may be necessary to switch the machine off and on Refer to Power On Off in the Product Overview chapter on p...

Страница 184: ...s of paper are left in the machine since they could cause more jams or even fire If a piece of paper is stuck in a hidden area or wrapped around the fuser unit or rollers do not remove it forcefully y...

Страница 185: ...ing it in its wrapper on a flat surface The orientation of the media in the paper tray must match the orientation of the documents Check the maximum fill line in the tray to make sure the paper tray i...

Страница 186: ...en open Cover A while lifting up the release lever 2 If the jammed paper is inside the fuser unit lower the green lever A2 in the direction of the arrow to open the fuser unit cover 3 If the jammed pa...

Страница 187: ...release lever 2 Remove the jammed paper 3 Close Cover B until it latches NOTE Firmly press the center of the cover when closing it Paper Jams in Cover C Follow the steps below to rectify paper jams i...

Страница 188: ...lease lever 3 Remove the jammed paper inside the duplex unit 4 Close the Cover D until it latches 5 Close Tray 5 bypass tray Paper Jams in Exit Follow the steps below to clear paper jams in exit 1 Ope...

Страница 189: ...elow to clear paper jams in Trays 1 to 4 1 Pull out the Tray 1 2 3 or 4 towards you 2 Remove the jammed paper 3 Close the paper tray Paper Jams in Tray 5 Bypass Tray Follow the step below to clear pap...

Страница 190: ...clear document jams in the document feeder 1 Pull up the knob to open the document feeder cover completely 2 Remove the jammed document slowly When the document jams tightly in the document feeder ro...

Страница 191: ...e the inner cover and then close the document feeder cover Paper Jams in the Document Exit Follow the steps below to clear document jams in the document exit 1 Pull up the knob to open the document fe...

Страница 192: ...11 Problem Solving 192 3 Remove the jammed document slowly while holding the document feeder tray 4 Close the document feeder tray and then close the document feeder cover...

Страница 193: ...ton and select Error Information to check the contents displayed on the screen The machine makes a squealing noise after it powers off Between 3 to 5 minutes after powering off the machine may make a...

Страница 194: ...nd press the Start button to restart the job Load the correct sized paper in the selected tray Any scanned data is discarded so load the document on the document feeder and specify the copy settings i...

Страница 195: ...w the toner may not be dispensed Repeat the job Check that the seal tape has been removed from the new drum cartridge Reinstall the drum cartridge and the toner cartridge Replace the drum cartridge Re...

Страница 196: ...cartridge Gloss variations coining Check the quality of the documents If the document has large areas of solid density adjust the Lighter Darken feature for the contrast Light copies when scanning glo...

Страница 197: ...Jams in the document feeder Open the document feeder and check that no paper or objects are inside Check that the document feeder cover on the document feeder is firmly closed Refer to Document Jams o...

Страница 198: ...Select Auto Receive on the Fax Receiving Mode screen The machine answers calls but will not accept incoming data If the job contains several diagrams the machine may not have enough memory Clear memor...

Страница 199: ...the document to be polled is not ready on their machine Ask the other party to set the document for polling 10xxxx An error occurred during F Code transmission Check the status of the remote machine...

Страница 200: ...e line If the error cannot be resolved contact the Customer Support Center 7905xx 790Bxx 7Axxxx 7A04xx Check the remote machine or the telephone line If the error cannot be resolved contact the Custom...

Страница 201: ...remote machine or the telephone line If the error cannot be resolved contact the Customer Support Center 9809xx 99xxxx 9908xx Check the remote machine or the telephone line If the error cannot be res...

Страница 202: ...nnot be resolved contact the Customer Support Center B7xxxx Turn the power off and on If the error cannot be resolved contact the Customer Support Center E1xxxx Turn the power off and on If the error...

Страница 203: ...er cover and remove the documents S10021 The document has jammed Open the document feeder cover and remove the documents S10022 The long page document has jammed Open the document feeder cover and rem...

Страница 204: ...following actions Lower the resolution the printer driver Increase the size of the print page buffer Add on memory 016 709 An error occurred while processing PCL print data Print again 016 719 There i...

Страница 205: ...for optimized speed in the print driver and instruct the machine to print again If this does not rectify printing set for highest compatibility to ensure printing and try again 016 762 A print langua...

Страница 206: ...Refer to Paper Jams on page 184 E1 1000 E1 2000 E3 1000 Paper jam is occurred in the exit Refer to Paper Jams on page 184 E1 6000 Paper jam is occurred in the machine Refer to Paper Jams on page 184 E...

Страница 207: ...tenance schedules for cleaning areas such as the document glass CVT glass and output trays Refer to the Maintenance chapter on page 173 J8 1000 J8 2000 J8 3000 Replace the toner cartridge Refer to Rep...

Страница 208: ...11 Problem Solving 208...

Страница 209: ...Copier only model or Copier printer model 32 MB Maximum 96 MB shared with fax Copier fax model 96 MB shared with fax Hard disk capacity Hard disk is not available Scan resolution 600 x 600 dpi Output...

Страница 210: ...speed for the first page will be slower Continuous 2 sided copy same magnification A4 B5 16 pages minute A4 B5 8 pages minute B4 A3 7 pages minute When paper is fed from Tray 3 Tray 4 or Tray 5 Bypass...

Страница 211: ...installed Dimensions Width 640 Depth 520 Height 563 mm with the document feeder Width 640 Depth 520 Height 486 mm with the document glass Weight excluding paper and options 39 7 kg 46 9 kg with the do...

Страница 212: ...KS5895 2 1 Only for Traditional Chinese and Simplified Chinese models 2 Only for Korean model Memory capacity 64MB Maximum 320 MB Interface Standard Ethernet 100BASE TX 10BASE T USB 2 0 Bi directiona...

Страница 213: ...200 x 100 dpi 7 9 x 3 9 dots mm Fine 8 x 7 70 lines mm 200 x 200 dpi 7 9 x 7 9 dots mm Superfine 16 x 15 4 lines mm Encoding method MH MR MMR JBIG Communication speed G3 33 6 31 2 28 8 26 4 24 0 21 6...

Страница 214: ...not a standard size or the size cannot be detected the machine prompt you to select the paper tray Document feeder type Duplex automatic document feeder Document size type Maximum A3 11 x 17 Minimum...

Страница 215: ...5 8 5 SEF 139 7 215 9 X O 1 5 5 8 5 LEF 215 9 139 7 X X A5 SEF 148 210 O O A5 LEF 210 148 O O B5 SEF 182 257 O O B5 LEF 257 182 O O A4 SEF 210 297 O O A4 LEF 297 210 O O 8 5 11 SEF Letter 215 9 279 4...

Страница 216: ...table Not Detectable Size in Sending mm Detectable Not Detectable Size in Sending mm A6 SEF 105 148 X Not loaded X 210 420 B6 SEF 128 5 148 X Not loaded X 210 420 5 5 8 5 SEF 139 7 215 9 X 210 215 9 X...

Страница 217: ...ndard size document is replaced with the standard document close to the scanned size The following table shows the sizes to be replaced in sending Executive LEF 266 7 184 2 X 257 184 2 1 X 297 257 16K...

Страница 218: ...in sending mm 210 420 Document length mm To 257 To 297 From 297 1 Size in sending mm 210 148 210 297 210 420 Document Length mm To 257 To 297 From 297 1 Size in sending mm 215 9 215 9 215 9 279 4 215...

Страница 219: ...ou scan the same size document using the document feeder or the document glass the image size to be sent may be different The following table shows the sizes to be detected automatically and to be rep...

Страница 220: ...tter 279 4 215 9 O 279 4 215 9 8 5 11 LEF Letter O 279 4 215 9 8 5 11 LEF Letter 8 5 13 SEF Legal 215 9 330 2 O 215 9 330 2 8 5 13 SEF Legal O 215 9 330 2 8 5 13 SEF Legal 8 5 14 SEF Legal 215 9 355 6...

Страница 221: ...1 O O O X X X X X X X X O O O Custom 2 O O O X X X X X X X X O O O Custom 3 O O O X X X X X X X X O O O Reduce Enlarge AUTO X O O X X O O O O O O O O O X X Presets O O O O O O O O O O O O O O X X Vari...

Страница 222: ...O O O O O O O O O O Transparencies O O O O O O O O O O O O O O O Labels O O O O O O O O O O O O O O O Custom 1 O O O O O O O O O O O O O O O Custom 2 O O O O O O O O O O O O O O O Custom 3 O O O O O O...

Страница 223: ...ritized Plain paper is the only pattern that can specify duplex Concurrency Matrix After Job Copy FAX Send FAX Receive Printer Print Preceding Job Copy Scan In Net Sent Net Receive Receive Print Enet...

Страница 224: ...anning cannot be performed simultaneously with the indicated function After Job CentreWare Internet Services Direct FAX E mail Preceding Job Exclude Speed Dial List Enet Receive Speed Dial List Enet R...

Страница 225: ...machine Also required to use the e mail feature PostScript Kit Allows you to use the machine as a PostScript printer 64 MB Memory Copy Fax This expands memory up to 64 MB for Copy Fax features 128 256...

Страница 226: ...eck the transmission result For how to print out the Sent Report refer to Report List Non print Jobs in the Product Overview chapter on page 42 When the document was sent using Direct Fax it may not h...

Страница 227: ...to store received documents in memory so fax reception is disabled If a document is received for which printout of multiple copies on reception has been specified the specified number of copies will...

Страница 228: ...he System Administrator it will not be forwarded if the forwarding recipient has not been specified If the document concerned has a specified number of copies for transmission is specified for priorit...

Страница 229: ...he jammed paper is removed Paper Out 1 Supply papers according to the displayed message The machine automatically starts copying when papers are supplied Paper Selection for Fax Reception This section...

Страница 230: ...duction is it possible to print one page at reduced size on one sheet of the paper 2 Can one page be printed on one sheet with reduction not exceeding the setting for maximum reduction ratio If Long S...

Страница 231: ...s stored in the machine for easy reference APS Auto Paper Selection which selects automatically an appropriate paper tray depending on the specified document size orientation or amount of reduction or...

Страница 232: ...ent Feeder Example Two copies of a three page document would output as page1 copy1 page2 copy1 page3 copy1 page1 copy2 page2 copy2 page3 copy2 Comments To recipient and From sender lines on a fax cove...

Страница 233: ...rum A printed image is formed on a drum before transferred to paper Duplex Refers to a document that contains an image on both sides of the page ECM Error Correction Mode An ITU T approved feature for...

Страница 234: ...a job basis Keypad The buttons on the control panel Landscape The image orientation on a sheet of paper where the short edge of the paper runs from top to bottom Line Type The dial type of connected...

Страница 235: ...ll the formatting and fonts of the original copy Photo An image especially a positive print recorded by a camera and reproduced on a photosensitive surface Polling A feature that allows you to retriev...

Страница 236: ...ed on a scanned image Select the standard setting for normal documents and fine and superfine settings for documents with more detail ROM An abbreviation of Read Only Memory which is the device memory...

Страница 237: ...ne and network settings TCP IP Transmission Control Protocol Internet Protocol TIFF Tagged Image File Format Toner Cartridge A customer replaceable cartridge which holds toner an electrically charged...

Страница 238: ...13 Glossary 238...

Страница 239: ...ay 29 CentreWare Internet Services 103 accessing 104 features 104 Jobs tab 105 Maintenance tab 121 Properties tab 108 Status tab 107 Support 121 target computers 103 Chain Dialing 84 Changing Password...

Страница 240: ...99 Transmission Report 98 E mail Address 92 E mail Settings 162 emulation 212 Emulation Settings CWIS 118 Enlarge Presets 163 Enter button 32 Error button 32 Error Information 41 Exit 184 Exit button...

Страница 241: ...211 maximum power 211 Media Available Settings 157 memory capacity 209 212 213 Memory Settings CWIS 120 Minimum Size Settings 156 Mixed Size Originals 61 Modes 37 Copy 38 E mail 39 Fax 38 Job Status 3...

Страница 242: ...creen 29 Screen Contrast 165 Screen Default 133 Search by Index 69 Select button 31 Send Header 74 154 Sender 99 sending document size 213 Setups 131 2 Sided 140 2 Sided Originals 155 Activity Report...

Страница 243: ...ial 69 166 button 31 Stamp Cartridge 180 Start button 32 Stop copy jobs 54 E mail jobs 91 fax jobs 67 Stop button 32 supported OS 212 213 supported protocol 211 System controls 31 System Settings 132...

Страница 244: ...14 Index 244...

Страница 245: ...DocuCentre 1085 1055 User Guide ME4040E2 1 Edition 1 July 2007 Fuji Xerox Co Ltd Copyright 2007 by Fuji Xerox Co Ltd...

Отзывы: