


9 Scanner Environment Settings
336
Sc
a
nne
r En
v
iron
men
t Set
tin
gs
9
Note
•
You can configure the settings using CentreWare Internet Services. For information on how to use
CentreWare Internet Services, refer to "Configuring Machine Settings Using CentreWare Internet
Services" (P.301).
1
Display the [Tools] screen.
1) Press the <Log In/Out> button.
2) Enter the system administrator's user ID with the numeric keypad or the keyboard
displayed on the screen, and select [Enter].
When a passcode is required, select [Next] and enter the system administrator's
passcode, and select [Enter].
Note
•
The default user ID is "11111".
•
The default passcode is "x-admin".
3) Select [Tools] on the Services Home screen.
2
Enable the SMB port.
1) Select [Connectivity & Network Setup].
2) Select [Port Settings].
3) Select [SMB Client], and then select [Change Settings].
4) Select [Port Status], and then select [Change Settings].
5) Select [Enabled], and then select [Save].
6) Select [Close] repeatedly until the [Tools] screen is displayed.
3
Set the IP address and the other addresses.
Skip this step if an IP address is already set.
If DHCP or BOOTP is available in your environment, configure the method for obtaining the
address. If an IP address cannot be obtained automatically or manual configuration is
preferred, confirm the settings of an IP address, a subnet mask, and a gateway address.
For information on how to set an IP address, refer to "Protocol Settings" (P.182).
4
Select [Close] repeatedly until the [Tools] screen is displayed.
5
Select [Close].
Note
•
Rebooting the machine may be required depending on the settings. When a message displayed on
the screen, follow the message and reboot the machine.
6
Print a configuration report to confirm that the SMB Client port is enabled and that TCP/IP
is set up correctly.
For information on how to print a configuration report, refer to "Print Reports" (P.92).
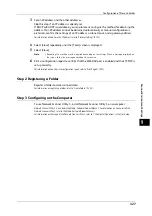
Step 3 Configuring Remote Authentication
Set the Login Type to Login to Remote Accounts.
Note
•
You can configure the settings using CentreWare Internet Services. For information on how to use
CentreWare Internet Services, refer to "Configuring Machine Settings Using CentreWare Internet
Services" (P.301).
1
Display the [Tools] screen.
1) Press the <Log In/Out> button.
2) Enter the system administrator's user ID with the numeric keypad or the keyboard
displayed on the screen, and select [Enter].
Содержание ApeosPort-V 6080
Страница 1: ...ApeosPort V 7080 ApeosPort V 6080 DocuCentre V 7080 DocuCentre V 6080 Administrator Guide ...
Страница 13: ...13 Activity Report 727 EP System 731 Glossary 732 Index 735 ...
Страница 14: ...14 ...
Страница 62: ...2 Paper and Other Media 62 Paper and Other Media 2 ...
Страница 88: ...3 Maintenance 88 Maintenance 3 ...
Страница 110: ...4 Machine Status 110 Machine Status 4 ...
Страница 296: ...5 Tools 296 Tools 5 ...
Страница 346: ...9 Scanner Environment Settings 346 Scanner Environment Settings 9 ...
Страница 354: ...10 Using IP Fax SIP 354 Using IP Fax SIP 10 ...
Страница 366: ...12 Using the Server Fax Service 366 Using the Server Fax Service 12 ...
Страница 382: ...13 Encryption and Digital Signature Settings 382 Encryption and Digital Signature Settings 13 ...
Страница 734: ...16 Appendix 734 Appendix 16 ...
Страница 744: ...Index 744 Index ...