147
EN
Component counter
General
A component counter function is provided in the "Documentation" menu item. Using the
part counter, consecutive numbers can be assigned to any desired parts or workpieces.
Each part can be precisely identified through the assigned number, e.g. when an error oc-
curs.
Activating the
component coun-
ter
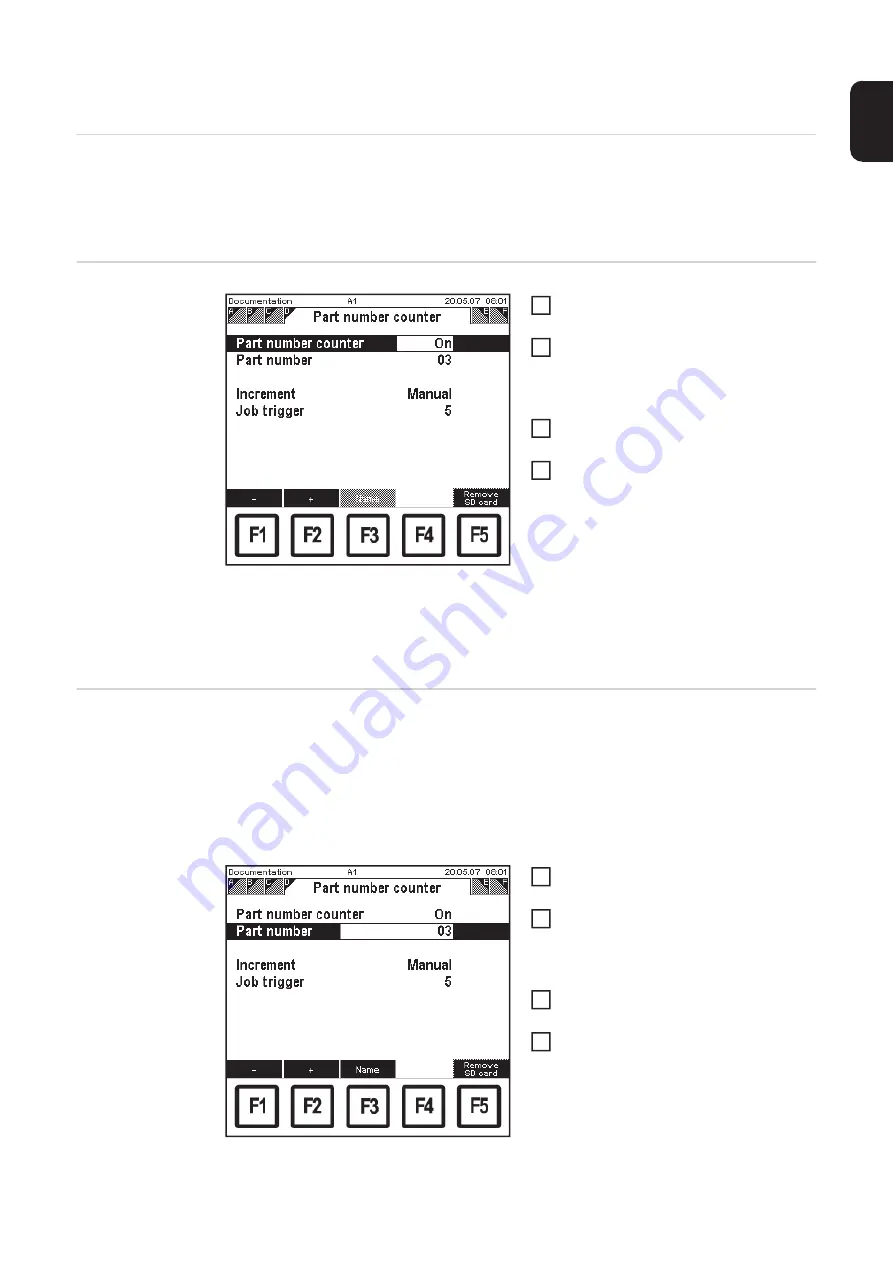
Documentation: "Component counter" screen, "Com-
ponent counter" parameter = "On"
Call up the "Documentation" menu
item
Select "Component counter" screen by
pressing the right arrow key (8)
–
"Component counter" screen ap-
pears
Select "Component counter" parame-
ter using the down (6) or up (7) keys
Use the adjusting dial (18) to alter the
parameter value
–
A parameter value can only be al-
tered within the defined setting
range. The setting range is high-
lighted
Defining the com-
ponent number
The component number can be any alphanumeric expression with a maximum length of
20 characters.
Entering separators ( . , - / ) allows the characters before the separator to be fixed. Then,
when the component number is increased, only the characters after the separator will be
incremented. The number of digits in a component number is determined by the number
of characters entered or the number of characters entered after a separator. If 3 characters
are entered, the component number will have 3 digits, i.e. from 0 to max. 999.
Documentation: "Component counter" screen, "Com-
ponent number" parameter selected
Call up the "Documentation" menu
item
Select "Component counter" screen by
pressing the right arrow key (8)
–
"Component counter" screen ap-
pears
Select "Component number" parame-
ter using the down (6) or up (7) keys
Press F3 "Name"
–
The "Component number" screen
is displayed.
1
2
3
4
IMPORTANT!
If the component counter function is not required, set the "Component coun-
ter" parameter to "Off"!
1
2
3
4
Содержание RCU 5000i
Страница 2: ...2 ...
Страница 4: ...4 ...
Страница 151: ...151 EN Welding information screen for seam 2 section 1 The welding data of the respective section is displayed ...
Страница 154: ...154 Information Save complete screen Removing a memory card Save complete The memory card can now be removed 2 ...
Страница 200: ...200 Backup screen All data from the remote control unit are sa ved onto the memory card ...
Страница 202: ...202 Restore screen The last Data screen called up appears ...
Страница 207: ...207 EN Machine pre sets MIG MAG screen MIG MAG screen appears ...
Страница 210: ...210 Machine pre sets e g MIG MAG screen The last Data screen called up appears ...
Страница 242: ...242 ...
Страница 243: ...Appendix ...
Страница 244: ...244 Spare parts list RCU 5000i ...
Страница 245: ...245 ...
Страница 246: ...246 ...
Страница 247: ...247 ...


