


28
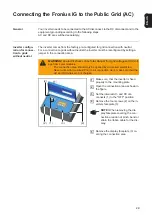
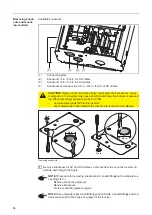
Inverter Installa-
tion
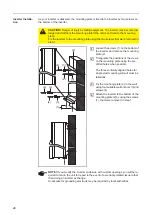
As your inverter is delivered, the mounting plate is fixed to the inverter by two screws on
the bottom of the inverter.
Loosen the screws (1) on the bottom of
the inverter and remove the mounting
plate (2)
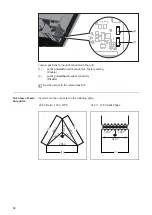
Triangulate the positions of the srews
on the mounting plate using the pre-
drilled holes when possible
The three vertically aligned holes for
single stud mounting will suit most ins-
tallations.
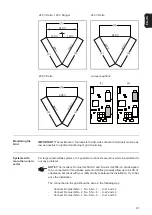
Fix the mounting plate (2) to the wall
using four suitable wall anchors (3) and
screws (4)
Attach the inverter to the bottom of the
mounting plate (2) by using the screws
(1), that were removed in step 1
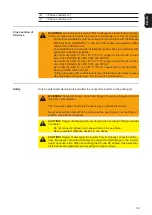
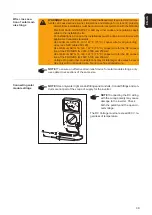
CAUTION!
Danger of injury by falling equipment. The inverter may become dis-
lodged and fall from the mounting plate if the unit is not fixed to the mounting
plate.
Fix the inverter to the mounting plate using the two screws that were removed in
step 1.
(2)
(4)
(3)
(4)
(3)
(4)
(3)
(4)
(3)
(1)
1
2
3
4
NOTE!
If you modify the inverter enclosure with custom openings you will be re-
quired to return the unit for repair in the event of a warranty-related issue rather
than doing an inverter exchange.
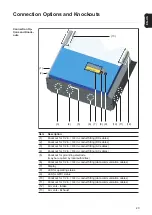
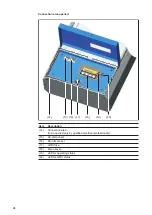
Knockouts for grounding electrode may be required by local authorities.
Содержание IG 2000
Страница 2: ...0...
Страница 4: ...2...
Страница 6: ...4...
Страница 10: ...8...
Страница 15: ...General Information...
Страница 16: ......
Страница 21: ...Installation and Startup...
Страница 22: ......
Страница 50: ...48...
Страница 51: ...Operation...
Страница 52: ......
Страница 80: ...78...
Страница 81: ...Troubleshooting and Maintenance...
Страница 82: ......
Страница 95: ...Appendix...
Страница 96: ......
Страница 113: ...111 EN US...
Страница 114: ...112...
Страница 115: ...113 EN US...


