12. Install a new roll pin and apply Torque Seal
(OPG F900 White) to the roll pin.
13. Install the brake valve assembly; see
Group 42
,
of the vehicle Workshop Manual.
14. Test the brakes before returning the vehicle to
service.
42–10 WABCO System Saver
Air Dryer Desiccant
Cartridge Replacement
NOTE: The following instructions apply to the
System Saver 1200, 1200 Plus, and Twin air
dryers.
NOTICE
The WABCO System Saver air dryers can use ei-
ther a standard or oil coalescing desiccant car-
tridge. When replacing the desiccant cartridge, it
is very important to use the same type of car-
tridge that was originally installed on the dryer. Oil
coalescing cartridges can be used in any applica-
tion, but require more frequent service intervals
(every 1 to 2 years instead of every 2 to 3 years
for a standard cartridge). Do not replace an oil co-
alescing cartridge with a standard cartridge, as
this may result in contamination and malfunction-
ing of downstream air system components.
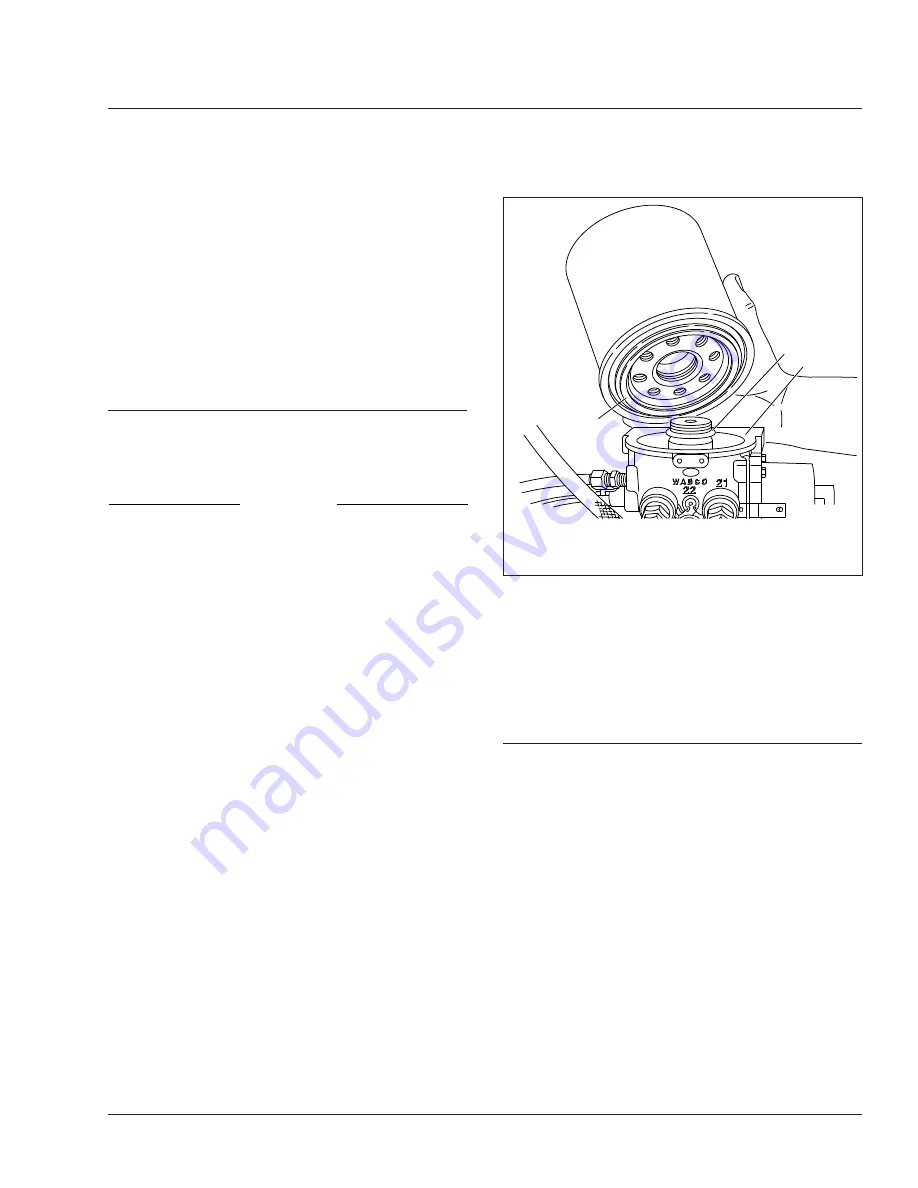
Refer to
for cartridge replacement.
1.
Drain the air system.
2.
Using a strap wrench, turn the desiccant car-
tridge counterclockwise and remove it.
3.
Remove and discard the O-ring.
4.
Clean the top surface of the dryer base with a
commercial cleaning solvent.
IMPORTANT: If the air dryer base is damaged,
preventing a tight seal, replace the air dryer.
5.
Using a multipurpose, high-temperature grease
that resists water, steam, and alkali, lightly coat
the surfaces of the new O-ring and the dryer
base. Install the O-ring.
6.
Thread the desiccant cartridge onto the dryer
base (turn clockwise). When the seal contacts
the base, tighten the cartridge one complete turn
more. Do not overtighten.
42–11 Versajust Slack Adjuster
Inspection and
Lubrication
IMPORTANT: Perform the
Brake Inspection
maintenance operation before lubricating the
slack adjusters.
1.
Visually check for physical damage, such as bro-
ken air lines and broken or missing parts.
2.
Using a quality multipurpose chassis lubricant,
NLGI Grade 2, lubricate the slack adjuster
through the grease fitting until clean lubricant
flows from the grease relief opening in the boot.
3.
Perform the "In Service Inspection."
In Service Inspection
1.
Apply and release the brakes several times while
observing the slack adjuster. The slack adjuster
and brake actuator should move freely, without
binding or interference, and should return to the
f421292
10/07/2016
1
2
3
1.
Seal
2.
O-Ring
3.
Air Dryer Base
Fig. 14, Desiccant Cartridge Replacement
Brakes
42
New Cascadia Maintenance Manual, January 2020
42/15
Содержание PE116DC
Страница 2: ......
Страница 10: ......
Страница 26: ......
Страница 28: ......
Страница 32: ......
Страница 34: ......
Страница 36: ......
Страница 38: ......
Страница 40: ......
Страница 46: ......
Страница 48: ......
Страница 52: ......
Страница 54: ......
Страница 62: ......
Страница 70: ......
Страница 72: ......
Страница 78: ......
Страница 80: ......
Страница 86: ......
Страница 88: ......
Страница 100: ......
Страница 102: ......
Страница 104: ......
Страница 106: ......
Страница 112: ......
Страница 130: ......
Страница 134: ......
Страница 136: ......
Страница 142: ......
Страница 148: ......
Страница 150: ......
Страница 154: ......
Страница 158: ......


