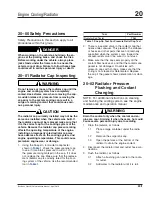
CAUTION
When flushing the radiator, do not apply more
than 20 psi (138 kPa) air pressure. Excessive pres-
sure can damage the radiator or heater core.
3.3
Apply no more than 20 psi (138 kPa) air
pressure intermittently to help dislodge
sediment buildup in the core.
4.
Drain the radiator, then flush the radiator until
clean water flows from it. Remove the flushing
gun.
5.
Close the petcock.
6.
Using clamps, connect the hoses to the radiator.
Torque the clamps 33 to 38 lbf·in
(370 to 430 N·cm).
IMPORTANT: On vehicles with EPA07 compliant
engines, the coolant capacity varies depending
on the engine and accessory installation. After
servicing the cooling system, always verify that
the coolant level is between the MIN and MAX
lines on the surge tank.
7.
Fill the radiator with coolant. Refer to the engine
manufacturer’s service literature for specific cool-
ant information.
20–03 Fan Drive Inspecting
(Noise Emission
Control)
Horton Advantage® Fan Clutch
1.
Check the fan for loose rivets and missing
weights. Check for bent, cracked, or missing
blades. Tighten loose components. Replace the
fan drive if necessary.
2.
Check for adequate clearance between the fan
and the fan shroud or other engine compartment
components in both the engaged mode and the
disengaged mode. If the clearance is not ad-
equate, make the necessary adjustments.
3.
Check the fan belt condition and the belt align-
ment. Replace or correct as necessary.
Horton HT650 Fan Drive
Check for friction facing wear condition. Replace
when worn to 1/16-inch (1.5-mm) thick, when oil
spotted, or when burn marks are visible.
Kysor K22RA, K22FA, and
K26RA Fan Drives
1.
Check the fan for missing, cracked, chipped, or
damaged blades. Tighten loose components. Re-
place damaged fans if necessary.
2.
Check for adequate clearance around the fan.
The fan should be centered in the shroud to pre-
vent contact between the fan and the shroud.
3.
Check the fan belt for proper alignment and con-
dition. If the belt is worn or frayed, replace the
belt.
4.
Verify the fan drive engagement. With the engine
and ignition key switch off, apply at least 90 psi
(620 kPa) to the clutch; the fan should rotate
freely. Remove air pressure from the clutch and
the fan should not rotate.
5.
With the fan drive disengaged, check for air
leaks at the front of the clutch and between the
clutch and the drive hub. If an air leak is de-
tected, the clutch seals and hub must be in-
spected for wear or damage. If necessary, the
seals of the clutch can be replaced with a Kysor
rebuild kit. If inspection of the hub indicates ex-
cessive wear, rebuild the hub using a hub rebuild
kit from Kysor.
6.
Any time the clutch is removed for repair or re-
placement, the pulley hub and bearings should
be inspected for play, roughness, or damage.
Hub bearing service kits are available from
Kysor.
7.
Check the lining with the System Alert Tool
™
. If
the lining is worn, install the appropriate lining kit.
A lining that is prematurely worn is caused by
control air supply problems. Inspect and correct
the vehicle control system before placing the ve-
hicle back in service.
8.
Check the air line entry and routing at the front
or rear of the fan drive. Look for cracked, dam-
aged, or improperly routed air lines. Make sure
the connections are tight and that there are no
air leaks.
Engine Cooling/Radiator
20
Business Class M2 Maintenance Manual, April 2019
20/2
Содержание BUSINESS CLASS M2 100
Страница 2: ......
Страница 10: ......
Страница 30: ......
Страница 34: ......
Страница 36: ......
Страница 38: ......
Страница 40: ......
Страница 42: ......
Страница 46: ......
Страница 52: ......
Страница 60: ......
Страница 62: ......
Страница 74: ...11 Remove the chocks from the tires Transmission 26 Business Class M2 Maintenance Manual March 2016 26 12 ...
Страница 76: ......
Страница 82: ......
Страница 84: ......
Страница 94: ......
Страница 104: ......
Страница 110: ......
Страница 112: ......
Страница 114: ......
Страница 116: ......
Страница 120: ......
Страница 122: ......
Страница 144: ......
Страница 146: ......
Страница 150: ......
Страница 152: ......
Страница 166: ......
Страница 168: ......
Страница 178: ......
Страница 180: ......
Страница 184: ......
Страница 186: ......
Страница 188: ......
Страница 190: ......
Страница 192: ......
Страница 196: ......
Страница 198: ......


