FRC TH4C Скачать руководство пользователя страница 19

TH4C Installation Guide

p. 19

TH4C Administration 

© Safe Fleet | May 2019 | All rights reserved 

Document Number: XE-SNB2-TH4CPM-R0A
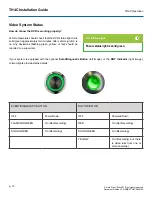
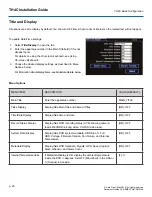
Working with Video

Playing Back and Copying Video

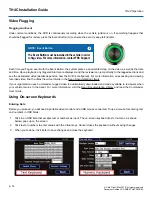
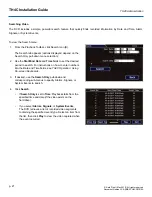
To search, play back, and archive video from the OSD (On-Screen Display) menus:

1.  Connect a portable monitor and USB mouse, and power up the DVR. For 

more information, see 

TH4C Administration: Accessing the On-Screen Display

.

2.  Right-click anywhere in the OSD view to access the Main Menu.

3.  Click 

Playback

.

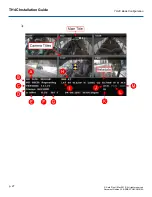
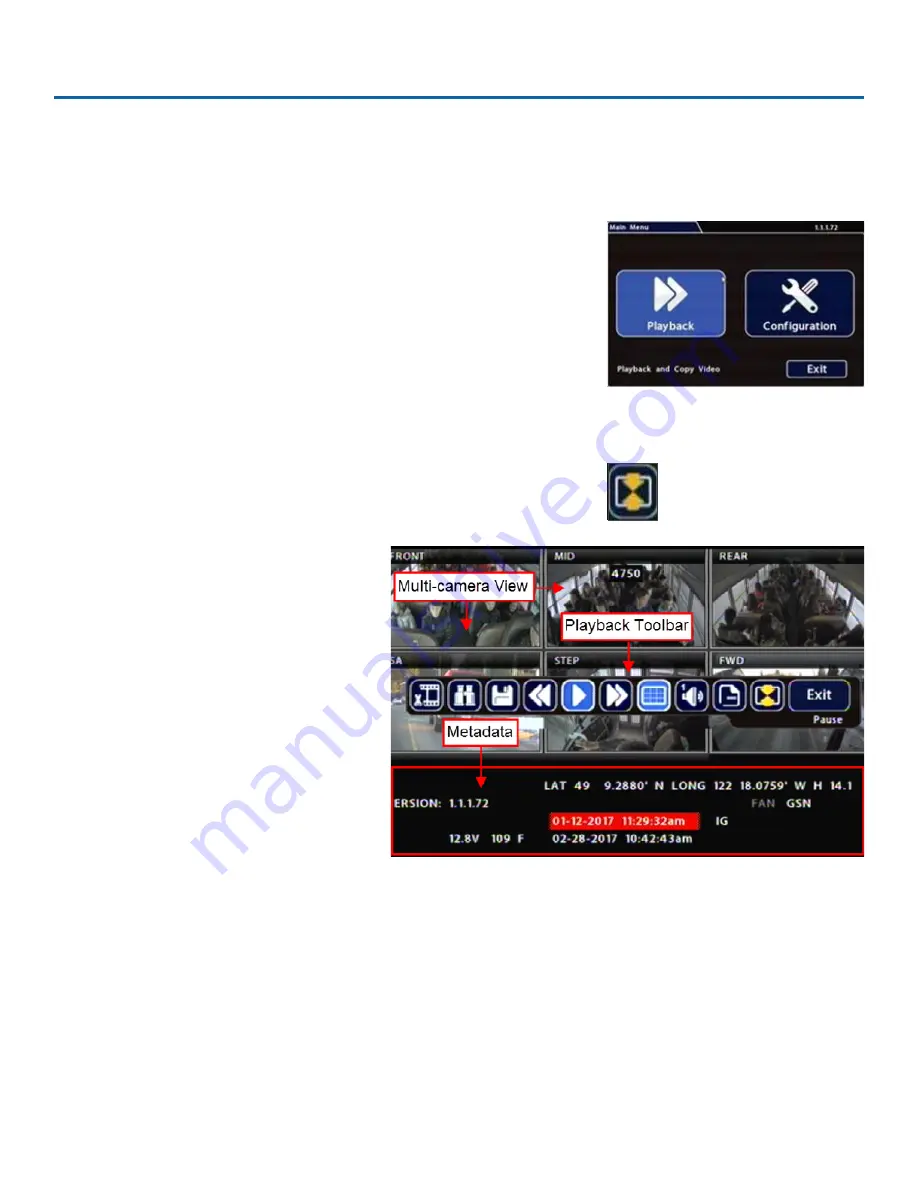
4.  In the center of the Playback View, click the 

Show/Hide

 icon. The 

Playback Toolbar

 appears.

5.  Click the icons to browse video and 

archive clips.

Содержание TH4C

Страница 1: ...Installation Guide TH4C 4 Channel DVR Document Number XE SNB2 TH4CPM R0A Safe Fleet May 2019 All rights reserved...

Страница 2: ......

Страница 3: ...en Keyboards 14 Health Check 15 TH4C Administration 16 Accessing the On screen Display 16 Working with Video 19 TH4C Basic Configuration 22 Setting up the DVR 22 Time and Date 24 Title and Display 25...

Страница 4: ...ch cellular router Smart Reach WiFi bridge Smart Reach GPS receiver Portable video monitor optional Required Tools Equipment The DVR system must be installed by a professional installer A professional...

Страница 5: ...H4C Installation Guide p 5 System Diagram Safe Fleet May 2019 All rights reserved Document Number XE SNB2 TH4CPM R0A System Diagram Click here to see an Interactive System Diagram with more informatio...

Страница 6: ...is subject to constant vibration ORIENTATION Mount the DVR in either a horizontal or vertical orientation or hung right side up but NOT upside down CLEARANCE Allow sufficient clearance of at least 6...

Страница 7: ...ot until it clicks 3 Slide the SD card slot door down until it clicks 4 Insert the key into the SD card lock and rotate a quarter turn to lock the drive 5 Select an appropriate mounting location and o...

Страница 8: ...to Signal inputs and to the optional Event Diagnostic button and Wake on Input trigger To install the Adaptor Harness connect the 2x6 Microfit to the SIGNALS socket on the DVR Then 1 Connect the 5 sig...

Страница 9: ...s the percentage complete 6 Once the update is finished the DVR automatically restarts 7 Remove the USB memory device Firmware Updates Firmware controls how DVR features operate including the Playback...

Страница 10: ...and power up the DVR from the vehicle ignition Configure the DVR to required specifications locally using the mouse and monitor or remotely by accessing vMax Web via WiFi or Ethernet using a PC For mo...

Страница 11: ...tor 5 TEMP POWER powers on the DVR for five minutes if held for more than 5 seconds powers down the DVR if held for more than 5 seconds in temporary power mode or in shutdown sequence with ignition of...

Страница 12: ...AN RJ 45 Ethernet connector for a laptop wireless equipment or other accessories In addition to the data transmitted this port supplies 12 volts POE Power Over Ethernet to power accessories such as th...

Страница 13: ...iations flashing green yellow or red should be reported to a supervisor If your system is equipped with the optional Event Diagnostic Button left image or the RGY Indicator right image colored lights...

Страница 14: ...nd the vMax View User Guide in the Seon Documentation Library If your organization uses Commander tagged video is automatically downloaded and made available to reviewers when your vehicle returns to...

Страница 15: ...HARD DRIVE TEMPERATURE Current temperature inside the drive To choose whether this value displays in Fahrenheit USA or Celsius Canada use the Titles and Display Internal Temperature Units setting HAR...

Страница 16: ...hing and archiving we recommend vMax View video management software on a Windows based computer For more information see the vMax View User Guide in the Seon Documentation Library To use the On screen...

Страница 17: ...VR internal drive in gigabytes GB The second value in square brackets is the size of the SD card OFF indicates the storage media is not present HD USED Percentage of recorded video on the DVR hard dri...

Страница 18: ...e in degrees Fahrenheit or Celsius TIME AND DATE Current recorded time and date GPS COORDINATES If GPS is connected the actual coordinates latitude longitude and heading appear If GPS is connected but...

Страница 19: ...video from the OSD On Screen Display menus 1 Connect a portable monitor and USB mouse and power up the DVR For more information see TH4C Administration Accessing the On Screen Display 2 Right click an...

Страница 20: ...playback F Fast Forward Fast forwards playback With playback paused each click advances the video by one frame G Individual Camera Multi view Displays camera 1 2 3 4 5 6 or multi view H Audio Cycles t...

Страница 21: ...On screen Keyboards 3 If desired use the Search Only pull down and corresponding sub menus to specify Alarms Signals or System Events to search 4 Click Search If Search Only is set to Time Playback s...

Страница 22: ...on Library then connect to the DVR with an RJ45 Ethernet cable You can then use vMax Web to configure the DVR via Internet Explorer The default network settings only allow connecting the DVR to a lapt...

Страница 23: ...ng on source Signals Speed G Sensor GPS Fence Wake Alarms and Signals Signals Configure which signals will trigger alarms Excessive speed and G Sensor readings can be set as signal outputs Alarms and...

Страница 24: ...ing On screen Keyboards 3 Click Back to save the settings and return to the Configuration menu MENU ITEM DESCRIPTION Daylight Saving Leave ON and at default dates unless in an area that does not use d...

Страница 25: ...lay items see Metadata Details below MENU ITEM DESCRIPTION VALUE DEFAULT Main Title Enter the apparatus number MAIN_TITLE Titles Display Display hide Main Title and Camera Titles ON OFF Time Date Disp...

Страница 26: ...input voltage G Temperature Ambient temperature inside the DVR F Fahrenheit C Celsius H Signals When a signal activates the Label is displayed I GPS Coordinates Latitude longitude and elevation If GPS...

Страница 27: ...TH4C Installation Guide p 27 TH4C Basic Configuration Safe Fleet May 2019 All rights reserved Document Number XE SNB2 TH4CPM R0A...

Страница 28: ...ot already there FordetailsonusingtheOn screenkeyboard seeTH4COperation Using On screen Keyboards 3 Choose the desired display settings as described in Menu Options below For information about display...

Страница 29: ...ess the Camera Advanced tab and adjust settings for each camera with CoC Control over Coax n a Configuring Signals The DVR supports 10 independent signals The first five are dedicated input wire signa...

Страница 30: ...and display associated labels during video playback Signals 6 through 10 can be user defined n a Label You can edit the on screen display text label maximum 3 characters to describe each signal as de...

Страница 31: ...lt Alarm 1 is connected to the optional Event Diagnostic button installed in the vehicle for use by the operator for more information see Flagging Video for Review Alarms 2 4 can be triggered automati...

Страница 32: ...0 VDC and goes to 12 VDC when active choose N C Normally Closed if the circuit rests at 12 VDC and drops to 0 when active N O N C FPS For each channel the recording speed in FPS Frames Per Second used...

Страница 33: ...meters Alarm and Signal assignments system preferences and networking details For more information see TH4C Configuration Setting up the DVR This procedure requires physical access to the DVR you want...

Страница 34: ...settings Yes overwrites DVR network settings with configuration from the file To copy configuration to a DVR from a USB storage device 1 Power up the DVR using the vehicle ignition 2 Connect the port...

Страница 35: ...metadata item displays Repeating for more information see TH4C Configuration Title Display Menu When set to OFF the DVR stops recording when storage is full HD Used displays 100 ON OFF Record On Dela...

Страница 36: ...fast downloading or real time viewing over a low bandwidth network such as a cellular link In the event of an emergency if the system is configured with Smart Reach cellular hardware and a cellular p...

Страница 37: ...automates the assignment of IP addresses in a network If DHCP is used the subnet mask default gateway and DNS server are configured automatically and only the HTTP Port field is editable Static IP OF...

Страница 38: ...e the integrated VMLfeature OFF disables the integrated VML feature OFF ON LAN Range If the customer network is outside of the DVR network set the customer network s LAN range as determined by a quali...

Страница 39: ...k Calibrate for the G Sensor to set the X Y Z axis planes based on the mounting surface selection When the process is done a Calibration Complete message appears 5 If required adjust G Sensor settings...

Страница 40: ...ond the threshold triggers the output as configured in the Output field X 2 00 Y 2 00 Z 3 00 V 3 00 A 5 00 Output If the specified G Sensor threshold value is exceeded the DVR triggers the selected ou...

Страница 41: ...u ITEM DESCRIPTION VALUE DEFAULT Speed Units Choose MPH in the US or Km h in Canada The speed display units the GPS signal is converted to display speed in the selected units MPH Miles per hour KM h K...

Страница 42: ...the Configuration menu ITEM DESCRIPTION VALUE DEFAULT Fencing Alarm ALM settings trigger the selected Alarm when the vehicle crosses the fencing boundary as defined by the selected coordinate style OF...

Страница 43: ...s Configuring User Levels To configure User Levels 1 Select Network User Levels to open the tab 2 The default Admin user cannot be changed Add other users with access levels as required Enter user nam...

Страница 44: ...ng and archiving recorded video and viewing live video Administrator for User 1 Playback for other Users Configure Menu Options System Settings Configuring System Settings To configure System Settings...

Страница 45: ...front panel 1 2 6 Diagnostic Indicator Select the type of system status indicator installed in the vehicle for more information see TH4C Operation DVR Status Button RGY Illum Language Select a languag...

Страница 46: ...gle camera by Channel number all connected cameras UP or to show each active camera feed in sequence Sequence applies only to the Timer option described below Channel 01 UP Sequence Switch On Set the...

Страница 47: ...ians to better track your product when it comes in for service Please show the RMA number on the outside of the package ANY RETURNED PRODUCT WITHOUT AN RMA NUMBER MAY BE REFUSED Product Information Fo...

Отзывы: