background image


INSTALLATION INSTRUCTIONS


FPVMODEL LIMITED 

http://www.fpvmodel.com


Содержание X-Racer X9

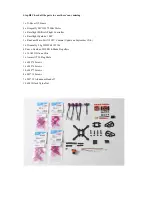
Страница 1: ...INSTALLATION INSTRUCTIONS FPVMODEL LIMITED http www fpvmodel com...

Страница 2: ...ontroller 1 x Raceflight Spark 4n1 ESC 1 x RunCam Micro Swift 2 FPV Camera Update on September 12th 1 x Dranonfly 5 8g 25MW 48CH Vtx 4 Pairs x GemFan 2035BN 4 Blade Propellers 1 x 16AWG Silicon Wire 1...

Страница 3: ...ck wire 44mm Red wire 38mm Please keep 35mm motor wires including the heat shrinkable tubes Step 3 Connect motors and flight controllers The parts you need are shown as below Connect the flight contro...

Страница 4: ...Solder power supply cable and make sure the connection of FC ESC is correct Solder the motors onto the ESC and then solder XT30 cable onto the ESC Black for and Red for...

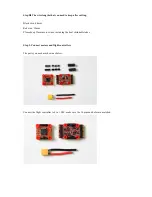
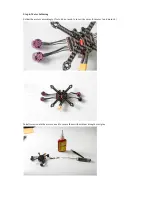
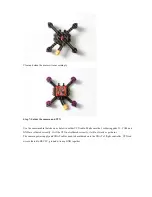
Страница 5: ...Step 4 Install the flight controller Step 5 Ready for motor soldering...

Страница 6: ...Step 6 Motor Soldering Solder the motors accordingly Note do not need to invert the wires for motor 1 and motor 4 Install screws onto the motors need to secure them with midium strength srew glue...

Страница 7: ...low to solder VTX cable Make sure the 3 soldering pads V CAM and GND are soldered correctly Or if the VTX not soldered correctly it will not work or get burnt The camera power supply and VBAT cables n...

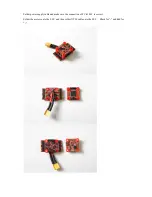
Страница 8: ...Note The wires need to get thru the center of board before soldering as the picture showed...

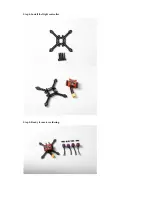
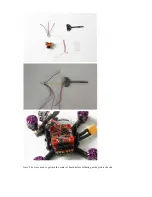
Страница 9: ...Step 8 Install camera protection plates What you need Aluminum standoff 20mm 3pcs...

Страница 10: ...Camera protection plate M2x6 4pcs Install the aluminum standoffs in three places and then install the Runcam Swift camera...

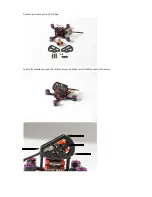
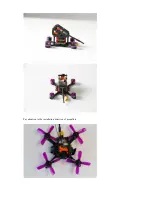
Страница 11: ...Pay attention to the installation direction of propellers...

Отзывы: