


FortiGate-6000F hardware assembly and rack mounting
Fortinet Technologies Inc.
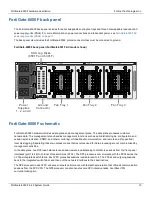
FortiGate-6000F four post rack-mount installation
This section describes how to use the sliding rails included with your FortiGate-6000F package to install the FortiGate-
6000F in a 4-post rack.
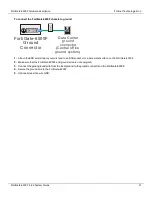
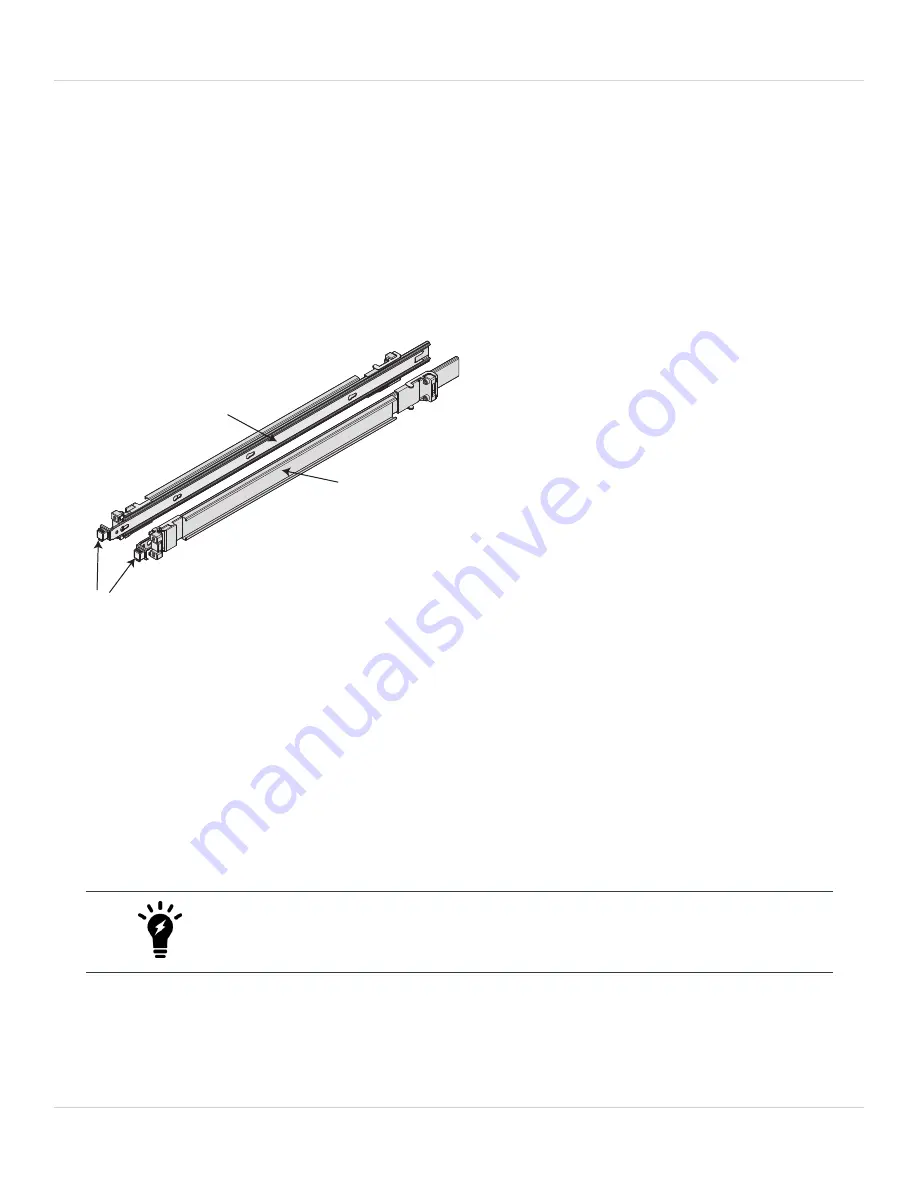
The FortiGate-6000F is shipped with a left and a right rail assembly. Each rail assembly includes an inner rail, a middle
rail, and an outer rail. The inner rail attaches to the side of the FortiGate-6000F. The middle rail remains attached to the
outer rail which attaches to the rack. The middle rail is used to guide the inner rail into the outer rail.
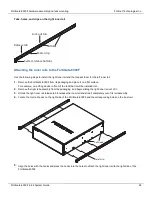
Sliding rails
Inner rail
Left rail
assembly
Right rail
assembly
Outer rail
System release buttons
When mounted on the rails and fully slid into the rack, the FortiGate-6000F locks into place. You can press the system
release buttons that project out of the front of the rack to unlock the rails and slide the FortiGate-6000F out.
No tools are required to install the rails and the FortiGate-6000F. Once the FortiGate-6000F is slid into the rack you can
use a screw driver to install four rack screws to secure the FortiGate-6000F in the rack.
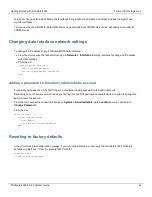
Installation steps
There are three steps to use the sliding rails to install the FortiGate-6000F in a four-post the rack:
1.
Attach the right and left inner rails to the right and left sides of the FortiGate-6000F.
2.
Attach the right and left outer rails to the right and left rack posts.
3.
Slide the FortiGate-6000F into the rack.
As a supplement to the instructions below, you can view the following video:
https://video.fortinet.com/latest/rack-mount-sliding-rail-installation
FortiGate-6000F 6.4.2 System Guide
23