background image


Wall/Ceiling Mounting 


To mount the FE120 camera to the wall or ceiling 

1.  Place the mounting template on the desired surface for installation and mark the location for the 

three mounting screws. 

Note: 

If mounting on the wall, one tab on the circular template must be pointing downwards and the 

other pointing rightwards for the camera to be upright.   

2.  Choose the desired entry port and arrange the plugs and grommet. Alternatively, the ports are 

compatible with ½” EMT installation material. Fix the box into position using the provided mounting 

screws. 

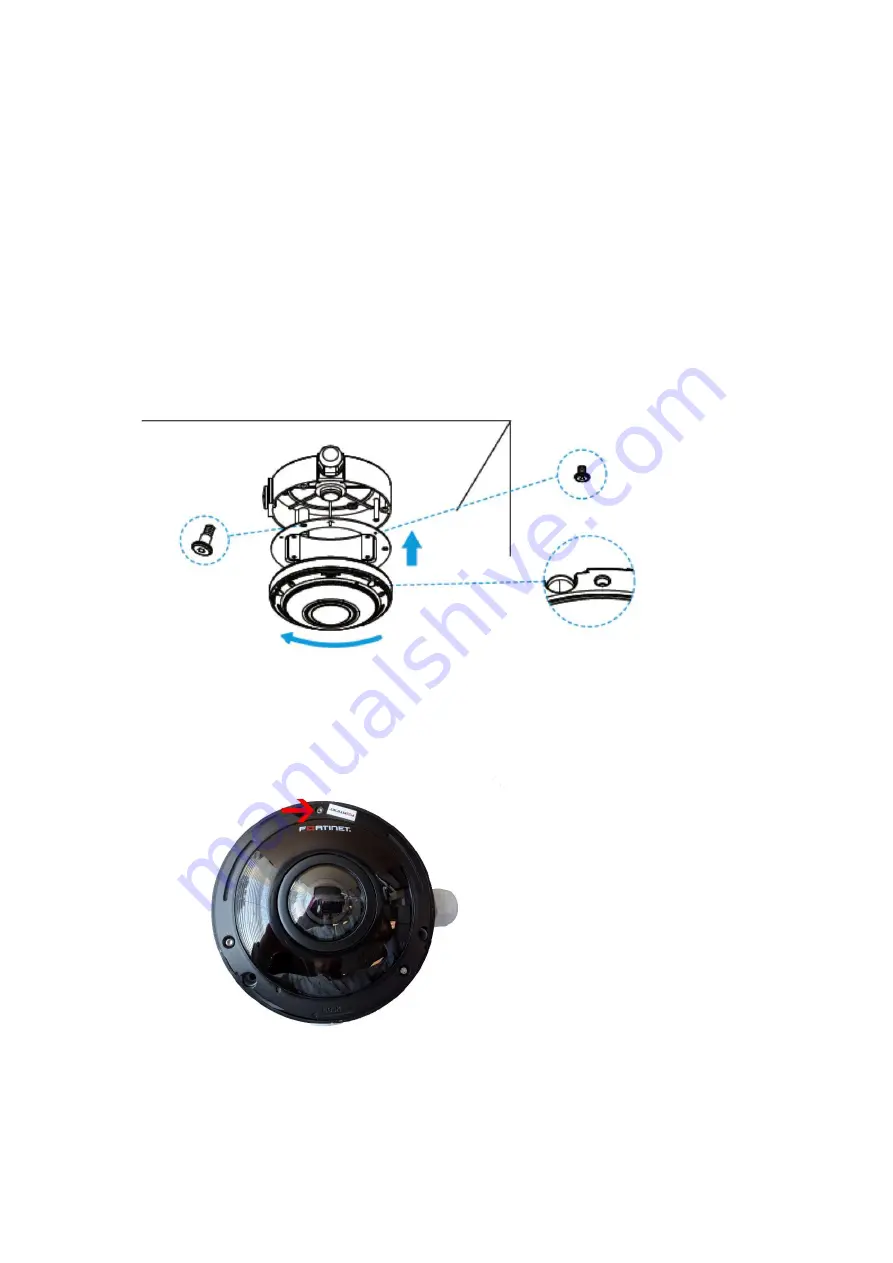
3.  Secure the adapter plate to the junction box with the three smaller screws provided.   

Note: 

If mounting on a wall, position the arrow on the adapter plate so that it points downward. 


4.  Connect the cables to the camera and place the camera on the adapter plate, rotating it clockwise till 

the anchor points align.   

5.  Lock the camera using the lock screw, located on the top of the camera under the cover.   


Содержание FortiCam FE120

Страница 1: ...1 FortiCam FE120 Mounting Guide ...

Страница 2: ...inet com CUSTOMER SERVICE SUPPORT https support fortinet com FORTINET COOKBOOK https cookbook fortinet com FORTINET TRAINING SERVICES https www fortinet com training FORTIGUARD CENTER https www fortiguard com END USER LICENSE AGREEMENT https www fortinet com doc legal EULA pdf FEEDBACK Email techdocs fortinet com May 17 2019 ...

Страница 3: ...3 Table of Contents Warnings and Cautions 4 Available Mounting Accessories 5 Wall Ceiling Mounting 6 ...

Страница 4: ...nditions where temperature is between 30 C 60 C 22 F 140 F and relative humidity is below 90 Avoid exposure to direct sunlight in outdoor installation for better image quality and longer service life Never face the camera towards the sun Do not aim the camera at bright objects Whether the camera is in use or not never aim it at the sun or other extremely bright objects Otherwise the camera may be ...

Страница 5: ...s with Junction box with three entry points Two plugs and one cable grommet for entry points Installation template 3x screws and plugs for mounting the box to the wall or ceiling 3x screws to mount the adapter plate to the box adapter plate is supplied with the camera ...

Страница 6: ...ntry port and arrange the plugs and grommet Alternatively the ports are compatible with EMT installation material Fix the box into position using the provided mounting screws 3 Secure the adapter plate to the junction box with the three smaller screws provided Note If mounting on a wall position the arrow on the adapter plate so that it points downward 4 Connect the cables to the camera and place ...

Страница 7: ...all the decorative cover by turning it clockwise until the anchor points are alighted Tip Use the back entry of the junction box to easily hang the camera from the ceiling using standard EMT tubing and material ...

Страница 8: ...tinet enters a binding written contract signed by Fortinet s General Counsel with a purchaser that expressly warrants that the identified product will perform according to certain expressly identified performance metrics and in such event only the specific performance metrics expressly identified in such binding written contract shall be binding on Fortinet For absolute clarity any such warranty w...

Отзывы: