background image

Page 23   


© 2015 FlexRadio Systems, v1.0.2 

Verifying the ATU Installation  

Replace the FLEX-6300 in its operating position and reconnect all cables, connecting the power cable last.  
Turn on the FLEX-6300 by pressing the front panel power button.  Once the radio has completely booted 
up, start SmartSDR for Windows and connect to the radio. 

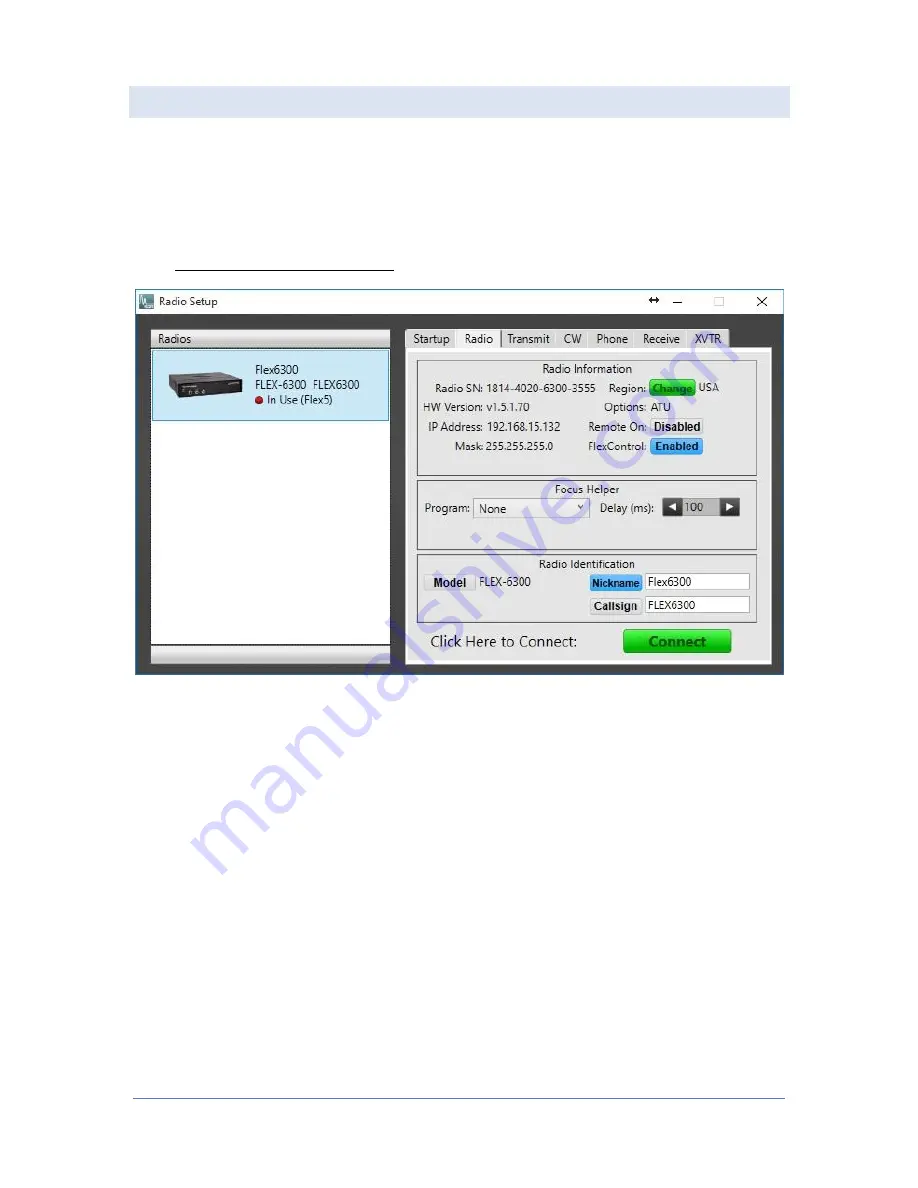
Open the Settings->Radio Setup screen and click on the 

Radio


tab and verify that the ATU is listed as one 

of the radio’s options as shown below.  At this point you may start using the FLEX-6300 ATU.  Please refer 
to the SmartSDR for Windows Users Guide for details on how to operate the FLEX-6300 ATU. 


Содержание FLEX-6300

Страница 1: ...ATU INSTALLATION 4 REMOVING THE FLEX 6300 CHASSIS COVER 4 Removing the Front Side Cover and Top Cover Screws 4 Removing the Middle Rear Side Cover and Rear Top Cover Screws 6 Removing the Top Cover 8...

Страница 2: ...p by step instructions Hours of Operation Our Technical Support engineers are available Monday Friday from 9 00am 6 00pm Central Time If you contact us after business hours on a holiday or weekend ple...

Страница 3: ...low One 1 ATU assembly FLEX 6300 ATU board One 1 Long RG 316 MCX micro coaxial cable assembly 5 2 13 21 cm One 1 Short RG 316 MCX micro coaxial cable assembly 2 7 6 86 cm Four 4 Phillips screws with w...

Страница 4: ...ocedures to prevent static discharges that may damage sensitive electronics components inside the radio such as grounding yourself to reduce static electrical build up Removing the FLEX 6300 Chassis C...

Страница 5: ...e Front Top Cover TORX screw the right side Front Top Cover TORX screw has been previously removed After removing the two Front Top Cover TORX screws remove the two 2 6 32 x 3 8 flat head Front Side C...

Страница 6: ...lete the FLEX 6300 should look like the image shown below Removing the Middle Rear Side Cover and Rear Top Cover Screws Remove all three 3 4 40 X Middle and Rear Side Cover TORX screws located on the...

Страница 7: ...op Cover TORX screws for re installation Image not provided Keep all removed screws from the previous de installation steps separate for re installation These screws are shorter than the previous set...

Страница 8: ...ms v1 0 2 Removing the Top Cover With both hands grasp both sides of the top cover and gently lift upwards to remove the top cover as shown below Do not rock the rock the cover from side to side as th...

Страница 9: ...the ATU Assembly Locate the short 2 7 6 86 cm RG 316 MCX cable assembly Carefully insert one end of the mini RG 316 Coax cable assembly into the gold MCX snap on connector labeled X2 on the ATU board...

Страница 10: ...t the hole on the center right hand side of the ATU assembly that does not have a copper ring should have the existing Phillips head screw centered in it when the ATU assembly is properly seated Refer...

Страница 11: ...6300 as shown below Tighten snugly do not over tighten the ATU mounting screw Install one 1 M3 x 6mm Phillips head screw using a 2 Phillips screwdriver in the top left hand corner threaded spacer faci...

Страница 12: ...r in the bottom left hand corner threaded spacer mounting hole facing the rear of the FLEX 6300 as shown below Tighten snugly do not over tighten the ATU mounting screw While continuing to support the...

Страница 13: ...he short RG 316 MCX cable assembly to the ATU OUT MCX connector by carefully inserting it into the gold MCX snap on connector and pressing down gently until it is completely seated as shown in the ima...

Страница 14: ...board facing the front of the FLEX 6300 below the black 12 pin connector as shown below On the Filter PC board locate the gold MCX connector labeled ATU IN adjacent to the ATU OUT connector Connect t...

Страница 15: ...TU PC board Locate the 12 pin dual sided jumper Position the jumper so that all twelve 12 pins bridge the ATU PC board to the Filter PC board as shown in the image below Be careful not to disturb the...

Страница 16: ...2015 FlexRadio Systems v1 0 2 Below is an image of the properly installed 12 pin jumper between the ATU and Filter PC boards After the ATU PC board is completely installed it should look like the imag...

Страница 17: ...0 disassembly there were two sets of screws removed a set of long and short screws The set of long screws will be installed first Replacing the Chassis Cover With both hands grasp both sides of the to...

Страница 18: ...d in place by the Front Side Cover screws that were removed from the chassis during disassembly If they have shifted forward or fallen out completely they will need to be reinserted before re installi...

Страница 19: ...below shows the installation of the center TORX Side Cover screw on the right side of the FLEX 6300 Repeat the previous procedure for reinstalling the TORX front side cover screw on the left side of...

Страница 20: ...einstall the two 2 6 32 x 3 8 flat head Front Side Cover Phillips screws using a 2 Phillips screwdriver Be careful not to cross thread the screw and over tighten the Front Side Cover Phillips screws T...

Страница 21: ...the Middle and Rear Side Cover TORX screws Repeat this procedure for installing the TORX Middle and Rear Side Cover screws on the left side of the FLEX 6300 The image below shows the removal of the ri...

Страница 22: ...FLEX 6300 Chassis cover has been reinstalled attach the ATU serial number label to the back panel of the FLEX 6300 Install the serial number label by removing the release paper from the adhesive back...

Страница 23: ...front panel power button Once the radio has completely booted up start SmartSDR for Windows and connect to the radio Open the Settings Radio Setup screen and click on the Radio tab and verify that the...

Отзывы: