background image

Laser rotativo

33

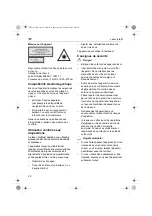
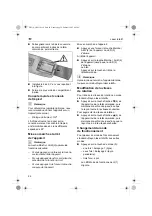
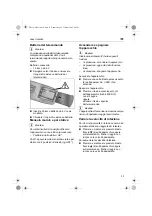
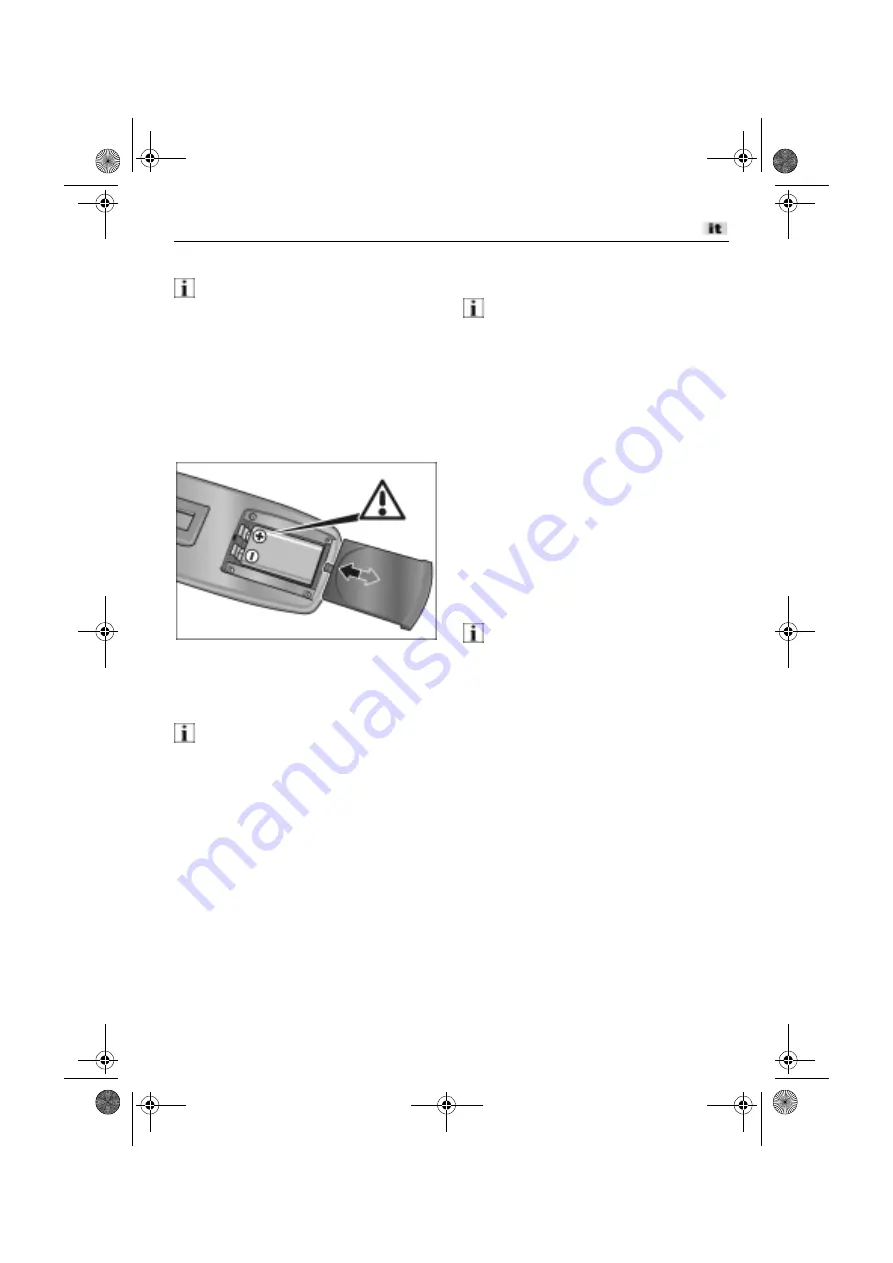
Batterie del telecomando

Avviso

L’occupazione dei tasti del telecomando 
corrisponde a quella del ALR. Con il 
telecomando l’apparecchio può essere solo 
spento.

Batteria necessaria:

1 blocco da 9 V 

n

Spingere verso il basso e rimuovere 
il coperchio del vano batteria del 
telecomando.

n

Inserire il blocco batteria da 9 V come 
mostrato.

n

Chiudere il coperchio del vano batteria.

Mensola murale e per stativo

Avviso

Per ottimi risultati si consiglia di fissare 
l’apparecchio su uno stativo (accessorio).

Filettatura dello stativo: 5/8"

L’ALR è girevole sulla mensola murale e per 
stativo con 4 posizioni d’arresto (ogni 90°).

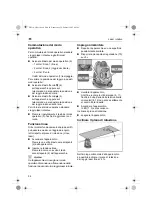
Accendere e spegnere 
l’apparecchio

Avviso

Il tasto acceso/spento (2) ha le seguenti 
funzioni:

1x pressione: accendere l’apparecchio

2x pressione: aggiunta della funzione 
linea

3x pressione: spegnere l’apparecchio

Accendere l’apparecchio:

n

Premere una volta il tasto acceso/spento 
(2) dell’apparecchio. Il LED (3) si 
accende.

Spegnere l’apparecchio:

n

Premere il tasto acceso/spento (2) 
dell’apparecchio finché il LED (3) 
non si spegne
oppure
azionare il tasto «spento» 
del telecomando.

Avviso

L’apparecchio all’accensione si avvia sempre 
nel modo operativo «raggio laser rotante».

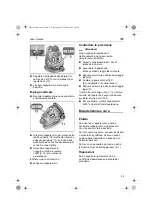
Variare la velocità di rotazione

Per ridurre la velocità di rotazione nel modo 
operativo standard «raggio laser rotante»:

n

Premere e mantenere premuto il tasto 
freccia 

t

 (4) sull’apparecchio oppure 

sul telecomando, finché il raggio non 
ruota con la velocità desiderata.

Per aumentare la velocità di rotazione:

n

Premere e mantenere premuto il tasto 
freccia 

s

 (4) sull’apparecchio oppure 

sul telecomando, finché il raggio non 
ruota con la velocità desiderata.

Laser_ALR411.book  Seite 33  Donnerstag, 24. Februar 2005  9:42 09

Содержание ALR 411 M

Страница 1: ...ALR 411 M 314 528 02 05 Laser_ALR411 book Seite 1 Donnerstag 24 Februar 2005 9 42 09 ...

Страница 2: ...leitung 3 Operating instructions 11 Notice d emploi 19 Istruzioni per l uso 29 Instrucciones de funcionamiento 38 Gebruiksaanwijzing 48 Bruksanvisning 56 Laser_ALR411 book Seite 2 Donnerstag 24 Februar 2005 9 42 09 ...

Страница 3: ...chnisch einwandfreiem Zustand Die Sicherheit beeinträchtigende Störungen umgehend beseitigen Laserklassifizierung Das Gerät entspricht der Laserklasse 2 basierend auf der Norm IEC 825 1 EN 60825 und der Klasse II basierend auf FDA 21 CFR Das Auge ist bei zufälligem kurzzeitigen Hineinsehen in die Laserstrahlung durch den Lidschlussreflex geschützt Dieser Lidschutzreflex kann jedoch durch Medikamen...

Страница 4: ...cht in Betrieb nehmen Gerät nur durch autorisierte Fachkräfte reparieren lassen Bei unsachgemäßem Öffnen des Geräts kann Laserstrahlung entstehen die die Klasse 2 übersteigt Gerät nicht in explosionsgefährdeter Umgebung einsetzen Bei Ausrichtarbeiten auf Leitern eine abnormale Körperhaltung vermeiden Für sicheren Stand und ständiges Gleichgewicht sorgen Sachschäden Wenn das Gerät aus großer Kälte ...

Страница 5: ...strahl 7 Laserstrahl Fenster Austrittsfenster für Vertikalstrahl Strichfunktion im rechten Winkel zur Rotationsebene 8 Horizontal Libelle zur Nivellierung beim Horizontaleinsatz in Y Richtung 9 Fußschraube zum Ausrichten des Gerätes in Y Richtung 10 Einstellrad zum Neigen der Rotationsebene 4 11 Fußschraube zum Ausrichten des Gerätes in X Richtung 12 Horizontal Libelle zur Nivellierung beim Horizo...

Страница 6: ...ach schließen Batterien der Fernbedienung Hinweis Die Tastenbelegung der Fernbedienung ent spricht den Tasten des ALR Mit der Fernbe dienung läßt sich das Gerät nur ausschalten Erforderliche Batterie 1 x 9 V Block n Batteriefachdeckel der Fernbedienung nach unten schieben und abnehmen n 9 V Block wie gezeigt einlegen n Batteriefachdeckel schließen Bestell Nummer 311 294 Genauigkeit 3 mm 10 m Betri...

Страница 7: ...r strahl zu verringern n Pfeiltaste t 4 am Gerät oder der Fernbedienung drücken und festhalten bis der Strahl in der gewünschten Geschwindigkeit rotiert Um die Rotationsgeschwindigkeit zu erhöhen n Pfeiltaste s 4 am Gerät oder der Fernbedienung drücken und festhalten bis der Strahl in der gewünschten Geschwindigkeit rotiert Umschalten der Betriebsart Um von der Standard Betriebsart rotieren der La...

Страница 8: ...rizontaleinsatz n Gerät auf einer möglichst ebenen Fläche aufstellen n Einstellrad 10 auf 0 stellen n Gerät nivellieren Dazu die Fußschrauben 9 11 drehen bis sich die Blasen der dazugehörigen Horizontal Libellen 8 12 genau mittig zwischen den Strichen befinden n Gerät einschalten Die LED s 1 3 leuchten Nach der Arbeit n Gerät ausschalten Rotationsebene neigen Im Horizontaleinsatz des Gerätes ist e...

Страница 9: ...arkierun gen X und Y ist der richtige Wert von dem die beiden Markierungen nicht mehr als 3 mm 10 m abweichen dürfen n Zur Kontrolle Gerät um 90 drehen und gesamten Vorgang wiederholen Wartung und Pflege Reinigung Wenn das Gerät nach Benutzung feucht ist Gerät und Zubehör mit einem trockenen weichen Tuch trockenreiben Zur Entfernung von Schmutz keine Lösungs mittel oder kratzende Hilfsmittel benut...

Страница 10: ...g eines Garantieanspruchs ist der Original Verkaufsbeleg mit Verkaufsdatum beizufü gen Garantiereparaturen dürfen ausschließ lich von FLEX autorisierten Werkstätten oder Service Stationen durchgeführt werden Ein Garantieanspruch besteht nur bei be stimmungsgemäßer Verwendung Von der Garantie ausgeschlossen sind insbesondere betriebsbedingter Verschleiß unsachge mäße Anwendung teilweise oder komple...

Страница 11: ...air any faults which impair safety Laser classification The power tool conforms to a class 2 laser based on the standard IEC 825 1 EN 60825 and to a class II product based on FDA 21 CFR Eyes must be protected with the eyelid close reflex in case you accidentally glance into the laser beam However this eyelid protective reflex may be impaired by medication alcohol or drugs These power tools may be ...

Страница 12: ...exceeds class 2 Do not use the power tool in an explosive environment If carrying out alignment work on ladders avoid an abnormal posture Ensure that you have a secure footing and keep your balance Damage to property If the power tool is brought from a cold to a warm environment or vice versa leave the power tool to acclimatise before using it If using adapters and tripods ensure that the power to...

Страница 13: ...w for vertical beam hairline function at right angles to the rotation level 8 Horizontal spirit level levels the machine for horizontal application in the Y direction 9 Foot screw aligns the machine in the Y direction 10 Adjusting wheel inclines the rotation level 4 11 Foot screw aligns the machine in the X direction 12 Horizontal spirit level levels the machine for horizontal application in the X...

Страница 14: ...V n Open the battery compartment 14 on the machine n Insert the batteries the correct way round n Close the battery compartment Batteries for the remote control Note The button configuration on the remote control corresponds to the buttons on the ALR The power tool can only be switched off with the remote control Order number 311 294 Precision 3 mm 10 m Operating modes Rotating laser beam standard...

Страница 15: ...ff button on the remote control Note When switched on the power tool always starts in the rotating laser beam operating mode Changing the speed of rotation To reduce the speed of rotation in rotating laser beam standard operating mode n Press and hold down the arrow button t 4 on the power tool or on the remote control until the beam is rotating at the required speed To increase the speed of rotat...

Страница 16: ...will switch to the rotating laser beam when the hairline function is switched on Horizontal application n Place the power tool on a surface which is as level as possible n Set the adjusting wheel 10 to 0 n Level the machine To do this rotate the foot screws 9 11 until the bubbles in the associated horizontal spirit levels 8 12 are exactly in the middle between the hairlines n Switch on the power t...

Страница 17: ...m Y on the wall The centre between the two marks X and Y is the correct value from which the two marks must not deviate by more than 3 10 m n To check the precision rotate the power tool by 90 and repeat the entire process Maintenance and care Cleaning If the power tool is damp after use wipe the power tool and accessories with a dry soft cloth Do not use solvents or abrasive cleaning agents to re...

Страница 18: ... to a material and or production fault as well as non performance of warranted characteristics When making a claim under the guarantee enclose the original sales receipt with purchase date Repairs under the guarantee may be carried out only by workshops or service centres authorised by FLEX A claim may be made under the guarantee only if the power tool has been used as intended The guarantee exclu...

Страница 19: ...r la prévention des accidents en vigueur sur le lieu d utilisation Cet appareil a été conçu selon l état actuel de la technique et les règles techniques de sécurité connues Cet appareil s utilise uniquement conformément aux dispositions en parfait état en ce qui concerne la technique de sécurité Éliminez immédiatement les dérangements entravant la sécurité Classification du laser L appareil appart...

Страница 20: ...Ajuster des installations et éléments selon trois axes L appareil peut s utiliser à l extérieur Consignes de sécurité Danger Éloignez les enfants des appareils laser Il est interdit de manipuler ou modifier l appareil Ne neutralisez pas les dispositifs de sécurité et n enlevez pas les étiquettes de consigne et d avertissement Avant de mettre l appareil en service examinez le pour détecter d éventu...

Страница 21: ...e durée assez longue isolez les piles ou enlevez les de l appareil Pollution Mettez l appareil et les batteries au rebut en respectant les directives spécifiques en vigueur dans votre pays En cas de doute contactez le fabricant ou le distributeur Contenu de l emballage Laser rotatif ALR 411 M 4 batteries AA pour ALR Télécommande avec bloc d alimentation 9 V Mallette de transport Laser_ALR411 book ...

Страница 22: ...if 7 Fenêtre du rayon laser Fenêtre de sortie du faisceau vertical fonction à trait perpendiculaire au plan de rotation 8 Nivelle horizontale pour niveler l appareil en cas d emploi à l horizontale selon l axe Y 9 Vis de piètement Pour aligner l appareil selon l axe Y 10 Molette de réglage Pour incliner le plan de rotation 4 11 Vis de piètement Pour aligner l appareil selon l axe X 12 Nivelle hori...

Страница 23: ...quises 4 piles type AA 1 5 V n Ouvrez le compartiment à batteries 14 de l appareil n Insérez les batteries en respectant les polarités n Refermez le compartiment à batteries Piles de la télécommande Remarque La disposition des touches de la télé commande correspond aux touches de l ALR La télécommande vous permet uniquement d éteindre l appareil Piles requises 1 bloc de 9 V Numéro de référence 311...

Страница 24: ...Marche Arrêt 2 de l appareil La LED 3 s allume Arrêt de l appareil n Appuyez sur la touche Marche Arrêt 2 de l appareil jusqu à que la LED 3 s éteigne ou bien Appuyez sur la touche Arrêt de la télécommande Remarque Après la mise en marche l appareil démarre toujours en mode Rayon laser rotatif Modification de la vitesse de rotation Pour réduire la vitesse de rotation en mode standard Rayon laser r...

Страница 25: ...u perpendiculaire au plan de rotation collimateur laser n Mise en marche de l appareil Appuyez une fois sur la touche Marche Arrêt 2 de l appareil n Pour enclencher la fonction de trait Appuyez à nouveau sur la touche Marche Arrêt 2 de l appareil Remarque Si l appareil se trouvait déjà en mode Balayage Scan il commute sur le faisceau laser rotatif lors de l enclenchement de la fonction à trait Uti...

Страница 26: ... vis 11 du piètement La bulle du niveau doit se trouver exactement au centre entre les traits n Enclenchez l appareil Le rayon commence à tourner Les LED 6 13 restent constamment allumées Après le travail n Arrêt de l appareil Contrôle de la précision Prudence Faites ajuster l appareil exclusivement par un technicien agréé n Placez l appareil à 10 m d un mur n Enclenchez l appareil Mode de fonctio...

Страница 27: ...les ordures ménagères Conformément à la directive européenne 2002 96 EG relative aux déchets d équipements électriques ou électroniques DEEE et à sa transposition dans la législation nationale les appareils électriques doivent être collectés à part et être soumis à un recyclage respectueux de l environnement Remarque Pour connaître les possibilités de mise au rebut des appareils usagés veuillez co...

Страница 28: ...e utilisation non conforme une machine partiellement ou entièrement démontée des dommages causés par une surcharge de la machine l utilisation d outils non autorisés défectueux ou inappropriés des dommages provoqués par la machine sur l outil et ou la pièce à scier une utilisation forcée des dommages indirects résultant d un entretien non conforme ou insuffisant de la part du client ou d un tiers ...

Страница 29: ...e previsto in condizioni perfette dal punto di vista tecnico della sicurezza Eliminare immediatamente i guasti che pregiudicano la sicurezza Classificazione del laser L apparecchio è conforme alla classe di laser 2 fondata sulla norma IEC 825 1 EN 60825 e alla classe II fondata sulla FDA 21 CFR L occhio che guarda casualmente e brevemente il raggio laser è protetto dal riflesso di chiusura della p...

Страница 30: ...lizzato autorizzato In caso di inappropriata apertura dell apparecchio può verificarsi un emissione di raggio laser superiore alla classe 2 Non impiegare l apparecchio in ambienti con atmosfera potenzialmente esplosiva In caso di lavori di allineamento su conduttori evitare posizioni anormali del corpo Provvedere sempre ad assumere posizioni sicure ed a mantenere continuamente l equilibrio Danni m...

Страница 31: ... rispetto al raggio rotante 7 Finestra del raggio laser finestra d uscita per il raggio verticale funzione di linea ad angolo retto rispetto al piano di rotazione 8 Livella orizzontale per livellamento nell impiego orizzontale in direzione Y 9 Vite del piede per orientare l apparecchio in direzione Y 10 Manopola di regolazione per inclinare il piano di rotazione 4 11 Vite del piede per orientare l...

Страница 32: ...comuni nell apparecchio Avviso Quando il LED 3 lampeggia sostituire il set di batterie Pile da usare 4 del tipo AA 1 5 V n Aprire il vano batterie 14 dell apparecchio n Introdurre le batterie con la corretta polarità n Chiudere il vano batterie Numero d ordinazione 311 294 Precisione 3 mm 10 m Modi operativi raggio laser rotante standard Scan 1 linea Scan 2 raggio oscillante Punto Supplementare ra...

Страница 33: ...recchio 2x pressione aggiunta della funzione linea 3x pressione spegnere l apparecchio Accendere l apparecchio n Premere una volta il tasto acceso spento 2 dell apparecchio Il LED 3 si accende Spegnere l apparecchio n Premere il tasto acceso spento 2 dell apparecchio finché il LED 3 non si spegne oppure azionare il tasto spento del telecomando Avviso L apparecchio all accensione si avvia sempre ne...

Страница 34: ...re emesso un raggio ad angolo retto rispetto al piano di rotazione croce laser n Accendere l apparecchio Premere una volta il tasto acceso spento 2 dell apparecchio n Inserire la funzione linea Premere ancora una volta il tasto acceso spento 2 dell apparecchio Avviso Se l apparecchio si trova già nel modo operativo di scansione all accensione della funzione linea commuta a raggio laser rotante Imp...

Страница 35: ...n muro n Accendere l apparecchio Modo operativo raggio laser rotante n Segnare sul muro la posizione del raggio laser X n Ruotare l apparecchio di 180 è consigliabile l uso dello stativo n Segnare sul muro la posizione del raggio laser Y Il centro fra i due segni X e Y è il valore corretto dal quale i due segni non devono scostarsi di oltre 3 mm 10 m n Per controllare ruotare l apparecchio di 90 e...

Страница 36: ...sulle possibilità di rottamazione degli apparecchi fuori uso Conformità CE Dichiariamo sotto la nostra esclusiva responsabilità che questo prodotto è conforme alle seguenti norme o documenti normativi EN 50082 1 EN 55022 secondo le disposizioni della direttiva 89 336 CEE 04 Rühle Severin FLEX Elektrowerkzeuge GmbH Bahnhofstraße 15 D 71711 Steinheim Murr Ricambi Accessori Codice d ord N Occhiali vi...

Страница 37: ... causata dall impiego l uso improprio la macchina parzialmente o totalmente smontata nonché i danni causati da sovraccarico della macchina uso di utensili montati non autorizzati difettosi oppure usati in modo errato i danni causati dalla macchina all utensile montato oppure al pezzo uso della forza danni indiretti riconducibili a manutenzione impropria oppure insufficiente da parte del cliente o ...

Страница 38: ...tes en el lugar de su utilización El equipo fue construido según el estado de la técnica y reglas de seguridad reconocidas El equipo debe utilizarse exclusivamente para los fines a los cuales fue construida en estado perfecto en lo que a su técnica de seguridad se refiere Deben eliminarse inmediatamente todas aquellas perturbaciones que afecten la seguridad Calificación del láser El equipo corresp...

Страница 39: ...ciones y elementos en tres ejes El equipo está previsto para su utilización al aire libre Advertencias de seguridad Peligro Mantener alejados a los niños de equipos láser No está permitido manipular o modificar el equipo No inutilizar los dispositivos de seguridad y no quitar carteles indicadores o de advertencia Antes de su uso controlar el equipo para determinar la existencia de daños visibles N...

Страница 40: ...Daños en el medio ambiente Depolución del equipo y las baterías según las pautas de válidas correspondientes específicas de cada país En caso de dudas consultar con el fabricante o el proveedor Volumen de entrega Láser rotativo ALR 411 M 4 x baterías AA para ALR Control a distancia incluyendo una batería de 9 V Gabinete de transporte Laser_ALR411 book Seite 40 Donnerstag 24 Februar 2005 9 42 09 ...

Страница 41: ...specto del haz rotativo 7 Ventana para el haz de láser Ventana de salida para el haz vertical función de línea en ángulo recto respecto del plano de rotación 8 Nivel horizontal para la nivelación en el sentido Y durante el uso en posición horizontal 9 Tornillo de pie para la orientación del equipo en sentido Y 10 Rueda de ajuste para inclinar el plano de rotación 4 11 Tornillo de pie para la orien...

Страница 42: ... el LED 3 centellea debe cambiarse el juego de baterías El tipo de baterías a utilizar 4 elementos del tipo AA 1 5 V n Abrir el compartimiento de baterías 14 n Colocar las baterías cuidando la polaridad correcta n Cerrar el compartimiento de baterías Número para el pedido 311 294 Exactitud 3 mm 10 m Modos de funcionamiento haz de láser giratorio estándar escaneo 1 línea escaneo 2 haz oscilante pun...

Страница 43: ...ones 1x accionamiento el equipo se enciende 2x accionamientos se adiciona la función de línea 3x accionamientos el equipo se apaga Encendido del equipo n Accionar la tecla de encendido y apagado 2 una vez El LED 3 está encendido Apagado del equipo n Accionar la tecla de encendido y apagado 2 una vez hasta que el LED 3 se apaga o bien accionar la tecla de apagado del control remoto Advertencia El e...

Страница 44: ...a falta para que el haz de láser vuelva a rotar Función de línea Puede generarse un haz en ángulo recto respecto del plano de rotación cruz de láser adicionalmente a las funciones descriptas anteriormente n Encendido del equipo Accionar la tecla de encendido y apagado 2 una vez n Accionar la función de línea Volver a accionar la tecla de encendido y apagado 2 otra vez Advertencia Si el equipo ya s...

Страница 45: ...el nivel debe encontrarse exactamente centrada entre las dos líneas n Encender el equipo El haz comienza a rotar Los LED s 6 13 están continuamente encendidos Concluida la tarea n Apagar el equipo Control de la exactitud Cuidado Hacer realizar los ajustes exclusivamente por personal especializado debidamente autorizado n Ubicar el equipo a 10 m de distancia de una pared n Encender el equipo Modo d...

Страница 46: ...e Accesorios Indicaciones para la depolución Sólo para países de la Unión Europea No deseche los aparatos eléctricos junto con los residuos domésticos De conformidad con la Directiva Europea 2002 96 CE sobre residuos de aparatos eléctricos y electrónicos y su aplicación de acuerdo con la legislación nacional las herramientas eléctricas cuya vida útil haya llegado a su fin se deberán recoger por se...

Страница 47: ...rizados por FLEX o estaciones de service Solamente existe derecho a la garantía si el equipo fue utilizado de modo adecuado a su función Se excluyen de la garantía el desgaste producido por el uso normal utilización inadecuada máquinas parcial o totalmente desmontadas así como daños causados por sobrecarga de la máquina o aquellos causados por el uso de herramientas no autorizadas o mal empleadas ...

Страница 48: ...igheidstechnische regels De machine mag alleen worden gebruikt voor het bestemde doel in een veiligheidstechnisch correcte toestand Verhelp storingen die de veiligheid in gevaar brengen onmiddellijk Laserclassificatie Het apparaat hoort bij laserklasse 2 gebaseerd op de norm IEC 825 1 EN 60825 en klasse II gebaseerde op FDA 21 CFR Het oog wordt bij het toevallig gedurende korte tijd in de laserstr...

Страница 49: ...e Neem een beschadigd apparaat niet in gebruik Laat het apparaat alleen door een erkende vakman repareren Als het apparaat onjuist wordt geopend kan laserstraling ontstaan die klasse 2 te boven gaat Gebruik het apparaat niet in een omgeving met explosiegevaar Voorkom bij uitrichtwerkzaamheden op een ladder een ongewone lichaamshouding Zorg ervoor dat u stevig staat en u voortdurend in evenwicht be...

Страница 50: ...straal streepfunctie haaks op het rotatievlak 8 Horizontale libel voor het nivelleren bij horizontaal gebruik in de Y richting 9 Voetschroef voor het uitrichten van het apparaat in de Y richting 10 Instelwiel voor het schuin zetten van rotatievlak 4 in de Y richting 11 Voetschroef voor het uitrichten van het apparaat in de X richting 12 Horizontale libel voor het nivelleren bij horizontaal gebruik...

Страница 51: ... type AA 1 5 V n Open het batterijvak 14 van het apparaat n Plaats de batterijen en laat daarbij op de juiste poolaansluiting n Sluit het batterijvak Batterijen van de afstandsbediening Aanwijzing De toetsen van de afstandsbediening komen overeen met de toetsen van de ALR Met de afstandsbediening kan het apparaat alleen worden uitgeschakeld Vereiste batterij 1 x 9 V blokbatterij Bestelnummer 311 2...

Страница 52: ...elen altijd in de modus roterende laserstraal Rotatiesnelheid wijzigen Als u de rotatiesnelheid in de standaardmodus ronddraaiende laserstraal wilt verminderen n Druk op de pijltoets t 4 op het apparaat of op de afstandsbediening en houd deze ingedrukt tot de straal op de gewenste snelheid roteert Als u de rotatiesnelheid wilt vergroten n Druk op de pijltoets s 4 op het apparaat of op de afstandsb...

Страница 53: ...schakeld naar de roterende laserstraal Horizontaal gebruik n Plaats het apparaat op een zo egaal mogelijk oppervlak n Zet het instelwiel 10 op 0 n Apparaat nivelleren Draai daarvoor de voetschroeven 9 11 tot de bellen van de bijbehorende horizontale libellen 8 12 zich precies in het midden tussen de strepen bevinden n Schakel het apparaat in De LED s 1 3 branden Na de werkzaamheden n Het apparaat ...

Страница 54: ...n Y is de juiste waarde waarvan de beide markeringen niet meer dan 3 per 10 meter mogen afwijken n Draai het apparaat 90 en herhaal ter controle de hele procedure Onderhoud en verzorging Reiniging Als het apparaat na gebruik vochtig is moet het apparaat en het toebehoren met een droge zachte doek worden drooggewreven Gebruik voor het verwijderen van vuil geen oplosmiddelen of krassende hulpmiddele...

Страница 55: ...ing van bepaalde eigenschappen Bij een garantieclaim moet het oorspronkelijke aankoopbewijs met de verkoopdatum worden bijgevoegd Garantiereparaties mogen uitsluitend worden uitgevoerd door werkplaatsen of servicestations die door FLEX zijn erkend Er bestaat alleen recht op garantie bij gebruik volgens bestemming Van de garantie uitgesloten zijn in het bijzonder slijtage als gevolg van normaal geb...

Страница 56: ... dagens tekniska standard och säkerhetstekniska regler Apparaten får endast användas på avsett sätt i säkerhetstekniskt felfritt tillstånd Störningar som påverkar säkerheten måste omgående åtgärdas Laserklassificering Apparaten motsvarar laserklass 2 grundad på standarden IEC 825 1 EN 60825 och klass II grundad på FDA 21 CFR Vid tillfällig kort direkt blick i laserstrålen skyddas ögonen av ögonloc...

Страница 57: ...amma och varningsskyltar ej avlägsnas Okulärbesiktiga apparaten innan den tas i bruk Starta aldrig defekt apparater Apparaten får endast repareras av autoriserad och särskilt utbildad personal Om apparaten öppnas på felaktigt sätt kan laserstrålningen överskrida klass 2 Använd ej apparaten i explosionsfarlig miljö Undvik anormal kroppshållning vid inriktningsåtgärder på stegar Se alltid till att d...

Страница 58: ...strålöppning Utgångsfönster för vertikalstråle streckfunktion i rät vinkel mot rotationsplanet 8 Horisontalt vattenpass för nivellering vid horisontal användning i Y riktning 9 Fotskruv för inriktning av apparaten i Y riktning 10 Inställningsratt för lutning av rotationsplanet 4 11 Fotskruv för inriktning av apparaten i X riktning 12 Horisontalt vattenpass för nivellering vid horisontal användning...

Страница 59: ...n Stäng batterifacket Fjärrkontrollens batterier OBS Fjärrkontrollknapparnas funktion motsvarar ALR knapparnas Apparaten kan endast kopplas från med fjärrkontrollen Batteri 1 x 9 V batteri n För fjärrkontrollens batterifacklock nedåt och ta av det n Lägg i 9 V batteri se bild n Sätt på locket igen Best nr 311 294 Noggrannhet 3 mm 10 m Driftsätt Roterande laserstråle standard Scan 1 linje Scan 2 pe...

Страница 60: ...t reducera rotationshastigheten i standardriftsättet roterande laserstråle n Håll knappen t 4 på maskinen eller fjärrkontrollen intryckt tills strålen roterar med önskad hastighet För att höja rotationshastigheten n Håll knappen s 4 på maskinen eller fjärrkontrollen intryckt tills strålen roterar med önskad hastighet Driftsättsomkoppling För omkoppling från standarddriftsättet roterande laserstrål...

Страница 61: ...ntal användning n Ställ apparaten på en så jämn yta som möjligt n Ställ inställningsratten 10 på 0 n Nivellera apparaten Genom att vrida fotskruvarna 9 11 tills tillhörande vattenpassblåsor 8 12 står exakt mitt emellan strecken n Koppla till apparaten Lysdioderna 1 3 lyser Efter arbetet n Koppla från apparaten Luta rotationsplanet När apparaten används horisontalt är det möjligt att luta laserstrå...

Страница 62: ...ens läge Y på väggen Mitten mellan de båda markeringarna X och Y är det riktiga värdet från vilket båda markeringarna inte får avvika med mer än 3 mm 10 m n För kontroll Vrid apparaten 90 och upprepa hela proceduren Underhåll Rengöring Torka av apparaten med en torr mjuk lapp om den är fuktig efter användningen Använd inga lösningsmedel eller skavande hjälpmedel för att avlägsna smuts Använd ren f...

Страница 63: ...material och eller tillverkningsfel liksom om garanterade egenskaper saknas Originalkvittot med försäljningsdatum måste uppvisas vid eventuella garantianspråk Garantireparationer får endast utföras av FLEX autoriserade verkstäder eller servicestationer Garantianspråk gäller endast om maskinen använts på avsett sätt Garantin gäller ej för normalt slitage felaktig användning delvis eller helt demont...

Страница 64: ...FLEX Elektrowerkzeuge GmbH Bahnhofstraße 15 D 71711 Steinheim Murr Telefon 07144 828 0 Fax 07144 25899 www flex tools de Laser_ALR411 book Seite 64 Donnerstag 24 Februar 2005 9 42 09 ...

Отзывы: