Instructions to Assemble the Perfect Platform™
For Model FB2232-M2
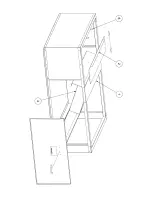
Refer to diagram on other side
Door
Place the handle on the door using the two #6 x ½” screws provided. Note: Only one of the doors has holes to
attach the handle. This door is to be located on the side which the homeowner has access for replacing the
filter.
Door Foam
To ensure a good seal between the door and the filter, the gasket material must be placed on each door. Once it
has been decided which direction the platform will face and the customer access door has been placed, you will
need to install the door foam. With a pencil mark both doors along the top edge of the filter. Remove the doors
and place the gasket on the doors under the mark you made.
Filter Spacer
The filter spacer (4) is not used on the model
FB2232-M2.
Adjustable Center Crossbar
The center crossbar (1) is secured to the platform with the formed flanges down. Place the crossbar in place but
do not secure it to the platform until the intake duct adjuster (2) is in place.
On the
FB2232-M2
platform this crossbar can be adjusted to close the gap for a narrow air handler or furnace.
Duct Flanges
The flat duct flanges (6) need to be bent up 90° and are used to secure the intake duct to the platform.
On the
FB2232-M2
the intake duct adjuster (2) can be placed allowing for either 8” or 10” duct. The formed
flange should be facing up and is used to secure the intake duct to the platform. Once the adjuster is positioned
correctly four #8 x
3
/
8
” screws are used to secure both the adjuster and crossbar to the platform. One screw is
used to secure the adjuster to the crossbar.
Filter Size
The filter part number for the
FB2232-M2
is
M2-1056
.
Once the air handler or furnace and the duct are in place and secured the joints must be properly sealed to prevent air
leakage.
fb2232-m2.doc (Rev. 1 – 5/11)
Содержание Perfect Platform FB2232-M2
Страница 2: ......


