EN
60
7.4 Inverter Web User Interface
The inverter is equipped with an advanced integrated Web User Interface that allow a full access to all configuration and comissioning
parameters from any electronic device (laptop, tablet and smartphone).
7.4.1 Connection in “Wi-Fi Station Mode”
• Enable the Wi-Fi connection on the device (tablet, smartphone
or laptop) and connect it to the same Wi-Fi network to which the
inverter is connected.
• Open an internet browser (recommended browser: Chrome
versions from v.55, Firefox versions from v.50) and enter theIP
Address assigned to the inverter or the “Host Name” http://
FIMER-YYWWSSSSSS.local (where YYWWSSSSSS is the SN
of the inverter).
NOTE –
D
The IP address assigned may vary for reasons
connected to the Wi-Fi router setup (for example, a very
brief DHCP lease time). If verification of the address is
required, it is usually possible to obtain the client list (and
the corresponding IP addresses) from the Wi-Fi router
administration panel.
NOTE –
D
In order to use the “Host Name” the Wi-Fi router
to which the inverter is connected (when operating in
“Station Mode”) must provide the Domain Name System
(DNS) service (contact the network administrator for further
information regarding the presence or absence of the DNS
service in the Wi-Fi router or how to enable it). In this way,
even if the IP address assigned to the inverter should change
over time (dynamic IP), it will always be possible to use the
same “Host Name” which will remain unchanged over time.
7.4.2 Connection in “AP Mode”
Enable the Wi-Fi connection on the device (tablet, smartphone or
laptop) and connect it to the Access Point created by the inverter
system: the name of the Wi-Fi network created by the inverter, will
be: FIMER-WWYYSSSSSS (where YYWWSSSSSS is the SN of
the inverter).
• When required digit the PRODUCT KEY (printed on the
“Communication Identification label” and applied during the
commissioning phase to the plant documentation) as access
point password.
NOTE –
D
It’s required to digit also the dash “-” characters of
the Product Key in the password field.
NOTE –
D
In case of need, product key can be recovered by
Aurora Vision Cloud or by calling FIMER technical support.
• Open an internet browser (reccomended browser: Chrome
versions from v.55, Firefox versions from v.50) and enter the pre-
set IP address 192.168.117.1 to access the login page.
7.4.3 Web UI login page
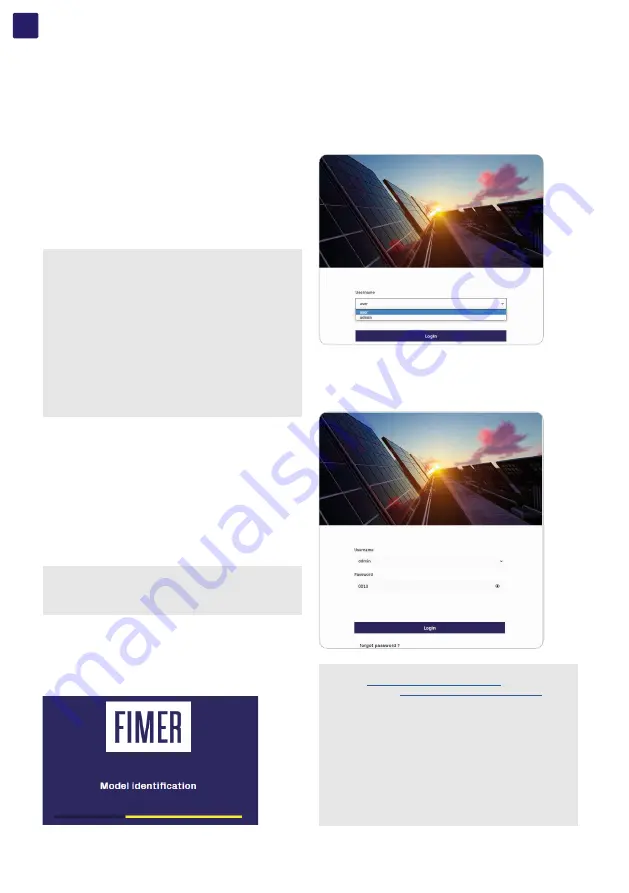
• After you have connected the Web UI will be opened.
Two type of access are availble:
• User (without password).
Basic access to the settings and visualization of the webUI
parameters.
• Admin (password: 0010)
Installer access to the settings and visualization of the webUI
parameters.
NOTE –
D
By logging in as “Admin” and obtaining the token
(on the
https://registration.solar.fimer.com
site and following
the procedure
“7.4.7.1 Admin Plus level access”
in this
document) it is possible to obtain the “Admin Plus” access
level which allows advanced configuration of the inverter
parameters.
NOTE –
D
If the Password is lost click on “Forgot your
password?” to obtain the access to the Web User Interface
(and it will be possible to change the password) by entering
the PRODUCT KEY (printed on the “Communication
Identification label” and applied during the commissioning
phase to the plant documentation).
NOTE –
D
The language of the wizard could be changed by
clicking on the upper status bar.
Содержание FMR-PVS-10-TL-SX
Страница 1: ...Solar Inverter PVS 10 12 5 15 TL Product Manual ...
Страница 15: ...EN 15 3 4 1 Inverter external view 02 07 05 01 03 04 26 09 23 08 20 21 ...
Страница 16: ...EN 16 08 05 19 19 09 16 18 18 25 15 14 17 13 12 10 11 ...
Страница 79: ...EN 79 ...


