2
2-8
Setting up the Fiery X2
N
OTE
:
If you make a mistake during Setup, you can always use the Menu button to
cancel without saving changes. If you are viewing a Setup screen, pressing the Menu
button cancels what you are doing in the current screen to bring you to the next higher
level menu. You may need to press Menu more than once to return to the top level for
the particular Setup procedure with which you are working. Once at the top level, you
can enter the current Setup again, or exit without making changes.
When you have entered all the settings or made all the changes you want, you need to
save the changes. You are usually prompted to do so. If you choose
Yes
, your settings
overwrite previous settings. If you choose
No
, your previous settings are retained. If
necessary, the Fiery X2 reboots after you exit from the Setup menu.
Server Setup options
The Server Setup menu lets you specify system information that pertains to the
Fiery X2 itself and all users. Accessing the menu is described on page 2-2.
When you choose Server Setup, the options appear in sequence, as described below.
Default values, where applicable, appear in square brackets. Words shown in italics
indicate that a product- or site-specific value is displayed.
Server Name
Default server name
Use this option to give the Fiery X2 a name (up to 10 characters long). This is the
name that will appear in the Chooser on an AppleTalk network.
Also enter this name when you configure the connection for Fiery Downloader on
IPX/SPX networks (see Getting Started).
N
OTE
:
Do not use the device name (5750, 5790, or 5799) as the server name. Also, if
you have multiple Fiery X2 servers and give them the same name, a unique number is
appended to the name that appears in the list of available servers. Although this routes
jobs correctly, it may be inconvenient to users and is not a recommended practice.
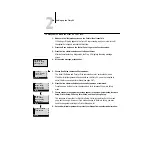
Exit Setup
Server Setup
Network Setup
Printer Setup
Setup
Press button for Server Setup


