Fetco CBS-5000H Series Скачать руководство пользователя страница 5

Go to fetco.com for the latest versions of all information        


Page 5                 

P183   March 2019


Installation 

(For Qualified Service Technicians Only) 

Keys To A Successful Installation 

If not installed correctly by qualified personnel, the brewer may not operate properly, and damage may result.  

Damages resulting from improper installation are not covered by the warranty. 

All FETCO Hot Beverage Equipment is designed and sold for commercial use only. 

Here are the key points to consider before installation: 


Electrical: 


All FETCO brewers require 

NEUTRAL

.  Ground is not an acceptable substitute.  Installation without neutral 

may cause damage to the electronic components. 


The power connection to L2 on the terminal block must be at least 105 volts.  Less than 105 volts will 

cause erratic behavior from the brewer. 


The power switch has a built-in circuit breaker.  To reset it, turn to the power switch to the “off” position, and 

then back to the “on” position. 


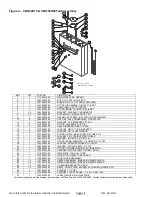
The electrical drawing for the brewer is located on the inside of the lower cover of the brewer. 


Plumbing: 


This equipment is to be installed to comply with the applicable federal, state, or local plumbing codes. 


The water line must be flushed thoroughly prior to connecting it to the brewer to prevent debris from 

contaminating the machine. 


Verify that the water line will provide at least ½ gallons per minute for the CBS-51H, and 1¼ gallons per 

minute for the CBS-52H before connecting it to the brewer. 


General: 


Utilize only qualified beverage equipment service technicians for installation.  A Service Company Directory 

may be found on our web site, 

http://www.fetco.com


Installation Instructions 


Brewer Setup  

1.  Review the Dimensions for the unit you are installing.  Verify that the brewer will fit in the space intended 

for it, and that the counter or table will support the total weight of the brewer and dispensers when filled. 

2.  The brewer’s legs are shipped inside the brew baskets.  Remove the brew basket(s) and the coffee 

dispenser(s).  Place the brewer on its back and screw in the legs. 

3.  Place the brewer on the counter or stand. 

4.  When the brewer is in position, level it front to back 

and side to side by adjusting the legs. 

5.  Remove the lower cover to access the water and 

electrical connections.  Knock-outs are provided in the 

back and base of the brewer body for the connections. 


Water Connection


1.  Water inlet is a 3/8 inch male flare fitting. 

2.  The brewer can be connected to a cold or hot water line.  Cold water is preferred for best coffee flavor, but 

hot water will allow for faster recovery times. 

3.  Install a water shut off valve near the brewer to facilitate service.  If an in-line water filter is used, it should 

be installed after the water shut off valve and in a position to facilitate filter replacement. 

4.  Flush the water supply line and filter 

before

 connecting it to the brewer. 

5.  Verify that the water line will provide at least ½ gallons per minute for the CBS-51H, and 1¼ gallons per 

minute for the CBS-52H, and that the water pressure is between 20 and 75 psig. 

6.  Use a wrench on the factory fitting when connecting the incoming water line. This will reduce stress on the 

internal connections and reduce the possibility of leaks developing after the install has been completed. 

7.  Commercial beverage equipment requires filtered water and an user installed backflow prevention valve.  

Most municipalities require a recognized backflow preventer.  The WATTS® SD-2 or SD-3 is usable on all 

hot beverage and cold beverage equipment.  The WATTS spring loaded double check valve models are 

accepted by most Authorities Having Juristiction (AHJ) 

Содержание CBS-5000H Series

Страница 1: ...ingle1 Gal CBS 51H15 Right Dual 2 Gal CBS 52H20 Contact Information FETCO Food Equipment Technologies Company 600 Rose Road Lake Zurich IL 60047 1560 USA 2008 2019 Food Equipment Technologies Company...

Страница 2: ...lf batch brewing capability Fully automatic with electronic temperature control Iced tea brewing capability Two level tank drain system Total serviceability from the front Can be added at any time Spe...

Страница 3: ...ph 3 ground 6 1 25 8 9 9 22 0 120 208 1 ph 3 ground 6 1 29 6 9 9 22 0 C52026 2 X 4000 watt 120 220 1 ph 3 ground 6 8 31 3 11 5 22 0 120 240 1 ph 3 ground 8 1 34 1 13 2 22 0 120 208 3 ph 4 ground 6 9...

Страница 4: ...Go to fetco com for the latest versions of all information Page 4 P183 March 2019 Dimensions Utility Connections CBS 51H15 CBS 52H15 CBS 52H20...

Страница 5: ...ing Verify that the brewer will fit in the space intended for it and that the counter or table will support the total weight of the brewer and dispensers when filled 2 The brewer s legs are shipped in...

Страница 6: ...tubes 2 Turn on the incoming power 3 Turn on the brewer s main power switch 4 Within 6 seconds the hot water tank will begin filling until the probe at the top of the tank senses the water 5 The contr...

Страница 7: ...ion This was done to help draw attention to the basket so the operator will notice any residual hot water or coffee Place a paper filter in each basket to be used Pour into the paper filter the approp...

Страница 8: ...never the power switch is turned on voltage will not be supplied to the thermostat until the tank fills and water touches the water level probe During operation when water is dispensed and the water l...

Страница 9: ...cutter controls the rate of flow over the coffee The standard hole in the flow disc is 240 except for the CBS 51H10 which is 219 Other flow discs are available for special situations like high levels...

Страница 10: ...ISPENSE TUBE SHAFT DISPENSE TUBE To remove the dispense tube 1 Unscrew seal locknut and release the drive screw from dispense tube shaft 2 Turn the dispense tube slightly back and forth while pushing...

Страница 11: ...will flash indicating that the display is showing the set point not the actual temperature The dots below the numbers indicate the temp range 0 dots less than 100 F 1 dot between 100 and 200 F 2 dots...

Страница 12: ...is energized Bypass Adjustment The purpose of the bypass valve is to allow a portion of the brewing water to flow between the brew basket and the wire insert directly into the server without coming in...

Страница 13: ...NUT SEAL 7 16 DIA KEEPER 17 2 1031 00033 00 LOCKNUT 3 8 18 NPT THREAD 18 1 1031 00022 00 FITTING ELBOW 3 8 TUBE OD X 3 8 NPT 19 1 1023 00003 00 LOCKNUT MODIFIED THREAD 1 4 18 NPT 20 1 1083 00006 00 WA...

Страница 14: ...Go to fetco com for the latest versions of all information Page 14 P183 March 2019 Figure 2 CBS 51H15 Main Assembly Drawing No 1101 00268 00 CBS 51 H...

Страница 15: ...AMP READY INDICATOR GREEN 220VAC EXPORT ONLY 26 1 1045 00022 00 OVERLAY CONTROL PANEL CBS 51H 27 1 1058 00011 00 LAMP BREW INDICATOR CLEAR 110VAC 27 1 58004 LAMP BREW INDICATOR CLEAR 220VAC EXPORT ONL...

Страница 16: ...Go to fetco com for the latest versions of all information Page 16 P183 March 2019 Figure 3 CBS 52H15 CBS 52H20 Main Assembly Drawing No 1101 00262 00 CBS 52H...

Страница 17: ...SPRAY CUTTER 8 1 075 CENTER 29 2 1012 00004 00 LOCKNUT SPRAY CUTTER 30 2 25001 TUBESILICONE 1 2 x 1 4 ID x 2 7 8 LG 31 2 1112 00041 00 DISPENSE TUBE WELDMENT CBS 50 S 32 1 102010 BREW HANDLE START STO...

Страница 18: ...00024 00 FITTING COMP MALE CONN 3 8 TUBE X 3 8 17 1 1031 00020 00 LOCKNUT 1 8 STRAIGHT PIPE THREAD 18 1 1083 00014 00 WASHER 812 OD X 0 412 ID FLAT 19 1 1031 00032 00 FITTING BARB ELBOW 90 1 4 HOSE ID...

Страница 19: ...BREW BASKET HANDLE BLACK includes magnet 3 1 1082 00040 00 HANDLE SCREW 4 1 1009 00005 00 WIRE INSERT 16 X 6 5 1 1046 00025 00 WARNING LABEL NOT SHOWN F001 PAPER FILTERS 15 X 5 5 500 PER CASE NOT SHO...

Страница 20: ...evels are erratic Water pressure or flow rate is too low or fluctuates too much to support a full brew problem is worse in simultaneous brews Make sure brewer has a dedicated water line Ensure that th...

Страница 21: ...isconnect the outlet side to see if it leaks water to the tank Coffee tastes too strong Incorrect dosage Measure and confirm the correct amount of coffee required Short brew levels See Short brew leve...

Страница 22: ...End of section notes N...

Отзывы: