background image

235

Advice for Emergency Situations

4

D

E

Important note 

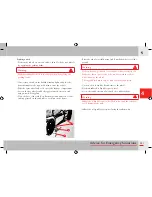
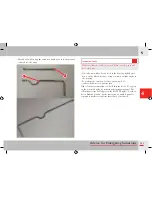
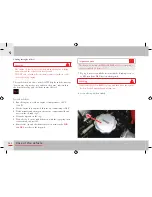
Make sure that the notch on wrench 

D

 fits onto the pin in the 

device housing.

• Once the wrench has been placed in the housing, lightly press 

down on the filter housing to bring to wrench at right angles to 

the housing.

• To perform the emergency release, turn wrench 

D


counterclockwise for a quarter turn.

If the electrical system allows it, check that the letter “N” appears 

on the gearbox display by activating the instrument panel. The 

following message will appear on the left TFT display: “Gearbox 

not in Parking position”. At the same time, an audible signal is 

repeated four times to indicate that it has been released.

• Extend wrench 

D

 using the extension 

E

 and place it in the manual 

release device housing.

Содержание 488

Страница 1: ......

Страница 2: ...e For information on where to find Ferrari Dealers and Author ised Service Centres visit the website www ferraridealer com or contact the Customer Care service on the numbers indicated in the Reference Guide booklet ...

Страница 3: ......

Страница 4: ...Convention on Road Traffic that ended on 8 November 1968 must be strictly observed common rules of caution must always be observed in relation to the quality performance of the vehicle driving conditions and contingent situations Caution and discipline are the basis of safe driving Driving takes place in a naturally dangerous context where a number of different risk factors interact For this reaso...

Страница 5: ...r continuous use on the track Most accidents are caused by distraction The driver must use any on board information communication and entertainment systems responsibly especially when the vehicle is in motion Examples of information communication and entertainment systems are the following satellite navigation systems traffic information systems e g ITT media players e g iPod telephones with Bluet...

Страница 6: ...nical Service Department and Ferrari Dealers and Authorised Service Centres can provide all the information needed to ensure that they are compatible Strict priority criteria must be observed when driving a vehicle you must not therefore take your attention and eye off the road In some countries the use of entertainment information systems is prohibited on vehicles when driving The driver is respo...

Страница 7: ...manual and your vehicle The Ferrari Sales and Service Network will provide you with all the information on any updates All specifications and illustrations contained in this manual are accurate as of the date of printing Spare parts When replacing parts or topping up with lubricants and fluids we recommend that you use original spare parts and lubricants and fluids recommended by Ferrari Warranty ...

Страница 8: ...d in the Reference Guide booklet enclosed with the vehicle documents can provide information on the location of the Ferrari Dealers and Authorised Service Centres The Ferrari Technical Service Department is at your complete disposal for any information and advice If you have any doubts about the information provided in this manual or how to use or operate the vehicle please contact the Ferrari Ser...

Страница 9: ...n Environment Warning for environmental protection useful advice for protection of the environment Abbreviations Acronyms Some descriptions and terms with particular meanings are found in this manual in an abbreviated form AC Air conditioning ABS Anti lock Braking System ASR Anti skid Regulation during acceleration DCT Dual Clutch Transmission EBD Electronic Brake force Distribution ECU Electronic...

Страница 10: ...e is correct Check the fuel consumption Proper periodic maintenance will contribute to preserving your vehicle in full working order and to protecting the environment We therefore advise you to respect the service due dates indicated in the Maintenance Schedule Driving style Do not accelerate during the starting procedure Do not warm up the engine when the vehicle is stationary Drive carefully and...

Страница 11: ...ycle for treatment at no additional cost excluding deregistration and transport take your vehicle to the nearest Ferrari dealer which will at its own expense transport the vehicle to one of the authorised collection and demolition centres which have been selected to ensure that all processes for the collection treatment and recovery of recyclable materials are carried out in an environmentally com...

Страница 12: ... 18 Duplicating the keys 19 Replacing remote control batteries 20 Electronic alarm 20 Identification and homologation plates and labels 24 Dimensions and weights 30 Main engine specifications 31 Consumption and emissions 31 Performance 31 Wheel rims and tyres 32 Refilling 38 ...

Страница 13: ...GENERAL 1 ...

Страница 14: ...icating the keys on page 19 Important note To guarantee optimum ignition and driving place the key inside the passenger compartment near the driving area Key codes A CODE CARD is supplied together with the keys indicating the following the electronic code the mechanical code for the keys to be given to the Ferrari Service Network if you request duplicates of the keys Warning The code numbers on th...

Страница 15: ... 1 Vehicle transmitter and key homologation certificates Hereby Continental declares that this vehicle key is in compliance with the essential requirements and other relevant Provisions of the Directive 1999 5 EC ...

Страница 16: ...16 General ...

Страница 17: ...17 General 1 ...

Страница 18: ...ing wheel 1 If the key is recognised the CODE warning light A on the instrument panel turns off whereas the EOBD warning light B only goes off when the engine has started once the ECU has completed its diagnostic cycle in these conditions the protection system has recognised the key code and deactivated the immobiliser 2 If the CODE warning light A stays on it means that the code has not been reco...

Страница 19: ...ant note Contact the Ferrari Service Network immediately to have all the keys stored in the system memory Important note Each key provided has its own specific code which must be stored in the memory of the system control unit Duplicating the keys If you request additional keys provided that the conditions to satisfy your request are met remember that the codes must be stored up to a maximum of 6 ...

Страница 20: ...ul to avoid damaging the remote control Electronic alarm The electronic alarm system performs the following functions remote control for central door locking unlocking perimeter surveillance detecting if doors and lids are open motion surveillance detecting intrusion in the passenger compartment vehicle movement surveillance Activation To activate the alarm system press button F on the ignition ke...

Страница 21: ...h the doors and front and rear lids properly closed it means that the self diagnostic feature has detected a malfunction in the system Contact the Ferrari Service Network to have the system checked Deactivation To deactivate the alarm system press button G on the ignition key the turn indicators flash twice the system beeps twice the red LED on the dashboard goes off the dome lights come on the ce...

Страница 22: ...left TFT display for 10 seconds after the system diagnosis cycle together with the message Break in attempted this means there has been an attempt to break into the car causing the alarm to activate In this case the system will indicate the reason for the alarm activation according to the following priority LED off twice anti lift sensor alarm LED off three times door alarm LED off four times lugg...

Страница 23: ...e the transmitter and or receiver marking the homologation number is found on the component Satellite alarm system optional In some markets the vehicle can be equipped on request with a satellite alarm system If the vehicle is equipped with a satellite alarm system please refer to the Nav Trak Satellite Alarm System Quick Reference booklet enclosed with the vehicle documents for further informatio...

Страница 24: ...24 General Identification and homologation plates and labels A B E F G L M O P N H C Q R ...

Страница 25: ... F Unleaded fuel Fuel filler flap G Radiator with antifreeze RH engine compartment cosmetic shield H Engine type and number Crankcase L Assembly number Engine compartment M Engine and gearbox oil label LH engine compartment cosmetic shield N Gearbox type and number Gearbox housing O Tyre pressure and type Driver side door P TPMS present warning Driver side door Q Chassis number Windscreen R Origin...

Страница 26: ...26 General A Low beam homologation B ECE homologation C Vehicle identification ...

Страница 27: ...27 General 1 E Passenger airbag warning F Unleaded fuel G Radiator with antifreeze H Engine type and number ...

Страница 28: ...28 General L Assembly number M Engine and gearbox oil label N Gearbox type and number O Tyre pressure and type ...

Страница 29: ...29 General 1 P TPMS present warning Q Chassis number R Original paintwork ...

Страница 30: ... length 4568 mm Max width 2261 mm Max height 1203 mm Front track 1679 mm Rear track 1647 mm Front overhang 1143 mm Rear overhang 775 mm Dry weight 1370 kg Kerb weight 1475 kg considering the most favourable Optional combination 2261 1203 1647 1679 2650 4568 ...

Страница 31: ...n 7th gear Consumption and CO2 emissions Standard version With HELE system l 100 km g km l 100 km g km City cycle 18 4 419 16 6 377 Motorway 8 6 196 8 4 193 Combined cycle 12 1 277 11 4 260 Transmission ratios Gearbox ratios Differential bevel gear pair ratio 1 3 334 2 2 285 3 1 728 4 375 4 1 369 5 1 115 6 0 875 7 0 642 R 2 979 Performance 0 100 km h 0 200 km h Max speed 3 0 s 8 3 s 330 km h 202 m...

Страница 32: ... ET 44 7 11 J x 20 ET 38 5 4 5 J x 20 Explanation of wheel rim codes Example 9 J x 20 ET 44 7 9 Rim width in inches J Shape of rim edge side projection where tyre bead rests 20 Rim diameter in inches ET 44 7 Offset distance in mm between the centreline of the rim and inner rim surface ...

Страница 33: ...0 2 10 bar E B 73 dB Rear 305 30 ZR20 2 10 bar F E 73 dB Pirelli PZero Front 245 35 ZR20 2 10 bar E A 73 dB Rear 305 30 ZR20 2 00 bar E A 72 dB Vredestein space saver spare wheel 145 60 R20 4 20 bar Winter tyres Inflation pressure cold Pirelli Winter Sottozero Front 235 35 R20 M S 2 10 bar E C 72 dB Rear 285 35 R20 M S 2 00 bar C C 73 dB Regulation no 1222 2009 EC see page 36 Warning The maximum s...

Страница 34: ...nding to the relative index The maximum load permissible is indicated in kg and pounds in the wording 3 Y Speed index This indicates the maximum speed at which the tyre can withstand the load indicated in the load index Speed indexes ECE UN 30 are shown in the table below Speed Index Maximum speed km h M 130 N 140 P 150 Q 160 R 170 S 180 T 190 U 200 H 210 V 240 W 270 Y 300 ZR Y 300 The speed index...

Страница 35: ... site tyre type and size The last four digits in a box indicate the date of manufacture 1011 means that the tyre was manufactured in the 10th week of 2011 Warning The Ferrari Service Network is suitably equipped to replace tyres and to determine whether a tyre is safe for use Only have the tyres replaced by the Ferrari Service Network which has the necessary equipment since careless handling may d...

Страница 36: ...er to promote the use of safer quieter and more efficient tyres The label provides the following information Fuel consumption The fuel consumption of a vehicle is influenced by the tyre rolling resistance There is a scale with 7 levels from A to G on the left of the label where A indicates the best tyre class for reducing fuel consumption with lower rolling resistance Wet grip On the right of the ...

Страница 37: ...level is measured in decibels dB and is divided into 3 categories based on the new stricter European levels of external tyre noise which will be introduced by 2016 1 black sound wave 3 dB below future European limit 2 black sound waves complies with future European limit 3 black sound waves complies with current European limit ...

Страница 38: ...controls 7 55 l DCT F3 or equivalent SHELL DCT F3 Braking system 1 0 l DOT4 4 PETRONAS TUTELA TOP5FF or SHELL BRAKE AND CLUTCH DOT4 Ultra 245 Cooling circuit 19 7 l Prediluted antifreeze coolant CARIX Premium Longlife mixed with 50 demineralised water 244 Hydraulic power steering system 1 8 l CHF 11S or equivalent PENTOSIN CHF 11S 244 Fuel tank 78 l Unleaded petrol at least 95 R O N 5 Unleaded pet...

Страница 39: ...ormance engine oil suitable for diesel engines 4 DOT Brake fluid classification indicates the chemical physical characteristics of the brake fluid in question 5 R O N Octane rating indicates the knock resistance of a fuel Important note For optimal engine performance and efficiency Ferrari recommends using unleaded petrol with an octane rating R O N 5 of 98 or higher Warning Only refuel with unlea...

Страница 40: ...to fasten seat belts 48 Pretensioners 50 Auxiliary Occupant Protection Systems 52 Front airbags 53 Child restraint systems 57 Side airbags 58 Fuel inertia switch 60 ABS and EBD 61 Stability and Traction Control 62 Electric parking brake 64 TPMS system 65 ...

Страница 41: ...SAFETY 2 ...

Страница 42: ...y must always be adequately protected Do not remove the guards or operate on the moving parts without taking due precautions Installations under pressure such as braking system air conditioning system cooling system and lubrication system may create pressures inside them Do not perform any operation which may cause gas or liquids to spill out with the risk of injury to persons and damage to things...

Страница 43: ...the neck and the abdominal section is fitted over the hips not the abdomen Make sure that the belt is not twisted and that it passes closely over your body if not in the event of a head on collision it may move and cause injury to the abdomen Avoid wearing bulky clothing that may interfere with the proper operation of the seat belts Warning Each seat belt has been designed to protect only one occu...

Страница 44: ...erating functions see page 53 front passenger airbag for operating functions see page 53 driver s head protection side airbag head bag for operating functions see page 58 passenger head protection side airbag head bag for operating functions see page 58 seats see page 166 deformable body occupant protection system ECU ECU auxiliary sensors instrument panel warning light see page 104 inertia switch...

Страница 45: ...ntrol system ABS and EBD this is designed to prevent the wheels from locking and to provide good handling and stability In some situations fast acceleration is important to get out of dangerous situations However always use the accelerator with extreme caution During acceleration of the driving wheels the anti skid system may help you in certain dangerous situations The air conditioning and heatin...

Страница 46: ...rns Warning For an effective restraining action the seat belt must be fastened correctly with the seat backrest in the upright position The seat belt is fastened correctly when the upper part of the belt crosses the centre of the shoulder not the neck and the abdominal section is fitted over the hips not the abdomen Make sure it is not twisted and that it passes closely over your body if not in th...

Страница 47: ...ently break in the event of a collision Warning If a seat belt has come into contact with cutting edges or was somehow perforated we recommend that you have it immediately replaced by the Ferrari Service Network Warning Periodically check the condition of the seat belts If the belt shows signs of wear it must be checked by a qualified person and replaced if necessary Contact the Ferrari Service Ne...

Страница 48: ... pulling it out let it wind back a little and pull it out again without jerking it Make sure that it has clicked into the locked position hold the belt and pull it to check that the latch plate has been inserted correctly Position the seat belt correctly If the driver s seat belt is not fastened when the vehicle system is activated KEY ON see page 135 the warning light D on the instrument panel li...

Страница 49: ...at belt must never be passed around a baby child or other person sitting on a passenger s lap Do not sit babies small children or other persons on your lap If there is a collision the weight of an adult may cause the child to be crushed by the seat belt causing severe or even fatal injuries Unfastening the seat belts Push the release button E Guide the latch plate A back to its rest position A E ...

Страница 50: ...ner on the side where the collision occurs will be activated Warning Pretensioners that have been activated will no longer function and may not be repaired under any circumstances Contact the Ferrari Service Network for replacement When a pretensioner is activated a small amount of smoke is released This smoke is not harmful Warning Activation of the pretensioners only depends on the status of the...

Страница 51: ...leach or aggressive solvents as they can weaken the fibres Make sure the retractors do not get wet proper functioning is only ensured if they are kept dry The pretensioner requires no maintenance or lubrication If immersed in water or mud it must be replaced Pretensioners must be replaced at regular intervals as indicated in the Warranty Booklet Important note All work on any part of this safety s...

Страница 52: ...atic system to mitigate force applied to the occupant Electronic Control Unit ECU Additional sensors Instrument panel warning light Deformable body The front driver s airbag and front passenger airbag have been designed to increase the level of protection given by the seat belts in the event of a head on collision see page 53 The driver s head protection side airbag and passenger head protection s...

Страница 53: ...en designed to reduce the risk of injury if a minor collision occurs Warning The driver and the passenger must maintain a distance of at least 25 cm from the steering wheel and the dashboard Always drive with your hands on the rim of the steering wheel so that in the event of activation the airbag can deploy without obstruction Driving with your hands on the steering wheel spokes or on the airbag ...

Страница 54: ...r inflating the airbags These gases are not harmful The driver s airbag has been designed to be deployed according to the following strategy For low severity crashes the airbag control unit will not deploy the airbag For crashes of higher severity the control unit will deploy the driver airbag in low energy mode For crashes of even higher severity the control unit will deploy the driver airbag in ...

Страница 55: ...t in any way Warning Do not place objects above or near the top of the dashboard and the steering wheel In the event that the airbags are deployed these objects would be projected into the passenger compartment at a high speed that would seriously jeopardise the safety of the occupants Warning Do not modify the airbag modules in any way indicated in the relevant picture Do not damage the airbag mo...

Страница 56: ... this may cause serious damage and consequent injury even fatal to the occupants in the event of an accident Warning Damaged or defective components of the airbag system cannot be repaired and must be replaced Improper operations performed on the system components may cause failures or accidental deployment or failure of the airbags to inflate with consequent damage and injury even fatal Environme...

Страница 57: ...nsport babies or young children in this vehicle Label F on both the sun visors indicates the presence of the airbag system and that rearward facing child restraint systems must not be used Warning As indicated on label F NEVER use a rearward facing child restraint system on a seat protected by an ACTIVE FRONTAL AIRBAG Risk of FATAL or SERIOUS INJURY to CHILDREN F ...

Страница 58: ...sion or side roll over the airbag on the impact side deploys immediately to protect the occupant s head Warning When the vehicle system is activated KEY ON see page 135 the warning light A comes on and if no airbag system malfunctions are detected it goes out after 4 seconds If the warning light does not come on if it remains on or if it comes on while driving contact the Ferrari Service Network i...

Страница 59: ...being thrown out of the vehicle and compromises the protective effect of the side airbags Warning Never place an object over or near the airbag covers In the event that the airbags are deployed these objects would be projected into the passenger compartment at such high speed as to seriously jeopardise the safety of the occupants Warning Never modify the airbag modules Do not damage the airbag mod...

Страница 60: ...vice Network Fuel inertia switch The fuel inertia switch is a safety device which deactivates the fuel pump relays if a collision occurs A symbol appears on the left TFT display and the hazard warning lights come on to indicate that the switch has been activated When the fuel inertia switch is activated the doors are also unlocked if locked and the central dome light comes on Warning The fuel pump...

Страница 61: ...ing circuit by running a 3 phase cycle reduction if necessary maintenance pressure increase in the hydraulic circuit In the event of ABS activation under braking these regulation cycles will be repeated until the car comes to a stop or pressure on the brake pedal is reduced In addition the system offers the following advantages Driving stability no skidding even in the event of sharp braking appro...

Страница 62: ...h as the ABS and EBD To provide optimal control in different driving and grip conditions four different settings have been developed Level 1 Manettino set to WET ensures stability and maximises traction on every type of road surface both in low and very low grip conditions by means of engine and brake control in this condition the standard ASR system is activated instead of the F1 Trac function Le...

Страница 63: ...d E Diff 3 systems ensures maximum performance and stability E Diff 3 The vehicle is equipped with an electronic differential working on the rear axle which continually performs a variable check on the locking between the two axle shafts The electronic differential system integrated with F1 Trac traction control is capable of improving performance directional stability of the vehicle active safety...

Страница 64: ...e should be blocked If this is not the case please contact the Ferrari Service Network Autopark Function The EPB Autopark function automatically activates the electric parking brake when the engine is switched off This means that the driver does not have to apply the parking brake every time the engine stops However the function can be temporarily deactivated before switching off the engine by pre...

Страница 65: ...f the pressure loss is 0 2 bar more than the rated pressure and a hard warning HW if it is 0 5 bar more or there is a dynamic decrease of over 0 2 bar min The TPMS can be calibrated using the special menu item in the left TFT display see page 86 Important note System calibration using the special menu item on the left TFT display is necessary after replacement or inflation of a tyre or tyres Warni...

Страница 66: ... the pressure level of one or more tyres is below the alarm threshold the screen page shown in example 3 for a warning related to only one tyre or example 4 for a warning related to several tyres appears immediately The screen page is displayed for 20 seconds and then the screen page that was previously displayed reappears If the failure persists the screen page shown above example 3 or 4 will be ...

Страница 67: ...ediately At the same time a warning light comes on on the panel see page 107 in fixed mode Warning If you have a puncture stop driving The screen page is displayed for 20 seconds and then the screen page that was previously displayed reappears whereas the warning light on the instrument panel remains on in fixed mode The fault is displayed with the same display logic applicable for other priority ...

Страница 68: ...ngine off Once the MENU screen page appears select the items Car setup Calibr TPMS When the Menu item is displayed and the subsequent calibration accepted the screen page shown in example 10 appears for 5 seconds Warning Before calibrating the system make sure that the tyre pressure corresponds to the indicated pressure values see page 33 If this is not the case the TPMS may issue wrong low pressu...

Страница 69: ...s The warning light then remains on in fixed mode until the situation is corrected The TYRES screen page cannot be called up by the driver System not active If the TPMS has been deactivated by a diagnostic tool when the instrument panel is activated the screen page in example 13 is displayed for a few seconds Simultaneously the specific warning light on the instrument panel see page 107 starts fla...

Страница 70: ...eel 118 Active aerodynamics DRS 120 Side Slip angle Control SSC2 121 Suspension damping delink button 122 Windscreen wipers 123 Lighting 126 Driving the vehicle 132 EPB Electric parking brake 152 Park Lock 154 Launch Control 155 Stop Start system optional 156 Seat adjustment 166 Air conditioning and heating system 176 Passenger compartment accessories 180 Infotainment system 182 ...

Страница 71: ...ABOUT YOUR VEHICLE 3 ...

Страница 72: ...1 Controls overview Ref Control Page 1 Adjustable air vents 179 2 Glove compartment 170 3 Climate control system control panel 176 Ref Control Page 4 Light switch 126 5 Electric parking brake EPB control 152 6 Left TFT display controls 84 ...

Страница 73: ...urn indicators 128 11 Windscreen washer wiper lever 123 12 Manettino control 118 142 13 ENGINE START STOP button 116 14 Suspension damping delink button 120 146 15 High beam and flashing lever 126 Ref Control Page 16 Power window controls 81 17 Hazard warning lights control 129 18 R reverse control 137 19 AUTO control 140 20 LAUNCH control 155 21 Air conditioning controls 176 ...

Страница 74: ...rget position When the door is closed the window will move up until it meets the upper limit Locking and opening the doors from the inside Warning Always carefully check manually that the doors have been closed properly to prevent them from opening while driving Both doors can be locked by activating deactivating the LOCK UNLOCK B button on the roof panel To lock the doors press button B when the ...

Страница 75: ... it meets its upper limit If handle C is lifted without opening the door the window will move down to its target position and stop and if the door is not opened after 2 seconds the window will move back up until it meets the upper limit Therefore to open the door release handle C and pull it again When the opening handle is operated both doors are unlocked ...

Страница 76: ...d The lid is held open by two gas struts E The engine compartment lid can also be opened when the key battery is flat D E E Closing Lower the lid until it is closed and press down near the lock until you hear it click in place Warning Always check manually that the engine compartment lid has been closed properly to prevent it from opening while driving ...

Страница 77: ...d pull the retaining lever H to lift it completely The lid is held open by two gas struts L The luggage compartment is illuminated by two light units which activate automatically when the luggage compartment lid is opened Important note After removing the battery from the vehicle or disconnecting it from the electrical system a door lock unlock cycle must be performed using the buttons on the key ...

Страница 78: ...ing Always check that the luggage compartment lid has been closed properly to prevent it from opening while driving Emergency Opening If the luggage compartment lid opening button does not work there is a string for manual emergency opening underneath the dashboard to the left of the steering wheel as shown by the arrow in the figure ...

Страница 79: ...r your health fuel coming into contact with your skin inhaling fuel vapours Opening To open the fuel filler flap press button M on the inner side of the driver door Closing To close the fuel filler flap push it until it clicks in place M Emergency Opening If the opening button does not work the fuel filler flap can be opened manually by pulling the cable P on the right hand side of the engine comp...

Страница 80: ...ce seal Do not try to open the external flap of the filler neck by pushing it with your fingers or lever it open using unsuitable tools e g screwdrivers This may damage the external flap mechanism compromising the seal integrity and safety of the system Warning Do not overfill the fuel tank this may cause the fuel to leak out After fuelling wait for about 5 seconds before slowly removing the nozzl...

Страница 81: ...sing the button again A B Passenger side power window Press button B to move the window up or down Only manual operation is possible partial opening to raise the window when button B is released the window stops at the position reached To lower the window automatic operation is also possible full opening if the button is pressed at length over 0 3 seconds automatic window operation is activated Th...

Страница 82: ...82 About your Vehicle Instruments and gauges 6 5 1 5 3 7 2 5 4 5 ...

Страница 83: ...status 7 Fuel level Electronic rev counter The electronic rev counter indicates the engine RPM The numbers on the dial multiplied by 1000 correspond to the engine RPM in one minute Avoid engine speed rates in the red sector There is a space to the bottom right of the rev counter for the display which gives information on dual clutch transmission DCT ...

Страница 84: ...creen page MANETTINO STATUS screen page CHRONOMETER screen page not available if vehicle is equipped with Ferrari Telemetry Left TFT display Located on the instrument panel it performs the following functions displays the control parameters displays general information while driving displays fault warnings The driver can interact with the system by selecting the configuration and setting the param...

Страница 85: ...ct another one To move up the menu levels press the BACK button and go back to the Main menu screen page Every screen page consists of four display areas A selected driving mode Manettino position DRS status windscreen wiper status external temperature and ice hazard icon Speed limit exceeded message B display of virtual control gauges parking sensor screen page display of abnormal events warnings...

Страница 86: ...hat can be activated are displayed To select them use the UP and DOWN buttons and press and quickly release the OK or RIGHT button to activate a subsection or activate the selected parameter To go back to the previous menu level press the BACK button If no operation is performed for at least 10 seconds the previous menu level reappears on the display Adjusting brightness The brightness setting of ...

Страница 87: ... in addition to the activation of the relative warning lamp on the instrument panel see page 104 the relative symbol and specific message together with the remaining range in Km are shown on the display for 10 seconds If the condition that has generated it persists this signal is repeated every 8 km In limited cruising range conditions the information on driving range in km is replaced by the word...

Страница 88: ...um engine response available to the driver depending on the number of revs For instance using the gearbox and accelerator pedal to push the engine to over 4000 RPM gives a very high of TR 80 90 pressing the accelerator pedal hard down will give instant engine response and acceleration Turbo Efficiency TE indicates the percentage of maximum turbo efficiency seen as the maximum torque obtainable by ...

Страница 89: ...rtual gauges are minimised For further information refer to the Fault displaying logic paragraph on page 101 65 80 90 65 80 12 4 0 SPORT 2 screen page The SPORT 2 screen page displays the following virtual gauges Engine oil pressure Voltmeter If the SPORT 2 screen page is being displayed and an event occurs that needs to be displayed as a symbol and or special message the virtual gauges are minimi...

Страница 90: ...cle status when on the track and can be used to intuitively understand the most suitable conditions for performance driving The VDA group which is recalled by selecting the icon in the Main menu or directly by pressing the VDA button with any screen page displayed consists of the Vehicle status Manettino status and Chronometer screen pages The Vehicle status screen page functions are only availabl...

Страница 91: ...mics of various parameters lateral acceleration speed etc The status of the vehicle is displayed concisely using three levels which are blue green and red WARMUP Warm up stage for components and self acquisition of control systems during this stage the vehicle should be driven so that it is taken to optimum conditions of use GO The vehicle has completed the warm up stage all its subsystems have re...

Страница 92: ...engine stops If this rule is not followed system performance may be reduced If one or more signals related to the performance parameters used to calculate the thermal state of the subsystems lateral acceleration speed etc are not valid the Vehicle Status screen page indicates to the driver that the function is not available by displaying the message Function not available Manettino status screen p...

Страница 93: ...is a Manettino failure the Manettino Status screen page cannot be displayed or recalled Chronometer screen page The Chronometer screen page not available if vehicle is equipped with Ferrari TELEMETRY is used to time laps and memorise lap times when the vehicle is used occasionally on track The screen page displays the following information Current Lap indicates the time elapsed since the start of ...

Страница 94: ...y releasing the OK button when the chronometer is off starts the Current Lap chronometer when the chronometer is on resets and restarts the Current Lap and updates the information on previous laps end of lap start of next lap Pressing and quickly releasing the UP or DOWN button when the chronometer is on stops the chronometer and updates information on previous laps Holding down the UP or DOWN but...

Страница 95: ...is minimised For further information refer to the Fault displaying logic paragraph on page 101 Ferrari Telemetry optional The Ferrari Telemetry system optional is used to acquire information on driving on a specific track in real time so that it can then be presented to the driver and compared and analysed according to a number of parameters Information acquired by different drivers while driving ...

Страница 96: ...up the MENU screen page by pressing the UP button when the MAIN screen page is activated Select the options Vehicle Config and Speed Limit the only menu function that is configurable while the vehicle is in motion To set the value use the UP and DOWN buttons When the minimum limit of 30 km h 18 6 mph is reached press the DOWN button again to deactivate the function or press the UP button after rea...

Страница 97: ...euvres The rear parking sensors are automatically activated when reverse gear is engaged When the rear sensors are activated an acoustic signal warns the driver that the system has been activated If the vehicle is also equipped with front sensors these can be activated or deactivated by pressing the relative button on the roof panel see page 131 Stop and Go function The Stop Go function available ...

Страница 98: ...art it will be displayed as shown below red The maximum medium and minimum distances between the vehicle and an obstacle represented graphically by the colours green orange and red are different for the front and rear parking sensors Rear sensors Maximum distance green 80 to 70 cm 150 to 70 cm in central zone Medium distance orange 69 to 41 cm Minimum distance red 40 to 0 cm Front sensors Maximum ...

Страница 99: ...d an event occurs that needs to be displayed as an icon and or special message the symbol is moved from the centre of the display to the right as shown below Cleaning the sensors When cleaning the sensors be very careful not to scratch or damage them and avoid using dry rough or hard cloths The sensors must be washed with clean water and car shampoo added if necessary In car washes that use steam ...

Страница 100: ...since obstacles may be located above or below the sensors Important note Objects placed close to the rear part of the vehicle are not always detected by the system and may therefore damage the vehicle or be damaged themselves Important note The signals sent by the sensors may also be affected by damage to the sensors caused by dirt snow or ice on the sensors or by ultrasound systems e g pneumatic ...

Страница 101: ...fault remains on the display for a period of time that varies according to the seriousness of the fault When the display cycle ends the symbol remains minimised in area D of the display see page 85 until the cause of malfunctioning has been resolved In area B the main screen page is displayed in maximum size ESCAPE function If the message OK TO CLOSE appears above the fault box displaying the faul...

Страница 102: ... a second fault with the same priority level occurs the latter is only displayed once the first has been displayed for at least 2 seconds If on the other hand a new fault occurs with a higher priority level this is displayed immediately Lamp Failure Indication of failure of turn indicators and running lights A failure of the running lights front and or rear and turn indicators front and or rear is...

Страница 103: ... luggage compartment lid are open the vehicle symbol appears on the display and indicates which doors or lids are open together with a special message If the vehicle is in motion an acoustic signal is also emitted When the display cycle ends or the OK button with ESCAPE function has been pressed the special symbol is minimised see page 101 ...

Страница 104: ...o high priority level 0 Turn off the engine and contact the Ferrari Service Network List of left hand TFT display symbols and instrument panel warning lamps TFT Warning light Description and warnings orange orange Alarm system failure Indicates a fault in the alarm system priority level 1 The system is not programmed priority level 2 Failure and system not programmed priority level 1 Contact the F...

Страница 105: ...ange Stop lights failure Indicates a system failure or blowing of the STOP light bulb priority level 2 orange External lights failure Indicates a system fault or blowing of a bulb in the running turn indicator or rear fog lights priority level 2 orange Number plate lights failure Indicates a system failure or blowing of the number plate light bulb priority level 2 orange Rear fog lights When the r...

Страница 106: ... road orange ESC system activation flashing warning light Indicates that the ESC system has been activated priority level 1 red Catalytic converter temperature Indicates that the catalytic converter temperature is too high stop the vehicle priority level 0 Contact the Ferrari Service Network orange Indicates that the catalytic converter temperature is very high reduce speed until the symbol goes o...

Страница 107: ...ith the warning light in flashing mode it indicates that the airbag test cycle has not been completed priority level 0 Contact the Ferrari Service Network red Driver side seat belt not fastened Indicates that the driver side seat belt has not been fastened priority level 0 together with an acoustic signal lasting 90 sec red red Passenger side seat belt not fastened Indicates that the passenger sid...

Страница 108: ...icates that the parking brake is applied red red orange Indicates an EBD system failure priority level 0 orange Rain sensor failure Indicates a rain sensor failure priority level 2 orange Suspension control system failure Indicates a malfunction in the suspension control system priority level 2 Contact the Ferrari Service Network green Front Lift system status When on in fixed mode it indicates th...

Страница 109: ...cantly reduced Warning In this condition activate the WET driving mode orange Stop Start on Stop Start system warnings Together with a special message it indicates Stop Start system on Stop Start system active Stop Start system not available or temporarily deactivated orange Stop Start off Indicates that the Stop Start system has been deactivated orange Stop Start failure Indicates a failure in th...

Страница 110: ...ant note Information on the gearbox is useful in all operating conditions Engine RPM LED on steering wheel optional The five LEDs on the steering wheel rim available on request light up in sequence and inform the driver that the maximum engine RPM has been reached for gearshifting When 5700 RPM is reached the first LED comes on the others come on in sequence when 6200 6700 7200 and 7700 RPM are re...

Страница 111: ...asy exit mode see page 140 the word auto appears in the bottom of the display together with a small arrow pointing downwards on the left Indication of gearbox in Parking mode When the gearbox is in Parking mode i e the Park Lock gearbox locking device is activated see page 154 the letter P appears in the centre of the gearbox display Indication of Launch Control activated When the gearbox is used ...

Страница 112: ...l it performs the following functions it displays the speedometer it displays infotainment system information it displays the parking camera if present it displays the Ferrari Telemetry system if present The driver can interact with the system by selecting the configuration and setting the parameters using the controls on the dashboard to the right of the steering wheel Holding button A down switc...

Страница 113: ...e Ferrari Telemetry system optional there is a second USB connector used to save the telemetry data on the USB support Speedometer display The speedometer can be displayed on the right TFT display in Speedometer or Digital speed mode To select the desired display mode call up the MENU screen page on the left TFT display see page 86 and select the items Display setup Display right Speedometer scree...

Страница 114: ...era optional the Rear Parking Camera screen page is automatically displayed on the right TFT display when reverse gear is engaged This screen page which continues to be displayed until reverse gear is disengaged shows the field of vision of the camera mounted on the rear bumper and helps the driver when parking With reverse gear engaged press button C on the dashboard to switch between rear view w...

Страница 115: ...ids with Rear Parking Camera rear view with wide angle lens with Rear Parking Camera When reverse gear is engaged the Rear Parking Camera screen is automatically displayed on the right TFT display Without engaging reverse gear you can switch to the Corner View mode front camera by pressing and quickly releasing button C on the dashboard to the right of the steering wheel The view can be selected b...

Страница 116: ... pedal If necessary you can accelerate by pressing the accelerator pedal when the pedal is released the vehicle will return to the previously memorised speed Resetting the memorised speed If the device has been turned off by pressing the brake pedal the memorised speed can be reset as follows gradually accelerate until the vehicle reaches a speed which is close to the memorised speed quickly press...

Страница 117: ... done in two ways by deactivating the device and then memorising the new speed or by turning control A counterclockwise One turn of the control corresponds to a decrease in speed of about 2 km h if the control is kept turned on the other hand the speed continually decreases Deactivating Cruise Control Hold down button A for longer than 0 3 seconds The device is also automatically deactivated by pr...

Страница 118: ...a long time For more information on starting the engine see page 135 A B Driving mode control switch Manettino The driver can select the desired driving mode by using the Manettino B The driving mode selected does not exempt the driver from complying with the rules of safe driving Important note In the event of a failure of one of the onboard systems signalled by the special symbol on the left TFT...

Страница 119: ...on track CT OFF mode When this mode is selected the F1 Trac traction control system is disabled whereas stability control remains active This setting is used on the racing track ESC OFF mode This mode allows the driver complete freedom and control of the vehicle for track use No electronic system other than the E Diff controls vehicle stability Warning In low to medium grip conditions e g wet icy ...

Страница 120: ...force the air flow is kept close to the diffuser and guarantees better grip Flaps lowered the flaps are lowered stalling the diffuser and reducing drag The DRS icon at the top of the left hand TFT display indicates the state of the active aerodynamics system DRS When the system is active the icon shows an extended flap in black Important note The active aerodynamics are disabled when the external ...

Страница 121: ...torque transmitted through the differential across the two drive wheels via the E Diff electronic differential see page 63 The system also includes active damping control of the shock absorbers which makes vehicle behaviour smoother and more uniform when the software intervenes If the ECU identifies a system fault impeding DRS activation the following pop up is shown on the display DRS system fail...

Страница 122: ...mbol on the steering wheel rim Suspension damping delink button By pressing button C on the left of the steering wheel the driver can choose to separate the suspension damping control from the logic of the Manettino driving mode control switch For further information see page 150 C ...

Страница 123: ...ers and washer only work when the instrument panel is activated The windscreen wipers and washer are operated using lever A on the steering wheel the lever must be pressed towards the dashboard or pulled back according to the function you require The windscreen wipers have 4 different speeds OFF Windscreen wipers stationary AUTO The rain sensor adjusts the windscreen wiper timing to the intensity ...

Страница 124: ...creen wiper operating is always guaranteed even if there is an electronic system failure If there is a failure the windscreen wipers can be activated by pressing lever A and deactivated by pulling it back If there is a particularly serious failure operating may not be automatically maintained if this is the case the windscreen wipers can be kept activated by holding down lever A Windscreen washer ...

Страница 125: ...g Before cleaning the front windscreen for example in service stations make sure the rain sensor is deactivated or that the instrument panel has been switched off The rain sensor must be deactivated also when washing the vehicle by hand or in automatic car washes In case of ice or snow on the front windscreen do not activate the rain sensor to avoid damaging the wiper motor and or blades Rain sens...

Страница 126: ...ts according to ambient light Parking lights The relative warning light on the instrument panel comes on A High beams To turn on the high beams when the light switch A is set to push lever B on the steering wheel towards the dashboard When the high beams are on the relative warning light on the instrument panel comes on Then push lever B towards the dashboard or pull it back to turn off the high b...

Страница 127: ...splay for 10 seconds When the light switch A is turned to AUT and the instrument panel is activated the low beams and number plate lights turn on and off automatically according to the ambient light Important note The high beams can only be activated manually by pulling back the left hand lever B Important note If the high beam control is activated the high beams will turn on every time the lights...

Страница 128: ...play The failure indication will be displayed as long as the light switch is turned to AUT If this occurs we recommend that you deactivate the automatic system and turn on the external lights manually if necessary Important note If this occurs contact the Ferrari Service Network as soon as possible Day lights The LEDs on the headlights serve as front turn indicators and day lights Turn indicators ...

Страница 129: ...en turned on Important note Use the rear fog lights only in poor visibility conditions Hazard warning lights Press button F to turn on the hazard warning lights All the turn indicators will start blinking intermittently this function is also available when the instrument panel is switched off When the lights are on the relative warning lights on the instrument panel and the button flash To turn th...

Страница 130: ... system deactivates its corrective action when driving round bends at low speed Follow me home function With the Follow me home function the low beams stay lit for a preset period of time once the engine has been turned off and light up the area around the vehicle to help the driver and passengers see their way in the dark To activate this function manually push the high beam flash stalk B see pag...

Страница 131: ...activates automatically in the following conditions after the preset activation time expires when the doors are closed and the instrument panel is activated when the doors are locked when the inertia switch is reactivated D F E G Roof panel controls Door lock unlock Both doors can be locked by activating deactivating the LOCK UNLOCK H button For further information see page 74 Deactivating the ant...

Страница 132: ... that the seat is properly adjusted Check the rear view mirror adjustment central and sides Before a trip Preliminary checks Check the following at regular intervals and always before long trips tyre pressure and condition levels of fluids and lubricants condition of the windscreen wiper blades proper functioning of the warning lights and external lights Important note In any case it is advisable ...

Страница 133: ...automatic gearbox safety warnings Deactivation of EPB warning see page 152 If the next scheduled maintenance deadline is approaching each time the key is turned to on information on scheduled maintenance is automatically displayed after diagnosis For further information refer to the Maintenance Schedule paragraph on page 238 Finally each time the key is turned to on the message for activation of t...

Страница 134: ... the UP and DOWN paddles while the vehicle is moving or press the AUTO button on the centre console Important note Immediately release the UP and DOWN paddles or button R after the gearbox display shows that the gear has been engaged a prolonged manoeuvre would cause the gearbox failure warning light to turn on see page 108 and triggering of the buzzer Important note None of the gears can be engag...

Страница 135: ...e engine when the vehicle is stationary press the ENGINE START STOP button on the steering wheel If the vehicle is in motion and the engine has to be switched off press the ENGINE START STOP button and hold it down for at least 2 seconds alternatively press the button quickly 3 times in succession If the key battery has a charge level that is only just sufficient the vehicle informs the driver via...

Страница 136: ...f the following causes insufficient speed of the starter motor flat battery ignition device faulty electrical contacts faulty fuel pump fuses blown Warming up the engine Do not run the engine at high speed until the engine oil temperature has reached at least 65 70 C 149 158 F approximately ...

Страница 137: ...sage Depress brake pedal and press LAUNCH to engage gear will appear on the left TFT display you can therefore engage the gear by pressing the LAUNCH button on the centre console see page 155 and the brake pedal In these cases the Launch Control function is not available If the engaged gear was R the LAUNCH button must be pressed twice to engage 1st gear Important note When reverse is selected an ...

Страница 138: ... certain RPM depending on the gear requested or if a DOWN shift is already in progress because of engine underrevving In any event it is advisable to Shift gears without releasing the accelerator pedal if pressed If DOWN shifting is requested to start overtaking which requires quick acceleration press the accelerator pedal just before using the paddle Wait until gearshifting has been completed bef...

Страница 139: ...g off the engine The engine can be switched off with the gearbox either in N or with a gear engaged After switching off the engine ENGINE STOP see page 140 the gearbox display remains on for a few seconds and indicates which gear is engaged If the gearbox is in N a buzzer will sound Before switching off the letter P is displayed on the gearbox display to inform the driver that the Park Lock has be...

Страница 140: ...paddles are used When the vehicle is stationary a N 1st gear or R request will not result in a change from Automatic to Manual Auto easy exit mode Every time the vehicle is started the gearbox starts in Auto easy exit mode unless it was in Automatic mode when the engine was turned off In this case it remains in Automatic mode the next time the engine is started Activation is signalled by the word ...

Страница 141: ...vel Windscreen washer fluid level While travelling Caution is the number one rule for safe driving which also means you should take other people s behaviour into consideration Follow the Road Regulations in force in the country you are driving in and always respect the speed limit Always make sure that the driver and passengers have their seat belts fastened and that all children are travelling in...

Страница 142: ... beams when you see oncoming vehicles and use the low beams Keep the lights and headlights clean Watch out for animals crossing the road when travelling outside urban areas Driving in the rain Rain and wet roads can cause hazardous situations Warning Given the vehicle s reduced ground clearance a characteristic that guarantees exceptional aerodynamic performance and driving comfort in adverse weat...

Страница 143: ...g On stretches where visibility is good turn off the rear fog light it may be annoying for the occupants of the vehicles behind you Remember that fog makes the road damp and therefore all manoeuvres are more difficult and braking distances are longer Keep a safe distance from the vehicle in front of you As far as possible avoid suddenly changing speed and direction As far as possible avoid overtak...

Страница 144: ...is activated you will feel a slight pulsing of the brake pedal during emergency braking or in low grip conditions DO NOT release the pedal but continue to push it to give continuity to the braking action The ABS prevents the wheels from locking but it does not increase the physical limits of grip between the tyres and the road keep a safe distance from the vehicles ahead and reduce speed before cu...

Страница 145: ... braking system and hence to control suspension damping This system not only ensures an optimal compromise between racing style performance handling and comfort but is capable of emphasising either aspect by using the different adjustments available controlled by the Manettino driving mode control switch Three different setting levels are available on this vehicle Level 1 COMFORT Slightly more fle...

Страница 146: ...oads but also to enhance comfort during city driving Suspension damping is optimised to provide the best possible absorption Level 1 and the ESC system is at its maximum level the standard Bosch ASR system is activated instead of the F1 Trac function If WET mode is selected it is indicated on the left TFT display as shown below 60 C 1 0 bar WET SPORT mode The SPORT mode is the best setting for dai...

Страница 147: ...d to ensure stability on the race track in high grip conditions If RACE mode is selected this is indicated on the left TFT display as shown below Warning Test driving the vehicle occasionally on the race track after each start cover the first straight stretch of the track at least 500 meters at a constant speed so that the traction control system and the ABS may calculate exactly the grip availabl...

Страница 148: ...C system CT OFF mode In CT OFF mode the F1 Trac traction control is disabled This mode further enhances the already racing style behaviour of the vehicle traction control is disabled while stability control remains active when a certain level of sideslip is exceeded The gearshift mode suspension damping and the performance ABS setting are the same as the previous position The electronic differenti...

Страница 149: ...started the ESC system will reactivate Important note When the brake pedal is pressed traction control is activated via the VDC system vehicle dynamics control via the braking system If ESC OFF mode is selected this is indicated on the left TFT display as shown below ...

Страница 150: ...shifts to COMFORT RACE RACE shifts to COMFORT CT OFF RACE shifts to COMFORT ESC OFF RACE shifts to COMFORT A If button A has been pressed and subsequently the position of the Manettino is changed the suspension setting follows the operating logic dictated by the Manettino Important note Upon turning off and restarting the vehicle the suspension setting depends on the position of the Manettino When...

Страница 151: ...your Vehicle 3 60 C 1 0 bar After 5 seconds next to the Manettino status in the top of the display the suspension symbol continues to be displayed as shown in the photo below example shows Manettino in SPORT mode ...

Страница 152: ...ts on all four wheels until button B is released by communicating with the ESP system which prevents locking B Warning Always apply the parking brake when the vehicle is parked The vehicle should be blocked If this is not the case please contact the Ferrari Service Network Drive Away function The electric parking brake EPB has a Drive Away function when a gear is engaged and the driver presses the...

Страница 153: ...essage PARK OFF is displayed on the left TFT display for 5 seconds In this case after the engine is switched off the parking brake must be engaged manually by pulling the lever B To re enable automatic EPB engagement at the next key off press the button C again the message PARK ON is displayed on the left TFT display for 5 seconds Automatic Vehicle Holding AVH function The electric parking brake p...

Страница 154: ...Park Lock is deactivated when the engine is running the first gear or R is requested with the brake pedal pressed and the luggage compartment lid has been closed correctly Carwash procedure The Park lock device can be electrically disabled on a temporary basis when the engine is switched off by performing the Carwash procedure This procedure is necessary when the vehicle has to be moved with the e...

Страница 155: ...he vehicle must be stationary the gearbox must be in Manual mode hold the brake pedal down and select first gear press the LAUNCH L button on the left of the centre console an acoustic signal informs the driver that the device has been switched on and the word launch appears on the gearbox display press the accelerator pedal and release the brake pedal L Important note The Launch Control function ...

Страница 156: ...tching off the instrument panel KEY OFF see page 135 Never leave children unattended in the vehicle Warning Make sure that the engine is switched off with the instrument panel deactivated before refuelling Warning Always make sure that the Stop Start system has been deactivated before carrying out any repair and or maintenance work as indicated on the special labels in the engine compartment and u...

Страница 157: ...on the roof panel If the system is activated pressing button A will deactivate it the message Stop Start OFF appears for 5 seconds on the left TFT display accompanied by a special symbol Once the system has been deactivated pressing button A again reactivates the system the message Stop Start ON appears for 5 seconds on the left TFT display accompanied by a special symbol If the Stop Start system ...

Страница 158: ...tic engine stop mode The engine stops automatically when the vehicle is stationary and the brake pedal is pressed and restarts when the brake pedal is released The left TFT display informs the driver that the Stop Start system has been activated by displaying the message Stop Start active accompanied by a special symbol The message is displayed as long as the vehicle remains in a stop state To int...

Страница 159: ... Lift system has been activated the DCT gearbox Park Lock has been manually released a failure interferes with proper system operating The system also constantly monitors some of the vehicle operating parameters battery charge level engine coolant temperature catalytic converter temperature clutch oil temperature vacuum level in brake servo climate comfort in passenger compartment so that engine s...

Страница 160: ...onary and correct operating of the entire vehicle the Stop Start system also automatically restarts the engine when the ENGINE START button on the steering wheel has been pressed the function has been deactivated by pressing the button located on the roof panel the driver s seat belt has been unfastened the driver side door has been opened the Front Lift system has been activated rear screen demis...

Страница 161: ...vehicle behaves in the same way as a vehicle with no Stop Start system to restart the driver must perform a manual start by pressing the ENGINE START button and using the shift paddles located behind the steering wheel Permanent deactivation of automatic restarting occurs when the luggage compartment lid or engine compartment lid are open automatic engine restarting has not been successful a failu...

Страница 162: ...maintenance work Switch off the instrument panel before carrying out any repair and or maintenance work on the vehicle If work has to be carried out on the vehicle with the instrument panel activated check that the Stop Start has been deactivated by performing the following procedure before doing any repair and or maintenance work if the instrument panel is switched on switch it off then switch it...

Страница 163: ...kly releasing buttons C and D respectively B C D Disconnecting the battery HELE system only On vehicles with the optional HELE system the quick release E for disconnecting the battery from the electrical system see page 224 is located on a dummy negative terminal in the bottom left of the battery compartment Warning After disconnecting the battery from the electrical system place clamp E between b...

Страница 164: ...the entire Front Lift system activation cycle the special warning light see page 108 remains on in flashing mode whereas the vehicle symbol with an arrow pointing upwards and a message Front Lift moving appears on the left TFT display When the system has been activated front of the vehicle raised an acoustic signal is emitted and the message Front Lift ON appears for 5 seconds whereas the warning ...

Страница 165: ... off with the front lift activated the vehicle is automatically lowered after 15 seconds Do not use the front suspension lift to park the vehicle on obstacles e g pavements these obstacles may come into contact with the front of the vehicle and damage it once the system has been deactivated In the event of engine failure the Front Lift system can however be activated by pressing button A for 10 se...

Страница 166: ... forward adjustment Pull lever B up and slide the seat forward or backward to the desired position Release the lever and wiggle in the seat to check that it is locked in place Warning The backward forward adjustment must consider the fact that airbag devices are placed in front of the driver and the passenger see page 53 Correct adjustment must ensure there is adequate space between the airbag and...

Страница 167: ... 3 Tilting the backrest To tilt the seat pull lever L up and push the backrest towards the front of the vehicle When the backrest goes back into position it will automatically block once it has reached the correct position L ...

Страница 168: ...n seat inclination tilting push the front or rear end of the control up or down to adjust seat inclination Warning The backward forward adjustment must consider the fact that airbag devices are placed in front of the driver and the passenger see page 53 Correct adjustment must ensure there is adequate space between the airbag and the driver passenger see page 53 Seat back rake adjustment Use contr...

Страница 169: ...H each one corresponding to a memorisable position Pressing one of these buttons for longer than 3 seconds memorises the position of the driver seat rear view mirrors and steering wheel confirmed by emission of a double tone To recall the memorised position press one of the buttons H and release it within 3 seconds Operation begins as soon as the button is released Recalling the memorised position...

Страница 170: ...heating choosing from 3 levels identified on the control with the numbers 1 2 and 3 When the instrument panel is switched off seat heating is not activated Tilting the backrest To tilt the seat pull lever L up and push the backrest towards the front of the vehicle When the backrest goes back into position it will automatically block once it has reached the correct position Warning Do not use the e...

Страница 171: ...rward or backward to the desired position Release the lever and wiggle in the seat to check that it is locked in place Warning The backward forward adjustment must consider the fact that airbag devices are placed in front of the driver and the passenger see page 49 Correct adjustment must ensure there is adequate space between the airbag and the driver passenger see page 49 ...

Страница 172: ...2 About your Vehicle Seat back rake adjustment Turn knob Q clockwise or counterclockwise until the desired back rake has been reached Tilting the backrest Pull lever R up to tilt the backrest forward R Q ...

Страница 173: ...is memorised together with the position of the external rear view mirrors when the seat position is memorised Adjusting the steering wheel The steering wheel can be adjusted for rake and reach Warning Do not adjust the steering wheel when the vehicle is moving Mechanical adjustment 1 Release lever X by pushing it forwards 2 Adjust the position of the steering wheel 3 Block the steering wheel by pu...

Страница 174: ... These mirrors can be electrically adjusted using the control C with the instrument panel activated and are equipped with defogging elements 1 Mirror selection turn control C to the left or right lock position to select the mirror that requires adjusting 2 Mirror positioning move control C in the four directions up down right left to adjust the selected mirror 3 Mirror closure optional turn contro...

Страница 175: ...arning The rear view mirrors must always be positioned correctly while driving Do not adjust the rear view mirrors when the vehicle is moving On request the external rear view mirrors can be fitted with an electrochromic mirror ...

Страница 176: ...anual This mode allows the user to set the values to suit the passengers needs Controls 1 Left hand temperature setting and AUTO button 2 A C compressor activation deactivation 3 Single zone mode activation deactivation 4 Air distribution fan speed 5 Enable disable rear screen and rear view mirror demist function 6 Windscreen demist activation deactivation 7 Right hand temperature setting and AUTO...

Страница 177: ...on or deactivate LED off the A C compressor Single zone mode activation deactivation 3 This is used to activate LED on or deactivate LED off the single zone operating mode Air distribution fan speed 4 The four setting positions allow the occupants to select the air flow rate Enable disable rear view mirror demist function 5 Press LED on to activate rear view mirror defogging demisting Windscreen d...

Страница 178: ...on feature remains on with a 60 second pause every twenty minutes to refresh the air If you activate the windscreen washer function the air recirculation feature activates for 20 seconds to prevent any smell of detergent products from entering the passenger compartment If pressed LED on the air flow comes from inside the passenger compartment The recirculation increases air heating or cooling Left...

Страница 179: ...closed Turned to right open Important note We recommend keeping the air flow set to open and directing the air flow to a neutral position Maintenance The pollen filter must be replaced every year as indicated in the Maintenance Schedule Important note The air coming out of the vents does not correspond to the temperature requested by the user but is the temperature required to maintain the desired...

Страница 180: ...e compartment This is located on the passenger side of the dashboard Oddment storage compartments They are located on the lower part of the doors and on the centre console There is also a compartment for storing the vehicle key in the front of the centre console ...

Страница 181: ... power small electrical appliances such as mobile phones lights vacuum cleaner and any other accessory with absorption not exceeding 140 Watts and a voltage of no more than 12 Volts Warning Prolonged use of this device may discharge the battery Do not try to insert plugs into the power socket that are not the right size and shape Warning Use the power socket to connect the tyre repair and inflatio...

Страница 182: ...cribed in the manual Contact the vehicle manufacturer if in any doubt Intended use The navigation system complies with the standards used in navigation technology Always be aware of the regulations and guidelines in force in the country where the vehicle will be used Software update The navigation data software can be updated For the most recent software contact the Ferrari Service Network Using t...

Страница 183: ...CD at a time into the drive slot Insert supported CD formats only See the Disc Mode section on page 190 for information on supported CD formats Other electronic devices Other electronic devices PDA iPod computer laptop etc may be used in the vehicle some of which may cause electromagnetic interference with the GPS antenna If you notice a reduction in GPS performance switch off all appliances and m...

Страница 184: ...el Commands are also situated on the back of the steering wheel Controls on dashboard Hold down button G to switch the infotainment system on and off and press and quickly release button G to activate the MUTE mode no audio Press and quickly release button H to display the options for the displayed screen and press and hold down button H to select whether to display infotainment system information...

Страница 185: ...uttons A and B for volume control and button PTT C are on the left hand steering wheel spoke press button A to increase the volume and press button B to decrease it Hold down button B to mute the volume MUTE function To deactivate volume muting press button A Button C is used to activate the voice commands if the voice recognition function is already activated it can be deactivated by quickly pres...

Страница 186: ...Quantum Logic if present and adjust the volume according to the speed on this page To adjust the balance and fading press the arrow soft keys The equalizer settings can be used to adjust the bass BASS mid MID and treble TREB levels Press the Quantum Logic soft key to activate deactivate the option The volume can be adjusted to the speed on 3 levels or deactivated Adjusting display brightness From ...

Страница 187: ...howing a phone and music indicate to the user the type of device connection and whether it is music only phone only or both After pairing and selecting a peripheral press the OPTIONS button on the right satellite to access the Bluetooth device settings Here you can tell the system to give priority to the peripheral selected using the Setting Priority option The system will ask you to pair your mob...

Страница 188: ...ect the desired radio station from a list by pressing the List soft key The list has two display options the first shows the radio stations stored as Favourites whereas the second shows the radio stations with the strongest signal in the area To change display mode press the Go to favourites Go to strong stations soft key at the top of the list Storing favourite radio stations You can store your f...

Страница 189: ...ntries where available has some additional options artists musical genres can be indicated as favourites Radio settings When you are in one of the three bands FM MW or DAB if available press the OPTIONS button on the right satellite to access the settings menu ...

Страница 190: ...en placing a disc in the player slot make sure the label is facing upwards Insert the disc in the slot the system pulls it into the player Once it has recognised the disc the system selects the appropriate mode and starts to play the first track Warning The player only accepts 12 cm 4 inch discs Using discs of any other format may damage the player mechanism The system can play compact discs CD re...

Страница 191: ...ng wheel To display and scroll through the list of multimedia content on the CD press the List soft key in the bottom of the display If the Shuffle play mode is activated the icon is displayed on the screen Disc mode settings While you are in disc mode with a disc inserted press the OPTIONS button on the right satellite to access the options menu Here you can activate deactivate the Shuffle mode a...

Страница 192: ...es in the USB peripheral connected to the system via connector A in the pocket change compartment on the centre console USB connection Using the USB connector you can also play audio files from iPod and iPhone devices using the USB cable supplied with the device Warning Do not force connectors into the infotainment system ports Before connecting make sure that the connectors are the same shape and...

Страница 193: ...menu The main NAVI menu has the following menu items Stop Guidance only when the Navigation mode is activated Show Map Select Show Map to display a map of your current position See the Show Map section for details Destination Entry Select Destination Entry to program a destination Recent Destinations Select Recent Destinations to call up a recent destination Go Home Select Go Home to follow the ro...

Страница 194: ...nterest Search by name telephone number category or type of place Emergency Select Emergency to follow a route to an emergency facility near to the current location of your vehicle This includes the fire brigade police hospitals Trips Select Trips to enter a point of interest from a list of previously saved routes Where Am I Select Where Am I to find your current position On board computer Select ...

Страница 195: ... bottom of the screen If you do not enter the house number the navigation system will guide you to the closest end location on the entered street You can also select the destination from a list of recent favourite destinations by selecting List You can always stop navigation by selecting the relevant item on the main navigation system screen NAVI settings To access the navigation system settings g...

Страница 196: ...e active and connected to the system one with the Phone function and one with the Audio streaming function playing of music A phone which has been assigned the Audio streaming function cannot be used for the Phone function and vice versa Select PHONE from the main screen to switch to Phone mode Five icons are displayed in the bottom of the display which can be used to access the functions Contacts...

Страница 197: ...fuse it If you give the voice command Guidance the system reads out a list of voice commands for the displayed screen The voice recognition system is flexible and identifies a set of words pronounced by the user by extracting the meaning to activate the desired function For example different phrases can be used to call up the same function For example in the relevant screen if you say Connect tele...

Страница 198: ...driver The passenger display shows information displayed on the following screens on the instrument panel Performance engaged gear RPM speed TRIP A distance travelled travel time average and maximum speed TRIP B distance travelled travel time average and maximum speed Manettino status Manettino position and vehicle parameter status Hold down the DISP button A to switch the passenger display on and...

Страница 199: ...199 About your Vehicle 3 ...

Страница 200: ...mergency start stop 204 Replacing light bulbs 209 Replacing a fuse 212 List of fuses 214 Replacing a wheel 220 Towing 222 Battery 224 Battery conditioner 228 EPB emergency release 232 Park Lock emergency release 234 ...

Страница 201: ...ADVICE FOR EMERGENCY SITUATIONS 4 ...

Страница 202: ...nimum specific expertise when working in contact with electrical parts components e g battery Toolkit Tool bag Stored in the luggage compartment it contains the necessary tools for emergency repair jobs pair of cotton gloves set of fuses pliers for removing fuses tow hook Allen key funnel for emergency fuelling screwdriver for slotted and crosshead screws EPB emergency release tool Park Lock emerg...

Страница 203: ...mergency Situations 4 Warning The Electric Parking Brake EPB emergency release tool and the Park Lock emergency release tool may only be used by specialised workshop personnel as indicated on the label in the tool bag ...

Страница 204: ...F ENGINE START and ENGINE STOP If the key battery is completely flat there is a button K for emergency switching on and off of the engine located under the cosmetic shield in the front of the centre console For emergency switching on put the key next to button K making sure that the rear part of the key and the button are in contact While holding the key in a perfectly vertical position above butt...

Страница 205: ...uations 4 For emergency switching off when the vehicle is stationary press button K once If the vehicle is in motion press and hold button K down for at least 2 seconds alternatively press the button quickly 3 times in succession ...

Страница 206: ... Warning Punctures cannot be repaired on the sides of the tyre Do not use the tyre repair kit if the tyre has been damaged after driving with a flat tyre Warning Damage to the wheel rim that causes air leaks cannot be repaired Do not remove foreign objects screws or nails that have penetrated the tyre Warning After using the repair kit the vehicle must be considered in an emergency situation drive...

Страница 207: ...ing Keep the kit in its box and out of children s reach Do not inhale or swallow the fluid contained in the cartridge and avoid contact with the skin and eyes Warning The spray contains ethylene glycol and latex The latex may cause an allergic reaction is harmful if swallowed and is irritating to eyes May cause sensitisation by inhalation and skin contact Avoid contact with eyes skin and clothing ...

Страница 208: ...kit cartridge can damage the sensor inside the wheel rim on vehicles fitted with a tyre temperature and pressure monitoring system TPMS If this occurs the sensor must be replaced Contact the Ferrari Service Network Warning Wear the protective gloves supplied with the tyre inflation and repair kit Useful accessories In addition to the tools supplied with the vehicle the hazard warning triangle and ...

Страница 209: ...t the Ferrari Service Network Replacing number plate light bulbs To replace a number plate light bulb proceed as follows remove the light from the right side where there is a spring clip remove the transparent cover A from its housing replace the bulb by removing connector B from its housing refit the connector and transparent cover by inserting it first from the left side and then pressing on the...

Страница 210: ...tor side and then pressing on the opposite side Underdoor light bulbs Prise gently under the edge of the transparent cover with a screwdriver and lift the cover Completely remove the transparent cover from its housing Take the bulb out of its clips Replace the bulb Refit the transparent cover and make sure that the wires are not trapped by inserting it first from the connector side and then pressi...

Страница 211: ...turn indicator lights LED Side turn indicator lights incandescent T4W Running and stop lights LED Reverse lights LED Supplementary stop lights LED Rear turn indicator lights LED Rear fog lights LED Number plate lights incandescent 5W Passenger compartment dome light incandescent 8W Spotlights incandescent 5W Underdoor courtesy lights incandescent 5W Luggage compartment lights LED ...

Страница 212: ...the problem persists contact the Ferrari Service Network Important note When replacing a fuse always use fuses of the same amperage same colour The tool bag contains spare fuses To remove the fuses use the pliers C in the tool bag A B C Fuse colours Ampere yellow ochre 5 brown 7 5 red 10 light blue 15 yellow 20 white 25 green 30 Maxi fuse colours Ampere yellow 20 green 30 red 50 blue 60 ...

Страница 213: ... fuse and relay boxes A Fuses and relays in battery compartment B Body Computer fuses and relays C Fuses and relays in passenger compartment on passenger side D Fuses and relays on driver side rear side panel E Fuses and relays on centre console A C D B E ...

Страница 214: ...arter motor and alternator F 70 150 Engine relay and fuse ECU power supply SCM F 71 70 Dashboard ECU power F 72 50 Front lift pump F 73 100 Centre console fuse protection Body Computer fuses and relays To access these fuses remove the dashboard panel 1 Important note Only open the boxes containing the fuses that need to be checked to avoid damaging other components Box B contains these fuses and r...

Страница 215: ...40 30 Heated rear window F 42 15 F 43 30 Windscreen washer wiper relay power supply F 46 20 F 47 30 Driver side door driver side power window F 48 30 Passenger side door passenger side power window F 49 7 5 Key for CPOD front lift rear view mirrors active aerodynamics parking sensors rain sensor electric seats F 50 7 5 Airbag Node weight sensor F 51 7 5 Key for functions on CVB relay T21 F 52 15 D...

Страница 216: ...1 50 30 Fuel pump ECU Fuses and relays in passenger compartment on passenger side These fuses are located behind the glove compartment The three boxes C contain the following fuses and relays Ref Amp Use F 01 40 30 Right hand radiator fan F 02 40 30 ESP9 Pump F 04 40 30 ESP9 Hydraulic F 05 40 30 Air conditioning Node F 06 40 30 Left hand radiator fan F 07 20 30 Horn relay F 08 7 5 Air conditioning...

Страница 217: ... T03 30 15 Button lighting T05 30 T06 30 T07 50 Horn relay T08 30 Air conditioning and heating system compressor relay T09 30 Main injection system relay T10 30 T14 30 F 82 70 30 Dashboard ECU and ECU on driver side rear side panel power supply F 83 50 30 Air pump relay F 84 15 Side markers F 85 25 Headlight washer F 87 25 F 104 15 Infotainment system CANBOX CD changer clock spring F 105 7 5 Telem...

Страница 218: ...lighter rear parking camera DCT gearbox T17 10 20 INT A relay devices excluded at ignition T19 30 Stop light control relay CLA T20 30 Turbine cooling fans T26 10 20 Windscreen wiper first speed relay T27 10 20 Windscreen wiper second speed relay T28 30 Windscreen washer pump relay T29 30 Side markers T30 30 LH DRL T31 30 RH DRL R3 ss Solid state relay for third stop light R4 15 passive start relay...

Страница 219: ... centre console Boxes E contain these fuses and relays Ref Amp Use F 90 30 30 Stabiliser F 91 40 F 92 40 30 HI FI amplifier F 93 30 30 Suspension control ECU T22 30 Reverse light relay T23 30 Fuel filler flap relay T24 30 T25 30 Electronically controlled gearbox main relay R1 Starter power relay R2 Starter power relay ...

Страница 220: ...pace saving tyre label B indicates the maximum speed allowed of 80 km h 50 mph additional tool bag C containing the jack for raising the vehicle and the socket wrenches for operating the jack and tightening the wheel stud bolts Warning The space saver spare wheel must only be used for short trips in the event of an emergency When the spare wheel is fitted never exceed the maximum speed of 80 km h ...

Страница 221: ... base of the jack E on flat firm ground under one of the jacking points F on the underfloor as shown in the figure Raise the vehicle carefully using jack E until the wheel is off the ground Warning If the jack is not positioned correctly the vehicle could slip off Make sure that no part of the body is underneath the vehicle while changing the wheel The supplied jack must only be used for changing ...

Страница 222: ... inflation mode Refer to the instruction manual supplied with the kit Inflate the spare wheel to the indicated pressure see page 29 Lower the vehicle and remove the jack Tightly fasten the stud bolts alternately going from one stud bolt to one that is diametrically opposite As soon as possible tighten the stud bolts with the torque wrench to a torque of 100 Nm Warning The space saver spare wheel d...

Страница 223: ... is switched off the power steering and brake servo functions do not work Fuel inertia switch The fuel inertia switch is a safety device which deactivates the fuel pump relays if a collision occurs A symbol appears on the left TFT display and the hazard warning lights come on to indicate that the switch has been activated When the fuel inertia switch is activated the doors are also unlocked if loc...

Страница 224: ...ommend using the battery conditioner if the vehicle is going to left unused for a long period To cut off the power supply from the battery to the electrical system use the quick release C terminal on the left hand side of the battery Use the locking lever to loosen the terminal Battery The battery is located in the passenger compartment behind the passenger side footrest Checking the battery Warni...

Страница 225: ...n it by closing the locking lever Each time the battery is reconnected do the following before starting the engine close both doors and close the luggage compartment lid unlock and lock the doors using the remote control open the luggage compartment lid using the remote control adjust the clock date and time on instrument panel close both doors and fully raise the driver side and passenger side wi...

Страница 226: ...e Deactivate all the electrical devices Remove cover A of the fuse box located above the positive terminal on the right side of the battery If emergency starting is performed using the battery of another vehicle leave the engine on the other vehicle to idle Using the jump leads connect the positive terminal of the battery to the positive terminal of the portable jump starter or external battery go...

Страница 227: ...227 Advice for Emergency Situations 4 Warning The emergency start procedure must only be performed by a specialised Ferrari Service Network centre ...

Страница 228: ...ioner to maintain and recharge the battery Important note If a battery is not periodically maintained it will be subject to an irreversible loss of functionality The time taken to reach this state depends on the battery charge level and we therefore recommend that you always use the battery conditioner when parking for over 70 hours The device is kept in a pocket inside the car cover bag supplied ...

Страница 229: ... Slow Down function is activated a special symbol see page 106 appears on the left TFT display accompanied by a message The message varies according to three alarm levels Temperature high Catalysts temp high Slow down Temperature too high Catalysts temp too high Engine performance limited Catalytic converter temperature system failure Catalysts temp not plausible Go to dealer slowly Displaying of ...

Страница 230: ...cessive overheating of the clutches the system warns the driver that the action is not permitted by displaying the message Operation not admissible on the left TFT display Warning If the temperature is too high the temperature in the catalytic converters has reached a dangerous level and could damage them if you continue to drive the engine control ECU intervenes and reduces the torque produced by...

Страница 231: ...layed Engine malfunction alarm devices If the engine control system failure EOBD see page 105 warning light flashes or comes on permanently while the engine is running it indicates that the engine or the emission control system may be malfunctioning The electronic system detects and isolates the error preventing damage to the engine or the production of harmful emissions Warning When the engine di...

Страница 232: ...he brake pads and discs Brake pads The front brake pads have a wear detector connected to the brake warning light if this warning light comes on or braking is not even have the pad thickness and the state of the braking surfaces checked The minimum brake pad thickness is 3 mm thickness of the friction material only Replacing brake pads When the brake failure warning light comes on it means that th...

Страница 233: ... deactivated because the battery is flat or there is a failure in the electrical system controlling it and the vehicle needs to be moved the emergency release procedure described below must be performed Before performing this procedure remove fuse F33 and F34 from the body computer fuse box situated under the driver side of the dashboard see page 215 Select the EPB emergency release socket wrench ...

Страница 234: ...anual unlock gearbox allowed See handbook C Warning When the Park Lock safety device is deactivated manually the vehicle may move unexpectedly The vehicle is only kept stationary by the parking brake if applied The Park Lock manual emergency release device is found in the engine compartment near the gearbox as shown by the arrow in the figure To perform the Park Lock emergency release procedure do...

Страница 235: ...erform the emergency release turn wrench D counterclockwise for a quarter turn If the electrical system allows it check that the letter N appears on the gearbox display by activating the instrument panel The following message will appear on the left TFT display Gearbox not in Parking position At the same time an audible signal is repeated four times to indicate that it has been released Extend wre...

Страница 236: ...Warranty Booklet 238 Maintenance 238 Level checks 240 Wheels and tyres 247 Maintenance of seat belts and pretensioners 249 Cleaning the vehicle 249 If the vehicle is stored for long periods 253 ...

Страница 237: ...CARE OF THE VEHICLE 5 ...

Страница 238: ...t which occurs when using the vehicle e g small leaks of essential fluids to the Ferrari Service Network immediately and not wait until the next service is due to correct the problem Periodic maintenance services must be performed at least once a year even if the specified mileage limit has not been reached see Yearly Maintenance in the Warranty Booklet Displaying information on scheduled maintena...

Страница 239: ...ce with rules of good workmanship Proper execution of repair work ensures that the commercial value of the vehicle is preserved and the safety standards are complied with Important note If the chassis is damaged in an accident Ferrari advises customers to contact the Ferrari Service Network who will perform the necessary safety checks The chassis under standard conditions of use requires no mainte...

Страница 240: ... the vehicle Level checks A C B D E Ref Page A Engine oil tank cap 242 B Coolant tank cap 244 C Power steering oil tank cap 244 Ref Page D Brake fluid tank cap 245 E Windscreen headlight washer fluid tank cap 246 ...

Страница 241: ...ney Environment All the materials used for the following operations e g cloths soaked with oil or grease pans etc must be disposed of in compliance with the environmental protection regulations Important note Only use lubricants and or fluids recommended by Ferrari or in any case that comply with the specifications defined by Ferrari see the Refilling table on page 38 ...

Страница 242: ...nd DO NOT add oil with different characteristics from those of the oil already in the engine The symbol shown below on the left TFT display and the message Low engine oil pressure stop and turn off engine indicate that the driver must stop and check the engine oil level Proceed as follows 1 Run the engine to reach an engine oil temperature of 90 C 194 F 2 Let the engine idle and check that the air...

Страница 243: ...d therefore consider this behaviour normal 9 When you have added or changed the oil check the oil level once again as indicated above Environment Top up with due care to avoid pouring the oil out of the filler neck Checking the DCT gearbox oil level Important note We recommend that you have the oil level of the DCT gearbox checked by the Ferrari Service Network or by skilled staff MAX MIN M ...

Страница 244: ...uent top ups are required after short trips have the system checked by the Ferrari Service Network Screw the cap B back on tightly B Checking the power steering system oil level Warning The power steering oil level must be checked with the engine warm after having driven at least 15 km If it is checked when the engine is cold the level may appear to be very low even when the recommended amount of ...

Страница 245: ...he rubber system gaskets Screw the cap C back on tightly Environment Do not dispose of used fluid in the environment Checking the brake fluid level The brake fluid tank is located under the right hand under windscreen protective cover Proceed as follows Remove cover P remove cap D and check that the fluid is near the MAX mark shown in the figure Important note Clean cap D before removing it If the...

Страница 246: ...sk always use protective goggles and gloves Keep out from children s reach Warning The use of mineral based fluids will irreparably damage the system rubber gaskets Do not use fluids other than those already in the system for topping up Screw cap D back on tightly Windscreen and headlight washer fluid The windscreen and headlight washer fluid tank can be accessed by lifting the luggage compartment...

Страница 247: ...ith the tyres inflated to the correct pressure helps to reduce fuel consumption Low tyre pressure can lead to overheating internal damage and even destruction of the tyres Warning Inflating the tyres to a pressure other than the specified value will render the TPMS monitoring system ineffective Sudden impact with pavements potholes and other obstacles of various types as well as long trips on roug...

Страница 248: ...ing The tyres are of the directional type and there is an arrow marked on their side wall to indicate the direction in which they must rotate or which side is the outer side When replaced maximum performance levels can only be ensured if the rotation direction corresponds with the direction indicated by the arrow Tyres on the same axle must always be replaced in pairs Regularly check the tyre trea...

Страница 249: ...operations e g cloths soaked with oil or grease pans etc must be disposed of in compliance with the environmental protection regulations Proper care of the vehicle on the part of the owner is essential for the vehicle long life Here is a list of the main precautions to be taken Certain parts of the vehicle should not be left wet or dirty for long periods of time in particular the passenger compart...

Страница 250: ...aired by the Ferrari Service Network Do not park the vehicle in damp and or unventilated areas for long periods of time Cleaning and care of matt paintwork optional Warning The paintwork MUST NOT be polished using any type of product Owners must take great care of vehicles with matt paintwork optional Here is a list of the main precautions to be taken Wash the vehicle using a steam cleaner and rin...

Страница 251: ... not use metal or abrasive substances in general and acid chemical compounds Important note Avoid the film coming into contact with the brake fluid the film will become opaque Do not use solvents along the edges of the film to them from penetrating inside the adhesive layer Important note Nürburgring Silver Avus White Alloy Grey Met Avio Ivory Met Light Blue Met Sky Blue and Fuji White vehicles mu...

Страница 252: ...hich includes the complete range of products for cleaning the vehicle Important note For use of the Care Kit products contact the Ferrari Service Network The following products must be avoided when cleaning the leather harsh detergents turpentine liquid stain removers petrol solvents and domestic cleaning products All of these products damage the natural material Cleaning and care of the Alcantara...

Страница 253: ...vehicle again after long periods of inactivity adjust the tyre pressure to the indicated pressure and check the fluid levels of all the systems Important note If you do not intend to connect the vehicle to the battery conditioner the battery must be recharged at least once every two weeks to keep certain functions such as the radio station memory alarm system etc working correctly The battery is i...

Страница 254: ...Glossary 257 ...

Страница 255: ...GLOSSARY 6 ...

Страница 256: ......

Страница 257: ...icle and is an aid for the driver DCT Dual Clutch Transmission Each clutch is associated with a part of the gearbox one is designed for engaging even gears the other for odd gears Once a gear has been engaged the system has already preselected the next one After reaching the correct RPM a clutch opens and at the same time the other one closes so that the traction force is not interrupted Disposal ...

Страница 258: ...erformance standing starts Manettino The driving mode control switch on the steering wheel that allows the driver to use vehicle potential in a quick intuitive way Park Lock Automatic DCT gearbox park lock When the engine is off a mechanical lock is automatically activated to prevent the vehicle from moving if the electric parking brake is not activated SSC Side Slip angle Control electronic side ...

Страница 259: ...he road surface through the wheels it indicates the grip VDC Vehicle Dynamic Control performed through the braking system and engine torque Xenon headlights Headlights on the front of the vehicle that produce a more intense beam by using a voltaic arc rather than an incandescent spiral ...

Страница 260: ...Table of Contents 262 ...

Страница 261: ...TABLE OF CONTENTS 7 ...

Страница 262: ...tem 134 Auto easy exit 140 Auto easy exit mode 140 Automatic gearbox 140 Automatic gearbox mode 140 Automatic Vehicle Holding 64 153 Autopark Function 64 153 Auxiliary Occupant Protection Systems 52 AVH function 64 153 B Backrest and seat cushion side width adjustment 169 Basic seat 166 Battery 224 Battery conditioner 228 Before a trip 132 Brake fluid 245 C Capless filler neck 80 Carwash 154 Carwa...

Страница 263: ...nic alarm 21 Deformable body 44 Dimensions 30 Disconnecting the battery 224 Display setting 86 Dome light 131 Doors 74 Doors engine or luggage compartment lid open function display 103 DOWN shifting 138 DOWN shifting due to underrevving 138 DOWN shift paddle 123 Drive Away function 152 Driver and passenger airbag operating 54 Driver and passenger airbags 53 Driver side power window 81 Driving at n...

Страница 264: ... RPM LED on steering wheel 110 ENGINE START 118 Environmental protection 10 EPB Electric parking brake 64 152 ESC 62 ESCAPE function 101 ESC OFF mode 119 148 Exhaust system overheating alarm devices 229 External rear view mirrors 174 F F1 Trac 63 Failure of turn indicators and running lights 102 Fault display 101 FBP Ferrari Brake Prefill 62 Ferrari CODE system 18 Flashing the headlights 126 Follo...

Страница 265: ...stem 134 L LAUNCH button 155 Launch Control 155 Leather upholstery 252 Left TFT display 84 Left TFT display symbols 104 Level checks 240 Light bulbs 211 Lighting 126 Light switch 126 Locking and opening the doors from the inside 74 LOCK UNLOCK 131 Low tyre pressure 66 Luggage compartment lid 77 Lumbar support adjustment 169 M Main engine specifications 31 Maintenance 238 Maintenance of seat belts ...

Страница 266: ...lay optional 198 Passenger side power window 81 Passive safety 44 Performance 31 Performance start 155 Pocket change compartments 180 Power steering 144 Power steering system oil 244 Power windows 81 Pregnant women 47 Pretensioners 50 Push start 140 R RACE mode 119 147 Rain sensor 125 Rain sensor failure 125 Rear fog lights 129 Rear view mirrors 174 Reconnecting the battery 225 Refilling 38 Remote...

Страница 267: ...T mode 119 146 SPORT screen page 89 Start button 118 Starting the engine 137 Starting the vehicle 137 State of vehicle 91 STATUS 84 Steering wheel 173 Stop and Go function 97 Stopping the vehicle 139 Stop Start 156 Stop Start failure 162 Stop Start system optional 156 Sun visors 181 Super Racing seat 171 Suspension damping control 145 Suspension damping delink button 150 Switching off the engine 1...

Страница 268: ...UP shift paddle 123 USB connectors 113 Use of the vehicle 10 V VDA 84 90 Vehicle Dynamic Assistance 90 Vehicle key homologation certificate 15 Vehicle keys 14 Vehicle status screen page 91 Voice commands and PTT Push To Talk function 197 W Warming up the engine 136 Warning danger of ice message 96 Warning lights on the panel 104 Warranty Booklet 7 238 Weights 30 WET mode 119 146 Wheel alignment ch...

Страница 269: ...Ferrari reserves the right to make any modification to the vehicle models described in this manual at any time for either technical or commercial reasons Contact the nearest Ferrari Dealer for any further information you may require In the interests of efficiency and safety as well as to preserve the value of the vehicle we do not recommend modifying the equipment using non approved parts ...

Страница 270: ...4000 Catalogue no 5010 15 Edition 1st edition May 2015 Editing STAR s r l Alessandria Italia Printing STAR s r l Alessandria Italia Technical Service Department Via Abetone Inferiore 4 41053 Maranello Modena Italia ...

Отзывы: