TIGHTENING HARDWARE
TIGHTENING HARDWARE
3PT Sprayer 973PT
Page 79
Face Seal Fittings Assembly & Installation - All Pressure Applications
Face Seal O-Ring to Stud End Installation
1.
Inspect the fitting surfaces. They must be free of dirt and defects.
2.
Inspect the O-ring. It must be free of damage and defects.
3.
Lubricate the O-rings and install them into the groove using petroleum jelly to hold them
in place.
4.
Push the O-ring into the groove with petroleum jelly so that the O-ring is not displaced
during assembly.
5.
Index any angle fittings and tighten by hand, pressing the joint together to ensure that the
O-ring remains in place.
6.
Tighten the fitting or nut to the torque value shown on the chart per dash size stamped on
the fitting. DO NOT allow hoses to twist when tightening fittings.
Face Seal Adjustable Stud End O-Ring Installation
1.
Back off the lock nut (jam nut) and washer to fully expose turned down section of the fitting.
2.
Install a thimble over the fitting threads to protect the O-ring from nicks.
3.
Slide the O-ring over the thimble into the turned down section of the fitting.
4.
Remove thimble.
Face Seal Straight Stud End O-Ring Installation
1.
Install a thimble over the fitting threads to protect the O-ring from nicks.
2.
Slide the O-ring over the thimble into the turned down section of the fitting.
3.
Remove thimble.
Fitting Installation
1.
Install the fitting by hand until it is snug.
2.
Position adjustable fittings by unscrewing the fitting no more than one turn.
3.
Apply with an assembly torque per table.
Assembly Torque
1.
Use one wrench to hold the connector body and one wrench to tighten the nut.
2.
For a hydraulic hose, it may be necessary to use three wrenches to prevent twist: one on
the connector body, one on the nut, and one on the body of the hose fitting.
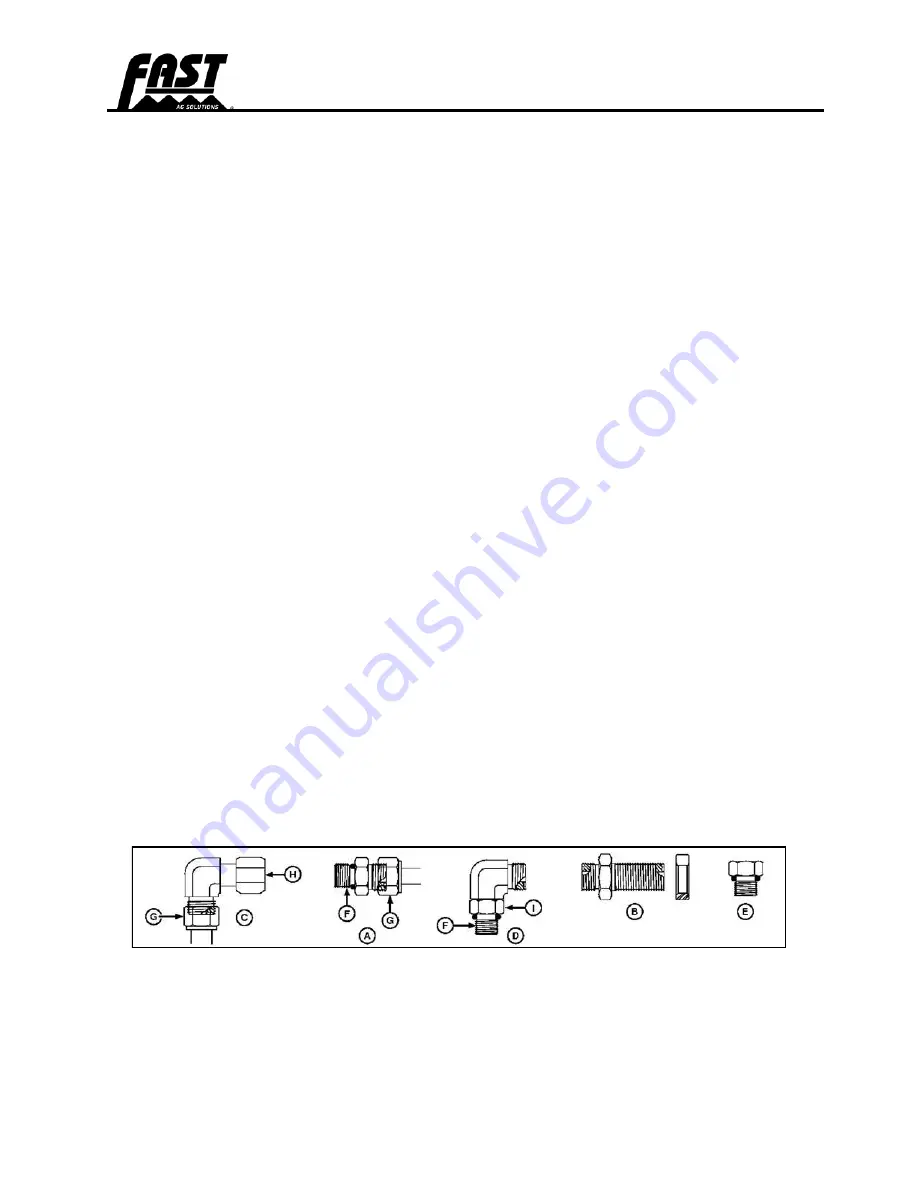
Figure 29: Common hydraulic fitting shapes and components
A.
Stud Straight and Tube Nut
B.
Bulkhead Union and Bulkhead Lock
Nut
C.
90° Swivel Elbow and Tube Nut
D.
90° Adjustable Stud Elbow
E.
Port Plug
F.
Stud End
G.
Tube Nut
H.
Swivel Nut
I.
Lock Nut
Содержание 973PT
Страница 1: ...973PT 120 132 3PT SPRAYER OWNER S MANUAL...
Страница 2: ...820071 973PT 120 132 3PT Sprayer 2023 12 01...
Страница 33: ...SAFETY SAFETY 3PT Sprayer 973PT Page 33...
Страница 34: ...SAFETY SAFETY 3PT Sprayer 973PT Page 34 Main Frame...
Страница 35: ...SAFETY SAFETY 3PT Sprayer 973PT Page 35...
Страница 57: ...SPRAYER CALIBRATION SPRAYER CALIBRATION 3PT Sprayer 973PT Page 57 Table 3 Common conversions...
Страница 58: ...SPRAYER CALIBRATION SPRAYER CALIBRATION 3PT Sprayer 973PT Page 58 Table 4 Nozzle flow rates...
Страница 59: ...SPRAYER CALIBRATION SPRAYER CALIBRATION 3PT Sprayer 973PT Page 59 Table 5 Ground speed calibration...


