Com.X Administrator Guide
Page 69
3.4.1 Configured devices
The list of configured devices is displayed on the hardware panel. Devices are
classified as follows:
•
Generic devices – the IP address and/or MAC address of the device is
known, and the Com.X GUI provides proxy web access to the device. This
class supports generic IP phones, ADSL routers, etc.
•
Comma devices – built in telephony hardware and Comma iTA devices
•
Managed SIP devices – supported IP phone types that are fully managed by
the Com.X
For each device, the device name, type, model, MAC address and Auto IP values are
listed. Where available, the device IP address and current status are also listed.
3.4.2 Detecting and scanning for devices
The Com.X unit can detect network devices present on all networks attached to it. By
default, devices requesting either DHCP IP information, internal telephony devices
and external Comma iTA devices are automatically added to the list of detected
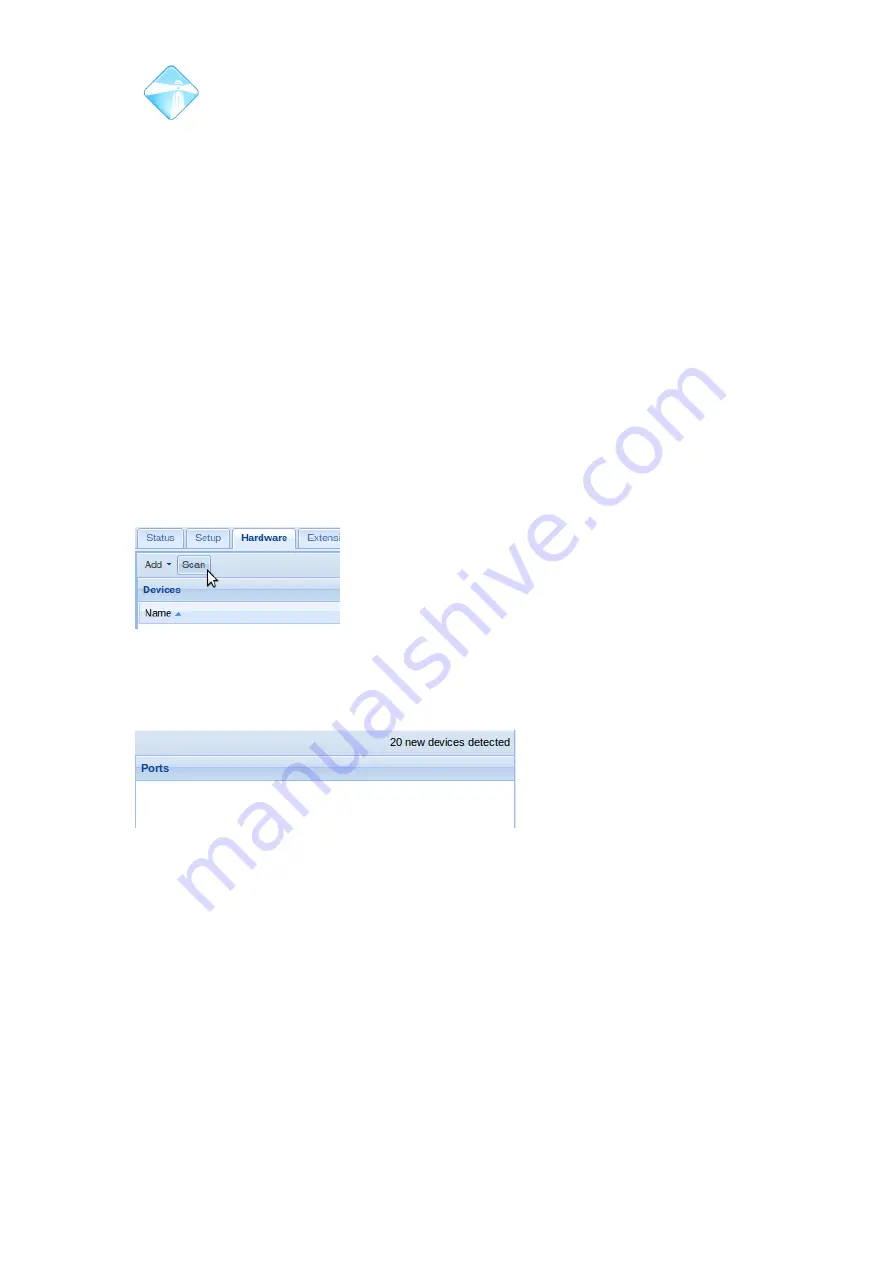
devices. A scan of all network interfaces can also be initiated by selecting the Scan
button. This process may take a couple of minutes.
Figure 64: The network can bge scanned for devices from the Hardware panel.
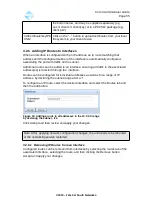
The number of devices detected is displayed in the top right corner of the Hardware
panel. To add detected devices to the configuration, select the Add menu item
followed by the Detected menu item.
Figure 65: The number of detected devices is displayed on the Hardware panel.
Scanning the network increases the number of detected devices.
This results in a list of detected devices from which one can be selected for
configuration. Where available, the existing MAC address, device type, model, IP
address and vendor information is listed.
3.4.3 Adding Detected Devices
Once a device has been detected by the Com.X, navigate to “Add” then “Detected”
and select the device from the list. If the network was scanned to detect the handset,
then the list of detected devices will include several devices and the correct handset
must be selected. Select the appropriate handset and click OK.
©2010 –
2016
Far South Networks
Содержание Com.X
Страница 34: ...Com X Administrator Guide Page 34 Figure 26 Global Settings 2010 2016 Far South Networks ...
Страница 99: ...Com X Administrator Guide Page 99 3 7 4 2 Advanced configuration 2010 2016 Far South Networks ...
Страница 110: ...Com X Administrator Guide Page 110 Figure 92 SIP trunk basic configuration options 2010 2016 Far South Networks ...


