Version 1.0
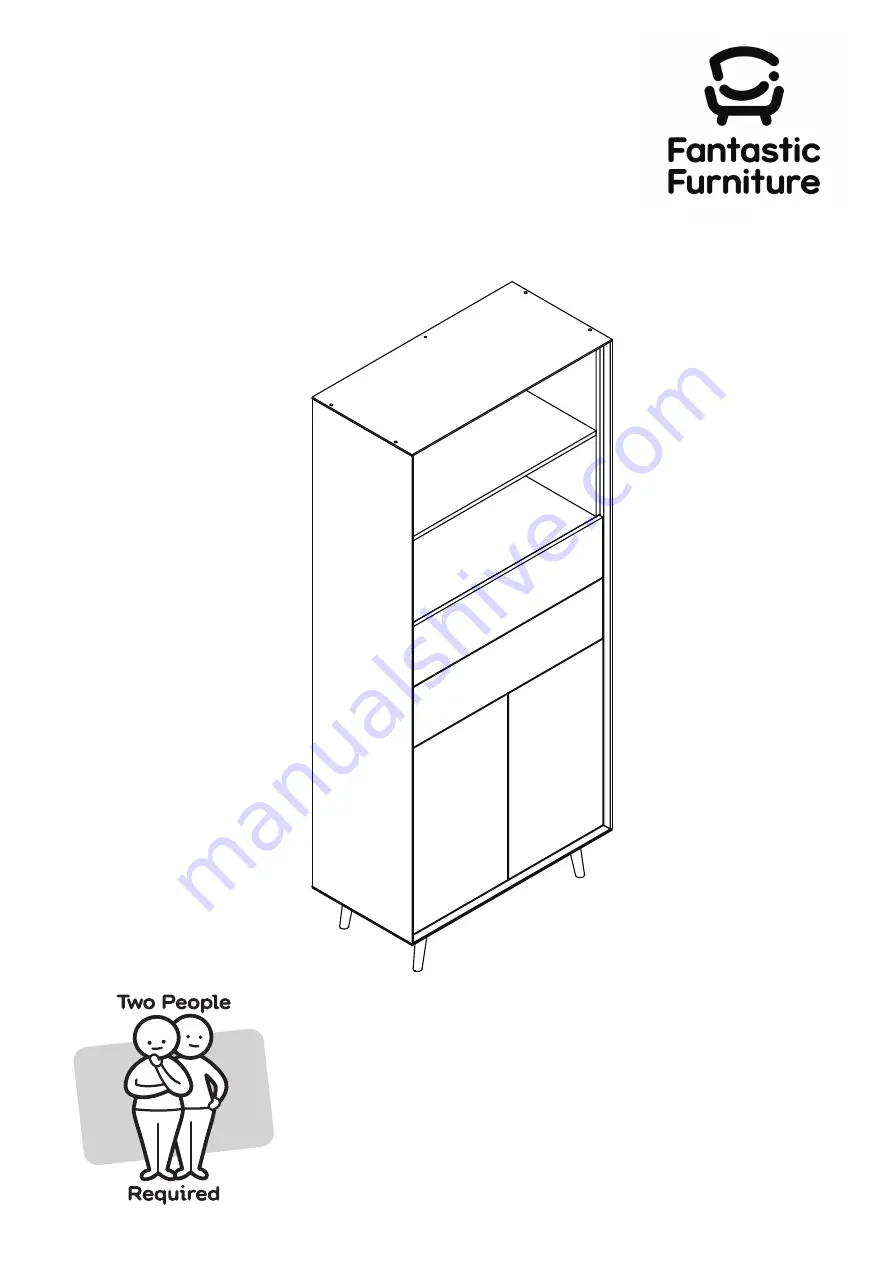
STOCKHOLM
BOOKCASE LARGE WIDE
fantasticfurniture.com.au
Страница 1: ...Version 1 0 STOCKHOLM BOOKCASE LARGE WIDE fantasticfurniture com au...
Страница 2: ...URE THE WALL STRAP IS ATTACHED TO AVOID SERIOUS INJURY To avoid any serious or fatal injury this product has been supplied with a wall strap to prevent toppling We strongly recommend that this product...
Страница 3: ...o avoid scratching or damaging the surface of the product Bulky items such as wardrobes and bunk beds should be assembled in the room they will be used in as they may not fit through a door once assem...
Страница 4: ...Panels P9 Back Panel P10 2 x Back Panels P11 Rail P12 Rail P13 Rail P14 2 x Doors P15 Shelf Panel P16 2 x Drawer Fronts P17 2 x Left Drawer Sides P18 2 x Right Drawer Sides P19 2 x Rails P20 2 x Draw...
Страница 5: ...el P3 and Right Side Panel P4 with 12 x Screws H16 by tightening with the Phillips Head Screwdriver Attach 2 x CL Runner Tracks H6 to Left Side Panel P3 and 2 x CR Runner Tracks H7 to Right Side Panel...
Страница 6: ...s ensure all Cam Nuts are on the bottom of each shelf panel except for the Inner Top Panel which should face upwards Attach 4 x Catches H13 to each side of Rail P14 and Rail P13 with 16 x Small Screws...
Страница 7: ...ls P12 P13 P14 and attach to Right Side Panel P4 by tightening each Cam Nut with the Phillips Head Screwdriver Slide 2 x Back Panels P9 and Back Panels P10 P11 into the grooves of Inner Top Shelf Pane...
Страница 8: ...rews H2 Insert 4 x Dowels H1 into the top of Left Right Side Panels P3 P4 and secure Top Panel P1 to the top of the unit with 4 x Long Screws H2 by tightening with the Phillips Head Screwdriver Slide...
Страница 9: ...t Right Side Panels P3 P4 and secure Bottom Panel P2 to the bottom of the unit with 4 x Long Screws H2 by tightening with the Phillips Head Screwdriver You will need Step 9 Phillips Head Screwdriver 4...
Страница 10: ...rewdriver Step 11 Phillips Head Screwdriver You will need Phillips Head Screwdriver 8 x Small Screws H10 16 x Small Screws H10 H11 H10 x 2 P3 P4 H11 H10 H13 H11 H10 To open the door firmly press the m...
Страница 11: ...Fronts P17x2 by tightening Cam Nuts with the Phillips Head Screwdriver Attach 10 x Cam Bolts H3 and 2 x Pin Screws H12 to both Drawer Fronts P17x2 by tightening with the Phillips Head Screwdriver Phi...
Страница 12: ...llips Head Screwdriver Before securing Ensure the Bottom Panel lines up with the grooves the whole way around the drawer H16 H16 H16 Slide the Drawer Bases P21x2 into the grooves of Left Right Drawer...
Страница 13: ...Step 17 P17 x 2 Step 18 You will need To open the drawer firmly press the middle of the drawer front to trigger the Catch to bounce the drawer open If the drawer does not pop open when pressed or is...
Страница 14: ...Head Screwdriver 1 x Safety Strap H19 1 x Safety Strap Screw H20 1 x Washer H21 8 x Wedges H17 8 x Wedge Screws H18 Step 19 You will need Step 20 Phillips Head Screwdriver 1 x Washer H21 Move the boo...