Version 1.0
STOCKHOLM
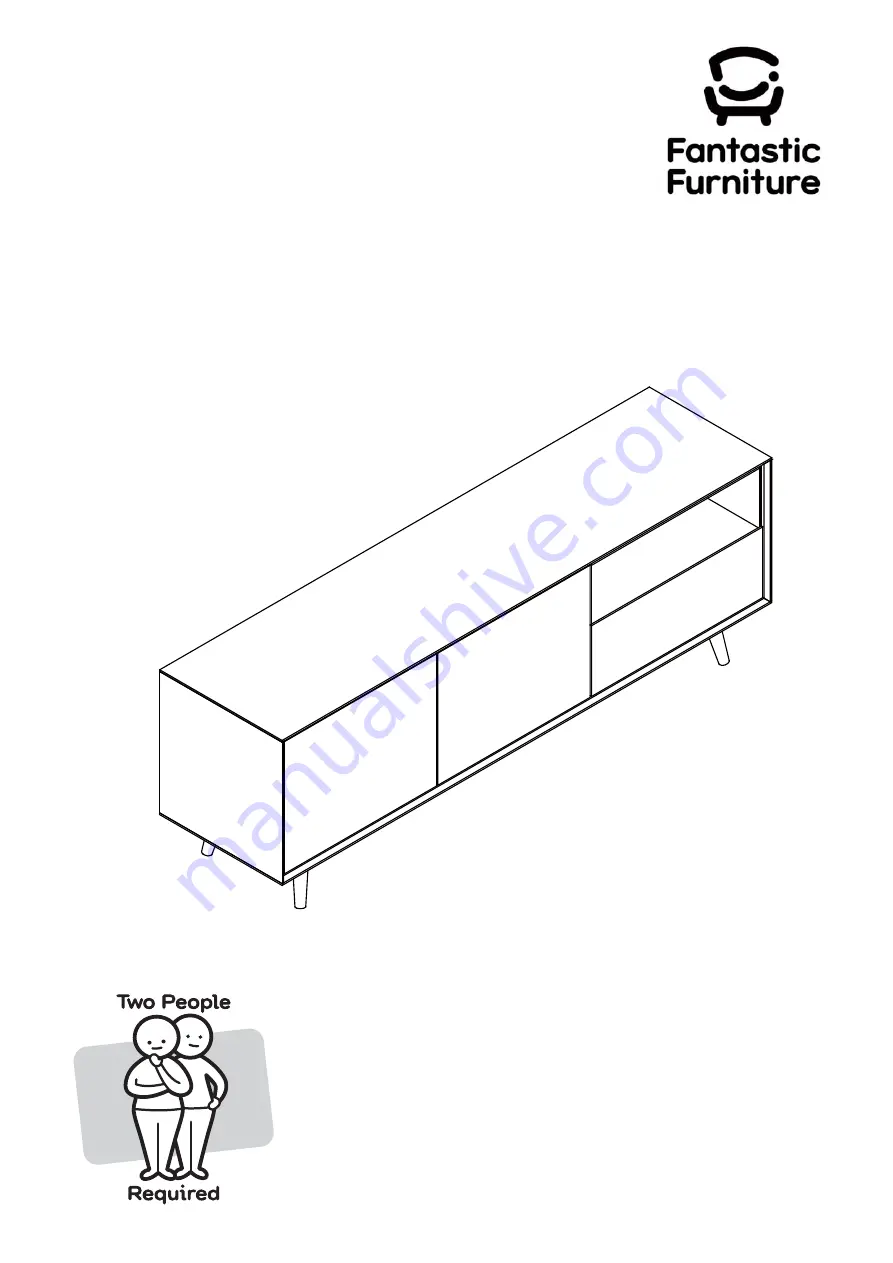
LOWLINE MEDIUM 1600MM
fantasticfurniture.com.au
Страница 1: ...Version 1 0 STOCKHOLM LOWLINE MEDIUM 1600MM fantasticfurniture com au...
Страница 2: ...SURE THE WALL STRAP IS ATTACHED TO AVOID SERIOUS INJURY To avoid any serious or fatal injury this product has been supplied with a wall strap to prevent toppling We strongly recommend that this produc...
Страница 3: ...o avoid scratching or damaging the surface of the product Bulky items such as wardrobes and bunk beds should be assembled in the room they will be used in as they may not t through a door once assembl...
Страница 4: ...eft Drawer Sides P19 Right Drawer Sides P20 Drawer Bases P21 Hardware pack Left Drawer Side P19 Right Drawer Side P20 Drawer Back P18 Drawer Base P21 Drawer Front P17 16 x Cam Bolts H3 16 x Cam Nuts H...
Страница 5: ...H5 1 x CR Runner Track H7 6 x Small Screws H5 Phillips Head Screwdriver P8 P1 H3 P3 H7 H5 12 x Cam Bolts H3 PAGE 5 fantasticfurniture com au Step 2 You will need Attach 1 x CL Runner Track H6 to Shel...
Страница 6: ...crews H10 Step 4 You will need Attach 2 x Hinges H11 H12 and 2 x Screws H13 to Doors P13 P14 securing with 8 x Small Screws H10 Tighten with a Phillips Head Screwdriver Phillips Head Screwdriver 12 x...
Страница 7: ...and Shelf Panel P8 to Shelf Panel P6 with 4 x Dowels H1 and secure with 4 x Cam Nuts H4 Tighten with a Phillips Head Screwdriver P3 P8 P6 H1 H4 H4 P2 P3 P8 P7 P4 4 x Cam Nuts H4 Phillips Head Screwdri...
Страница 8: ...Legs P16 to Bottom Panel P4 and secure with 16 x Bolts H15 Tighten with an Allen Key H16 Insert the 2 x Adjusters H24 into the middle Support Legs P16 Step 7 You will need P16 P4 P9 P9 P10 P3 P2 P7 P8...
Страница 9: ...anel P2 Right Side Panel P3 Shelf Panel P7 and Shelf Panel P8 with 8 x Dowels H1 and secure with 8 x Cam Nuts H4 Tighten with a Phillips Head Screwdriver You will need Step 9 H1 H4 H1 H4 P1 P3 P2 P7 P...
Страница 10: ...P11 against Top Panel P1 then slide Rail P11 between Shelf Panel P12 and Top Panel P1 to form the unit as shown Attach Rail P11 to Top Panel P1 with 2 x Screws H17 Tighten with a Phillips Head Screwdr...
Страница 11: ...iver Secure Door Panels P13 P14 to the main unit by attaching the other end of the 2 x Hinges H11 H12 with 16 x Small Screws H10 as shown Tighten with a Phillips Head Screwdriver P17 H3 P13 P14 H12 H1...
Страница 12: ...laminated side of panel is facing inwards Step 16 Attach Drawer Sides P19 P20 to Drawer Front P17 Insert 4 x Cam Nuts H4 into the holes of Drawer Sides P19 P20 Make sure the opening on cam nuts point...
Страница 13: ...ttach 1 x DL Runner H8 to Left Drawer Side P19 and 1 x DR Runner H9 to Right Drawer Side P20 with 4 x Small Screws H5 using a Phillips Head Screwdriver 4 x Small Screws H5 1 x DL Runner H8 1 x DR Runn...
Страница 14: ...re it is rmly attached and snug t Step 21 You will need P9 P9 P10 H22 Screw Wall Step 20 Phillips Head Screwdriver 1 x Safety Strap H20 1 x Screw H21 You will need 1 x Washer H22 12 x Wedges H18 12 x...
Страница 15: ...Job Complete In the interest of our environment please dispose of all packaging thoughtfully fantasticfurniture com au PAGE 15...