fantasticfurniture.com.au
Sonoma
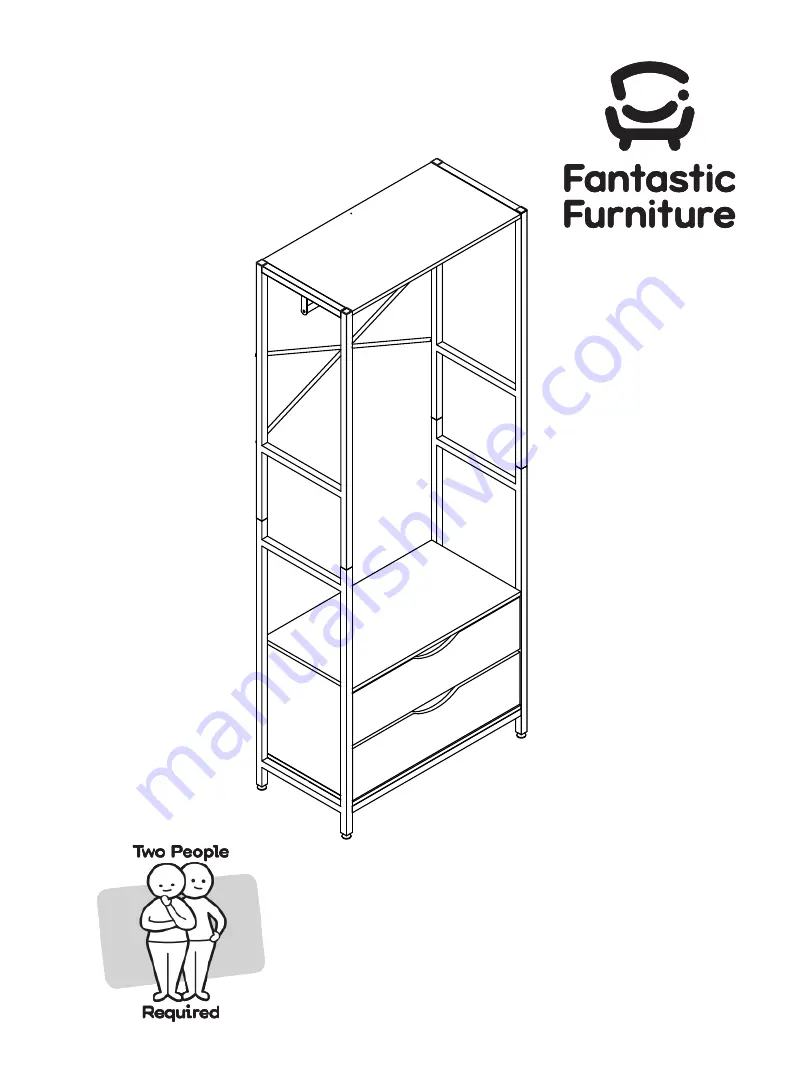
Clothes Rack 2 Drawer
Version 1.0
Страница 1: ...fantasticfurniture com au Sonoma Clothes Rack 2 Drawer Version 1 0 ...
Страница 2: ...tagram for your chance to win a 250 Fantastic Furniture Gift Card fantasticfurniture Weight Limit 20kgs per shelf Warning Ensure the wall strap is attached to avoid serious injury To a void any serious of fatal injury a wall strap has been provided with this product to prevent topping We strongly recommend that this product is permanently fixed to the wall or other suitable surface Fixing of what ...
Страница 3: ...g hardware or getting components back to front Always use a so t surface such as carpet or cardboard when assembling your product to avoid scratching or damaging the surface of the product Bulky items such as wardrobes and bunk beds should be assembled in the room they will be used in as they may not fit through a door once assembled Never use any glue until you are certain that the parts belong t...
Страница 4: ...s H8 Tracks H9 H10 Tracks H11 H12 4 x Adjustable 28 x Screws 12 x Screws H13 H14 Other tools you need Phillips Head screwdriver Hammer 1 x Allen Key Top Panel P1 2 x Base Rails P2 Top Left Frame P3 Lower Left Frame P4 Top Right Frame P5 Lower Right Frame P6 2 x Back Supports P7 Hanging Rail P8 Drawer Top Panel P9 Base Panel P10 Left Side Panel P11 Right Side Panel P12 Back Panel P13 2 x Drawer Lef...
Страница 5: ...rews H3 by Repeat steps for Top Lower Right Frames P5 P6 Secure 4 x Adjustable Feet H1 to the bottom of Lower Left Right Frames P4 P6 as shown You will need H15 H15 H3 8 x Screws H15 P1 P3 P3 P4 P5 P6 P2 P2 P1 P2 P2 P4 P4 P4 P2 P4 P2 H3 H3 H15 H3 H3 H3 H3 H3 H3 H3 H3 Allen Key H3 Attach Top Lower Left Frames P3 P4 and Top Lower Right Frames P5 P6 to Top Panel P1 and Base Rails P2x2 with 8 x Screws...
Страница 6: ...Screws Allen Key Secure Back Supports P7x2 together as shown with 1 x Nut H4 and 1 x Screw H2 by Attach Back Supports P7x2 to Top Left Right Frames P3 P5 as shown with 4 x Screws H2 by tightening with the Allen Key H15 Secure Hanging Rail P8 to Top Left Right Frames P3 P5 as shown with 2 x Screws H3 by tightening with the Allen Key H15 Step 3 1 x Wrench H19 tightening with the Allen Key H15 and Wr...
Страница 7: ...7 H13 H13 P11 H5 H13 H13 H13 Insert 4 x Dowels H7 and 4 x Cam Nuts H5 into Left Side Panel P11 as shown Attach 2 x CL Runner Tracks H9 to Left Side Panel P11 with 8 x Screws H13 as shown by tightening with the Phillips Head Screwdriver Attach 2 x CR Runner Tracks H11 to Right Side Panel P12 with 8 x Screws H13 as shown by tightening with the Phillips Head Screwdriver Insert 4 x Dowels H7 and 4 x C...
Страница 8: ...6 H6 H6 H6 H6 H6 H6 H6 H6 P9 P10 Attach 8 x Cam Bolts H6 to Drawer Top Panel P9 and Base Panel P10 as shown by tightening with the Phillips Head Screwdriver Rotate the Cam Nuts so the arrows point towards the incoming Cam Bolts Secure the Drawer Top Panel P9 and Base Panel P10 to Left Right Side Panels P11 P12 as shown by tightening 8 x Cam Nuts H5 with the Phillips Head Screwdriver fantasticfurni...
Страница 9: ... P4 P6 P4 Gently place the partially assembled drawer unit into the shelving frame as shown Secure the Base Panel P10 to Lower Left Right Frames P4 P6 and Base Rails P2x2 with 6 x Screws H3 by tightening with the Allen Key H15 Secure Back Panel P13 to the back of the partially assembled drawer unit as shown with 20 x Nails approximately 5mm from the edge using the Hammer Ensure the Back Panel is s...
Страница 10: ...ront P14 by tightening with the Phillips Head Screwdriver Repeat steps for the second Drawer Secure Left Right Drawer Sides P15 P16 to Back Panel P17 with 4 x Screws H14 by tightening with the Phillips Head Screwdriver Attach Drawer Support Panel P19 to Back Panel P17 with 2 x Screws H14 by tightening with the Phillips Head Screwdriver Repeat steps for the second Drawer Phillps head Screwdriver Ph...
Страница 11: ...econd Drawer Slide Drawer Base P18 into the grooves of Left Right Drawer Sides P15 P16 and Back Panel P17 Insert 5 x Cam Nuts H5 into Left Right Drawer Sides P15 P16 and Drawer Support Panel P19 as shown Rotate the Cam Nuts so the arrows point towards the incoming Cam Bolts Secure the Repeat steps for the second Drawer Step 14 Step 13 Phillps head screwdriver Drawer Front P14 toDrawer Lef t Right ...
Страница 12: ...m a n e n t l y fi x e d t o t h e w a l l o r o t h e r s u i t a b l e s u r f a c e F i x i n g d e v i c e s a r e n o t i n c l u d e d s i n c e d i e r e n t s u r f a c e m a t e r i a l s r e q u i r e d i e r e n t a t t a c h m e n t s P l e a s e s e e k p r o f e s s i o n a l a d v i c e i f y o u a r e i n d o u b t o f w h a t fi x i n g d e v i c e t o u s e C O U N T R Y O F O R ...
Страница 13: ...t t e d w i t h a w a l l s t r a p t o p r e v e n t t o p p l i n g W e s t r o n g l y r e c o m m e n d t h a t t h i s p r o d u c t i s p e r m a n e n t l y fi x e d t o t h e w a l l o r o t h e r s u i t a b l e s u r f a c e F i x i n g d e v i c e s a r e n o t i n c l u d e d s i n c e d i e r e n t s u r f a c e m a t e r i a l s r e q u i r e d i e r e n t a t t a c h m e n t s P l e...