Eden
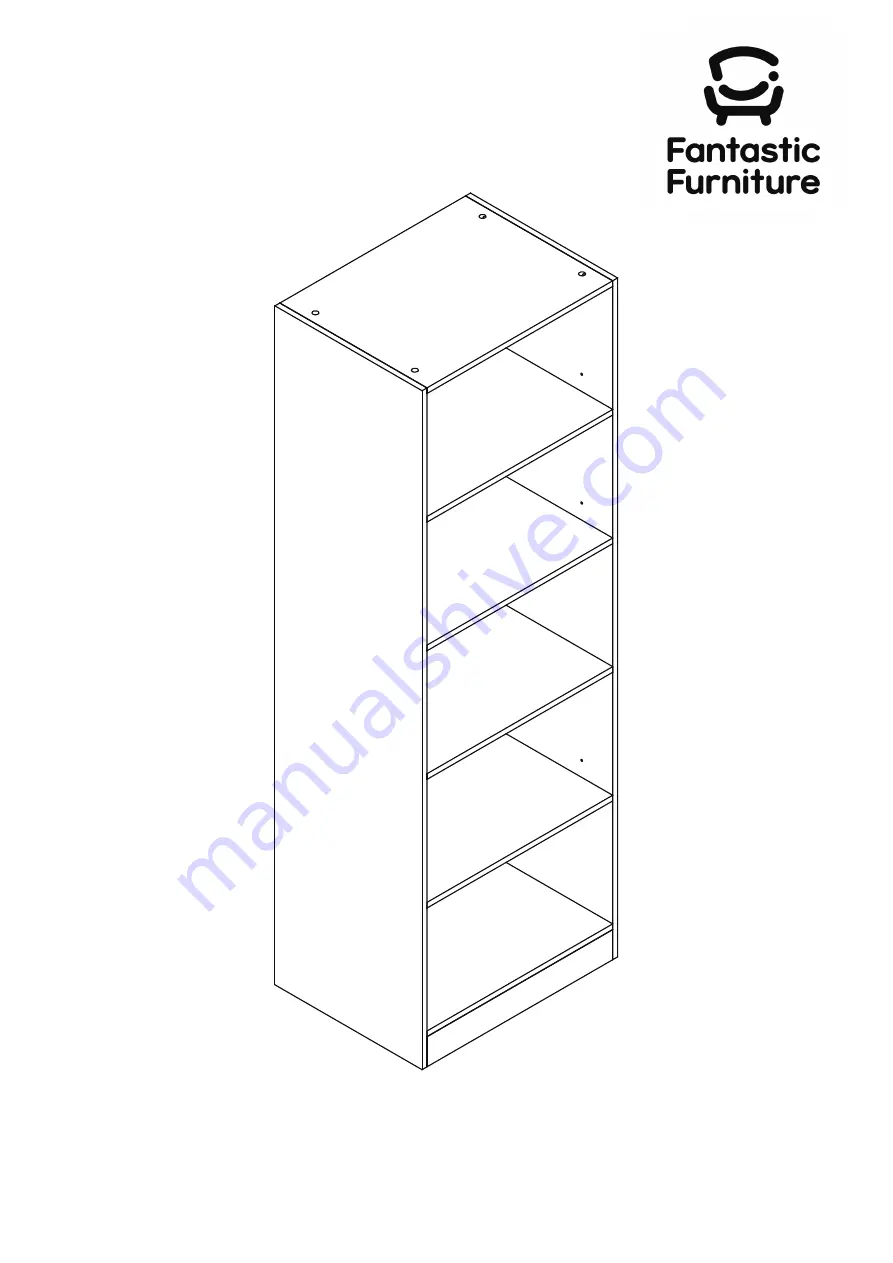
Utility 5 Shelf
fantasticfurniture.com.au
Version 1.0
Страница 1: ...Eden Utility 5 Shelf fantasticfurniture com au Version 1 0 ...
Страница 2: ...ent toppling We strongly recommend that this product is permanently fixed to the wall or other suitable sur face Connecting attachments for your wall are not included since different surface materials require different attachments Please seek professional advice if you are in doubt of what wall connections to use Recommended weight capacity 15kg Shelf Love it Share it Fantastic buy Share how it loo...
Страница 3: ...to avoid scratching or damaging the surface of the product Bulky items such as wardrobes and bunk beds should be assembled in the room they will be used in as they may not fit through a door once assembled Never use any glue until you are certain that the parts belong together Periodically check and re tighten all fasteners Check the product care label or website for product care instructions If yo...
Страница 4: ... Panel P5 Shelf Panel P4 Right Side Panel P3 Left Side Panel P2 Rail P7 Rail P7 Back Panel P6 Back Panel P8 Back Panel P8 Back Panel P6 What you need to assemble the product Other tools you need Phillips head screwdriver Hammer Page 4 fantasticfurniture com au DO NOT USE 16 x Dowels H1 12 x Screws H2 16 x Cam Bolts H3 16 x Cam Nuts H4 12 x Shelf Supports H5 12 x Wedges H7 4 x Plastic Glides H6 1 x...
Страница 5: ...as shown by tightening with the Phillips Head Screwdriver fantasticfurniture com au Page 5 8 x Cam Bolts H3 Phillips Head Screwdriver Phillips Head Screwdriver Attach 8 x Cam Bolts H3 to Right Side Panel P3 as shown by tightening with the Phillips Head Screwdriver H3 H3 H3 H3 H3 H3 H3 H3 H3 H3 H3 H3 H3 H3 H3 H3 ...
Страница 6: ...er the bolt Step 4 Step 3 You will need Phillips Head Screwdriver 8 x Cam Nuts H4 8 x Dowels H1 Insert 8 x Dowels H1 into Left Side Panel P2 Insert 8 x Cam Nuts H4 into Top Base Panels P1 x 2 Fixed Shelf Panel P5 and Rails P7 x 2 Rotate the nuts so the arrows point towards the incoming bolts Attach Top Base Panels P1 x 2 Fixed Shelf Panel P5 and Rails P7 x 2 to Left Side Panel P2 by tightening all...
Страница 7: ... 8 x Dowels H1 4 x Plastic Glides H11 Insert 8 x Dowels H1 into Top Base Panels P1 x 2 Fixed Panel P5 and Rails P7 x 2 Insert 8 x Cam Nuts H4 into Top Base Panels P1 x 2 Fixed Shelf Panel P5 and Rails P7 x 2 Rotate the nuts so the arrows point towards the incoming bolts Attach Right Side Panel P3 to Top Base Panels P1 x 2 Fixed Shelf Panel P5 and Rails P7 x 2 by tightening all nuts with the Philli...
Страница 8: ...ure eash shelf is positioned securely Secure Back Panels P6 x 2 P8 x 2 in place with 12 x Wedges H7 using 12 x Wedge Screws H2 by tightening with the Phillips Head Screwdriver P3 P3 P4 P4 P4 P2 P2 P6 P6 P8 P1 P8 fantasticfurniture com au Page 8 H7 H2 H5 12 x Shelf Supports H5 You will need Step 8 Phillips Head Screwdriver 12 x Wedges H7 12 x Wedge Screws H2 Align the Shelf Support to the hole of A...
Страница 9: ...ewdriver H10 wall Screw Move the unit to the final position and attach the safety strap to the wall securely Make sure it is firmly attached and snug fit Seek advice from a qualified trades person on how to attach this safety strap to your specific wall You will need Step 10 Phillips Head Screwdriver 1 x Washer H10 Screw and Wall Plug are not provided Please use appropriate fixtures for your wall You wi...