OWNER’S MANUAL
Model No. FPS7967**
The Embrace
™
Ceiling Fan
READ AND SAVE THESE INSTRUCTIONS
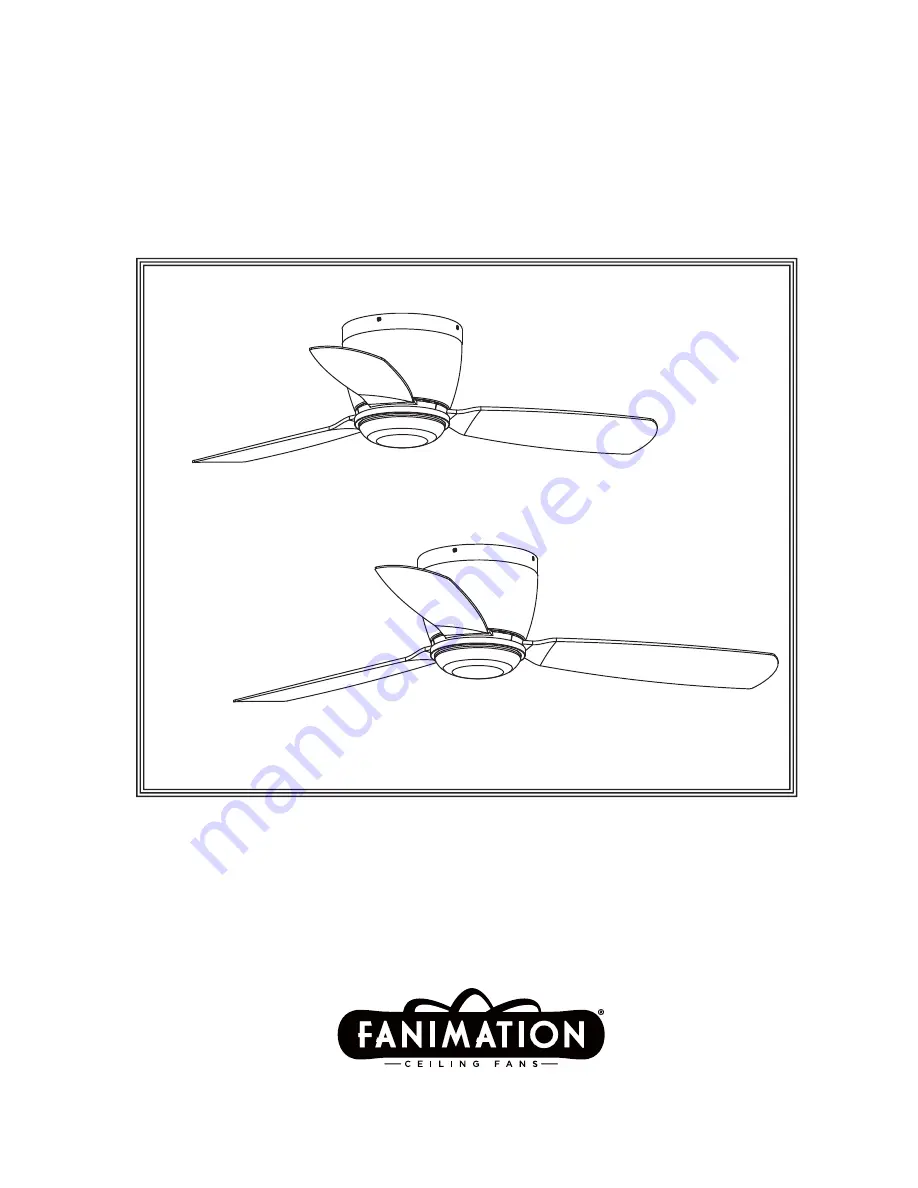
FPS7967** 44”Net Weight 23.68 lbs (10.74 kg)
FPS7967** 52”Net Weight 23.68 lbs (10.74 kg)
Страница 1: ...OWNER S MANUAL Model No FPS7967 The Embrace Ceiling Fan READ AND SAVE THESE INSTRUCTIONS FPS7967 44 Net Weight 23 68 lbs 10 74 kg FPS7967 52 Net Weight 23 68 lbs 10 74 kg ...
Страница 2: ... to the ceiling fan before servicing 4 Do not insert anything into the fan blades while the fan is operating 5 Do not operate reversing switch until fan blades have come to a complete stop Additional Safety Instructions 1 To avoid possible shock be sure electricity is turned off at the fuse box before wiring and do not operate fan without blades 2 All wiring and installation procedures must satisf...
Страница 3: ...eiling Fan How to Wire Your Ceiling Fan Remote Control 8 8 How to Assemble the Ceiling Fan Blade How to Assemble the Light Kit 10 How to Operate Your Ceiling Fan 11 9 How to Assemble Your Ceiling Fan 9 Maintenance 12 Blade Cleaning 12 How to Install Your Remote Control 12 Trouble Shooting 13 Parts List 14 Exploded View Illustration 15 ...
Страница 4: ... ODGH ROGHU 6HW ODVV ODGH 6HW Ý ODGH 6HW Ý XOE HOG 5HPRWH Fan Motor Assembly Housing Socket Plate Assembly Light Plate Assembly Steel Cap Assembly Bulb Glass Blade Set 52Þ Blade Set 44Þ Blade Holder Set 2QH 3KLOOLSV KHDG VFUHZGULYHU 2QH VWHSODGGHU 2QH óÝ EODGH VFUHZGULYHU 2QH ZLUH VWULSSHU Three wire connectors supplied DUGZDUH EDJV Four Wire Connectors 6HYHQ Ý PP 3KLOOLSV HDG 6FUHZV ZLWK RFN DVKH...
Страница 5: ...ch forces warm air near the ceiling down into the occupied space Remember to adjust your thermostat when using your ceiling fan additional energy and dollar savings could be realized with this simple step Electrical and Structural Requirements Your new ceiling fan will require a grounded electrical supply line of 120 volts AC 60 HZ 15 Amp Circuit Electrical code requires use of a fan rated outlet ...
Страница 6: ... reduce the risk of fire electrical shock or personal injury mount fan to outlet box marked acceptable for fan support of 15 88 kg 35 lbs or less Use screws supplied with outlet box Most outlet boxes commonly used for support of light fixtures are not acceptable for fan support and may need to be replaced Consult a qualified electrician if in doubt WARNING No blocking Figure 3 Paired with a deep b...
Страница 7: ...are not sure if the outlet box is grounded contact a licensed electrician for advice as it must be grounded for safe operation ʆWARNING The fan must be hung with at least 7 of clearance from floor to blades Figure 1 Floor Ceiling No less than 7 ft Figure 2 Figure 3 NOTE Supply wires omitted for clarity Outlet Box Ceiling Bracket Assembly 2 Remove the four screws and hex nuts from the ceiling brack...
Страница 8: ...code switches to your choice of up or down position Factory setting is all up Do not use this position With a small screwdriver or ball point pen slide firmly up or down Figure 1a Replace battery cover on the transmitter 3 Receiver Slide code switches to the same positions as set on your transmitter Figure 1b Receiver Unit Detail Figure 1b How to Wire Your Ceiling Fan 1 Connect the green grounding...
Страница 9: ...g Fan Blades x 9 x 9 FLAT WASHER WASHER HEAD SCREWS HARDWARE USED 1 Position the blade over the blade holder with threaded posts showing Make sure the bottom edge of the blade is fully seated against the blade holder With a phillips screwdriver tighten 3 16Ý 24 x 15 mm washer head screws and flat washers to secure the blade to the blade holder Figure 1 Do not connect fan blades until the fan is co...
Страница 10: ...stalling light kit CAUTION Blade Holder Motor Assembly Figure 2 Ý PP Screws 2 per assembly Motor Assembly Figure 2 1 Remove one of the three screws in the support bracket at the bottom of the motor assembly Slightly loosen the remaining two screws Assemble the light plate assembly to the support bracket using the two key slots in the light plate Replace the third screw and securely tighten all thr...
Страница 11: ... If you want to install the steel cap and not the light kit Assemble the steel cap to the light plate assembly by twisting in a clockwise direction Figure 4B NOTE If you have installed your fan with the steel cap skip steps 5 5 Secure the glass to light plate assembly by twisting in a clockwise direction Do not over tighten Figure 5 3V CR2032 BATTERY 2PCS REMOTE CONTROL How to Operate Your Ceiling...
Страница 12: ...ure 2 1 Unthread two screws from the wall switch plate Figure 1 2 Install the control bracket with two 6 32x 3 4 screws And push the four plastic plug to cover the screw holes Including in the control Figure 2 Figure 1 Figure 1 Figure 2 Figure 1 Figure 2 12 Maintenance Blade Cleaning Periodic cleaning of your new ceiling fan is the only maintenance that is needed When cleaning use only a soft brus...
Страница 13: ...e operating 2 Check to make sure all screws in motor housing are snug not over tight 3 Check to make sure the screws which attach the fan blade to the blade arm with holder are tight 4 Check to make sure wire connectors in motor housing are not rattling against each other or against the interior wall of the housing CAUTION Make sure main power is turned off 5 Some fan motors are sensitive to signa...
Страница 14: ... AMA7967 1 HLOLQJ UDFNHW VVHPEO AP796701 Housing 3 Blade Holder Set 4 P796703 AP796702 5 Blade Set 44 Blade Set 52 AP796744 6 AP796752 7 ODVV VVHPEO 8 6RFNHW 3ODWH VVHPE AP796705 33 1 9 LJKW XOE PPE11B100 AP796706 6WHHO DS VVHPEO Hand Held Remote Control TR20WH 11 10 Receiver REC7967 12 13 Hardware Bags Containing Wire Connectors 4 Ý PP 3KLOOLSV HDG 6FUHZV ZLWK RFN DVKHUV 3 16Ý PP DVKHU HDG 6FUHZV...
Страница 15: ...15 NOTE FPS7967 Exploded View Figure 1 2 13 13 13 11 3 6 12 4 7 8 9 10 13 5 1 ...
Страница 16: ...10983 Bennett Parkway Zionsville IN 46077 Toll Free 888 567 2055 FAX 866 482 5215 Outside U S call 317 733 4113 Visit Our Website www fanimation com Copyright 2013 Fanimation 2013 10 V 01 ...
Страница 17: ...The Embrace Ventilador de techo FPS7967 44 Peso neto 23 68 kg 10 74 lbs FPS7967 52 Peso neto 23 68 kg 10 74 lbs Modelo N º FPS7967 MANUAL DEL PROPIETARIO LEA Y GUARDE ESTAS INSTRUCCIONES ...
Страница 18: ...as del ventilador deben instalarse por lo menos a 2 13 m 7 pies del suelo a fin de evitar un contacto accidental con las mismas 4 Siga las recomendaciones sobre el método correcto de instalación eléctrica de su ventilador de techo Si no posee la experiencia o 5 los conocimientos eléctricos adecuados contrate a un electricista autorizado para instalar el ventilador Apto para usar con controles de v...
Страница 19: ...ventilador Fanimation Tabla de contenidos Instrucciones para el desempaque 20 21 Requisitos eléctricos y estructurales 21 Cómo colgar el ventilador de techo 23 Cómo realizar la instalación eléctrica del ventilador de techo mando a distancia 24 Cómo realizar la instalación eléctrica del ventilador de techo 24 Cómo ensamblar los Aspas 25 7 Fanimation se reserva el derecho de modificar o discontinuar...
Страница 20: ...GLGD TXH FRPSOHWD FDGD SDVR FRORTXH XQD PDUFD GH YHUL FDFLyQ RQ HVWR VH DVHJXUDUi GH FRPSOHWDU WRGRV ORV SDVRV SRGUi VDEHU GHVGH GyQGH UHWRPDU VL IXHUD LQWHUUXPSLGR r o d a l i t n e v l e d r o t o m l e d d a d i n U Ŗ Ŗ 7PKFCF FG UQRQTVG FGN XGPVKNCFQT Unidad de soporte del ventilador Ŗ CTECUC Carcasa Ŗ PUCODNG FG NC RNCEC FG KNWOKPCEKÎP Ŗ PUCODNG FG NC RNCEC FGN RQTVCN ORCTC Ŗ XHJR GH VRSRUWH ...
Страница 21: ...ectainstalación yuso Acontinuaciónlepresentamosalgunassugerencias para asegurar un rendimiento eficiente del producto Selección del lugar de montaje adecuado Los ventiladores de techo se deben instalar en el centro de la habitación a 2 13 m 7 pies de altura del piso como mínimo y 0 5 m 18 pulgadas de las paredes Si la altura del techo lo permite instale el ventilador a 2 5 m 8 9 pies por encima de...
Страница 22: ...gar el interruptor de pared no es suficiente Para evitar posibles descargas eléctricas asegúrese de que la electricidad esté desconectada en la caja de fusibles principal antes de realizar la instalación eléctrica Toda instalación eléctrica debe cumplir con los códigos nacionales y locales y el ventilador de techo debe tener la conexión a tierra adecuada como forma de precaución ante posibles desc...
Страница 23: ...sesoramiento a un electricista autorizado ya que la conexión a tierra es fundamental para un funcionamiento seguro ADVERTENCIA Las aspas del ventilador deben estar suspendidas al menos a 2 m 7 del piso Figura 1 23 Figura 1 Figura 2 Figura 3 Unidad de soporte de techo 2 Extraiga los cuatro tornillos y las tuercas hexagonales de la Guárdelos para después Figura 3 Figura 4 Tornillos para cajas de con...
Страница 24: ...erencias desde o hacia otras unidades de control remoto como la de apertura de puertas del garaje la alarma del auto o sistemas de seguridad simplemente cambielacombinacióndelcódigoensutransmisoryreceptor Para configurar el código siga los siguientes pasos 2 Transmisor retire la cubierta de la batería Presione firmemente la flecha que se encuentra debajo y deslice para retirar la cubierta de la ba...
Страница 25: ...cada uno por aspa Aspas Figura 1 Cómo realizar la instalación eléctrica del ventilador de techo cont Unidad de soporte del ventilador Unidad de soporte del ventilador Unidad de motor 1 Coloque el aspa sobre el soporte de aspas con los pilotes roscados a la vista Asegúrese de que la parte inferior del aspa se encuentre bien apoyada sobre el soporte Con un destornillador Phillips fije los tornillos ...
Страница 26: ...D soportes de las aspas y vuelva a ajustarlas si fuese necesario Soporte de aspas SRU FRQMXQWR Unidad del PRWRU 8QLGDG GHO PRWRU 8QLGDG GHO PRWRU 2 QVWDOH HO FRQHFWRU GH FODYLMDV GHVGH OD SODFD GH FRQH LyQ D OD XQLGDG GHO PRWRU LJXUD Unidad de la SODFD GH FRQH LyQ 3 WUDLJD XQR GH ORV WUHV WRUQLOORV GH OD XQLGDG GH OD SODFD IORMH OHYHPHQWH ORV RWURV GRV WRUQLOORV QVWDOH OD SODFD GH FRQH LyQ HQ OD X...
Страница 27: ... el riesgo de incendios utilice la bombilla halógena tungsteno de tipo T4 minican JD E11 de 100 vatios máximo Apague el interruptor de la pared y deje que la bombilla se enfríe durante 10 minutos antes de cambiar la bombilla La bombilla está presurizada y puede hacerse añicos NO TOQUE LA BOMBILA CON LAS MANOS SIN PROTECCIÓN Las huellas dactilares pueden disminuir la vida útil de la bombilla Elimin...
Страница 28: ...gura 1 Figura 1 Figura 2 Figura 1 Figura 2 Cómo instalar su mando a distancia Opción 1 1 Retire los dos tornillos colocados en la plaza del interruptor de la pared Figura 1 2 Instale el soporte de control con los dos tornillos 6 32x 3 4 Empuje los cuatro tapones de plástico para cubrir los orificios de los tornillos Incluidos con el mando Figura 2 Cómo instalar su mando a distancia Opción 2 1 Reti...
Страница 29: ...ja del interruptor no produzcan ruido al rozar unos con otros o al rozar la pared interior de la caja del interruptor PRECAUCIÓN Asegúrese de que el suministro principal de electricidad esté desconectado 4 Algunos motores de ventilador son sensibles a las señales de los controles de velocidad de estado sólido variables Los controles de estado sólido no son recomendables Escoja un método de control...
Страница 30: ...sorios para el montaje de soporte de aspas Bolsa de accesorios para el montaje de aspas Modelos N FPS7967 Lista de piezas Reference N a z e i P n ó i c p i r c s e D Antes de desechar los materiales de embalaje asegúrese de haber extraído todas las piezas Inserte los CÓDIGOS DE ACABADO consulte el número de modelo del ventilador que se encuentra en el soporte de barral Cómo hacer un pedido de piez...
Страница 31: ...2 13 13 13 11 3 6 12 4 7 8 9 10 13 5 1 Figura 1 NOTA la ilustración que se muestra no está hecha a 31 FPS7967 Despiece ...
Страница 32: ...013 Fanimation 2013 10 V 01 10983 Bennett Parkway Zionsville IN 46077 Llame sin cargo al 888 567 2055 FAX 866 482 5215 Desde fuera de los EE UU llame al 317 733 4113 Visite nuestro sitio Web en www fanimation com ...