FALMEC Polar FDPLR15I5SS Скачать руководство пользователя страница 15

15

ENGLISH

In case of:
•  devices fitted with cables without a plug: the type of plug to use is 

a ''standardised'' one. The wires must be connected as follows: yel-
low-green for earthing, blue for neutral and brown for the phase. The 
plug must be connected to an adequate safety socket.

•  fixed equipment not provided with a power supply cable and plug, 

or any other device that ensures disconnection from the electrical 
mains, with an opening gap of the contacts that enables total dis-
connection in overvoltage category III conditions.

  Said disconnection devices must be provided in the mains power 

supply in compliance with installation regulations.

The yellow/green earth cable must not be cut off by the switch.
The Manufacturer declines all responsibility for failure to comply with 
the safety regulations.

FUMES DISCHARGE

EXTERNAL EXHAUST HOOD (SUCTION)

In this version the fumes and vapours are discharged 
outside through the exhaust pipe.
To this end, the hood outlet fitting must be connected 
via a pipe, to an external output.

The outlet pipe must have:
•  a diameter not less than that of the hood fitting.
•  a slight slope downwards (drop) in the horizontal sections to prevent 

condensation from flowing back into the motor.

•  the minimum required number of bends.

•  the minimum required length to avoid vibrations and reduce the 

suction performance of the hood.

  You are required to insulate the pipes if it passes through cold envi-

ronments.

  In the presence of motors with 500 CFM or higher, a check valve is 

present to prevent external air flowing back.

HOOD WITH INTERNAL RECIRCULATION (FILTERING)

In this model, the air passes through the charcoal filters 
to be purified and recycled in the environment.

Ensure that the active carbon filters are assembled into 
the hood, if not, install them as indicated in the assem-

bly instructions. 

In this version the check valve must not be assembled: remove 
it if it is on the air outlet fitting of the motor.

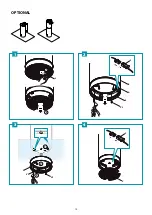
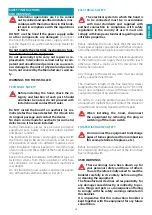
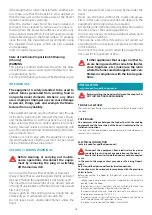
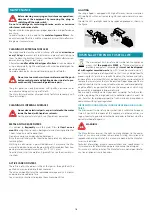
ASSEMBLY INSTRUCTIONS

only intended for qualified personnel

The hood can be installed in various configurations.

The generic assembly steps apply to all installations; for 
each case, follow the specific steps provided for the re-

quired installation.

OPERATION

WHEN TO TURN ON THE HOOD?

Switch on the hood at least one minute before starting to cook to direct 
fumes and vapours towards the suction surface.
After cooking, leave the hood operating until complete extraction of all 
vapours and odours. By means of the Timer function, it is possible to set 
auto switch-off function which will allow the hood to turn off automat-
ically after 15 minutes of operation.

WHICH SPEED IS TO BE SELECTED?

1st speed:

 maintains the circulation of clean air with low electricity 

consumption.

2nd speed:

 normal conditions of use.

3rd speed:

 presence of strong odours and vapours.

4th speed:

 rapid disposal of odours and vapours.

WHEN SHOULD THE FILTERS BE WASHED OR REPLACED?

The metal filters must be cleaned every 30 hours of operation. 
The active carbon filters must be replaced every 3-4 months, depend-
ing on the use of the hood.
For further details see the 

“MAINTENANCE” 

chap.

ELECTRONIC PUSHBUTTON PANEL

Motor ON/OFF

Upon start-up, the speed is that stored at the previous op-
eration.

Increase speed from 1 to 4

Speed 4 is only active for a 
few minutes, then speed 3 
activates.

The speeds are indicated by 
the LEDs on the keys:


Speed 1

 Speed 2

 Speed 3

only version:

 Speed 4 

("+" LED flashing)

Reduce speed from 4 to 1


Light on/off

TIMER

 (red LED flashing)

Auto switch-off after 15 min.
The function deactivates (red LED off ) if:
- The TIMER key ( ) is pressed again.
- The ON/OFF key ( ) is pressed.

FILTER ALARM

 (red LED steady on with ( ) off)

Anti-grease filter maintenance after approximately 30 hours 
of operation.
Press ( ) the meter for 3 seconds to reset.

If the pushbutton panel is completely inactive, before contacting the 
Technical assistance service, disconnect power temporarily to the ap-
pliance (about 5“), possibly by acting on the main switch, to restore 

normal operation.
If this measure has no effect, contact the Technical assistance service.

Содержание Polar FDPLR15I5SS

Страница 1: ...Polar FDPLR15W5SS wall FDPLR15I5SS island EN INSTRUCTIONS BOOKLET IT LIBRETTO ISTRUZIONI FR MODE D EMPLOI ES MANUAL DE INSTRUCCIONES ...

Страница 2: ...7 mm 6 152 6 mm 152 6 mm 8xØ2 8 Ø8x6 mm 8 5 8 Ø 2 2 0 m m 1 5 6 0 Ø316 mm 12 7 16 Posizione pulsantiera elettronica Diameter of fixing holes Position for electronic pushbutton panel 2 6 8 70 mm 1 1 8 30 mm 3 8 10 mm 26 6 8 680 mm 30 760 mm Min 33 Min 840 mm Ø350 mm Ø 13 6 8 Ø350 mm Ø 13 6 8 Max 1240 mm Max 48 7 8 POLAR ISLAND 53 lb 24 Kg ...

Страница 3: ...mm 32 7 8 835 mm 6 154 mm 4 7 16 113 mm 8 1 2 218 mm 6 5 8 Ø170 mm POLAR WALL 51 lb 23 Kg 35 7 16 12 6 8 3 8 R10 m m 13 32 R10 mm 324 mm Tempered 23 5 8 600 mm 900 mm 12 2 8 310 mm 35 7 16 12 6 8 3 8 R10 m m 13 32 R10 mm 324 mm Tempered 19 11 16 500 mm 900 mm 12 2 8 310 mm 24 lb 11 Kg 22 lb 10 Kg POLAR ISLAND GLASS POLAR WALL GLASS ...

Страница 4: ...4 max 28 2 8 max 720 mm 2 1 8 m m 8 1 2 min 19 11 16 min 500 mm 150 mm 5 15 16 POLAR WALL ...

Страница 5: ...résent document ES Medidas instalación La altura de montaje recomendada desde la su perficie de cocción hasta el fondo de la campana se indica con una A en el dibujo siguiente Se recomienda instalar la campana en este rango para optimizar el rendimiento Se recomienda no exceder 35 890mm para la dimensión A ya que las campanas montadas por encima de ésta pueden ser difíciles de alcanzar para los usu...

Страница 6: ...6 T V1 A 2 1 3 1 2 446 mm 18 3 8 113 mm 4 7 16 113 mm 4 7 16 Ø8 V2 1 2 A 3 1 2 3 4 ø 5 16 8 mm ø 1 4 6 mm EN tool required FR outil requis ES herramienta requerida IT Attrezzi necessari ...

Страница 7: ... valve installation 5 Hood fastening 6 7 8 9 FR Installation du clapet anti retour 5 Fixation de la hotte 6 7 8 9 ES Instalación de la válvula antirretorno 5 Fijación de la campana 6 7 8 9 IT Installazione valvola di non ritorno 5 Fissaggio cappa 6 7 8 9 ...

Страница 8: ...8 150 mm 5 15 16 POLAR ISLAND x2 2 1 3 A B C ...

Страница 9: ...résent document ES Medidas instalación La altura de montaje recomendada desde la su perficie de cocción hasta el fondo de la campana se indica con una A en el dibujo siguiente Se recomienda instalar la campana en este rango para optimizar el rendimiento Se recomienda no exceder 35 890mm para la dimensión A ya que las campanas montadas por encima de ésta pueden ser difíciles de alcanzar para los usu...

Страница 10: ...10 Ø8 mm 5 16 V1 C 1 2 3 M 4 C B G D x V2 1 2 3 4 ...

Страница 11: ...etirer les filtres métalliques A monter les filtres au charbon actif B Branchements élec triques C ES Fijación de la campana 1 3 4 5 Instalación de la válvula antirretorno 2 ISLAND WALL Quite los filtros metálicos A monte los filtros de carbón activo B Conexiones eléctricas C IT Fissaggio cappa 1 3 4 5 Installazione valvola di non ritorno 2 ISOLA PARETE Rimuovere filtri metallici A montare filtri ...

Страница 12: ...12 V3 V3 A 1 2 3 S C C 1 2 1 E V3 A B S 2 3 4 OPTIONAL ...

Страница 13: ...mospheric elements rain wind etc ELECTRICAL SAFETY The electrical system to which the hood is to be connected must be in accordance with local standards and supplied with earthed connection in compliance with safety regulations in the country of use It must also comply with European standards regarding radio antistatic properties Before installing the hood check that the electrical mains power sup...

Страница 14: ...eave open unattended flames under the hood Do not prepare food over an open flame under the hood Never use the hood without the metal anti grease filters in this case grease and dirt will deposit in the equipment and compromise its operation Accessible parts of the hood can be hot when used at the same time as the cooking appliances Do not carry out any cleaning operations when parts of the hood are ...

Страница 15: ...tting of the motor ASSEMBLY INSTRUCTIONS only intended for qualified personnel The hood can be installed in various configurations The generic assembly steps apply to all installations for each case follow the specific steps provided for the re quired installation OPERATION WHEN TO TURN ON THE HOOD Switch on the hood at least one minute before starting to cook to direct fumes and vapours towards t...

Страница 16: ... switching off the main switch Do not use detergents containing abrasive acidic or corrosive substances or abrasive cloths Regular maintenance guarantees proper operation and performance over time Special attention is to be paid to the metal anti grease filters fre quent cleaning of the filters and their supports ensures that no flamma ble grease is accumulated CLEANING OF EXTERNAL SURFACES You are ...

Страница 17: ...t de tenue mécanique Ne pas installer la hotte à l extérieur et ne pas l expo ser à des agents atmosphériques pluie vent etc SÉCURITÉ ÉLECTRIQUE Le circuit électrique auquel est reliée la hotte doit être aux normes et muni d un raccordement à la terre conformément aux normes de sécurité du pays d utilisation il doit en outre être conforme aux normes euro péennes sur l antiparasite radio Avant d in...

Страница 18: ...nettoyage ou d entretien désactiver l ap pareil en enlevant la fiche ou en agissant sur l interrupteur général Ne pas utiliser la hotte avec les mains mouillées ou les pieds nus Contrôler toujours que toutes les parties électriques lumières aspirateur soient éteintes lorsque l appa reil n est pas utilisé Le poids maximum total d éventuels objets position nées ou suspendus où c est prévu sur la hot...

Страница 19: ...erie si elle passe par des endroits non chauffés Pour empêcher les retours d air de l extérieur un clapet de non retour est installé en présence des moteurs avec 500 CFM ou supérieurs HOTTE À RECIRCULATION INTÉRIEURE FILTRANTE Dans cette version l air passe à travers les filtres au char bon actif pour être purifié et est recyclé dans la pièce Contrôler que les filtres au charbon actif soient montés su...

Страница 20: ... mais il pourrait ternir le matériau des filtres pour réduire cet inconvénient utiliser des lavages à basses températures 131 F 55 C max Pour l extraction et l introduction des filtres métalliques anti graisse voir les instructions de montage FILTRES AU CHARBON ACTIF Ces filtres retiennent les odeurs présentes dans l air qui les traverse L air épuré est ainsi renvoyé dans la pièce Les filtres au charb...

Страница 21: ...cánico No instale la campana en exteriores ni la exponga a agentes atmosféricos lluvia viento etc SEGURIDAD ELÉCTRICA La instalación eléctrica a la cual se conecta la campana debe respetar las normas co rrespondientes y tener obligatoriamente una conexión a tierra según las normas de seguri dad del país de uso además debe respetar las normativas europeas sobre la protección contra interferencias r...

Страница 22: ... lu ces aspirador estén apagadas cuando no se use el equipo El peso máximo total de los posibles objetos coloca dos o colgados cuando esté previsto en la campana no debe superar los 3lb 5 oz 1 5 kg Controle las freidoras mientras las está usando El aceite recalentado podría inflamarse No encienda llamas libres debajo de la campana No cocine con llamas libres debajo de la campana No use nunca la cam...

Страница 23: ... si no es así móntelos tal como se indica en las instrucciones de montaje En esta versión la válvula de no retorno no debe estar montada desmóntela si está presente en el racor de salida del aire del motor INSTRUCCIONES DE MONTAJE parte reservada al personal cualificado La campana puede instalarse en diferentes configuracio nes Las fases de montaje generales valen para todas las instala ciones mie...

Страница 24: ...ARBÓN ACTIVO Estos filtros retienen los olores presentes en el aire que los atraviesa El aire depurado vuelve a recircular por el ambiente Los filtros de carbón activo deben ser sustituidos cada 3 4 meses en condiciones de uso normal Para sustituir los filtro de carbón activo consulte las instrucciones de montaje ILUMINACIÓN La campana cuenta con iluminación mediante bombillas de ledes ca racterizada...

Страница 25: ...di utilizzo deve essere inol tre conforme alle normative Europee sull antidi sturbo radio Prima di installare la cappa verificare che la tensione di rete corrisponda a quella riportata dalla targhetta posta all interno della cappa La presa usata per il collegamento elettrico deve es sere facilmente raggiungibile con l apparecchiatura installata in caso contrario prevedere un interruttore generale p...

Страница 26: ...i filtri metallici anti grasso grasso e sporco in questo caso si depositereb bero nell apparecchio compromettendone il funzio namento Parti accessibili della cappa possono essere calde se utilizzate insieme con apparecchi di cottura Non effettuare operazioni di pulizia quando parti del la cappa sono ancora calde Se la pulizia non è condotta secondo le modalità e i prodotti indicati nel presente libr...

Страница 27: ...nte sul raccordo di uscita aria del moto re ISTRUZIONI DI MONTAGGIO parte riservata solo a personale qualificato La cappa ha la possibilità di essere installata in varie confi gurazioni Le fasi di montaggio generiche valgono per tutte le in stallazioni seguire invece dove specificato le fasi corrispondenti all installazione desiderata FUNZIONAMENTO QUANDO ACCENDERE LA CAPPA Accendere la cappa alme...

Страница 28: ...ontaggio FILTRI AL CARBONE ATTIVO Questi filtri trattengono gli odori presenti nell aria che li attraversa L aria depurata viene così rimessa nell ambiente I filtri al carbone attivo devono essere sostituiti mediamente ogni 3 4 mesi in condizioni di utilizzo normale Per la sostituzione dei filtri al carbone attivo vedi istruzioni di montag gio ILLUMINAZIONE La cappa è dotata di illuminazione tramite ...

Страница 29: ...29 NOTE NOTES ...

Страница 30: ...30 NOTE NOTES ...

Страница 31: ...31 NOTE NOTES ...

Страница 32: ...FALMEC S p A 31029 VITTORIO VENETO Treviso ITALY Zona Industriale Via dell Artigianato 42 www falmec com Code 110033088 Ed 01 2020 Codice Code Matricola Serial Number ...

Отзывы: