Insert
68-353-05
Rev. A
Printed in the USA
09 02
This insert describes how to use the video and audio mute functions of the CrossPoint, CrossPoint
Plus, MAV series, and Matrix 50 switcher. Video and audio mutes are new features for those matrix
switchers. The front panel operations and SIS commands detailed in this insert are in addition to
the functions described in those products’ manuals.
Depending on your switcher, the video selection button and LED are labeled either RGBHV or Video.
In this insert, they are referred to as Video, but on switchers that have an RGBHV button and LED,
the function is identical.
Muting and unmuting video and/or audio
1
.
Press the Esc button to clear any input LEDs, output LEDs, or control LEDs that
may be on.
2
.
Press and release the View button.
3
.
Select video, audio, or both to mute or unmute by pressing the Video and/or Audio
buttons.
4
.
One at a time, press and
hold
the output button(s) for the desired output(s). The
output LED(s) for the selected output(s) flash to indicate the mute or return to their
previous state to indicate the unmute.
5
.
Press and release the View button to return to normal switcher operation.
1.
You can mute video and audio, video-only, or audio-only outputs. Pressing and
releasing the Video and Audio buttons toggles each selection on and off.
2.
When you enter view-only mode, the output LEDs turn
on
for all outputs
without
ties.
3.
On the CrossPoint and Cro, the video mute function mutes the R, G, and
B planes only; the H and V planes are still active. On MAV and Matrix 50
switchers, the function mutes all video planes.
4.
Mutes are
not
saved. When power is removed and restored, the mutes are lost.
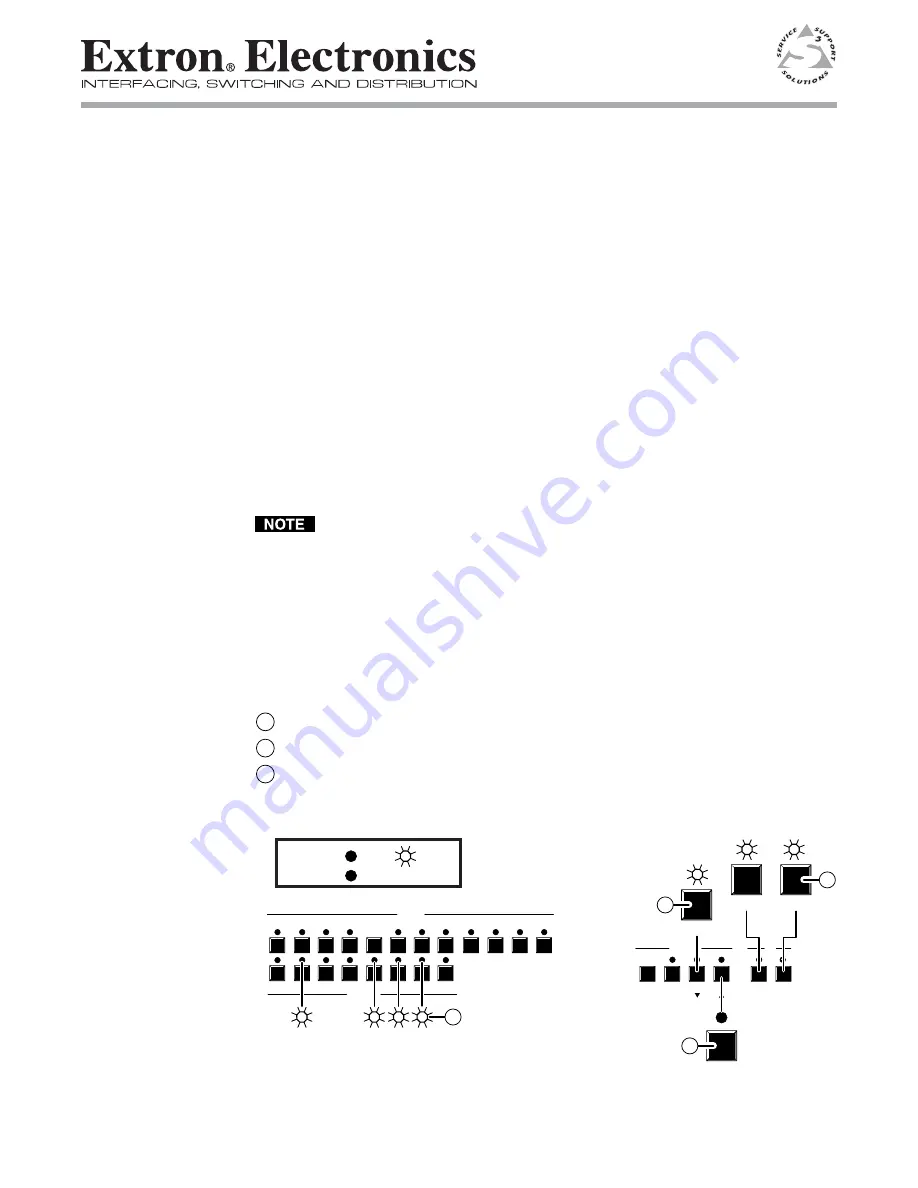
Example: Muting and unmuting an output
A
Press and release the Esc button. The Esc LED flashes once.
B
Press and release the View button to enter view-only mode. The View LED lights.
C
To select both video and audio for viewing, if necessary, press and release the Video
and Audio buttons until the Video LED and Audio LED light. With no input
selected, all output LEDs that have no established ties (outputs 2, 5, 6, and 7 in the
figure 1 example below) light.
1
1
2
2
3
3
4
4
5
5
6
INPUTS
ENTER
OUTPUTS
6
7
7
8
9
10
11
PRESET VIEW
ESC
ESC
VIDEO AUDIO
VIEW
12
8
CONTROL
I/O
A
B
C
VIDEO
AUDIO
C
F
2
7
6
5
LED key: = off, = on,
= flash once
F
Press
Press
Press
Press
Figure 1 — Example: Viewing the current configuration


