background image


Anleitung 

Vers. 1.0 / 01.10.15  

RS-232 PCI Karte  

mit  4 x 9 Pin Anschluss 

EX-41384 


Manual 

Содержание EX-41384

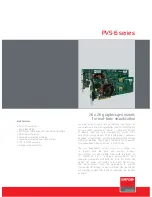
Страница 1: ...Anleitung Vers 1 0 01 10 15 RS 232 PCI Karte mit 4 x 9 Pin Anschluss EX 41384 Manual...

Страница 2: ...5 4 Jumper Einstellungen 5 6 5 Hardware Installation 6 6 Treiber Installation 7 8 7 Technische Daten 8 Index 1 Description 9 2 Extent of Delivery 9 3 Layout and Connections 10 11 3 1 Layout 10 3 2 Co...

Страница 3: ...beim installieren des Betriebs systems automatisch vorgenommen werden ber die Jumper k nnen Sie 12V oder 5V auf Pin9 des seriellen Anschluss umleiten Achten Sie bitte darauf dass die Ange schlossenen...

Страница 4: ...S4_PWR Power auf 9 Pin Stecker Ein Aus JP1 Jumper zum einstellen der Spannung am UART JP2 Jumper f r die Stromquelle Netzteil oder J2 Stroman schluss JP4 Nur f r Testzwecke Bitte nicht ndern JP3 PME...

Страница 5: ..._PWR f r auf PWR gesetzt haben k nnen Sie mit dem Jumper JP2 die Spannungsquelle einstellen Es gibt 2 verschiedene Spannungsquellen Mainboard PC Netzteil Bei Jumper Einstellung X5V X12V muss der Strom...

Страница 6: ...ne generelle Anleitung zum Einbau der EX 41384 geben Bei Unklarheiten halten Sie sich bitte an die Bedienungsan leitung Ihres Computersystems 1 Schalten Sie Ihren Rechner und alle angeschlossenen Peri...

Страница 7: ...chlusseinstellung und Erweitert Sie k nnen dann zwischen COM3 und COM256 w hlen Windows 9x Starten Sie Windows 9x und legen Sie die Treiber CD in Ihr CD ROM Laufwerk z B Laufwerk D und klicken Sie auf...

Страница 8: ...inander unterschei den k nnen wir Ihnen leider keine Installationsanweisung geben Bitte halten Sie sich an die Installationsanweisung f r Standard I O Ports Ihrer Unix Linux Version In eini gen neuere...

Страница 9: ...lly they will be obtained automatically by the system BIOS and operating system With the jumpers you can enable power to pin 9 Please note if you use power to pin 9 your peripheral device must support...

Страница 10: ...S4_PWR Power to 9 Pin connector On Off JP1 Jumper to set the volta ge at the UART JP2 Select the power over Power Supply or PCI Bus J2 Connector for Power Supply JP4 Only for Test purposes Please do n...

Страница 11: ...to PWR then you can set the volta ge source with the jumper JP2 There are two different voltage sources Mainboard Power Supply If the jumper JP2 set to X5V X12V then the power connector J2 must be con...

Страница 12: ...s between PC s we can give you only a general installation guide for the EX 41384 Please refer to your computer s reference manual whenever in doubt 1 Turn off the power to your computer and any other...

Страница 13: ...card is installed correctly CHANGE PORT NUMBER If you like to change the port number for example COM3 to COM5 open the Device Manager click at COM3 Settings and then Advance There you can change betwe...

Страница 14: ...or similar entry s the card is installed correctly SCO UNIX LINUX The drivers are located in the following folder on our driver CD D IO SYSTEMBASE DRIVERS PCI SCO Because each individual distribution...

Страница 15: ......

Страница 16: ......

Отзывы: