background image

36

Note:

If a new cylinder has just been connected, please allow at least one minute for the 

air in the gas pipeline to purge out through the pilot hole.

When lighting the pilot flame, make sure that the variable control knob is 

continously pressed down while pressing the igniter button. The variable control 

knob can be released after the pilot flame lights.

Pilot flame can be watched and checked from the small round window with 

sliding lid located at the bottom of the flame screen (to the left or right side of the 

controller).

If the pilot flame does not light or it goes out, repeat step 3.

4.  After the pilot flame lights, turn the variable control knob to maximum position 

and leave it there for 5 minutes or more before turning the variable control knob 

to the desired temperature position.

To turn off the heater.

Abschalten des Heizers

1.  Turn the variable control knob to PILOT position.
2.  Press and turn the variable control knob to OFF position.
3.  Turn off the valve on the gas supply cylinder completely.

Storage

1.  Always close the gas valve of the gas cylinder after use or in case of distur-

bance.

2.   Remove the pressure controller and the hose.
3.  Check the tightness of the gas valve and for damage. If you suspect a damage, 

have it changed by your gas dealer.

4.  Never store liquid gas cylinders in a sub-terrain, or at places without adequate 

air ventilation.

Содержание 613-401068

Страница 1: ...BEDIENUNGSANLEITUNG INSTRUCTION MANUAL Terrassenheizer Patio heater 613 401068 Manufacturer EXPO Börse GmbH Industriestr 12 D 49577 Ankum www expo boerse de ...
Страница 2: ...geschlossene Flüssiggasflasche darf nicht in der Nähe dieses oder eines anderen Geräts aufbewahrt werden WARNUNG 1 Nur für den Gebrauch im Freien oder in gut belüfteten Bereichen 2 Bei einem gut belüfteten Bereich muss mindestens 25 des Oberflächenbereichs offen sein 3 Der Oberflächenbereich ergibt sich aus der Summe der Wandoberflächen WARNUNG Bitte lesen Sie die folgenden Sicherheitsrichtlinien ...

Страница 3: ...mindestens 1 m von der Gasflasche entfernt ist Der Injektor darf nur vom Hersteller installiert werden Schließen Sie die Gasflasche nicht direkt ohne Regler an das Gerät an Verwenden Sie nur die in den Anweisungen angegebene Gasart und Gasflaschen Ein Regler muss EN16129 2013 und nationale Vorschriften erfüllen des der Gerätekategorie entsprechenden Drucks Für Butan Propan der Kategorie I3B P 30 e...

Страница 4: ...n Sie das Gasventil sofort ab wenn Sie Gas riechen Drehen Sie das Gasflaschenventil auf OFF Wenn sich das Leck am Schlauch Regler Anschluss befindet Den Anschluss festziehen und einen weiteren Lecktest durchführen Falls weiterhin Blasen auftreten sollte der Schlauch am Einkaufsort zurückgegeben werden Wenn sich das Leck am Regler Gasflaschen Anschluss befindet Anschluss trennen neu anschließen und...

Страница 5: ...der sollten in der Nähe des Heizers sorgfältig beaufsichtigt werden Kleidungsstücke oder andere entflammbare Materialien sollten nicht auf den Heizer gehängt oder auf den oder in die Nähe des Heizers gelegt werden Die Gasflasche muss in einem gut belüfteten Bereich ohne Zündquellen Kerzen Zigaretten andere Flammen erzeugende Geräte gewechselt werden Überprüfen Sie ob die Reglerdichtung korrekt ang...

Страница 6: ...erden Bauart und Eigenschaften Transportabler Terrassen Gartenheizer mit Flaschengehäuse Gehäuse aus Stahl mit Pulverbeschichtung oder aus Edelstahl Gasschlauchanschlüsse mit Metallklammer Schraubkappen für Deutschland Hitzeabstrahlung von Reflektor Spezifikationen Verwenden Sie nur Propan Butan oder Mischungen dieser Gase Max Wattzahl 13000 Watt Min Wattzahl 5000 Watt Verbrauch 456 870 g h GERÄTE...

Страница 7: ...lte die entsprechende Gaskategorie in der Tabelle des Injektors erfüllen Das Gerät benötigt einen zugelassenen Schlauch von 1 2 Meter Länge Heizerständer und Aufstellort Der Heizer ist in erster Linie nur für den Gebrauch im Freien vorgesehen Achten Sie darauf dass stets für ausreichende Belüftung gesorgt ist Halten Sie stets einen ausreichenden Abstand zu entflammbaren Materialien ein d h oben 10...

Страница 8: ...Die Gasanschlüsse des Heizers werden in der Fabrik vor dem Versand einem Lecktest unterzogen Am Installationsort muss eine vollständige Gasdichtigkeitsprüfung durchgeführt werden da es beim Versand möglicherweise zu falscher Handhabung gekommen sein kann oder zu starker Druck auf den Heizer ausgeübt wurde Stellen Sie eine Seifenlösung aus einem Teil Flüssigreiniger und einem Teil Wasser her Die Se...

Страница 9: ...gersinn 90 3 Drücken Sie den variablen Kontrollknopf und halten Sie ihn 60 Sekunden gedrückt Drücken Sie den Zündknopf mehrmals während Sie den variablen Kontrollknopf gedrückt halten bis die Zündflamme zündet Lassen Sie den variablen Kontrollknopf los nachdem die Zündflamme an ist OFF Der Heizer schaltet ab HI Maximaltemperaturstellung LO Minimaltemperaturstellung Variabler Kontrollknopf Kontroll...

Страница 10: ...iablen Kontrollknopf nachdem die Zündflamme an ist auf die Maximalstellung und lassen Sie ihn dort 5 Minuten oder länger bevor Sie den variablen Kontrollknopf auf die gewünschte Temperaturstellung drehen Abschalten des Heizers 1 Drehen Sie den variablen Kontrollknopf in die PILOT Stellung 2 Drücken und drehen Sie den variablen Kontrollknopf in die OFF Stellung 3 Drehen Sie das Ventil an der Gasver...

Страница 11: ...t er sauber bleibt und sicher benutzt wer den kann Die Brennereinheit mit der optionalen Schutzabdeckung abdecken wenn der Heizer nicht in Gebrauch ist Montage Es wird auf die Teileübersicht im hinteren Teil dieser Gebrauchsanweisung verwiesen Montieren Sie die Bügel mit 3 Schrauben C an der Bodenplatte Montieren Sie die Befestigungsbeschläge F mit jeweils 2 Schrauben 2 Scheiben und 2 Muttern G an...

Страница 12: ...12 Montieren Sie die Säule an jedem der 3 Bügel mit 2 Schrauben 2 Scheiben und 2 Muttern B Setzen Sie das Gehäuse über die Säule und auf die Bodenplatte ...

Страница 13: ...13 Setzen Sie das Gasversorgungsrohr in die Säule und ziehen Sie das Gasversorgungsrohr mithilfe der Überwurfmutter am Brennerkopf fest ...

Страница 14: ...14 Schrauben Sie den Brennerkopf mit den bereits am Brennerkopf montierten Schrauben an der Säule fest Bringen Sie in jedem Loch oberhalb des Brennerkopfs 1 Scheibe E 1 Gewindestück A und 1 Scheibe E an ...

Страница 15: ...s Reflektorschirms ab Schrauben Sie die Teile des Reflektorschirms mit 9 Schrauben 9 Scheiben und 9 Hutmuttern I zusammen Setzen Sie den Reflektorschirm über die Gewindestücke A am Brennerkopf und schrauben Sie ihn mit 3 Scheiben E und 3 Flügelschrauben D fest ...

Страница 16: ...ie den Schlauch mit dem Regler am Gasversorgungsrohr fest Der Terrassenheizer ist jetzt zusammengebaut Anschluss der Gasflasche Heben Sie das Gehäuse an und schieben Sie es ein wenig nach hinten sodass es auf den Bügeln ruht Ziehen Sie die Manschette des Reglers hoch und setzen Sie sie auf das Ventil der Gasflasche ...

Страница 17: ...17 Drücken Sie nun die Manschette ganz nach unten bis sie spürbar an der Gasflasche einrastet Der Regler muss so fest sitzen dass man die Gasflasche anheben kann indem man nur den Regler festhält ...

Страница 18: ...aubt werden muss Zündung Drehen Sie den Regler an der Gasflasche in die geöffnete Position sodass das Flammensymbol nach oben zeigt Drücken Sie den Einstellknopf ein und drehen Sie ihn gegen den Uhrzeigersinn zu dem Punkt nach der Position PILOT Zündflamme siehe den Pfeil auf der Abbildung ...

Страница 19: ...schte Wärmeeinstellung zwischen den Stellungen HI maximale Leistung und LO minimale Leistung drehen Falls die Zündflamme nicht angeht müssen Sie wieder von vorne beginnen oder den Anweisungen im Abschnitt Fehlerbehebung folgen Hinweis Bei der ersten Ingebrauchnahme oder beim Wechseln der Gasflasche müssen Sie den Einstellknopf zu dem Punkt nach der Stellung PILOT drehen und 3 4 Minuten lang gedrüc...

Страница 20: ...chlägen geschützt ist Bewahren Sie Gasflaschen niemals unterirdisch oder an Orten ohne ausreichende Lüftung auf Reinigung und Pflege Reinigen Sie den Terrassenheizer niemals mit brennbaren scheuernden oder rosterzeugenden Reinigungsmitteln Wischen Sie pulverlackierte Oberflächen mit einem feuchten Tuch ab Reinigen Sie den Brennerkopf regelmäßig mit einer weichen Bürste Kaufen und benutzen Sie ggf ...

Страница 21: ...zende Hülle zu geben Reinigung des Gasversorgungsrohrs Wenn der Terrassenheizer während eines längeren Zeitraums nicht benutzt wird können Staub Schmutz und Insekten das Gasversorgungsrohr und die Öffnungen an der Zündflamme und dem Brenner blockieren Wenn dies geschieht müssen Sie den Brennerkopf und das Gasversorgungsrohr demontieren Halten Sie den Einstellknopf gedrückt und blasen Sie die Rohrf...

Страница 22: ...22 Teile und Spezifikationen Reflektor Flammschutz Brennersockel Lufteinlassgitter Gasventilregler Sockel des Regelungsgehäuses Gasflaschengehäuse Pfostenbeschlag Ständer Säule ...

Страница 23: ...nopf auf die Stellung HI und schauen Sie ob der Brenner angeht Thermoelement schlecht Thermoelement ersetzen Die Zündflamme erlischt Um die Zündflamme haben sich Verschmutzungen angesammelt Reinigen Sie den Bereich um die Zündflamme mit einer kleinen Bürste oder einem Pfeifenreiniger Es liegt ein Leck vor Siehe den Abschnitt Leckprüfung Die Zündflamme wurde ausgeblasen Stellen Sie den Terrassenhei...

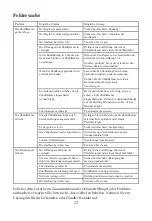
Страница 24: ...lfunktionen aufgrund von Eingriffen und Reparaturen durch Dritte oder durch den Einbau von Nicht Originalteilen entstehen sind durch diese Garantie nicht abgedeckt Umweltgerechte Entsorgung Das Symbol über und auf dem Produkt bedeutet dass das Produkt als elektrisches oder elektronisches Gerät klassifiziert ist und am Ende seiner Nutzungsdauer nicht zusammen mit an derem Haushalts oder Gewerbemüll...

Страница 25: ... Gasregler Typ C21 C31 30 C31 50 CGAS Gasschlauch Modell DRE0311 den Bestimmungen der folgenden EG Richtlinie n entspricht einschließlich aller einschlägigen Änderungen Referenznr Titel Ja Nein 2016 426 EG Geräte zur Verbrennung gasförmiger Brennstoffe Ja und dass die umseitig angegebenen Normen und oder technischen Spezifikationen angewendet wurden Der Terrassenheizer stimmt mit der Version übere...

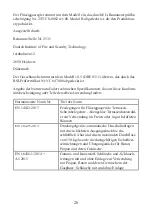
Страница 26: ...ung oder Teile derselben Anwendung finden Harmonisierte Norm Nr Titel der Norm EN 14543 2017 Festlegungen für Flüssiggasgeräte Terrassen Schirmheizgeräte Abzugslose Terrassenheizstrahl er zur Verwendung im Freien oder in gut belüfteten Räumen EN 16129 2013 Druckregelgeräte automatische Umschaltanlagen mit einem höchsten Ausgangsdruck bis ein schließlich 4 bar und einem maximalen Durchfluss von 150...

Страница 27: ...le oder Paragraphen der Norm oder der technischen Spezifikation verwiesen Kirsten Vibeke Jensen 2020 11 05 Kolding Dänemark Product Safety Manager Name und Funktion des Unterzeichneten der befugt ist für den Hersteller oder seinen Bevollmächtigten rechtsverbindlich zu unterzeichnen ...

Страница 28: ...appliance WARNlNG 1 For use outdoors or in amply ventilated areas 2 An amply ventilated area must have a minimum of 25 of the surface area open 3 The surface area is the sum of the walls surface WARNING Please read carefully the following safety guidelines before operation Improper installation adjustment alteration service or maintenance can cause injury or property damage Read the installation o...

Страница 29: ...nal regulation of the correct pressure corresponding to the appliance category Use 30 mbar regulator for butane propane under the category I3B P 30 Use 30 mbar regulator for butane under the category I3 28 30 37 Use 37 mbar regulator for propane under the category I3 28 30 37 Use 50 mbar regulator for butane propane under the category I3B P 50 It s recommended to use flexible hose that approved by...

Страница 30: ...alve is defective and should be returned to cylinder s place of purchase Do not transport heater while it s operating Do not move the heater after it has been turned off until the temperature has cooled down Keep the ventilation opening of the cylinder enclosure free and clear of debris Do not paint the radiant screen control panel or top canopy reflector Control compartment burner and circulation...

Страница 31: ...ylinder housing To close the gas supply at the valve of the gas cylinder or the regulator after use In the event of gas leakage the appliance shall not be used or if alight the gas supply shall be shut off and the appliance shall be investigated and rectified before it is used again To check the hose at least once per month each time the cylinder is changed or each time before long time no use If ...

Страница 32: ... 28 30mbar 37 mbar 30 mbar 50mbar 37mbar OUTLET PRESSURE OF REGULATOR 30mbar 37 mbar 30 mbar 50mbar 37mbar Using the proper regulator according to outlet pressure of regulator as showed in the table above Table of injector APPLIANCE CATEGORY I3 28 30 37 I3B P 30 I3B P 50 I3B P 37 TYPES OF GAS Butane Propane Butane propane or their mixtures GAS PRESSURE 28 30mbar 37 mbar 30 mbar 50mbar 37mbar TOTAL...

Страница 33: ...other flammable liquids or vapors are stored To protect heater from strong wind anchor the base securely to the ground with screws Gas requirements Use propane or butane gas only The pressure regulator and hose assembly to be used must conform to local standard codes The installation must conform to local codes or in the absence of local codes with the standard for the storage and handling of liqu...

Страница 34: ...heater Make a soap solution of one part liquid detergent and one part water The soap solution can be applied with a spray bottle brush or rag Soap bubbles will appear in case of a leak The heater must be checked with a full cylinder Make sure the safety control valve is in the OFF position Turn the gas supply ON In case of a leak turn off the gas supply Tighten any leaking fittings then turn the g...

Страница 35: ...e 90 3 Press down the variable control knob and hold for 60 seconds While holding down the variable control knob press the ignitor button several times until the pilot flame lights Release the variable control knob after the pilot flame lights OFF The heater stop work HI Maximum temperature position LO Minimum temperature position Variable control knob Variable control knob Igniter ...

Страница 36: ...peat step 3 4 After the pilot flame lights turn the variable control knob to maximum position and leave it there for 5 minutes or more before turning the variable control knob to the desired temperature position To turn off the heater Abschalten des Heizers 1 Turn the variable control knob to PILOT position 2 Press and turn the variable control knob to OFF position 3 Turn off the valve on the gas ...

Страница 37: ... from the burner to keep it clean and safe for use Cover the burner unit with the optional protective cover when the heater is not in use Assembly Please refer to the component overview at the back of these user instructions Fit the clamps to the base using 3 screws C Fit the reinforcement brackets F to the base using 2 screws 2 washers and 2 nuts G each ...

Страница 38: ...38 Fit the column to each of the 3 clamps using 2 screws 2 washers and 2 nuts B Place the cabinet over the column and down onto the base ...

Страница 39: ...39 Place the gas supply pipe into the column and secure the pipe to the burner head using the coupling nut ...

Страница 40: ...rew the burner head securely to the column using the screws that are already fitted to the burner head Insert 1 washer E 1 thread piece A and 1 washer E securely into each hole at the top of the burner head ...

Страница 41: ...the reflector screen components Screw the reflector screen components together using 9 screws 9 washers and 9 cap nuts I Place the reflector screen down over the thread pieces A on the burner head and secure it using 3 washers E and 3 wing nuts D ...

Страница 42: ...clamps and screw the hose with the regulator to the gas supply pipe The patio heater is now assembled Connecting the gas bottle Lift the cabinet up and push it back slightly so that it rests on the clamps Pull the regulator collar up and place it down on the gas bottle valve ...

Страница 43: ...43 Now press the collar down fully so that it clearly locks securely to the gas bottle The regulator must be tight so that it is possible to lift the gas bottle just by holding on to the regulator ...

Страница 44: ...44 Note This does not apply to the Swedish regulator which simply screws to the gas bottle Ignition Turn the gas bottle regulator to the open position so that the flame symbol is facing upwards ...

Страница 45: ...ugh the small window at the bottom of the burner next to the control panel Then turn the adjustment button to HI maximum heat output so that the pilot lights the burner and allow the patio heater to heat up for 5 minutes Once the patio heater has warmed up turn the adjustment button to the required heat setting between HI maximum and LO minimum If the pilot will not come on try again or follow the...

Страница 46: ...flame symbol is facing downwards Storage Always close the gas bottle regulator after use or in the event of malfunction Remove the regulator from the gas bottle The patio heater may only be stored indoors if the gas bottle has been disconnected and removed from the heater Store the patio heater in a dry location sheltered from the wind and rain Never store gas bottle underground or in locations wi...

Страница 47: ...surfaces with a lint free cloth dampened with lukewarm water so they dry more quickly without streaks Then if necessary wipe with a cloth dipped in paraffin oil or WD40 to give the stainless steel a protective film Cleaning the gas supply pipe If the patio heater is not used for a prolonged period of time dust dirt and insects can block the gas supply pipe and the openings at the pilot and burner ...

Страница 48: ...48 Teile und Spezifikationen Reflector Flame screen Burner base Air admittance fence Gas valve controller Base of control housing Tank housing Post bracket Stand Post ...

Страница 49: ...aylight if the pilot is lit Turn the adjustment button to HI and see if the burner is lit Thermocouple bad Replace thermocouple The pilot will not stay on There is dirt around the pilot Clean the area around the pilot with a small brush or pipe cleaner There is a leak See Leak test The pilot has blown out Move the patio heater into a sheltered location Loose connections Tighten connections The gas...

Страница 50: ...s caused by unauthorised intervention or repairs and faults caused by use of non original parts are not covered by the guarantee Correct disposal The symbol above and on the product means that the product is classed as Electrical or Electronic equipment and should not be disposed with other household or commercial waste at the end of its useful life The Waste of Electrical and Electronic Equipment...

Страница 51: ...P 50 CGAS Gas Regulator Type C21 C31 30 C31 50 CGAS Gas hose model DRE0311 is in conformity with the provisions of the following EC directive s including all applicable amendments Reference no Title Yes No 2016 426 EC Appliances burning gaseous fuels Yes and that the standards and or technical specifications referenced overleaf have been applied Patio heater is identical to the version covered by ...

Страница 52: ... this declaration of conformity or parts there of Harmonized Standard No Title of the standard EN 14543 2017 Specifications for dedicated liquefied petroleum gas appliances Parasol patio heaters Flueless radiant heaters for outdoor or amply ventilated area use EN 16129 2013 Pressure regulators automatic change over devices having a maximum regulated pressure of 4 bar with a maximum capacity of 150...

Страница 53: ...able parts or clauses of the standard or the techni cal specification shall be referenced Kirsten Vibeke Jensen 2020 11 05 Kolding Denmark Product Safety Manager name and function of the signatory empowered to bind the manufacturer or his authorized representative ...

Отзывы: