background image

Multimeter Tests

Copper and G.fast/VDSL2/ADSL2+ Multi-play Test Set

117

Voltage

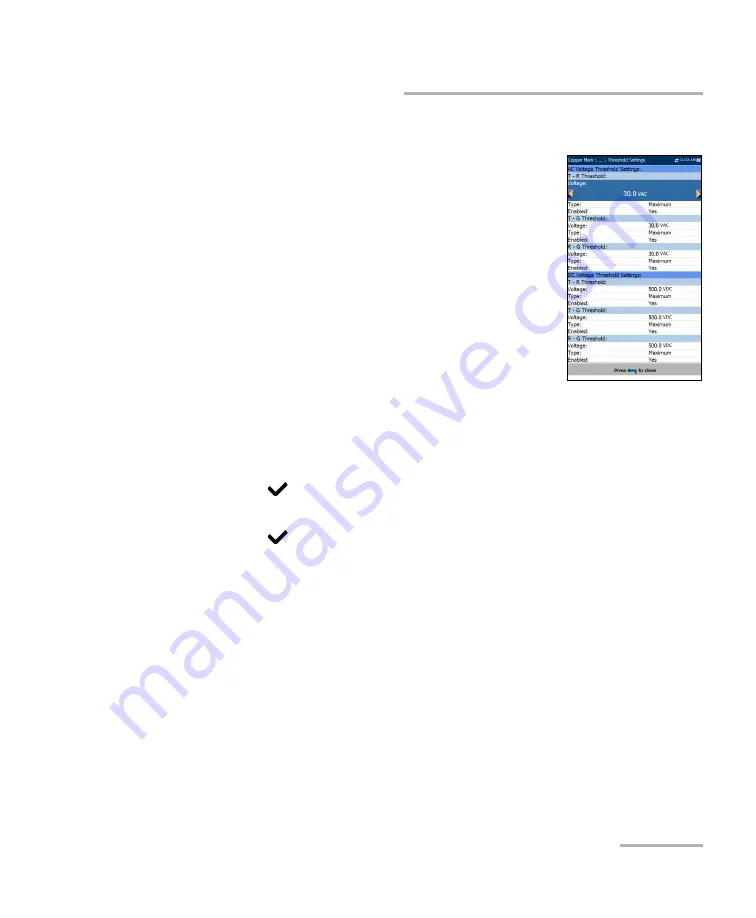
Voltage Thresholds

The 

AC

/

DC


Voltage


Threshold Settings

 page allows 

you to set the 

Threshold Voltage 

for each pair. The 

threshold is a programmable value you can use as an 
on-screen indicator in each test when a measured 
value is too high or too low.

Type

 is the threshold limit for each pair: either 

Maximum

 or 

Minimum

.

Enabled

 is a flag to use the voltage threshold: 

either 

Yes

 or 

No

.

To set threshold values:
1.

Press the up/down arrow keys to highlight the 
desired parameter.

2.

Press the left/right arrow keys to view and select the options.

OR

3.

Press 

 on a value to open a list box of options or the alphanumeric 

editor screen and use the navigation keys to scroll through.

4.

Press 

 to confirm the value.

Содержание MAX-635G

Страница 1: ...User Guide Copper and G fast VDSL2 ADSL2 Multi play Test Set MAX 635G www EXFO com ...

Страница 2: ...y result from its use No license is granted by implication or otherwise under any patent rights of EXFO EXFO s Commerce And Government Entities CAGE code under the North Atlantic Treaty Organization NATO is 0L8C3 The information contained in this publication is subject to change without notice Trademarks EXFO s trademarks have been identified as such However the presence or absence of such identif...

Страница 3: ...ventions 10 2 Safety Information 11 Electrical Safety 13 Equipment Ratings 14 Other Safety Symbols 15 3 Getting Started with the MaxTester 17 Turning the Unit On Off 17 Using Menus and Keypad 19 Keypad 20 Using Screenshot Capture Online Help 21 4 Setting Up the MAX 635G 23 Home 23 System Settings 24 Display and Language 25 Date and Time 29 Battery Info 31 Software Options 33 Information 36 Upload ...

Страница 4: ...g Results 100 6 Reading Saved Copper Test Results 103 Result Manager 103 Results Summary 103 Result Manager Menu 104 Upload 108 Export 110 Delete 112 7 Multimeter Tests 113 Multimeter Main Page 113 Voltage 115 Current 121 Resistance 126 Resistive Balance 131 Isolation 134 Capacitance Opens 139 Station Ground 145 Stressed Balance 148 8 SmartR Features 153 Pair Detective 153 Pair Detective Result De...

Страница 5: ...ance 210 WB Balance 215 WB Attenuation 221 Return Loss 228 Load Coils 236 Locator Tone 240 TX RX Tone 242 RX Tone with FED 246 11 TDR 253 Continuous 254 xTalk TDR 267 Cable Setup 272 Load Trace 273 Result Details 274 TDR Profile Details 279 12 RFL 281 Single Pair 281 Separate Good Pair 284 K Test 287 RFL Cable Setup 291 Result Manager 293 Result Details 295 13 Copper Auto Tests 297 Menu 297 POTS A...

Страница 6: ...Summary 385 Join Leave 387 DSL Parameter Details 388 DSL Statistics 391 Band Information 394 Loop Diagnostics 395 Data Tests Summary 396 Web Browser 401 Bookmarks 403 16 Saving Reading and Managing DSL IP Test Results 405 Saving Results 405 Managing Results 410 17 Maintenance 415 General Maintenance 415 Recalibrating the Unit 416 Battery 418 Recycling and Disposal 421 18 Troubleshooting 423 Solvin...

Страница 7: ... Copper and G fast VDSL2 ADSL2 Multi play Test Set vii 19 Warranty 429 General Information 429 Liability 430 Exclusions 431 Certification 431 Service and Repairs 432 EXFO Service Centers Worldwide 433 Index 435 ...

Страница 8: ... harmful interference to radio communications Operation of this equipment in a residential area is likely to cause harmful interference in which case the user will be required to correct the interference at his own expense Modifications not expressly approved by the manufacturer could void the user s authority to operate the equipment European Electromagnetic Compatibility Regulatory Statement War...

Страница 9: ...per and G fast VDSL2 ADSL2 Multi play Test Set ix European Declaration of Conformity The full text of the EU declaration of conformity is available at the following Internet address www exfo com en resources legal documentation ...

Страница 10: ......

Страница 11: ...ith rubber over mold which makes it ideal for field use Its display is a back lit LCD featuring 480 x 800 resolution A membrane keypad mounted on the face of the unit features a 14 button keypad used to operate the test set Key Features and Benefits Broadcom chipset IP login Single ended copper testing no remote device required DSL testing User defined automatic testing Dual Ethernet ports Custome...

Страница 12: ...s including Pair Detective and FaultMapper Supports vectoring and G INP for operators looking to mitigate self FEXT far end crosstalk and promote DSL stability ADSL2 VDSL2 and G fast testing Optional ADSL2 and VDSL2 bonding support Supports Ping FTP and Traceroute tests with optional support for Web Browser VoIP testing and IPTV analysis Ethernet testing for qualifying FTTx service at the customer...

Страница 13: ...ors are properly closed If the equipment is used in a manner not specified by the manufacturer the protection provided by the equipment may be impaired The MaxTester is equipped with a series of interfaces shown in the following views for single and dual battery option GVXAA and GVXAB models only Left side Single battery Dual battery USB Host Port USB Client Port SD Card not used Head Set Jack 2 5...

Страница 14: ...X 635G 4 MAX 635G Using the MaxTester Right side Single battery Dual battery Note For the dual battery the DC power outlet is on the left side of the unit DC Power Door USB Client Port Stylus USB Client Port Door Stylus ...

Страница 15: ...Introducing the MAX 635G Copper and G fast VDSL2 ADSL2 Multi play Test Set 5 Using the MaxTester Front Power LED Battery LED Speaker Touchscreen ...

Страница 16: ...Introducing the MAX 635G 6 MAX 635G Using the MaxTester Back Single battery Battery Door Screws Screws Stylus ...

Страница 17: ...Introducing the MAX 635G Copper and G fast VDSL2 ADSL2 Multi play Test Set 7 Using the MaxTester Dual battery Note The MaxTester enclosure may become warm during normal use Stylus Battery Pack ...

Страница 18: ...DSL WAN RJ11 connector When connecting the unit to a wall socket with a modem cable Ground terminal Ethernet 1 GigE LAN port Ethernet 1 GigE WAN port DSL port Primary Tip A and Ring B connectors for DSL and copper testing Secondary Tip A and Ring B connectors for 4 wire copper and bonded DSL testing Secondary Tip A wire of phone line Secondary Ring B wire of phone line Shield of phone line Primary...

Страница 19: ... T1 R1 G A1 B1 E when the unit is testing isolation resistance Use with caution WARNING These connections are intended for the express purpose of electrical testing of common telephone line conductors within the ranges specified in the Technical Specifications found on the EXFO Web site The device is not intended to be used on telephone lines having voltages greater than 280 VAC or 400 VDC and it ...

Страница 20: ... unless you understand and meet the required conditions CAUTION Indicates a potentially hazardous situation which if not avoided may result in minor or moderate injury Do not proceed unless you understand and meet the required conditions CAUTION Indicates a potentially hazardous situation which if not avoided may result in component damage Do not proceed unless you understand and meet the required...

Страница 21: ... hazardous situations or impair the protection provided by this unit WARNING If the equipment is used in a manner not specified by the manufacturer the protection provided by the equipment may be impaired WARNING Use only accessories designed for your unit and approved by EXFO For a complete list of accessories available for your unit refer to its technical specifications or contact EXFO ...

Страница 22: ...ORTANT When you see the following symbol on your unit make sure that you refer to the instructions provided in your user documentation Ensure that you understand and meet the required conditions before using your product IMPORTANT Other safety instructions relevant for your product are located throughout this documentation depending on the action to perform Make sure to read them carefully when th...

Страница 23: ...r replacing detachable mains supply cords with inadequately rated cords may result in overheating of the cord and create a fire risk The adapter shall have the appropriate safety mark e g UL CSA TUV CE etc that is acceptable to the authorities in the country where the equipment is to be used CAUTION When using the MaxTester while connected to the AC DC adapter charger make sure you do not position...

Страница 24: ... operation altitude 2000 m 6562 ft unit connected to external power supply 3000 m 9842 ft unit operated from batteries Pollution degree 2 unit connected to external power supply b 3 unit operated from batteries c b For indoor use only c Equipment is normally protected against exposure to direct sunlight precipitation and full wind pressure Overvoltage category Unit I AC adapter II Input powerd d N...

Страница 25: ... and G fast VDSL2 ADSL2 Multi play Test Set 15 Other Safety Symbols Other Safety Symbols One or more of the following symbols may also appear on the MAX 635G or its power supply Symbol Meaning Direct current Alternating current ...

Страница 26: ......

Страница 27: ...current profile before turning the unit off or else any changes are lost See Save Profile page 53 for more information Regional LCD and energy saving settings Test results saved internally vs USB There are two ways to turn off the MaxTester Suspend the next time you turn your unit on you will quickly return to your work environment Shutdown completely cuts power to the unit the unit will perform a...

Страница 28: ...y touching the display after putting the unit into suspend mode You must press to wake up the MaxTester To perform a shutdown Hold down for about 4 seconds The shutdown process starts Note If you hold down for 12 seconds or more the MaxTester may reset the date and time to incorrect values Once the unit is powered back on an Invalid Date and Time dialogue box will pop up displaying The unit date a...

Страница 29: ...se the arrow keys To confirm a choice or enter a menu press To cancel an action or return to the previous item or pane press To return to the home pane press Press once to return to the Main test menu or twice to return to the Home pane Note Pressing while a test is running will also stop the test and return to the main menu screen Note You can also select an option directly by pressing the functi...

Страница 30: ... the unit is used to power the unit on and off Arrow keys navigate the screen to access and modify parameters Function keys activate the corresponding on screen function button Home button brings you to the Home pane of the MaxTester Function keys Home Help Start Stop test Power Back Arrow keys Enter ...

Страница 31: ...s is 2 digit hour 2 digit minute and 2 digit second The date and time value format is dependent on the format selected in System Settings Date and Time Screenshots can be Enabled Disabled from the System Settings Display and Language page If Enabled press and hold the key to capture a screenshot on any page A popup message is displayed saying Screenshot captured Press Yes to save or No to continue...

Страница 32: ... Screenshot Capture Online Help Online Help Online help is available at any time Most test operations pause while you view help but will resume automatically when you exit help To access help about the current function at any time Press and hold the key ...

Страница 33: ... Main menu for optional G fast ADSL2 VDSL2 and multi play services testing applications System Settings allow you to set the parameters of the unit such as language date and time and power battery info You can also view installed options and software and hardware revision information Plus System Settings provides access to Upload Setup Wi Fi Test GVXAA and GVXAB models only scans and collects Wi F...

Страница 34: ...displays the battery status and measurements and allows you to set the power schemes Software Options allow you to enable disable purchased feature options Information displays information About EXFO and unit details pertaining to hardware software product info Upload Setup allows you to enable and select an upload method using the following function keys Upload Enable FTP Setup Wi Fi Setup Ethern...

Страница 35: ... and then Display and Language 2 Use the up down arrow keys to select the setting to change 3 Press to select it By using the up down arrow keys you can switch between preset brightness levels in the Backlight item Press to confirm To display the time and Active Sync in the title bar enable the item Press after your selection to confirm Use the up down arrow keys to navigate between the available ...

Страница 36: ...on and no USB is connected to the MaxTester the following popup message is displayed Screenshot not saved Insert USB and press Yes to save it or press No to continue to Help If EXFO Connect Client the image is saved to DATA EXFO ECC FileUpload and the EXFO Connect Client ECC manages the screenshots for example delete No change to ECC is required If FTP the image is saved locally to DATA MaxTester ...

Страница 37: ...ccessfully or a USB Connection A connection icon is displayed in the menu bar if the setup is successful If you select None then the Enable Remote Display button is disabled Note The USB Connection for Remote Display uses RNDIS protocol and the Active Sync will not be functional when this USB connection is active VNC Server IP address displays one of the following server IP addresses for a USB Con...

Страница 38: ...up arrow key to highlight and press the Enable Remote Display button OR 3 Press the down arrow key to highlight and press the Find Bluetooth Devices button to search for available Bluetooth devices 4 Press the down arrow key to highlight the list box and press to get into the list 5 In the list press the up down arrows to select a device to pair 6 Follow the instructions in the pop up dialog boxes...

Страница 39: ...formats You can also modify the Time Zone and enable an option so that your unit automatically adjusts the time for the daylight saving period To set the date and time 1 Press select System Settings and then Date and Time 2 Use the up down arrow keys to select any of the date or time settings 3 Press to enable the modification controls 3a For the Date and Time an edit screen is displayed with desc...

Страница 40: ...Time in the edit screen toggle the AM PM function key for the desired period of the day Press to go back to the previous screen without saving the new value 3d For the Time Format Auto daylight saving and Time Zone values use the arrow keys to select the desired value then press to confirm the change ...

Страница 41: ...ime to incorrect values Once the unit is powered back on an Invalid Date and Time dialogue box will pop up displaying The unit date and time are probably invalid 1 1 2006 12 00 25 PM Please update the date and time in System Settings Date and Time to ensure the delivery of all the functionalities the unit has to offer DC IN BATTERY Idle timeout allows you to set the time duration for the unit to i...

Страница 42: ...progress Default power scheme settings are LCD backlight turns off after system idles no keys pressed for 10 min Unit switches to suspend mode after timeout 10 min Power Save Mode is Disable requiring you to go to this page to see what will be changed before enabling it The chart displays the following battery measurements capacity current and voltage Battery Status indicates the current power lev...

Страница 43: ... Options This screen lists all the DSL Configured Options which are present on the unit Possible options are as follows VDSL2MOD Support VDSL2 test PING Support Ping and IP login FTP FTP Test Support Traceroute Traceroute Test Support Browser Web Browser Support IPTV IPTV Test Support BOND Bonding not supported with GVXAB modem VOIP VoIP Test Support MOS MOS R Factor Scores IPV6 IPv6 Support GFAST...

Страница 44: ...ptions which are present on the unit Possible options are as follows TDR RFL FaultMapper Pair Detective Wideband Testing Near End Crosstalk High Voltage Isolation Resistance Stressed Balance Test Far End Device Test Control Return Loss ADSL and VDSL2 Data Rate Prediction VDSL2 35b Data Rate Prediction UFED Control ...

Страница 45: ...and G fast VDSL2 ADSL2 Multi play Test Set 35 Software Options Platform Options This screen lists all the Platform Configured Options which are present on the unit Possible options are FTP Result Upload Touchscreen Support Wi Fi Test ...

Страница 46: ...assistance MAX 635G Information The Information tab displays information about the product software and memory installed on the device The page also identifies hardware information To view the complete version numbers of the software installed on the device 1 Press the Information tab again 2 Press the tab again to return to the original value ...

Страница 47: ...es Copper User Auto Test from Upload Save Result tab Copper User Auto Test from Result Manager Summary Upload All DSL tests from Upload Save Result tab All Copper and DSL results from Result Manager Upload Note Only channels 1 to 11 are supported on the Wi Fi hotspot router A Wi Fi symbol in the top right hand corner of the navigation bar identifies whether or not a connection is present The Wi Fi...

Страница 48: ...oad option disables uploading your files via Wi Fi or Ethernet You can export results to a USB memory device The DSL In band Upload method supports DSL or Ethernet and can be set to either Enable or Disable Export to EXFO Connect Client allows you to Enable Disable this location to export your CQ and DSL test reports To select the Upload method 1 Press select System Settings and then Upload Setup ...

Страница 49: ...assive for the file transfer mode Transfer Type is set to Binary transferring files as a binary stream of data Remote Directory can be used to specify the file upload directory on the FTP server for example dir1 dir2 If this field is left empty the FTP upload will save the result file at root directory on FTP server Restore Default button allows you to reset the entries to their defaults To config...

Страница 50: ...previously selected networks last 3 the MaxTester will try to join that network using the credentials saved for the selected network Status displays a Wi Fi symbol if the device is connected and is dynamically updated with the present connectivity state of the networks Network Name is the Wi Fi network name A third right hand column displays a checkmark indicating the network selected for upload F...

Страница 51: ...own arrow key to highlight the list box and press to get into the list 2 In the list press the up down arrows to select the desired network 3 Press to confirm a network and open the alphanumeric editor screen to enter your Password 4 Press to come out of the list 5 Press the down and left right arrow keys to highlight the network buttons and press ...

Страница 52: ...s case please use WPA2 encryption Password opens the alphanumeric editor screen allowing you to enter the desired Wi Fi network s password Join function key replaces Done on the editor screen Join function key allows your MaxTester to connect to the other network and it becomes the selected preferred upload network To configure the other network parameters 1 Press the up down arrow keys to highlig...

Страница 53: ...l local area network VLAN tag ranging from 0 through 4094 The entry is available only when VLAN Support is Enable Vendor ID is the name of the unit This entry is available only when Access Mode is DHCP Local Mac Address is the internal MAC address of the unit either MaxTester or User Defined Mac Address is a specific MAC address in a hexadecimal format if User Defined was selected for the previous...

Страница 54: ...e address of the primary domain name server to be used by the unit If DNS is unavailable enter 0 0 0 0 DNS2 is the address of the secondary domain name server to be used by the unit If DNS is unavailable enter 0 0 0 0 Restore Default button allows you to reset the entries to their defaults To configure the setup options 1 Press the up down arrows to select the desired parameter 2 Press the left ri...

Страница 55: ...ails below Chan displays the Wi Fi channel number Network Name or SSID service set IDentifier is the name assigned to a wireless network MAC Address or BSSID basic service set identifier is the address of the WAP wireless access point RSSI is the received signal strength indicator returned from the Wi Fi dongle Sort Channels button allows you to toggle the channel numbers by ascending and descendi...

Страница 56: ...Excellent 58 green Channel displays the Wi Fi channel number and frequency Security displays one of the following encryption and authentication types NONE WEP OPEN WEP SHARED WPA TKIP WPAPSK TKIP WPA2 TKIP WPA2PSK TKIP WPA AES WPAPSK AES WPA2 AES WPA2PSK AES Network Type is either Access Point the infrastructure network or router or Adhoc spontaneous To navigate to a Wi Fi network and view the det...

Страница 57: ...XFO Connect The EXFO Connect menu presents the following 2 sub menus EXFO Connect Client ECC opens to the main menu pane which allows you to navigate between the ECC interfaces Please refer to the ECC User Guide Comms Setup allows you to configure the EXFO Connect communications upload setup ...

Страница 58: ...g the EXFO Connect application from the Upload Save Result screen When DSL is selected the following message is displayed DSL connection was chosen for EXFO Connect Please use EXFO Connect button inside DSL Manual Test Upload Save Results page Disable Connection option disables uploads via Wi Fi or the Ethernet When Wi Fi or Ethernet are selected their respective icons are displayed in the top rig...

Страница 59: ...he MAX 635G Copper and G fast VDSL2 ADSL2 Multi play Test Set 49 Comms Setup Wi Fi Setup The Wi Fi Setup function for Comms Setup is the same as in the System Settings Upload Setup Please see Wi Fi Setup on page 40 ...

Страница 60: ...Setting Up the MAX 635G 50 MAX 635G Comms Setup Ethernet Setup The Ethernet Setup function for Comms Setup is the same as in the System Settings Upload Setup Please see Ethernet Setup on page 43 ...

Страница 61: ...g xDSL technology In addition it utilizes noise measurements longitudinal and stressed balance tests and power spectral density tests to assist in the installation maintenance and troubleshooting of copper cables Copper Test Main Menu Copper Main presents the main copper menu page which allows you to navigate between all the copper qualification testing applications using the up down left right ar...

Страница 62: ...ation profile A Profile Default is provided with a predefined set of parameters for all test applications Note Cable parameters are not included in these profiles but can be configured in Setup Select Profile lists available profiles saved in the internal memory The current active profile is shown in the upper information header An asterisk on the currently Selected Profile name indicates that mod...

Страница 63: ... to the unit Delete Profile allows you to delete a profile except the default profile on the unit Profile Default resets the current test setup to the factory default profile If selected a dialogue box pops up to confirm that all single and auto test settings will revert to factory test settings Save Profile allows you to save changes made to selected profile An asterisk on the Selected Profile na...

Страница 64: ...he Select Profile page lists the available profiles in the internal memory by Profile Name and Modification Date The Selected Profile displays the current active profile To select a profile 1 Press the up down arrow keys to highlight the desired entry and press The profile is loaded and the Selected Profile is updated with the current selection OR 2 Press to cancel your selection and go back to th...

Страница 65: ...made to this profile in the threshold settings or parameters of a particular test Each test displays a sub menu of test icons to select and view To select a test 1 Press the up down left right arrow keys on the keypad to select an icon 2 Press to display the sub menu test icons Multimeter Profile Details The profile details Multimeter main menu allows you to view the test threshold and parameters ...

Страница 66: ...m your selection Noise Tests Profile Details The profile details Noise Tests main menu allows you to view the test threshold and parameters of the following tests VF Noise Power Influence VF Impulse Noise WB PSD Noise WB Impulse Noise NEXT To navigate between the test profiles 1 Press the up down left right arrow keys on the keypad to select an icon 2 Press to confirm your selection ...

Страница 67: ...nuation Return Loss TX RX Tone RX Tone with FED To navigate between the test profiles 1 Press the up down left right arrow keys on the keypad to select an icon 2 Press to confirm your selection TDR Profile Details The profile details TDR menu allows you to select and view the parameters set for the following tests Auto TDR Manual TDR xTalk TDR To navigate between the test profiles 1 Press the left...

Страница 68: ...the keypad to select an icon 2 Press to confirm your selection Delete Profile Delete Profile lists all profiles found on the internal memory except the default profile which cannot be removed Selected Profile displays the profile name in use To delete a profile 1 Press the up down arrow keys to highlight the entry to be removed and press 2 Press the Delete function key to remove the entry from the...

Страница 69: ...d clone and delete a cable as well as modify its details Application Settings include the following pages General Standard Identification File Name and Buzzer Current settings are kept in memory and are independent of the profiles Factory Default allows you to revert the Phone Book and or Application Settings to the factory default values Test Lead Compensation overwrites the current test lead cha...

Страница 70: ...orming the copper tests It can include a maximum of 50 groups of up to 3 individual entries each The functions are as follows Select Group Entry Phone Book Details Add Group Clone Group Delete Group Load Phone Book Save Phone Book To navigate between the phone book functions 1 Press the up down left right arrow keys on the keypad to select an icon 2 Press to confirm your selection ...

Страница 71: ...rrent selection OR 2 Press to cancel your selection and go back to the Phone Book menu Phone Book Details The Phone Book Details page allows you to view and modify the Phone Book parameters of the currently highlighted phone entry As well you can enable disable entries 2 and 3 in each phone group When creating a new phone group only entry 1 is enabled Entries 2 and 3 remain disabled until entry 1 ...

Страница 72: ...the parameters of the Phone Book To view and modify the group details 1 Press the up down arrow keys to highlight the desired parameter 2 Press the left right arrow keys to view and select the options OR 3 Press on a value to open a list box of options or the alphanumeric editor screen and use the navigation keys to scroll through 4 Press to confirm the value 5 Press the Accept function key to upd...

Страница 73: ... Phone Book Phone Number is the 10 digit numeric phone number of the entry Type displays the following list of values Milliwatt tone Drop battery Quiet line for additional line types Enable displays either Yes or No Add function key adds the new group entry to the Phone Book To add a new group entry 1 Press the up down arrow keys to highlight the desired parameter 2 Press the left right arrow keys...

Страница 74: ...ge allows you to copy the details of an existing entry to a new group entry in the Phone Book The page lists all entries by Group ID The list can display a maximum of 50 entries Group In Use displays the Group ID number in use To clone a group entry 1 Press the up down arrow keys to highlight the desired entry 2 Press the Clone function key to copy the details of the highlighted entry and append a...

Страница 75: ...Use displays the group number in use To delete a group entry 1 Press the up down arrow keys to select the entry to be removed 2 Press the Delete function key to remove the selected entry from the Phone Book If you try to delete a cable in use a warning message pops up and changes the Group in Use to Group 1 by default OR 3 Press to cancel your selection remove any display message and go back witho...

Страница 76: ...ad button imports the selected phone book You will be prompted for confirmation since this action will overwrite the current phone book Cancel button removes the confirmation warning message without impacting the phone book To load a phone book 1 Select the Storage Location using the left right arrow keys OR 2 Press to display the list of options 3 Using the up down arrow keys select a file name t...

Страница 77: ...he current phone book to save By default the name is phone_book csv The Storage Location lists the save destinations MT internal memory USB Save button saves the selected file Note The unit will overwrite any document with the same file name found on the disk without warning To save a phone book 1 Accept the default file name or press to create a new one using the edit screen 2 Select a Storage Lo...

Страница 78: ...nction speed dial and last dialed lists without exiting the current test application To access the Dialer function 1 On the Home pane use the up down arrow keys to highlight Copper Test then press 2 From the Copper Main or Multimeter if FED option enabled page select Dialer and press Dialer Dialer provides the following functions The means to call and signal voice switch test functions such as dro...

Страница 79: ...m this page Dialing Status shows the current status of the dialed number Group ID displays the group ID number of the dialed number if it was selected from the Phone Book Entry ID displays the Entry Name of the dialed number if it was selected from the Phone Book Enter Number displays the telephone number entered or selected from the Recent Dialed Numbers list or Phone Book Recent Dialed Numbers b...

Страница 80: ... keypad by using the navigation keys on the unit and pressing The selected numbers are entered in the text box 2 Press Pause to enter a 1 second pause while dialing For example pressing Pause consecutively 3 times creates a 3 second pause 3 Move left or right in the text box by using Cursor Left Right function keys 4 Delete a character by moving the cursor to the left of the character and pressing...

Страница 81: ...cally entered in the Enter Number field of the Dialer page Select from Phone Book The Select Entry read only page lists entries by Group ID and Entry Name Type There is 1 group of 3 factory default entries The Phone Book can include a maximum of 50 groups Group in Use displays the group number in use Entry in use displays the Entry Name in use To select a group and entry Press the up down arrow ke...

Страница 82: ... tone Drop battery Quiet line for additional line types Enable displays either Yes or No Add function key adds the new group entry to the Phone Book To add a number to the phone book 1 Press the up down arrow keys to highlight the desired parameter 2 Press the left right arrow keys to view and select the options OR 3 Press on a value to open a list box of options or the alphanumeric editor screen ...

Страница 83: ...ate between the cable book functions 1 Press the up down left right arrow keys on the keypad to select an icon 2 Press to confirm your selection Select Cable The Select Cable page lists entries by ID Cable Name and Cable Fill The list can display a maximum of 25 entries Only the cables from the selected Cable Book will be available for selection in test screens Also only cables from the CableBookS...

Страница 84: ...d go back to the Cable Book menu Cable Details The Cable Details page allows you to view the parameter details of the Cable in Use or select a Cable ID number by pressing the left right arrow keys on the keypad and view its details You can only modify cables from the CableBookSettings book Cable Name is the name of the cable in the Cable Book Cable Gauge is the gauge system for measuring wire size...

Страница 85: ...ratio and percentage of the speed of light Temperature specifies the temperature of reference at which all cable parameters have been measured in either F Fahrenheit or C Celsius units The measurement units are updated based on the Temperature settings in Setup Application Settings Standard To view and modify the cable details 1 Press the up down arrow keys to highlight the desired parameter 2 Pre...

Страница 86: ...h Aircore Jelly Pulp 5 PR or 2 PR Capacitance T R A B allows you to specify a value for the capacitance per length constant Capacitance T R to GND A B to E allows you to specify a value for the capacitance per length to ground constant Resistance allows you specify a value for the resistance constant of the cable Attenuation 300 kHz allows you to specify a value for the reduction in signal strengt...

Страница 87: ...able Book entries has been reached delete an entry before adding a new one Clone Cable The Clone Cable page allows you to copy the cable details of an existing entry from the selected Cable Book to a new cable entry in the CableBookSettings The page lists all entries by ID Cable Name and Cable Fill Cable in Use displays the ID number of the cable in use Cable Book Version displays the current edit...

Страница 88: ...le Book Version displays the current edition number of the Cable Book in use To delete a cable entry 1 Press the up down arrow keys to highlight the entry to be removed and press 2 Press the Delete function key to remove the entry from the Custom Cable Book If you try to delete a cable in use a warning message pops up and changes the Cable in Use to cable 1 by default OR 3 Press to cancel your sel...

Страница 89: ...le name s to load Load button imports the selected cable book You will be prompted for confirmation since this action will overwrite the current cable book Cancel button removes the confirmation warning message without impacting the cable book To load a cable book 1 Select the Storage Location using the left right arrow keys OR 2 Press to display the list of options 3 Using the up down arrow keys ...

Страница 90: ... to save By default the name is cable_book csv The Storage Location lists the save destinations MT internal memory USB Save button saves the selected file Note The unit will overwrite any document with the same file name found on the disk without warning To save a cable book 1 Accept the default file name or press to create a new one using the edit screen 2 Select a Storage Location 3 Press Save ...

Страница 91: ...emperature of the cable under test in either F Fahrenheit or C Celsius units Capacitance Measurement is either 3 Terminal or 2 Terminal The latter method measures the capacitance across the 2 terminals specified either T R T G R G or A B A E B E whereas the 3 Terminal method measures the capacitance across the 2 terminals specified and shorts the remaining or unspecified terminal to G E The 3 Term...

Страница 92: ...r keypad to start a test Report File Storage Location is dependent on whether Export to EXFO Connect Client is enabled or not in System Settings Upload Setup If enabled you can select either USB or EXFO Connect Client as your test report storage location If disabled USB is automatically selected Report Format is HTML MHTML or XML as the generated report format Note If EXFO Connect Client is select...

Страница 93: ...her Right to rotate the MaxTester 90 degrees clockwise so that the keypad is on the left hand side or Left to rotate the unit 90 degrees counter clockwise so that the keypad is on the right hand side To select the parameter values 1 Press the up down arrow keys to highlight the desired parameter 2 Press the left right arrow keys to view and select the options OR 3 Press on a value to open a list b...

Страница 94: ...et for the page Measurement Units Distance lists the measurement units for distance in feet or meters Temperature lists the measurement units for temperature in F Fahrenheit or C Celsius Level lists the units of power level in dBm or dBRN Capacitance lists the units of capacitance for Tip and Ring in nF km or nF mi Resistance lists the units for resistance in Ω km or Ω mi Attenuation lists the uni...

Страница 95: ...rt Phone and Phone Off Hook Disabled does not run the Device Detection as part of Pair Detective test VOP allows you to select the velocity of propagation for the cable as a Ratio Percentage or V 2 m μsec meters per microsecond Label Customization Connection lists the type of cable connection T R G or A B E Test Parameters Preset Power Line Frequency lists the frequency value of the power line Noi...

Страница 96: ...the name of a contractor used to perform the tests Test From To allows you to select from a list of entries up to 20 each including user defined values Test From To List Setup buttons open separate list management pages To select the parameter values 1 Press the up down arrow keys to highlight the desired parameter 2 Press the left right arrow keys to view and select the options OR 3 Press on a va...

Страница 97: ...d To manage the list 1 Press the left right arrow keys to select the Previous Next Entry buttons and press to select the previous next entry 2 Press Page Up Down function keys to see entries on the previous or next pages These keys are disabled if no other pages exist 3 Press Add function key to add an entry just below the selected entry in the list 4 To edit an entry press the up down arrow keys ...

Страница 98: ...n the format selected in System Settings This entry cannot be disabled Separator allows you to choose a value to separate the enabled entries in the file name e g Space Dash Underscore _ Change Order button allows you to change the order of the file name entries by moving them up or down in the list To select an entry and choose a value 1 Press the up down arrow keys to highlight the desired entry...

Страница 99: ...st To change the order 1 Press to get into the list 2 Use the up down arrow keys to select the desired entry 3 Press to come out of the list 4 Press the up or down arrow key to activate the Up Down buttons 5 Using the left right arrow keys select Up Down and press to move the entry up down the list 6 Press to go back to the File Name tab The File Name Preview will be updated with your changes ...

Страница 100: ...volts Hush Time allows you to configure the hush timeout from 1 to 15 minutes Hush Buzzer button mutes the sounding buzzer Note Upon raising the hazardous voltage flag the MaxTester opens the relays and you will have to press Start Stop on the keypad to re initialize the unit In case the voltage is still too high the MaxTester will open the relays once again preventing any damage to the equipment ...

Страница 101: ...ompensation The Test Lead Compensation routine also performs resistance and capacitance compensation The page displays the Pass Fail status of the last compensation done Note Always perform a test lead compensation if the test leads have recently been removed or replaced Date and Time identifies when the last compensation was done or application installation time Start Compensation button allows y...

Страница 102: ...ed to ground as well as the P U T pair under test By connecting the T R G A B E of a customer s pair CPE to the customer side of the FED blue labeled connectors the red labeled connectors are connected to CO Exchange side of the pair for pass through mode control signals are sent to the FED by the MaxTester in order to open short or pass through to the CO Exchange the T R G A B E connections Conne...

Страница 103: ...d ground wires to the customer side of the FED blue labeled connectors 3 For T R G A B E Shorted connect the T R G A B E to the customer connectors blue labeled Pair1 Cu and the ground lead to the network ground Note P U T in the above diagrams refers to the Pair Under Test Remote is the FED and Controller is the MaxTester ...

Страница 104: ...sable FED and run the test anyway FED Type is enabled when FED is set to Auto or Manual If Auto is selected you can choose between TS125 or UFED IIB When UFED support is enabled the Isolation test voltage source will automatically be limited to 125 V Return Loss test termination to 120 Ω and VF WB Impulse Noise tests duration to 15 min only MMT maximum measurement time is determined for every test...

Страница 105: ...nt session If you leave the copper application at next startup FED will be set to the value saved in the profile Disabled or Auto Manual Setup includes 5 options Open 0 T R A B Shorted 1 T R G A B E Shorted 2 Pass Through Exchange Connect 3 default ID Tone 4 Set FED button activates the state defined in the Manual Setup control Test Status displays a communication with FED status message FED Facto...

Страница 106: ...8 None Note For all FED States other than Pass Through Exchange Connect the Dialer tab is disabled If the dialer is already running before the test starts the dialer will be stopped on entry of the test with a message saying Dialer cannot be used hence dialer will be stopped similar to FaultMapper test To select the parameter values 1 Press the up down arrow keys to highlight the desired parameter...

Страница 107: ...d select the options OR 3 Press on a value to open a list box of options and press the up down arrow keys to highlight the desired parameter 4 Press to confirm the value Noise The Noise tab allows you to set the FED States for all noise tests and lists the default value for NEXT test The Terminated FED state appends the required resistance value For example if you select Terminated 600 Ω 5 the Ter...

Страница 108: ... Return Loss Default values are displayed for WB Attenuation RX Tone with FED and Load Coils The Terminated FED state appends the required resistance value For example if you select Terminated 600 Ω 5 the Termination Resistance will be 600 ohms To select the parameter values 1 Press the up down arrow keys to highlight the desired parameter 2 Press the left right arrow keys to view and select the o...

Страница 109: ...ngle Separate Good Pair K Test Pair Detective You can set the default values for the following Auto Manual TDR FaultMapper To select the parameter values 1 Press the up down arrow keys to highlight the desired parameter 2 Press the left right arrow keys to view and select the options OR 3 Press on a value to open a list box of options and press the up down arrow keys to highlight the desired param...

Страница 110: ...creen where the following information can be entered Identification Fields User Name User ID display the values set up in the Application Settings Identification tab You can edit this field using the editor screen Contractor Name allows you to enter the name of a contractor used to perform the tests Test From To display the values set up in the Application Settings Identification tab You can edit ...

Страница 111: ...plication Settings File Name Save button confirms if the Result File Name is saved successfully Export Report Report File Storage Location is dependent on whether Export to EXFO Connect Client is enabled or not in System Settings Upload Setup If enabled you can select either USB or EXFO Connect Client as your test report storage location If disabled USB is automatically selected Report Format is H...

Страница 112: ...d save results 1 Press the left right and up down arrow keys to highlight the desired parameter 2 Press to display the list or select the value 3 Press the up down arrow key to highlight the desired value OR 4 Press the left arrow key to erase the existing value and then use the alphanumeric keypad to enter a value To cancel the entry press 5 Press to accept the value Select Result File Select Res...

Страница 113: ...ew the results of files previously saved The page lists all saved result files by test date and time The format of Test Date Time is per the selection in System Settings Result files can be loaded from either the MT internal memory or a USB To open previously saved test results 1 Press the left right arrow keys to highlight the desired Storage Location OR 2 Press to display the list and select the...

Страница 114: ...or each lead combination and cable parameters of the test Profile Details displays the thresholds and setup parameters of the test Phone Book displays the phone entry dialed during the test FED Details displays the FED far end device State for the test The File Name of the selected saved results file is continually displayed at the top of the page To navigate the results menu 1 Press the up down l...

Страница 115: ... of the test lead Editable Identification Fields display values from the loaded file You can edit all fields using the editor screen or by selecting an entry from the list box User Name ID Contractor Name Test From To Job ID Customer Name Circuit ID Comments Function keys Save keeps any current changes with the current file name Save As saves the current changes under a different file name that yo...

Страница 116: ...via the presently selected method Wi Fi or Ethernet To view and edit the test result information 1 Press the up down arrow keys to highlight and view the desired parameter 2 Press the left right arrow keys to view and select the options OR 3 Press on an editable value to open the list box of options or the alphanumeric editor screen Use the navigation keys to scroll through and select 4 Press to c...

Страница 117: ...sults Manager is the file name of the selected saved results Test Group is the overall test group of the selected saved results file for example Multimeter Test Identification is the test type of the group for example Current Phone Book The Phone Book page summarizes the Phone Book details when loading a results file It contains information about group entries such as group ID name phone numbers a...

Страница 118: ...sly saved Files are uploaded via the selected method Wi Fi or Ethernet as shown by the corresponding icon in the top right hand corner of the navigation bar Upload Location is FTP or USB Select Files is either None which removes all check marks allowing you to select one or more files or All Uploaded status column displays a successful failed or no upload for each file Upload button transfers the ...

Страница 119: ...esired Upload Location OR 2 Press to display the list and select the value 3 Press the down arrow key and select either None or All files 4 If None press the down arrow key to highlight the list box and press to open the list 5 In the list press the up down arrows to select the desired files 6 Press to come out of the list 7 Press the down arrow key to highlight either Upload or Delete and press ...

Страница 120: ...xporting your results to either the MT internal memory or USB device Select Files is either None or All None removes all check marks allowing you to select one or more files or All Export Report Report File Storage Location is dependent on whether Export to EXFO Connect Client is enabled or not in System Settings Upload Setup If enabled you can select either USB or EXFO Connect Client as your test...

Страница 121: ...s the down arrow key and select either None or All files 4 If None press the down arrow key to highlight the list box and press to open the list 5 In the list press the up down arrows to select the desired files 6 Press to come out of the list 7 Press the down arrow key to highlight the Report Format 8 Press the left right arrow keys to select the desired format OR 9 Press to display the list and ...

Страница 122: ...wing you to select one or more files or All Delete button removes the selected files To delete previously saved test results 1 Press the left right arrow keys to select either None or All files 2 If None press the down arrow key to highlight the list box and press to open the list 3 In the list press the up down arrows to select the desired files 4 Press to come out of the list 5 Press the down ar...

Страница 123: ...he following make basic electrical safety checks AC volts check for crossed or coupled battery voltages assess basic loop continuity balance loop quality with resistance measurements measure total electrical length with capacitance measure the ground path resistance with the station ground test run a stress test Pair Detective runs many of these tests automatically and is a recommended starting te...

Страница 124: ...on Ground Stressed Balance Dialer icon shown here if FED or UFED enabled see Dialer Function on page 68 for details To start stop a test 1 Press the up down left right arrow keys on the keypad to select the desired test icon 2 Press to confirm your selection 3 The test will start automatically if the Setup Application Settings Test Startup Mode is set to Auto If not press Start Stop on the keypad ...

Страница 125: ...h as Stressed Balance VF AC Balance and or short the far end and run Resistive Balance to isolate small faults Larger foreign unwanted voltages are a real problem because they indicate a contact fault and add unwanted noise affecting other signals including affecting test set signals 48 to 52 volts would indicate working POTS If you have not already done so press and select Pair Detective to ident...

Страница 126: ...w much resistance the tester uses to connect to the line and measure voltages Threshold Settings button opens a new page that allows you to set the DC voltage thresholds for each pair Result displays a snapshot of the pass fail status and volts for each continuous DC pair Test Status displays the current state of measurement or an error message To select the parameter values 1 Press the up down ar...

Страница 127: ... a measured value is too high or too low Type is the threshold limit for each pair either Maximum or Minimum Enabled is a flag to use the voltage threshold either Yes or No To set threshold values 1 Press the up down arrow keys to highlight the desired parameter 2 Press the left right arrow keys to view and select the options OR 3 Press on a value to open a list box of options or the alphanumeric ...

Страница 128: ...timeter Current Test displays the test being measured Here you can switch to another test from the given list However this action will terminate the ongoing measurement test Selected Pair allows you to select All Pairs or a single wire pair for measurement Termination Resistance defines how much resistance the tester uses to connect to the line and measure voltages Threshold Settings button opens ...

Страница 129: ...st Set 119 Voltage To select the parameter values 1 Press the up down arrow keys to highlight the desired parameter 2 Press the left right arrow keys to view and select the options OR 3 Press on a value to open a list box of options 4 Press to confirm the value ...

Страница 130: ...ce defines how much resistance the tester uses to connect to the line and measure voltages The default value of 100 kΩ is widely used in the industry Threshold Settings button opens a new page that allows you to set the AC DC voltage thresholds for each pair Result displays a snapshot of the pass fail status volts and frequency Hz values for each continuous AC DC pair Test Status displays the curr...

Страница 131: ...s Current Group is the current test group name for example Multimeter Current Test displays the test being measured Here you can switch to another test from the given list However this action will terminate the ongoing measurement test Selected Pair allows you to select All Pairs or a single wire pair for measurement Termination Resistance is a read only value of 430 Ω that defines how much resist...

Страница 132: ...ch pair The threshold is a programmable value you can use as an on screen indicator in each test when a measured value is too high or too low Type is the threshold limit for each pair either Maximum or Minimum Enabled is a flag to use the current threshold either Yes or No To set threshold values 1 Press the up down arrow keys to highlight the desired parameter 2 Press the left right arrow keys to...

Страница 133: ...example Multimeter Current Test displays the test being measured Here you can switch to another test from the given list However this action will terminate the ongoing measurement test Selected Pair allows you to select All Pairs or a single wire pair for measurement Termination Resistance is a read only value of 430 Ω that defines how much resistance the tester uses to connect to the line Thresho...

Страница 134: ...this test is running can indicate intermittent swinging contact or wet faults To view all lead combinations right away Press the Snapshot function key Continuous AC and Continuous DC are run synchronously Press Start Stop on the keypad to run the test Current Group is the current test group name for example Multimeter Current Test displays the test being measured Here you can switch to another tes...

Страница 135: ...a snapshot of the pass fail status and DC current results for each selected wire pair Test Status displays the current state of measurement or an error message To select the parameter values 1 Press the up down arrow keys to highlight the desired parameter 2 Press the left right arrow keys to view and select the options OR 3 Press on a value to open a list box of options 4 Press to confirm the val...

Страница 136: ...the balance Significant differences indicate one sided faults or series resistance and or high resistive partial opens Typical values for POTS circuits are 1 to 3 5 MΩ across each lead combination whereas pairs for broadband DSL should be at least 5 MΩ and for higher speed broadband circuits 20 MΩ is recommended Resistance values are valuable when the far end is shorted and grounded all leads We c...

Страница 137: ... single wire pair for measurement Cable Parameters Cable Type displays the ID Cable Name and Fill and allows you to select an entry with its associated parameters from the current Cable Book to use for testing The selection is not saved when leaving the test The current Cable Book entry is shown by default Cable Temperature is the temperature in either F or C of the cable under test Resistance dis...

Страница 138: ... pair The threshold is a programmable value you can use as an on screen indicator in each test when a measured value is too high or too low Type is the threshold limit for each pair either Maximum or Minimum Enabled is a flag to use the current threshold either Yes or No To set threshold values 1 Press the up down arrow keys to highlight the desired parameter 2 Press the left right arrow keys to v...

Страница 139: ...d numeric state are displayed beside the Current Test Here you can switch to another test from the given list However this action will terminate the ongoing measurement test Selected Pair allows you to select All Pairs or a single wire pair for measurement Cable Parameters Cable Type displays the ID Cable Name and Fill and allows you to select an entry with its associated parameters from the curre...

Страница 140: ...the current state of measurement or an error message To select the parameter values 1 Press the up down arrow keys to highlight the desired parameter 2 Press the left right arrow keys to view and select the options OR 3 Press on a value to open a list box of options or the alphanumeric editor screen and use the navigation keys to scroll through 4 Press to confirm the value ...

Страница 141: ... when possible 97 98 balance There will be low ohm values when measuring resistance with a short at the far end For example on 24 AWG cable at 21 C 70 F you will see 520 Ω for a 3 m 10 ft cable If both Tip and Ring have 520 ohms the pair is balanced perfectly but there will normally be some small difference and a much larger value on one side for example 800 Ω indicates a significant series fault ...

Страница 142: ...reshold Settings The Threshold Settings page allows you to set the Resistive Balance Ω Threshold values The threshold is a programmable value you can use as an on screen indicator in each test when a measured value is too high or too low Type is the threshold limit for each pair either Maximum or Minimum Enabled is a flag to use the current threshold either Yes or No To set threshold values 1 Pres...

Страница 143: ...mbination and the pass fail status for Resistive Balance in Ω and Profile Details The Profile Details page displays read only Resistive Balance thresholds Profile Name is the file name of the selected saved results Test Group is the overall test group of the selected saved results file for example Multimeter Test Identification is the test type of the group for example Resistive Balance ...

Страница 144: ...or paper pulp etc may be lower because of long term voltage on the pair under test Remember that telecom signals are full time This is especially important for power span pairs carrying significant voltages over time Be aware that the continuous application of a voltage tends to dry up moisture and some faults may seem to disappear You would see the resistance value increase and thus improve as th...

Страница 145: ...to enter a voltage value between 50 and 125 V 50 and 500 V if HIVOLT for Tip to Ring wire Pair User Defined Voltage T R G A B E allows you to enter a voltage value between 50 and 125 V 50 and 500 V if HIVOLT for Tip or Ring to Ground wire Pair Soak Time sets a soak period of time from 1 to 60 seconds Threshold Settings button opens a new page that allows you to set isolation thresholds for each pa...

Страница 146: ...le value you can use as an on screen indicator in each test when a measured value is too high or too low Type is the threshold limit for each pair either Maximum or Minimum Enabled is a flag to use the voltage threshold either Yes or No To set threshold values 1 Press the up down arrow keys to highlight the desired parameter 2 Press the left right arrow keys to view and select the options OR 3 Pre...

Страница 147: ...test in Snapshot mode and terminate after the Soak Time period expires Current Group is the current test group name for example Multimeter Current Test displays the test being measured Here you can switch to another test from the given list However this action will terminate the ongoing measurement test Selected Pair allows you to select a single wire pair for measurement Soak Voltage allows you t...

Страница 148: ...you to set isolation thresholds for each pair Result displays a snapshot of the pass fail status Resistance and a Soak Counter for each selected wire pair While running the test the counter displays the soak period by the second for the wire pair s under test Test Status displays the current state of measurement or an error message To select the parameter values 1 Press the up down arrow keys to h...

Страница 149: ...e for POTS internet and better for high speed broadband such as VDSL2 If the opens distance is significantly less than indicated on plant maps then the pair may be open at the distance suggested Of course if the distance matches the expected length you are seeing the end Be a bit cautious with capacitance opens as wet faults or physical damage can significantly change the result Wetness can provid...

Страница 150: ...rrent Test Here you can switch to another test from the given list However this action will terminate the ongoing measurement test Note The accuracy of the 2 Terminal Capacitance Measurement is impacted by the use of the FED and the 3 Terminal default method is recommended to be used instead Selected Pair allows you to select All Pairs or a single wire pair for measurement Cable Parameters Cable T...

Страница 151: ...e test Result displays a snapshot of the pass fail status Capacitance and Length for each selected wire pair Capacitive Balance is shown in when All Pairs is selected Test Status displays the current state of measurement or an error message To select the parameter values 1 Press the up down arrow keys to highlight the desired parameter 2 Press the left right arrow keys to view and select the optio...

Страница 152: ...ction will terminate the ongoing measurement test Note The accuracy of the 2 Terminal Capacitance Measurement is impacted by the use of the FED and the 3 Terminal default method is recommended to be used instead Selected Pair allows you to select All Pairs or a single wire pair for measurement Cable Parameters Cable Type displays the ID Cable Name and Fill and allows you to select an entry with it...

Страница 153: ...nce and Length for each selected wire pair Capacitive Balance is shown in when All Pairs is selected Test Status displays the current state of measurement or an error message To select the parameter values 1 Press the up down arrow keys to highlight the desired parameter 2 Press the left right arrow keys to view and select the options OR 3 Press on a value to open a list box of options and use the...

Страница 154: ...OTS and internet circuits should be 95 and higher speed broadband circuits 97 or 98 if possible Type is the threshold limit for each pair either Maximum or Minimum Enabled is a flag to use the current threshold either Yes or No To set threshold values 1 Press the up down arrow keys to highlight the desired parameter 2 Press the left right arrow keys to view and select the options OR 3 Press on a v...

Страница 155: ... For values between a few ohms and 25 there may be a differential with the premises ground potential and some noise may couple onto communications circuits creating problems to the broadband signal Depending on where you measure the station ground check the bonding lugs on cross boxes pedestals and electronics remotes as well as cable and terminal bonds These all need to be good quality and tight ...

Страница 156: ...nly The Confirmation window is prompted before every Station Ground test is started if you selected Yes for the Show hookup diagram You can select No to hide the diagram next time you run the test However you can check the connection diagram at any time by pressing the Hookup Diagram button In this case the test does not start when you press the Ok button to close the Confirmation window Test Stat...

Страница 157: ...alues 1 Press the up down arrow keys to highlight the desired parameter 2 Press the left right arrow keys to view and select the options OR 3 Press on a value to open a list box of options or the alphanumeric editor screen and use the navigation keys to scroll through 4 Press to confirm the value Result Details The Result Details read only page displays the Station Ground results and the pass fail...

Страница 158: ...r higher speed ADSL2 and VDSL2 circuits should stress 20 A low stress value 20 indicates imbalance on the pair which can have different causes Most common causes are grounds and shorts but also one sided series resistance sometimes also called high open high resistive fault or dirty open Poor or failing splice connectors beanies also case minor imbalances affecting higher speed DSL circuits Watch ...

Страница 159: ... at the far end This will confirm if ohms on one side are higher than the other and there is a one sided high resistive fault If the ohms on the faulted side measure 20 M ohms use the RFL Single Separate Good Pair method depending on available spare pairs to try to locate the corrosion See RFL on page 281 for more help on using this test The Stressed Balance parameters are as follows Current Group...

Страница 160: ...keys to view and select the options OR 3 Press on a value to open a list box of options 4 Press to confirm the value Threshold Settings The Threshold Settings page allows you to set the Good Marginal Balance threshold values for the Stressed Balance test The threshold is a programmable value you can use as an on screen indicator in each test when a measured value is too high or too low Type is the...

Страница 161: ...r screen and use the navigation keys to scroll through 4 Press to confirm the value Result Details The Result Details read only page displays the Stressed Balance results and the pass fail status Good values are lower compared to the VF longitudinal Balance test 60 Test Group is the overall test group of the selected saved results file for example Multimeter Test Identification is the test type of...

Страница 162: ......

Страница 163: ...ge and color codes to identify common metallic faults and imbalances such as shorts and grounds Pair Detective includes high voltage isolation leakage tests and Auto TDR to quickly locate identified faults It also includes two unique tests corrosion and wet detect found nowhere else in the test set In one minute you have a great picture of pair quality and it is easy to stop the test move to a new...

Страница 164: ... the TDR tab to use Pair Detective runs two unique tests found nowhere else in the MaxTester Corrosion and Wet detect Corrosion detect identifies the presence of one sided corrosion or series resistance such as a high resistive or partial dirty open while Wet detect tells you if a fault faulted splice joint or module for example is damp Pair Detective cannot identify flooded cable sections use TDR...

Страница 165: ...TI User Jack with Capacitor C TI User Jack with C and Phone On Off Hook Phone On Off Hook Slovakia DT PPA DT PPA inverted DT PPA and Phone On Hook DT PPA inverted and Phone On Hook Phone On Off Hook Battery Shorts hard short Grounds high resistive ground Opens possible high resistive open Imbalanced pair Corrosion one sided series resistance Wet detected but not flooded section ...

Страница 166: ...y the moisture has disappeared The fault remains and moisture will likely return at a later time Therefore do not extend the soak time unless testing insulation resistivity PIC paper etc Cable Setup button opens a new page that allows you to set the Cable Parameters for the test Threshold Settings button opens a new page that allows you to set the threshold parameters They control when Pair Detect...

Страница 167: ...rs affect distance calculations of Capacitance Opens and Resistance measurements and the TDR cursor distance indication Cable Gauge identifies the gauge system for measuring wire sizes in AWG American Wire Gauge units or mm metric wire size Cable Fill read only entry is the type of material the cable is filled with Aircore Jelly Pulp 5 PR or 2 PR Setup in the Cable Book This value affects Capacita...

Страница 168: ...d when a fault is identified such as a short at 3 5 M ohms Foreign DC Voltage sets the maximum foreign DC voltage value Default is 4 V which is fine for POTS and internet circuits consider a lower value for high a speed DSL such as VDSL2 POTS DC Voltage sets the minimum working POTS DC voltage value POTS DC Current sets the minimum working POTS DC current value Capacitive Balance sets the minimum ...

Страница 169: ...selection 4 Press to confirm and close your selections Multimeter The Multimeter page displays the raw values used by Pair Detective to identify a fault on the summary screen Read only results and the P F pass fail status are shown for the following tests DC Voltage displays the volts for each DC Pair DC Current displays the DC current results for T R A B wire Pair Capacitance Opens displays Capac...

Страница 170: ...n real time in either Portrait or Landscape Mode recommended until you stop the test The last valid results then remain displayed Current Test displays the test being measured Range allows you to set the range from the given list Gain allows you select the gain test parameter from the given list The previous 2 parameters have 2 modes of operation Auto is the default mode upon loading the test page...

Страница 171: ...d control exit the Pair Detective test and select TDR from the Copper Main menu Select Graph button changes to Graph Selected when pressed and opens a new selection of function keys which allow you to maneuver the graph as follows Cursor Marker allows you to select the cursor blue or marker red independently by toggling the function key The footer updates to reflect either Move cursor or Move mark...

Страница 172: ... the desired parameter 2 Press the left right arrow keys to view select the options or increase decrease values OR 3 Press on a value to open a list box of options or the alphanumeric editor screen and use the navigation keys to scroll through 4 Press to confirm the value Landscape Mode is the best way to use the TDR and allows you to view the test results in landscape mode utilizing the full leng...

Страница 173: ...w the Cable Gauge and Cable Fill entries which were setup in Cable Book and VOP For more information see Pair Detective Cable Setup on page 157 To select the parameter values in Landscape Mode 1 Press the desired function key 2 For Parameters and Cable Setup press the up down arrow keys to highlight the desired parameter 3 Press the left right arrow keys to view select the options or increase decr...

Страница 174: ...Pulp 5 PR or 2 PR Velocity of Propagation is defined as m μsec meters per microsecond a ratio or percentage of the speed of light for the cable Cable Temperature is the temperature of the cable under test in either F or C Result displays a Summary of the overall pass fail status DC Voltage Current and Isolation for each selected wire pair as well as other detailed results of the Pair Detective tes...

Страница 175: ...VDSL2 ADSL2 Multi play Test Set 165 Pair Detective Result Details Multimeter The read only Multimeter page displays detailed results saved from running the Pair Detective test Please refer to Multimeter on page 159 for more information ...

Страница 176: ...and run the test again The TDR function key is available for your reference although FaultMapper is not solely a TDR and performs some signal analysis FaultMapper can identify and or locate the following Shorts Grounds strap required to determine distance Opens Detect load coils Bridged tap The FaultMapper page displays the following parameters Current Test displays the test being measured Far End...

Страница 177: ...ay include the Bridge Tap length remove the Bridge Tap for better accuracy Fault Status displays the number of faults detected or No fault detected after running the test The status Open detected is reported in the following case No strap The pair is open No faults other than the pair being open Open and the distance to Open is displayed and represented using X in the graph Test Status displays th...

Страница 178: ...ifies the gauge system for measuring wire sizes in AWG American Wire Gauge units or mm metric wire size Cable Fill read only entry is the type of material the cable is filled with Aircore Jelly Pulp 5 PR or 2 PR Capacitance T R A B read only entry is a value for the capacitance per length constant used to calculate distance to opens Capacitance T R to GND A B to E read only entry is a value for th...

Страница 179: ...ess the up down arrow keys to highlight the desired parameter 2 Press the left right arrow keys to view and select the options OR 3 Press on a value to open a list box of options or the alphanumeric editor screen and use the navigation keys to scroll through 4 Press to confirm the value TDR The FaultMapper TDR function provides a shortcut to the TDR test A dialogue box opens warning that you are a...

Страница 180: ...right arrows to select the button and press to open the page Result displays the cable fault details Note When running FaultMapper with a strap at the far end of the pair and there is a T G A E fault the strap may also cause FaultMapper to display a R G B E short In such cases the resistance shown is the resistance that would be measured using a multimeter Estimated Length displays the cable lengt...

Страница 181: ...f material the cable is filled with Aircore Jelly Pulp 5 PR or 2 PR Capacitance T R A B is the value for the capacitance per length constant Capacitance T R to GND A B to E is the value for the capacitance per length to ground constant Attenuation 300 kHz is the value for the reduction in signal strength or insertion loss of the cable VOP is the velocity of propagation defined as m μsec meters per...

Страница 182: ...pper FaultMapper Profile Details The Profile Details page displays read only FaultMapper Test Parameters Profile Name is the file name of the selected saved results Test Identification is the test type of the group for example FaultMapper ...

Страница 183: ...in pane highlight Noise Tests and press to open the menu Noise Tests Main Page The Noise Tests menu allows you to select and run the displayed tests VF Noise Power Influence VF Impulse Noise WB PSD Noise WB Impulse Noise NEXT To start stop a test 1 Press the up down left right arrow keys on the keypad to select the desired test icon 2 Press to confirm your selection 3 The test will start automatic...

Страница 184: ...However this action will terminate the ongoing measurement test VF Noise Filter allows you to define the voice frequency noise filter to be used dependent on ITU or ANSI Standard mode and the Noise Filter set in Setup Application Settings Termination Resistance is a read only value of 600 Ω Threshold Settings button opens a new page that allows you to set the VF Noise threshold Result displays the...

Страница 185: ...old Settings The Threshold Settings page allows you to set the VF Noise Threshold values for the test Type is the threshold limit either Maximum or Minimum Enabled is a flag to use the current threshold either Yes or No To set threshold values 1 Press the up down arrow keys to highlight the desired parameter 2 Press the left right arrow keys to view and select the options OR 3 Press on a value to ...

Страница 186: ...Noise Tests 176 MAX 635G VF Noise Result Details The Results Details read only page displays the VF Noise value and the pass fail status ...

Страница 187: ...on will terminate the ongoing measurement test VF Noise Filter allows you to define the voice frequency noise filter to be used dependent on ITU or ANSI Standard mode and the Noise Filter set in Setup Application Settings Power Line Frequency is a read only value of 50 or 60 Hz based on frequency selected in Setup Application Settings Standard Threshold Settings button opens a new page that allows...

Страница 188: ...ts the x axis and y axis limits to full scale Return To Test removes these function keys and displays the Detection page Result displays a value and graph of the Power Influence measurement and pass fail status Test Status displays the current state of measurement or an error message To select the parameter values 1 Press the up down arrow keys to highlight the desired parameter 2 Press the left r...

Страница 189: ...he threshold limit either Maximum or Minimum Enabled is a flag to use the current threshold either Yes or No To set threshold values 1 Press the up down arrow keys to highlight the desired parameter 2 Press the left right arrow keys to view and select the options OR 3 Press on a value to open a list box of options or the alphanumeric editor screen and use the navigation keys to scroll through 4 Pr...

Страница 190: ... Press and hold the left right arrow keys to accelerate the cursor Press to recall the cursor and place it in the middle of the current x axis limits Zoom references the middle of the x y axis and not the cursor position Press the arrow keys as follows Right x axis zoom in Left x axis zoom out Up y axis zoom in Down y axis zoom out Pan use left right arrow keys to pan the x axis and the up down ar...

Страница 191: ...te the ongoing measurement test VF Noise Filter allows you to define the voice frequency noise filter to be used dependent on ITU or ANSI Standard mode and the Noise Filter set in Setup Application Settings Termination Resistance is a read only value of 600 Ω Test Duration allows you to set the length of time to run the test from a list of values If UFED Control option is enabled the maximum value...

Страница 192: ...its for the impulse noise test Power Separation defines the level difference between the Low Mid and High thresholds Specify a value between 1 and 6 dB Mid Counter allows you to set the threshold value for this counter Type is the threshold limit of the Mid Counter either Maximum or Minimum Enabled is a flag to use the current Mid Counter threshold either Yes or No To set threshold values 1 Press ...

Страница 193: ... fast VDSL2 ADSL2 Multi play Test Set 183 VF Impulse Noise Result Details The Results Details read only page displays the High Mid Low VF Impulse Noise Count and Detection Level values and the pass fail status of the Mid level ...

Страница 194: ...wever this action will terminate the ongoing measurement test Bandwidth allows you to select the frequency range for the test from a list of available bandwidths ISDN HDSL SHDSL ADSL1 2 ADSL2 VDSL2 8 VDSL2 12 VDSL2 17 VDSL2 30 or VDSL2 35 Noise Filter defines the filter currently enabled Options are None ISDN E HDSL F ADSL G ADSL ADSL2 VDSL VDSL2 8 VDSL2 12 VDSL2 17 VDSL2 30 VDSL2 35 Termination i...

Страница 195: ...keys which allow you to maneuver the graph as follows Cursor press the left right arrow keys to decrease increase the values by moving the cursor Press and hold the left right arrow keys to accelerate the cursor Press to recall the cursor and place it in the middle of the current x axis limits Zoom references the middle of the x y axis and not the cursor position Press the arrow keys as follows Ri...

Страница 196: ...e reading for the Current results including a pass fail status If Peak Hold is ON Max PSD Peak reading among all frequency bins Frequency bin for Max PSD Peak Test Status displays the current state of measurement or an error message To select the parameter values in Portrait Mode 1 Press the up down arrow keys to highlight the desired parameter 2 Press the left right arrow keys to view and select ...

Страница 197: ...to change the screen orientation from landscape to portrait Select Graph opens a new selection of function keys which allow you to maneuver the graph Same as above Parameters displays a small strip window when selected allowing you to change the Bandwidth Noise Filter Termination and Termination Resistance values from a list of options To select the parameter values in Landscape Mode 1 Press the P...

Страница 198: ... either Maximum or Minimum Enabled is a flag to use the current threshold either Yes or No To set threshold values 1 Press the up down arrow keys to highlight the desired parameter 2 Press the left right arrow keys to view and select the options OR 3 Press on a value to open a list box of options or the alphanumeric editor screen and use the navigation keys to scroll through 4 Press to confirm the...

Страница 199: ...l length of exchange to cabinet cable and is applied to the DPBO mask calculation Note DPBO and ESEL are only available if Termination is set to Bridging or Hi Z Cable Masks lists all the networks available to select dependent on the ITU or ANSI Standard mode set in Setup Application Settings Standard To set parameters and enable the Masks for the PSD test 1 Press the up down arrow keys to highlig...

Страница 200: ... displayed The graph can be viewed in portrait and landscape modes and maneuvered as follows Cursor press the left right arrow keys to decrease increase the values by moving the cursor Press and hold the left right arrow keys to accelerate the cursor Press to recall the cursor and place it in the middle of the current x axis limits Zoom references the middle of the x y axis and not the cursor posi...

Страница 201: ...unction key allows you to view the test results in landscape mode Whether the keyboard is on the right or left is dependent on your preferred Landscape Mode Settings configured in Setup Application Settings General Portrait Mode is used to change the screen orientation from landscape to portrait ...

Страница 202: ...ther test from the given list However this action will terminate the ongoing measurement test WB Noise Filter displays the filter currently enabled Options are None ISDN E HDSL F ADSL G ADSL ADSL2 VDSL VDSL2 8 VDSL2 12 VDSL2 17 VDSL2 30 Termination is either Terminated if the termination resistance is internal to the unit or Bridging if additional termination resistance is used to bridge onto live...

Страница 203: ... page that allows you to set the Power Detection Level and WB Impulse Noise thresholds Result displays the Count Detection Level Elapsed Time and pass fail status which is periodically refreshed until you stop the test Test Status displays the current state of measurement or an error message To select the parameter values 1 Press the up down arrow keys to highlight the desired parameter 2 Press th...

Страница 204: ...alue for this counter Type is the threshold limit for each pair either Maximum or Minimum Enabled is a flag to use the current threshold either Yes or No To set threshold values 1 Press the up down arrow keys to highlight the desired parameter 2 Press the left right arrow keys to view and select the options OR 3 Press on a value to open a list box of options or the alphanumeric editor screen and u...

Страница 205: ...ursor press the left right arrow keys to decrease increase the values by moving the cursor Press and hold the left right arrow keys to accelerate the cursor Press to recall the cursor and place it in the middle of the current x axis limits Zoom references the middle of the x y axis and not the cursor position Press the arrow keys as follows Right x axis zoom in Left x axis zoom out Up y axis zoom ...

Страница 206: ...The Results Details read only page displays the WB Impulse Noise Count Detection Level and pass fail status Profile Details The WB Impulse Noise Profile Details read only page displays the test thresholds and parameters along with the Impulse Separation Time value ...

Страница 207: ...p the test The last valid results then remain displayed Current Group is the current test group name for example Noise Tests Current Test displays the test being measured Here you can switch to another Noise test from the given list However this action will terminate the ongoing measurement test Frequency allows you to set the frequency value for the Near End Crosstalk NEXT Frequency Step lists a ...

Страница 208: ...s at the beginning of the test When FED is Enabled on the FED Setup page both the T R A B and T1 R1 A1 B1 pairs will be terminated at the FED The hookup diagram uses graphic and textual components Proceed button closes the hookup diagram prompt and starts the test Cancel button closes the hookup diagram prompt only ...

Страница 209: ...hen you press the Ok button to close the Confirmation window Threshold Settings button opens a new page that allows you to set the NEXT Spot Threshold for the test Step Freq button automatically enters transfers the Frequency Step value into the Frequency value If the step size is less than 10 kHz but not 4 3125 kHz the Frequency value will be set to 10 kHz If the Frequency Step is set to 4 3125 k...

Страница 210: ...value Spot Threshold Settings The Threshold Settings page allows you to set the threshold values for the NEXT Spot test Type is the threshold limit either Maximum or Minimum Enabled is a flag to use the current threshold either Yes or No To set threshold values 1 Press the up down arrow keys to highlight the desired parameter 2 Press the left right arrow keys to view and select the options OR 3 Pr...

Страница 211: ...or example Noise Tests Current Test displays the test being measured Here you can switch to another Noise test from the given list However this action will terminate the ongoing measurement test Bandwidth allows you to select the bandwidth of the frequency range for the test Available frequency bandwidths are 2 2 MHz 8 MHz 12 MHz 17 6 MHz and 30 MHz Termination Resistance lists a choice of resista...

Страница 212: ...s at the beginning of the test When FED is Enabled on the FED Setup page both the T R A B and T1 R1 A1 B1 pairs will be terminated at the FED The hookup diagram uses graphic and textual components Proceed button closes the hookup diagram prompt and starts the test Cancel button closes the hookup diagram prompt only ...

Страница 213: ...test does not start when you press the Ok button to close the Confirmation window Threshold Settings button opens a new page that allows you to set the NEXT Spectrum Threshold Select Graph button changes to Graph Selected when pressed and opens a new selection of function keys which allow you to maneuver the graph as follows Cursor press the left right arrow keys to decrease increase the values by...

Страница 214: ...Return To Test removes these function keys and displays the Spectrum page Result displays the pass fail status and test results in graphical format Good is the good threshold value for the selected bandwidth represented by a horizontal green line Test Status displays the current state of measurement or an error message To select the parameter values 1 Press the up down arrow keys to highlight the ...

Страница 215: ...m Enabled is a flag to use the existing threshold either Yes or No For example setting the threshold Enabled to No will disable pass fail threshold To set threshold values 1 Press the up down arrow keys to highlight the desired parameter 2 Press the left right arrow keys to view and select the options OR 3 Press on a value to open a list box of options or the alphanumeric editor screen and use the...

Страница 216: ...graph as follows Cursor press the left right arrow keys to decrease increase the values by moving the cursor Press and hold the left right arrow keys to accelerate the cursor Press to recall the cursor and place it in the middle of the current x axis limits Zoom references the middle of the x y axis and not the cursor position Press the arrow keys as follows Right x axis zoom in Left x axis zoom o...

Страница 217: ...ils page displays detailed read only test thresholds and parameters for both Spot and Spectrum modes Profile Name is the file name of the selected saved results Test Group is the overall test group of the selected saved results file for example Noise Tests Test Identification is the test type of the group for example NEXT ...

Страница 218: ......

Страница 219: ...d detect the presence of load coils To access frequency tests From the Copper Main pane highlight Frequency Tests and press to open the menu Frequency Tests Main Page The Frequency Tests menu allows you to select and run the displayed tests VF AC Balance WB Balance WB Attenuation Return Loss Load Coils Locator Tone TX RX Tone RX Tone with FED To start stop a test 1 Press the up down left right arr...

Страница 220: ...is an overall health indicator and a quick way to tell if the line is in good condition The better the longitudinal balance of the cable pair the higher the dB reading The name of the frequency test depends on the selected Standard ANSI VF Balance ITU AC Balance Active The Active function takes a balance measurement displaying and updating results in real time until you stop the test The last vali...

Страница 221: ...ght arrow keys to view and select the options OR 3 Press on a value to open a list box of options 4 Press to confirm the value VF AC Balance Active Threshold Settings The Threshold Settings page allows you to set the Active VF AC Balance Threshold values for the test VF AC Balance sets the active balance threshold Type is the threshold limit either Maximum or Minimum Enabled is a flag to use the e...

Страница 222: ...til you stop the test The last valid results then remain displayed The measurement results of the active and passive VF Longitudinal Balance tests will generally be different due to the fact they use different measurement techniques Current Group is the current test group name for example Frequency Tests Current Test displays the test being measured Here you can switch to another test from the giv...

Страница 223: ... parameter 2 Press the left right arrow keys to view and select the options OR 3 Press on a value to open a list box of options 4 Press to confirm the value VF AC Balance Passive Threshold Settings The Threshold Settings page allows you to set the Passive VF AC Balance Threshold values for the test VF AC Balance sets the passive balance threshold Type is the threshold limit either Maximum or Minim...

Страница 224: ...he left right arrow keys to view and select the options OR 3 Press on a value to open a list box of options or the alphanumeric editor screen and use the navigation keys to scroll through 4 Press to confirm the value Passive Result Details The Passive Results Details read only page displays the Passive pass fail status Power Influence VF Noise and VF AC Balance values ...

Страница 225: ...nfigure the parameters for the WB Balance test and view the results in either Portrait or Landscape Mode Current Group is the current test group name for example Frequency Tests Current Test displays the test being measured Here you can switch to another test from the given list However this action will terminate the ongoing measurement test Bandwidth allows you to select the frequency range for t...

Страница 226: ...s zoom out Up y axis zoom in Down y axis zoom out Pan use left right arrow keys to pan the x axis and the up down arrow keys to pan the y axis 1 1 resets the x axis and y axis limits to full scale Return To Test removes these function keys and displays the previous ones Result displays a graph of the Marginal and Good balance results and pass fail status If any attenuation measurement trace is gre...

Страница 227: ...urement or an error message To select the parameter values in Portrait Mode 1 Press the up down arrow keys to highlight the desired parameter 2 Press the left right arrow keys to view and select the options OR 3 Press on a value to open a list box of options 4 Press to confirm the value Landscape Mode function key allows you to view the test results in landscape mode Whether the keyboard is on the...

Страница 228: ... you to maneuver the graph Same as above Parameters displays a small strip window when selected allowing you to change the Bandwidth and Termination Resistance values from a list of options To select the parameter values in Landscape Mode 1 Press the Parameters function key 2 Press the up down arrow keys to highlight the desired parameter 3 Press the left right arrow keys to view and select the op...

Страница 229: ...electing Mask provides a shaped mask as threshold When Mask is selected it will be used as pass fail criteria next time the test is run Enabled is a flag to use the existing threshold either Yes or No For example setting the threshold Enabled to No will disable pass fail threshold Mask Tolerance allows you to set a marginal pass value which will be displayed on the graph in yellow To set threshold...

Страница 230: ... of the current x axis limits Zoom references the middle of the x y axis and not the cursor position Press the arrow keys as follows Right x axis zoom in Left x axis zoom out Up y axis zoom in Down y axis zoom out Pan use left right arrow keys to pan the x axis and the up down arrow keys to pan the y axis 1 1 resets the x axis and y axis limits to full scale Landscape Mode function key allows you ...

Страница 231: ...ction will terminate the ongoing measurement test Bandwidth allows you to select the frequency range for the test from a list of available bandwidths ISDN HDSL SHDSL ADSL1 2 ADSL2 VDSL2 8 VDSL2 12 VDSL2 17 VDSL2 30 or VDSL2 35 Threshold Tolerance allows you to set a marginal pass value which will be displayed on the graph in yellow Threshold Frequency allows you to add threshold calculations to th...

Страница 232: ... axis zoom out Pan use left right arrow keys to pan the x axis and the up down arrow keys to pan the y axis 1 1 resets the x axis and y axis limits to full scale Return To Results removes these function keys and displays the Attenuation page Result displays the Cable Length pass fail status and test results in text and graphical format If a Threshold Frequency was selected other than None the calc...

Страница 233: ...r the selected bandwidth The end of tolerance or fail point is displayed as a red cursor value Good is the good balance threshold mask for the currently selected bandwidth represented by green in the graph Test Status displays the current state of measurement or an error message To select the parameter values 1 Press the up down arrow keys to highlight the desired parameter 2 Press the left right ...

Страница 234: ...provides a shaped mask as threshold When Mask is selected it will be used as pass fail criteria next time the test is run Enabled is a flag to use the existing threshold either Yes or No For example setting the threshold Enabled to No will disable pass fail threshold To set threshold values 1 Press the up down arrow keys to highlight the desired parameter 2 Press the left right arrow keys to view ...

Страница 235: ...Book to use for testing For each section the selected Cable Type must have attenuation data available or else the total equivalent attenuation can not be calculated The selection is not saved when leaving the test The current Cable Book entry is shown by default Section Length specifies the cable length of each section The total length for all cable sections cannot exceed 8000 m or 24000 ft If you...

Страница 236: ...le Configuration button opens a new page displaying the cable parameters of the test Use the left right arrows to select the button and press to open the page Select Graph button changes to Graph Selected when pressed and opens a new selection of function keys which allow you to maneuver the graph as follows Cursor press the left right arrow keys to decrease increase the values by moving the curso...

Страница 237: ...The end of tolerance or fail point may be displayed as a red cursor value Good is the good balance threshold mask for the currently selected bandwidth represented by green in the graph Result Details Cable Configuration The Cable Configuration page in the Results Details allows you to view the cable parameters set for the WB Attenuation test No of Cable Sections is the number of consecutive cable ...

Страница 238: ...The page provides a Return Loss result value in dB and pass fail status Current Group is the current test group name for example Frequency Tests Current Test displays the test being measured Here you can switch to another Frequency test from the given list However this action will terminate the ongoing measurement test Frequency allows you to set the frequency value for the Return Loss test Freque...

Страница 239: ...e to open a list box of options or the alphanumeric editor screen and use the navigation keys to scroll through 4 Press to confirm the value Return Loss Threshold Settings The Return Loss Threshold Settings page allows you to set the Loss Threshold for each pair The threshold is a programmable value you can use as an on screen indicator in each test when a measured value is too high or too low Typ...

Страница 240: ...eft right arrow keys to view and select the options OR 3 Press on a value to open a list box of options or the alphanumeric editor screen and use the navigation keys to scroll through 4 Press to confirm the value Single Frequency Result Details The Results Details read only page displays the pass fail status Return Loss and Frequency TX values ...

Страница 241: ...idth ISDN HDSL SHDSL ADSL1 2 or ADSL2 Termination Resistance lists a choice of resistance values for the termination of the signal Threshold Settings button opens a new page that allows you to set Return Loss thresholds for the transmission Select Graph button changes to Graph Selected when pressed and opens a new selection of function keys which allow you to maneuver the graph as follows Cursor p...

Страница 242: ...us and a graph of the Return Loss Sweep compared to Marginal results If the measurement is greater less than the marginal test threshold represented by a horizontal red line the status is fail Otherwise the status is pass Test Status displays the current state of measurement or an error message To select the parameter values 1 Press the up down arrow keys to highlight the desired parameter 2 Press...

Страница 243: ...threshold flat mask while selecting Mask provides a shaped mask as threshold When Mask is selected it will be used as pass fail criteria next time the test is run and Loss Threshold becomes read only Enabled is a flag to use the Return Loss threshold either Yes or No For example setting the threshold Enabled to No will disable pass fail threshold Mask Tolerance is a fixed value representing a marg...

Страница 244: ...r the graph as follows Cursor press the left right arrow keys to decrease increase the values by moving the cursor Press and hold the left right arrow keys to accelerate the cursor Press to recall the cursor and place it in the middle of the current x axis limits Zoom references the middle of the x y axis and not the cursor position Press the arrow keys as follows Right x axis zoom in Left x axis ...

Страница 245: ...page displays read only Return Loss Test Thresholds Parameters for both Single Frequency and Sweep Profile Name is the file name of the selected saved results Test Group is the overall test group of the selected saved results file for example Frequency Tests Test Identification is the test type of the group for example Return Loss ...

Страница 246: ...sured Here you can switch to another test from the given list However this action will terminate the ongoing measurement test Cable Parameters Cable Type displays the ID Cable Name and Fill and allows you to select an entry with its associated parameters from the current Cable Book to use for testing The selection is not saved when leaving the test The current Cable Book entry is shown by default ...

Страница 247: ...cursor and place it in the middle of the current x axis limits Zoom references the middle of the x y axis and not the cursor position Press the arrow keys as follows Right x axis zoom in Left x axis zoom out Up y axis zoom in Down y axis zoom out Pan use left right arrow keys to pan the x axis and the up down arrow keys to pan the y axis 1 1 resets the x axis and y axis limits to full scale Return...

Страница 248: ...e to open a list box of options or the alphanumeric editor screen and use the navigation keys to scroll through 4 Press to confirm the value TDR The Load Coils TDR function provides a shortcut to the TDR test A dialogue box opens warning that you are about to leave the Load Coils test TDR results captured while running Load Coils will be available upon loading TDR Please go to TDR on page 253 for ...

Страница 249: ... values by moving the cursor Press and hold the left right arrow keys to accelerate the cursor Press to recall the cursor and place it in the middle of the current x axis limits Zoom references the middle of the x y axis and not the cursor position Press the arrow keys as follows Right x axis zoom in Left x axis zoom out Up y axis zoom in Down y axis zoom out Pan use left right arrow keys to pan t...

Страница 250: ...the line to trace a cable pair at the far end Current Group is the current test group name for example Frequency Tests Current Test displays the test being measured Here you can switch to another test from the given list However this action will terminate the ongoing measurement test Tone Power allows you to select either low or high power for the Locator Tone Tone Frequencies displays the frequen...

Страница 251: ...Set 241 Locator Tone To select the parameter values 1 Press the up down arrow keys to highlight the desired parameter 2 Press the left right arrow keys to view and select the options OR 3 Press on a value to open a list box of options 4 Press to confirm the value ...

Страница 252: ...ing measured Here you can switch to another frequency test from the given list However this action will terminate the ongoing measurement test Send Tone allows you to select either a VF voice frequency or WB wideband signal if this option was purchased Level allows you to set the tone level value Level Step read only displays the level step of the uplink frequency Frequency allows you to set a fre...

Страница 253: ...ric editor screen and use the navigation keys to scroll through 4 Press to confirm the value Receive Tone The Receive Tone RX tab allows you to configure and run a receive tone test which measures the frequency and level of incoming signals Current Group is the current test group name for example Frequency Tests Current Test displays the test being measured Here you can switch to another frequency...

Страница 254: ...or message To select the parameter values 1 Press the up down arrow keys to highlight the desired parameter 2 Press the left right arrow keys to view and select the options OR 3 Press on a value to open a list box of options 4 Press to confirm the value Result Details The Results Details read only page displays the saved receive tone or RX VF WB Level and VF WB Frequency values ...

Страница 255: ...45 TX RX Tone Profile Details Receive Tone The Profile Details page displays read only Receive Tone Test Parameters Tone displays whether the receive tone was VF or WB Termination Resistance is the resistance value selected for the termination of the Receive Tone test ...

Страница 256: ...the test being measured Here you can switch to another Frequency test from the given list However this action will terminate the ongoing measurement test Receive Tone allows you to select either a VF voice frequency or WB wideband signal WB selection is only available when the 30 MHz Wideband Testing software option is installed Termination Resistance defines how much resistance the tester uses to...

Страница 257: ...es 1 Press the up down arrow keys to highlight the desired parameter 2 Press the left right arrow keys to view and select the options OR 3 Press on a value to open a list box of options or the alphanumeric editor screen and use the navigation keys to scroll through 4 Press to confirm the value Single Tone Result Details The Result Details read only page displays the saved receive tone or VF WB RX ...

Страница 258: ... test Receive Tone allows you to select either a VF voice frequency or WB wideband signal WB selection is only available when the 30 MHz Wideband Testing software option is installed Termination Resistance defines how much resistance the tester uses to connect to the line and is set as follows for VF Receive Tone a read only value of 600 Ω for WB Receive Tone select 100 120 or 135 Ω FED Frequency ...

Страница 259: ...old the left right arrow keys to accelerate the cursor Press to recall the cursor and place it in the middle of the current x axis limits Zoom references the middle of the x y axis and not the cursor position Press the arrow keys as follows Right x axis zoom in Left x axis zoom out Up y axis zoom in Down y axis zoom out Pan use left right arrow keys to pan the x axis and the up down arrow keys to ...

Страница 260: ...mat for the Multiple RX Tone with FED test Test Group is the overall test group of the selected saved results file for example Frequency Tests Test Identification is the test type of the group for example RX Tone with FED Test Modes is the mode of test for example Multiple Tone Select Graph button changes to Graph Selected when pressed and opens a new selection of function keys which allow you to ...

Страница 261: ...x axis and y axis limits to full scale Return To Test removes these function keys and returns to the test results page Multiple Tone Table The Multiple Tone Table displays the RX Frequency Loss for the FED Frequency Group selected for VF Receive Tone POTS PSTN 404 804 1004 1204 1804 2204 2404 2804 3204 3404 Hz VF 5 Tone 404 1004 2804 3004 3604 Hz for WB Receive Tone HDSL 20 30 50 70 90 110 130 196...

Страница 262: ...nd Multiple RX Tone with FED tests and may contain the following entries Profile Name only displayed in Results Manager is the file name of the selected saved results Test Group is the overall test group of the selected saved results file for example Frequency Tests Test Identification is the test type of the group for example RX Tone with FED ...

Страница 263: ...t significant event and optimizes the ranges pulse width and gain Range and Gain are updated to reflect the optimized TDR settings but can be edited Auto TDR displays the distance for the Largest Event and updates results in real time until you stop the test The last valid results then remain displayed 2 Manual TDR does not automate any function nor settings and gives you full control over TDR par...

Страница 264: ... xTalk TDR Note If you run Auto TDR first and use the left right arrow keys to change the Current Test from Auto TDR to Manual TDR the test will copy the TDR parameters from the Auto TDR to the Manual TDR but not to xTalk TDR Range allows you to set the range from the given list Gain allows you to select a gain test parameter from the given list Variable Gain Auto TDR only when enabled automatical...

Страница 265: ... offset 0 then the primary and secondary traces will overlap VOP allows you to change the velocity of propagation value for the cable as defined in m μsec meters per microsecond a ratio or percentage of the speed of light Current Trace available only in Manual TDR allows you to turn on off Live and Peak traces and calculates the Differential trace Select one of the following Live turns Peak Hold o...

Страница 266: ... graph as follows Cursor Marker allows you to select the cursor blue or marker red independently by toggling the function key The footer updates to reflect either Move cursor or Move marker Press the left right arrow keys to decrease increase the values by moving the cursor marker Press and hold the left right arrow keys to accelerate the cursor marker Press to recall the cursor marker and place i...

Страница 267: ...d Trace function key opens a new page that allows you to load a trace from a list of previously saved TDR tests Clear Trace function key deletes the loaded trace from the graph To select the parameter values in Portrait Mode 1 Press the up down arrow keys to highlight the desired parameter 2 Press the left right arrow keys to view select the options or increase decrease values OR 3 Press on a valu...

Страница 268: ...TDR and allows you to view the test results in landscape mode utilizing the full length of the high resolution color screen Whether the keyboard is on the right or left is dependent on your preferred Landscape Mode Settings configured in Setup Application Settings General ...

Страница 269: ... be edited or viewed the same way as in Portrait Mode described above dependent on the TDR test being run Cable Setup displays a small strip window when selected allowing you to change the Cable Type VOP and Cable Temperature You can also view the Cable Fill entry which was setup in Cable Book For more information see Cable Setup in portrait mode To select the parameter values in Landscape Mode 1 ...

Страница 270: ...TDR 260 MAX 635G Continuous Examples of Common Faults Short Fault ...

Страница 271: ...TDR Copper and G fast VDSL2 ADSL2 Multi play Test Set 261 Continuous Open ...

Страница 272: ...TDR 262 MAX 635G Continuous Bridged Tap ...

Страница 273: ...TDR Copper and G fast VDSL2 ADSL2 Multi play Test Set 263 Continuous Splice Joint ...

Страница 274: ...TDR 264 MAX 635G Continuous Peak Function ...

Страница 275: ...TDR Copper and G fast VDSL2 ADSL2 Multi play Test Set 265 Continuous Dual Trace View ...

Страница 276: ...TDR 266 MAX 635G Continuous Load Coil ...

Страница 277: ...cables for this test When FED is Enabled on the FED Setup page both the T R A B and T1 R1 A1 B1 pairs will be terminated at the FED The hookup diagram uses graphic and textual components Proceed button closes the hookup diagram prompt and starts the test Cancel button closes the hookup diagram prompt only The Continuous function displays the line trace and is continuously on and ready to use It di...

Страница 278: ...y trace with a range of 100 to 100 Note If the loaded secondary trace offset 0 then the primary and secondary traces will overlap VOP allows you to change the velocity of propagation value for the cable as defined in m μsec meters per microsecond a ratio or percentage of the speed of light Current Trace allows you to turn on off Live and Peak traces by selecting one of the following Live turns Pea...

Страница 279: ...oom references the middle of the x y axis and not the cursor position Press the arrow keys as follows Right x axis zoom in Left x axis zoom out Up y axis zoom in Down y axis zoom out Pan use left right arrow keys to pan the x axis and the up down arrow keys to pan the y axis 1 1 resets the x axis and y axis limits to full scale Return To Test removes these function keys and displays the previous o...

Страница 280: ... the right or left is dependent on your preferred Landscape Mode Settings configured in Setup Application Settings General Landscape Mode generates the following function keys Portrait Mode is used to change the screen orientation from landscape to portrait Select Graph opens a new selection of function keys which allow you to maneuver the graph Same as above Parameters displays a small strip wind...

Страница 281: ... parameter values in Landscape Mode 1 Press the desired function key 2 For Parameters and Cable Setup press the up down arrow keys to highlight the desired parameter 3 Press the left right arrow keys to view select the options or increase decrease values 4 Press to confirm the value ...

Страница 282: ... metric wire size Cable Fill read only entry is the type of material the cable is filled with Aircore Jelly Pulp 5 PR or 2 PR Setup in the Cable Book VOP allows you to change the velocity of propagation value for the cable as defined in m μsec meters per microsecond a ratio or percentage of the speed of light Cable Temperature allows you to change the temperature of the cable under test in either ...

Страница 283: ...oaded Prior to starting the TDR test During the TDR test while it is running After the TDR test has been stopped Traces may be loaded from either MT internal memory or USB To load a previously saved trace 1 Press the left right arrow keys to highlight the desired Storage Location OR 2 Press to display the list and select the value 3 Press the down arrow key to highlight the list box and press to o...

Страница 284: ...n is the test type of the group for example Auto TDR Range allows you to set the range from the given list in Auto TDR only Gain displays whether the parameter was set to Auto or manual Pulse Width is a non editable value that is updated dependent on whether the parameters are set to Auto or manual Dual Trace Offset is a configurable offset parameter for the secondary trace with a range of 100 to ...

Страница 285: ...ling the function key The footer updates to reflect either Move cursor or Move marker Press the left right arrow keys to decrease increase the values by moving the cursor marker Press and hold the left right arrow keys to accelerate the cursor marker Press to recall the cursor marker and place it in the middle of the current x axis limits Zoom references the middle of the x y axis and not the curs...

Страница 286: ...t arrow keys to view select the options or increase decrease values OR 3 Press on a value to open a list box of options or the alphanumeric editor screen and use the navigation keys to scroll through 4 Press to confirm the value Landscape Mode is the best way to use the TDR and allows you to view the test results in landscape mode utilizing the full length of the high resolution color screen Wheth...

Страница 287: ...ge Gain Pulse Width and Current Trace not in Auto TDR They can be edited or viewed the same way as in Portrait Mode described above dependent on the TDR test being run Cable Setup displays a small strip window when selected allowing you to view the Cable Type Cable Fill VOP and Cable Temperature For more information see Cable Setup in portrait mode To select the parameter values in Landscape Mode ...

Страница 288: ...ire Gauge units or mm metric wire size Cable Fill is the type of material the cable is filled with Aircore Jelly Pulp 5 PR or 2 PR Setup in the Cable Book VOP is the velocity of propagation defined as m μsec meters per microsecond a ratio or percentage of the speed of light for the cable Cable Temperature is the temperature of the cable under test in either F or C Load Trace The Load Trace functio...

Страница 289: ...y Test Set 279 TDR Profile Details TDR Profile Details The Profile Details page displays read only TDR Test Parameters Profile Name is the file name of the selected saved results Test Identification is the test type of the group for example TDR ...

Страница 290: ......

Страница 291: ...nd By default the unit assumes that the fault cable is connected to ring Connect the strap to the far end of the wires connected to T A and R B The connection diagram shows you how to connect the cables to the unit The green lead is used as reference When FED is Enabled on the FED Setup page the Confirmation window pops up displaying how to connect your cables at the beginning of the test The FED ...

Страница 292: ...lt displays single pair RFL test results Based on the cable condition corresponding values are added into the diagram at their specific positions Test result units are dependent on Standard in Setup Application Settings Distance to strap DTS Resistance to strap RTS Distance from fault to strap DFTS Resistance from fault to strap RFTS Resistance to fault RTF Distance to fault DTF Faulted cable FC R...

Страница 293: ...strap connected There is a strap but the cable is too long and has a loop resistance 10 k ohms There is a strap but there is a high resistance fault or open in the cable The connection leads or strap may be faulty The resistance test may be used to troubleshoot this problem Fault Status displays the status of the RFL test Test Status displays the current state of measurement or an error message ...

Страница 294: ... Confirmation window pops up displaying how to connect your cables at the beginning of the test The FED allows you to remotely place a strap to short together the A1 A B T1 T R at the far end for 4 wire RFL The Confirmation diagram uses graphic and textual components Proceed button closes the hookup diagram prompt and starts the test Cancel button closes the hookup diagram prompt only Note Unlike ...

Страница 295: ... open the page Result displays the separate good pair RFL test results Based on the cable condition corresponding values are added into the diagram at their specific positions Test result units are dependent on Standard in Setup Application Settings Distance to strap DTS Resistance to strap RTS Distance from fault to strap DFTS Resistance from fault to strap RFTS Resistance to fault RTF Distance t...

Страница 296: ...here is a strap but the cable is too long and has a loop resistance 10 k ohms There is a strap but there is a high resistance fault or open in the cable The connection leads or strap may be faulty The resistance test may be used to troubleshoot this problem Fault Status displays the status of the RFL test Test Status displays the current state of measurement or an error message ...

Страница 297: ...ded faults when a good wire pair isn t available Both resistance faults must be occur at the same place in the cable either both to ground or both to the same negative or positive battery voltage The K Test is performed in 2 steps 1 Measurements are made with the far end open 2 Measurements are made with the far end closed shorted strap The connection diagram shows you how to connect the cables to...

Страница 298: ...ON OFF is available only when FED is Enabled and can be turned ON to run alternating open short tests 6 open 5 closed displaying average values and highlighting minimum and maximum results When turned OFF the test runs in single shot mode only Repeat Mode OFF is the default value RTF resistance to fault is used as a reference to find minimum and maximum faults When the result deviation is greater ...

Страница 299: ...ndition corresponding values are added into the diagram at their specific positions Test result units are dependent on Standard in Setup Application Settings The K Test diagram can display some of the following elements R A T B G E wire connectors Distance resistance to strap DTS RTS distance resistance from the MaxTester to the strap far end Distance resistance from fault to strap DFTS RFTS Dista...

Страница 300: ...s a strap but the cable is too long and has a loop resistance 10 k ohms There is a strap but there is a high resistance fault or open in the cable The connection leads or strap may be faulty The resistance test may be used to troubleshoot this problem Fault Status displays the status of the RFL test Test Status displays the current state of measurement or an error message ...

Страница 301: ... set above ID Cable Name and Fill and allows you to select an entry with its associated parameters from the current Cable Book to use for testing The selection is not saved when leaving the test The current Cable Book entry is shown by default Resistance specifies a value for the resistance constant of the cable in each section Section Length allows you to specify the cable length of each section ...

Страница 302: ...p down arrow keys to highlight the desired parameter 2 Press the left right arrow keys to view and select the options OR 3 Press on a value to open a list box of options or the alphanumeric editor screen and use the navigation keys to scroll through 4 Press to confirm the value ...

Страница 303: ...was run General Information displays read only information pertaining to the test result Result File Name Test Date and Time Test Identification Test Modes Test Lead Compensation displays read only Date and Time and Pass Fail Status of the compensated resistance and capacitance based on the cable temperature of the test lead Editable Identification Fields display values from the loaded file You ca...

Страница 304: ...t allows you to load a result file to a USB device update the ID fields and generate a report in either HTML MHTML or XML format To view and edit the test result information 1 Press the up down arrow keys to highlight and view the desired parameter 2 Press the left right arrow keys to view and select the options OR 3 Press on an editable value to open the list box of options or the alphanumeric ed...

Страница 305: ...he current test for example RFL Cable Setup button opens a new page displaying the cable parameters of the RFLtest Press to open the page Separate Good Pair The Results Details read only page displays the Separate Good Pair RFL results using text and a connection diagram Test Identification displays the current test for example RFL Cable Setup button opens a new page displaying the cable parameter...

Страница 306: ...t Identification displays the current test for example RFL Cable Setup button opens a new page displaying the cable parameters of the RFL test Press to open the page Cable Setup The Cable Setup page displays the cable parameters for each section used while running the RFL test Settings are shared by both Single Pair and Separate Good Pair tests ...

Страница 307: ...nd run the displayed tests POTS Auto Test detects the loop current and measures voice frequency parameters in a copper telephone loop User Auto Test runs a range of different user defined tests To activate a test 1 Press the left right arrow keys on the keypad to select the desired test icon 2 Press to confirm your selection 3 The test will start automatically if the Setup Application Settings Tes...

Страница 308: ...s 2 Highlight POTS Auto Test and press to start the test Summary The Summary page displays detailed results of the loop current Power Influence and voice frequency measurement values pass fail status and parameters POTS Auto Test consists of a combination of multiple tests Current Group is the current test group name for example Auto Test Current Test displays the test being measured Here you can ...

Страница 309: ...of time while the test is running Volume button adjusts the volume level Threshold Settings button opens a new page that allows you to set the POTS Auto Test threshold parameters Mute Unmute Speaker button changes the speaker status Result displays the number dialed and its status measurement values of the multiple test parameters and their pass fail status Test Status displays the current state o...

Страница 310: ... value for the test VF Noise sets the level of voice frequency noise to be used VF AC Balance Active sets the VF AC longitudinal balance value for active mode Type is a read only field displaying the threshold limit either Minimum or Maximum Enabled is a read only field and always Yes for all thresholds To set threshold values 1 Press the up down arrow keys to highlight the desired parameter 2 Pre...

Страница 311: ...o Test Result Details The Results Details read only page displays the number dialed and its status measurement values of the test parameters and their pass fail status Phone Book The Phone Book results page displays the Group and type entry parameters when loading the results file ...

Страница 312: ... Test and press 2 Highlight User Auto Test and press to start the test Summary The Summary page displays the overall pass fail status of all tests selected for auto testing Current Group is the current test group name for example Auto Test Current Test displays the test being measured Here you can switch to another test from the given list However this action will terminate the ongoing measurement...

Страница 313: ...ed parameter 2 Press the left right arrow keys to view and select the options OR 3 Press on a value to open a list box of options 4 Press to confirm the value Test Selection The Test Selection page allows you to select the test types to include in the auto test and set a Pause between tests by selecting ON or OFF When FED is Enabled on the FED Setup page Pause is replaced with FED State parameters...

Страница 314: ...Noise measures voice frequency noise in the line Power Influence measures the effects that 50 Hz and 60 Hz power line AC Mains interference has on the circuit under test VF Impulse Noise measures the random occurrences of energy spikes in the voice frequency range that have random amplitude and spectral content WB PSD Noise measures power spectral density noise WB Impulse Noise measures the irregu...

Страница 315: ...selected for DRP to function It is recommended to run the DRP test on open lines only non terminated For FED support the FED state for both WB Attenuation and WB PSD Noise must be set to Open 0 Return Loss measures the loss of power in the Sweep frequency returned reflected by a discontinuity in a transmission line To select the tests 1 Press the up down arrow keys to scroll through all the tests ...

Страница 316: ...a contractor used to perform the tests Test From To display the values set up in the Application Settings Identification tab You can edit this field using the choices from the list box Job ID allows you to create edit a unique identifier for the task Customer Name is the name of the customer for which the test was run Circuit ID allows you to create edit a unique identifier for the circuit under t...

Страница 317: ...ent is enabled or not in System Settings Upload Setup If enabled you can select either USB or EXFO Connect Client as your test report storage location If disabled USB is automatically selected Report Format is HTML MHTML or XML You can generate and export HTML MHTML or XML reports from any saved test result Note If EXFO Connect Client is selected the available selections for Report Format are only...

Страница 318: ...list or select the value 3 Press the up down arrow key to highlight the desired value OR 4 Press the left arrow key to erase the existing value and then use the alphanumeric keypad to enter a value To cancel the entry press 5 Press to accept the value Multimeter 1 Result The Multimeter 1 Result page displays the following results and pass fail status AC DC Voltage volts and frequency Hz values for...

Страница 319: ...as the HIVOLT high voltage software option configured it enables Isolation Resistance testing up to 500 V Default is inherited from Multimeter Isolation test Capacitance Opens and Length for each wire Pair and overall Capacitive Balance Noise Result The Noise Result page displays the following results and pass fail status VF Noise measures voice frequency noise in the line VF Impulse Noise High Mi...

Страница 320: ...ht arrow keys to view and select the options OR 2 Press on a value to open a list box of options and press the up down arrow keys to highlight the desired test 3 Press to confirm the test Select Graph button changes to Graph Selected when pressed and opens a new selection of function keys which allow you to maneuver the graph as follows Cursor press the left right arrow keys to decrease increase t...

Страница 321: ... axis limits to full scale Return To Test removes these function keys to display the previous function keys Landscape Mode function key allows you to view the WB PSD Noise results in landscape mode Whether the keyboard is on the right or left is dependent on your preferred Landscape Mode Settings configured in Application Settings General Frequency Result The Frequency Result page displays results...

Страница 322: ... for Cable Length Elapsed Time M SS Load Coil Detection displays the number of load coils Return Loss displays the pass fail status and a graph of the Return Loss Sweep compared to Marginal results If the measurement is greater less than the marginal test threshold represented by a horizontal red line the status is fail Otherwise the status is pass To select a test 1 In the Select Test parameter p...

Страница 323: ... the left right arrow keys to accelerate the cursor Press to recall the cursor and place it in the middle of the current x axis limits Zoom references the middle of the x y axis and not the cursor position Press the arrow keys as follows Right x axis zoom in Left x axis zoom out Up y axis zoom in Down y axis zoom out Pan use left right arrow keys to pan the x axis and the up down arrow keys to pan...

Страница 324: ...endent on the Range VOP allows you to change the velocity of propagation value for the cable as defined in m μsec meters per microsecond a ratio or percentage of the speed of light Cable Setup button allows you to view the Cable Parameters of the TDR test Select Graph button changes to Graph Selected when pressed and opens a new selection of function keys which allow you to maneuver the graph as f...

Страница 325: ...lts in landscape mode Whether the keyboard is on the right or left is dependent on your preferred Landscape Mode Settings configured in Application Settings General TDR Result Cable Setup The Cable Setup page allows you to configure and or view the Cable Parameters set for the TDR test Cable Type displays the ID Cable Name and Fill and allows you to select an entry with its associated parameters f...

Страница 326: ...isplays the predicted maximum Downstream and Upstream data rates If a calculation is not possible the calculated bandwidth data is replaced by a message It states that the DRP cannot be completed due to low bandwidth settings in the Noise PSD and or Attenuation tests and that with the current settings you can calculate rates up to a certain highest possible Technology listed as follows If the Nois...

Страница 327: ...s either CO default or CPE Set this value based on where you connect the tester for example if the tester is connected at the user side and performs a test toward the CO set the Reference Point to CPE Information Annex displays the mode A or B Remote Noise Level ranges from 40 to 110 dBm Hz default and is configurable in profile cqcfg files The noise level value is dependent on the Reference Point...

Страница 328: ...ormation Summary The Result Details Summary page displays the overall pass fail status of all tests selected for auto testing This page varies slightly from the run User Auto Test page in that there are no configurable parameters Test Group is the overall test group of the selected saved results file for example Auto Test Test Identification is the test type of the group for example User Auto Test...

Страница 329: ...ID Cable Name and Fill with its associated parameters from the current Cable Book used for testing Cable Fill Material is the type of material the cable is filled with Aircore Jelly Pulp 5 PR or 2 PR VOP is the velocity of propagation defined as m μsec meters per microsecond a ratio or percentage of the speed of light for the cable Cable Temperature is the temperature of the cable under test in ei...

Страница 330: ...ED States parameters and will show the FED state for each test Test Parameters button opens a new page displaying read only parameter details of all tests Test Thresholds button opens new pages displaying read only threshold values for all tests FED displays Enabled or Disabled To access the test parameter and threshold results 1 Press the left right arrow keys to highlight a button 2 Press to ope...

Страница 331: ...plays read only parameter details of all tests Multimeter Parameter The Multimeter Parameters page displays the profile details of the cable parameters for all multimeter tests Noise 1 Parameter The Noise 1 Parameter page displays the profile details of the parameter values for the VF Noise Power Influence and VF Impulse Noise tests ...

Страница 332: ... details of the parameter values for the WB PSD Impulse Noise tests Frequency Parameter The Frequency Parameters page displays the profile details of the parameter values for the WB Balance Attenuation DRP and Return Loss tests TDR Parameter The TDR Parameters page displays the parameter values of the TDR results ...

Страница 333: ...age displays the AC DC Voltage and Current Test Thresholds and limits for each Pair Multimeter 2 Threshold The Multimeter 2 Threshold page displays the Test Thresholds and limits for the following tests Resistance displays values for each Pair Resistive Balance displays values for the test in Ω and Isolation displays the Resistance thresholds for each Pair Capacitance Opens displays the Capacitive...

Страница 334: ...lse Noise displays the Mid Counter threshold value and limit as well as the Low Counter Power and Power Threshold Separation WB PSD Noise displays the RMS Noise and limit WB Impulse Noise displays the Power Detection Level Counter threshold value and limit Frequency Threshold 1 The Frequency Threshold 1 page displays the VF AC Balance Active and WB Balance threshold values and limits ...

Страница 335: ... Auto Tests Copper and G fast VDSL2 ADSL2 Multi play Test Set 325 Profile Details Frequency Threshold 2 The Frequency Threshold 2 page displays WB Attenuation and Return Loss test threshold values and limits ...

Страница 336: ......

Страница 337: ...art and the screen control will navigate to the Connection Summary page Result Manager opens a list of file names previously saved tests to view upload export or delete results Test Configuration provides the utilities to configure test parameters Setup opens a sub menu displaying the following Modem Settings allows you to set the display and power parameters of the modem Application Settings allo...

Страница 338: ... the upper information header At power up settings are read from the last loaded profile Profile Details lists the 3 types of tests for configuration Auto Test Setup Manual Test Setup Ethernet Test Setup Copy to USB allows you to copy all profiles found in the internal memory to an external USB device If the profile name already exists in the destination folder Copy x will be appended to the profi...

Страница 339: ... Name This alphanumeric editor screen allows you to change parameter values and save changes to a new word To use the editor screen 1 Press the up down left right arrows to navigate the on screen keyboard 2 Press to confirm each selection 3 Use the on screen function buttons to create or edit the word Profile Details Menu You can view any of your saved profiles on the MaxTester from the Profile De...

Страница 340: ...L2 ADSL2 if VDSL2 option enabled ADSLMulti supports G DMT T1 413 and G Lite ADSL2 Bonding if VDSL2 option disabled Bonding option enabled VDSL2 ADSL2 Bonding if VDSL2 and Bonding options enabled VDSL2 30a if VDSL2 option enabled The V2XAB unit does ADSL Annex A and Annex B ADSL Annex A is on pair 2 and ADSL Annex B is on pair 1 The Test Interface setup options for the V2XAB module are the followin...

Страница 341: ... if VDSL2 option enabled ADSLMulti supports G DMT T1 413 and G Lite VDSL2 ADSL2 Bonding if VDSL2 and Bonding options enabled VDSL2 35b if enabled The GVXAB unit does ADSL Annex B and UR2 which can be configured in Setup Modem Settings DSLAM ADSL Annex A is on pair 1 and ADSL Annex B and UR2 are on pair 2 This modem does not support bonding Test Interface options for the GVXAB module are as follows...

Страница 342: ...options are dependent on the test setup selection For Auto and Manual tests available options are Sync Only Bridged not in Auto Test DHCP Static PPPoE PPPoA IPoA and IPv6 DHCP For Ethernet tests available options are Bridged DHCP Static PPPoE and IPv6 DHCP Note IPv6 requires an option key to be enabled Auto Resync allows you to Enable the SyncLossCounter as the Pass Fail criteria When SyncLossCoun...

Страница 343: ...l local area network VLAN tag ranging from 0 through 4094 The entry is available only when VLAN Support is Enable Vendor ID is the name of the unit This entry is available only when Access Mode is DHCP or IPv6 DHCP Local Mac Address is the internal MAC address of the unit either MaxTester or User Defined Mac Address is a specific MAC address in a hexadecimal format if User Defined was selected for...

Страница 344: ...n Access Mode is PPPoE or PPPoA Login Name Password is your user ID and password Obtain IP is either Dynamic where the access concentrator or broadband remote access server assigns a temporary IP address to the unit or Static where you enter the IP address of the unit Static IP is the address of the current location assigned by the service provider This entry is available only if Obtain IP is set ...

Страница 345: ...ly WAN LAN Link Speed is a choice between Auto negotiated during the link establishment 100 or 10 Mbit s WAN LAN Connect Mode is Full or Half Duplex when Link Speed is set to 100 or 10 Mbit s Note GVXAA and GVXAB models also support 1000 Mbit s To configure the setup options 1 Press the up down arrows to select the desired parameter 2 Press the left right arrow keys to view and select the options ...

Страница 346: ... Pass Through Mode Enable or Disable When the Access Mode is Bridged Pass Through Mode is set to Enable LAN IP Address is the local network IP address of the unit Note If the DSL WAN has an IP address on a specific subnet for example 192 168 x y and the Ethernet LAN port is enabled configure the default LAN IP address to a different subnet for example 10 0 x y to avoid IP communication problems Su...

Страница 347: ...ter values press the on screen function keys to save or cancel your input IPv6 LAN Setup The IPv6 LAN Setup tab is available only in Manual Test Setup and when the Access Mode set in Connection Setup is set to IPv6 DHCP This page allows you to Enable Disable Pass Through Mode when the LAN local area network is connected to the external device which supports 10 100 1000 Ethernet Pass Through Mode i...

Страница 348: ... 35b D S can be 350 Mbit s U S is 50 Mbit s D S and U S Min SNR margin values range from 0 to 63 5 dB Default is 5 dB D S and U S Max Attenuation values range from 0 to 96 dB Default is 10 dB Sync Loss Counter is the number of times the unit lost synchronization Bonding Criteria allows you to select either Single Line Both Lines Connected Bonded to check the pass fail criteria of the DSL lines in ...

Страница 349: ...tup In Manual Test Setup you can enable all sub tests independent of each other IPTV Test supports STB set top box emulation mode over DSL and Ethernet interfaces enabling the MaxTester to join and leave multicast IPTV streams When enabled all other sub tests are automatically disabled in Auto Test and Ethernet Test Setup In Manual Test Setup you can enable all sub tests independent of each other ...

Страница 350: ...n only be started when a WAN connection either through xDSL or Ethernet has been established When enabled the sub tests test pages are available in the results pages You must highlight the sub test for which you want the contents shown on the Test Setup page Note Select Tests and Test Setup tabs are not available in Sync Only and Bridged Access Modes To select sub tests 1 Press the up down arrows ...

Страница 351: ...s set as the Access Mode the Select Tests tab allows you to Enable Disable only the Ping parameter To set the parameter 1 Press the left right arrow keys to toggle between Enable Disable OR 2 Press on any value to open the list box to toggle between Enable Disable by pressing the up down arrow keys 3 Press to confirm your selection ...

Страница 352: ...l Mode enabled for Auto Test only is either Incoming or Outgoing The VoIP test is not only used to initiate a VoIP call but responds to incoming VoIP calls Note When Incoming mode is selected Auto Answer is set to Yes and is read only When Outgoing mode is selected Auto Answer is set to No and is read only that is incoming calls are rejected Auto Answer disabled for Auto Test is either Yes or No W...

Страница 353: ...are listed and can be modified One additional Access Mode Bridged DHCP can be configured here in the VoIP WAN setup to support the modem in bridge mode and WinCE in DHCP This allows WinCE to get the WAN IP address via DSL connection through the modem s bridge Bridged DHCP uses same parameters as DHCP mode To configure test setup values 1 Press the up down arrow keys to select the desired parameter...

Страница 354: ... enter alphanumeric characters in this field using the editor screen to create a name Signalling Port read only displays a fixed numeric value of the signalling port used to establish an IP network session Address Format read only displays DNS Name Domain read only displays the domain name www exfo com To enter a user name 1 Press to open the alphanumeric editor screen and use the navigation keys ...

Страница 355: ...ue of the proxy port used to establish an IP network session Address Format is either IP Address or DNS Name Proxy Domain allows you to enter either the address of the IP or name of the domain server Proxy Password allows you to set a password for the proxy domain To setup the proxy info 1 Press the up down arrow keys to select the desired parameter 2 Press the left right arrow keys to view and se...

Страница 356: ...ersion is a value of either 2 or 3 used to send IGMP join leave messages Note If you change the IGMP Version from the default of 2 to 3 you must reboot your unit Max TS Packet Loss Ratio is an editable percentage ranging from 1 to 50 used to qualify if the IPTV stream is stable Max ZAP Time is an editable value ranging from 0 to 10 000 that measures the channel switch time in ms Channel List Setup...

Страница 357: ...he modem in bridge mode and WinCE in DHCP This allows WinCE to get the WAN IP address via DSL connection through the modem s bridge Bridged DHCP uses same parameters as DHCP mode To configure test setup values 1 Press the up down arrow keys to select the desired parameter 2 Press the left right arrow keys to view and select the options OR 3 Press on a value to open a list box of options or the alp...

Страница 358: ...s the first last entry of the alias table page the button s is disabled On screen function buttons Add Insert adds currently edited channel info into the alias table below the highlighted entry and moves the highlight to the newly added entry If the page is full the bottom entry moves to the next page Selecting the highlight placement allows you add and group entries with similar parameters Delete...

Страница 359: ...PTV Test Setup The Auto IPTV Test Setup page in the IPTV test setup allows you to define 2 types of IPTV tests to run automatically Join leave Test Enable to define a list of channels to sequentially join and leave If disabled no test is performed Channel 1 10 allows you to define a list of up to 10 channels IPTV Channel Analysis Enable to add channels for analysis If disabled channel analysis in ...

Страница 360: ...lias table is added and so on Delete removes the selected channel from the list You can Enable either one or both but you cannot Disable both of them at same time If both tests are enabled Join leave Test runs first To configure test setup values 1 Press the up down arrow keys to select the desired parameter 2 Press the left right arrow keys to view and select the options OR 3 Press on a value to ...

Страница 361: ...00 of the number of bytes sent in one packet The default value is 32 Total Pings is the total number of Ping packets to send out from 1 through 99 The default value is 3 Timeout is the time in seconds from 1 through 10 that the unit will wait for a response back from the destination device To configure test setup values 1 Press the up down arrow keys to select the desired parameter 2 Press the lef...

Страница 362: ...reen function buttons to create or edit the address FTP Test Setup The FTP test verifies the file transfer speed of the file download and upload The FTP Test Setup tab allows you to configure the following parameters Address Format is URL or IP Address FTP Server Address lists either the URL or IP Address Login Name Password is your user ID and password Download File Name is the filename requested...

Страница 363: ...le options available only in Auto Test Setup Enable to perform the upload download operation automatically To configure test setup values 1 Press the up down arrow keys to select the desired parameter 2 Press the left right arrow keys to view and select the options OR 3 Press on a value to open a list box of options or the alphanumeric editor screen and use the navigation keys to scroll through 4 ...

Страница 364: ...is the number of simultaneous sessions required to download the file from 1 to 4 To configure test setup values 1 Press the up down arrow keys to select the desired parameter 2 Press the left right arrow keys to view and select the options OR 3 Press on a value to open a list box of options or the alphanumeric editor screen and use the navigation keys to scroll through 4 Press to confirm the value...

Страница 365: ...of the iPerf3 server Default port is 5201 Test Duration modifies the duration value of the test from 10 60 sec Default is 10 sec Sim Dn Sessions is the number of simultaneous sessions required to download the file from 1 to 4 Sim Up Sessions is the number of simultaneous sessions required to upload the file from 1 to 4 Auto Download Upload available only for Auto Test can be enabled or disabled 1 ...

Страница 366: ...er to the list The newly added server will be automatically set as the selected server Remove from the list button is used to remove any Ookla server from the list except Automatic Note Ookla Privacy Policy http www speedtest net privacy You end user understand and acknowledge by performing the test contained in the Speedtest Powered Software Application that Ookla LLC may collect your IP address ...

Страница 367: ... destination address Timeout is the time in seconds from 1 to 10 that the unit will wait for a response back from the destination device To configure test setup values 1 Press the up down arrow keys to select the desired parameter 2 Press the left right arrow keys to view and select the options OR 3 Press on a value to open a list box of options or the alphanumeric editor screen and use the naviga...

Страница 368: ...t Manual and Ethernet tests If the list is changed in one test the changes are reflected in the other two Home URL acts as the Home URL for the web browser test page when started It is independent among the 3 types of test applications Copy to Home URL allows you to set a highlighted URL as the Home URL To configure the web browser setup 1 Press the up down arrows to highlight the desired entry in...

Страница 369: ...nt values VoIP Phone Book includes pages to setup and save phone numbers for the VoIP test Modem Settings Modem Settings provide the means to configure the unit power scheme Display Modem displays the modem state in the title bar of the unit Default value is Yes Modem Power OFF Immediately for when a DSL IP test is completed or stopped In this mode the modem is powered on when DSL IP test starts I...

Страница 370: ...line under test to the Tip A and Ring B connectors See Cable Connections on page 8 for more information on connecting to your unit If your modem is V2XAB GVXAB then DSLAM entry is visible and allows you to choose the following Annex B UR2 Annex B and UR2 To access the modem settings 1 From select DSL IP Tests Setup and then Modem Settings 2 Use the up down arrow keys to select the setting to chang...

Страница 371: ...r Export to EXFO Connect Client is enabled or not in System Settings Upload Setup If enabled you can select either USB or EXFO Connect Client as your test report storage location If disabled USB is automatically selected Report Format is MaxTester HTML MHTML or XML as the generated report format Note If EXFO Connect Client is selected the available selections for Report Format are only MHTML and X...

Страница 372: ... box of options 4 Press to confirm the value Identification The Identification tab allows you to preset values to identify each single and auto test result file when saving them The parameters are as follows User Name User ID allow you to enter up to 25 alphanumeric characters in each field Contractor Name allows you to enter the name of a contractor used to perform the tests Test From To allows y...

Страница 373: ... Accept buttons are disabled A maximum of 20 different entries can be added To manage the list 1 Press the left right arrow keys to select the Previous Next Entry buttons and press to select the previous next entry 2 Press Page Up Down function keys to see entries on the previous or next pages These keys are disabled if no other pages exist 3 Press Add function key to add an entry just below the s...

Страница 374: ...are not shown Date and Time value format depends on the format selected in System Settings This entry cannot be disabled Separator allows you to choose a value to separate the enabled entries in the file name e g Space Dash Underscore _ To select an entry and choose a value 1 Press the up down arrow keys to highlight the desired entry 2 Press the left right arrow keys to view and select the option...

Страница 375: ...nge the order 1 Press to get into the list 2 Use the up down arrow keys to select the desired entry 3 Press to come out of the list 4 Press the up or down arrow key to activate the Up Down buttons 5 Using the left right arrow keys select Up Down and press to move the entry up down the list 6 Press to go back to the File Name tab The File Name Preview will be updated with your changes ...

Страница 376: ... Phone Book Details displays an editable list of phone book entries Load Phone Book allows you to import a phone book from either the internal memory of a USB Save Phone Book allows you to save or export a phone book Delete Phone Book allows you to delete an entry To navigate between the phone book functions 1 Press the up down left right arrow keys on the keypad to select an icon 2 Press to confi...

Страница 377: ...06 162 164 122 3145551212 domain com john 206 162 164 122 5060 On screen function buttons Add Insert adds a new entry into the Phone Book below the highlighted entry and moves the highlight to the newly added one If the page is full the bottom entry moves to the next page Delete removes the highlighted entry in the Phone Book Modify replaces the edited value of the current highlighted entry Page U...

Страница 378: ...e address Load Phone Book The Load Phone Book page allows you to import a phone book The page lists phone book files stored at a particular location and displays the Loaded File name and date of the last phone book loaded Only csv files are supported The Storage Location lists the load destinations MT internal memory USB Entry displays the entry number of the phone book s File Name lists the phone...

Страница 379: ...loaded one Save Phone Book The Save Phone Book page allows you to save or export a phone book Save File allows you to enter a file name of the current phone book to save By default the name is phone_book csv The Storage Location lists the save destinations MT internal memory USB Save button saves the selected file Note The unit will overwrite any document with the same file name found on the disk ...

Страница 380: ...ion lists the location where the phone book file is stored MT internal memory USB Entry displays the number of the phone book s File Name lists the phone book file name s Delete button deletes the selected phone book To delete a phone book 1 Select the Storage Location using the left right arrow keys OR 2 Press to display the list of options 3 Press the up down arrow keys to select the entry to be...

Страница 381: ...m to the point that it can handshake and connect with an DSLAM and report the upstream and downstream parameters Simply connect to the line turn on the MAX 635G and select a test to run Results obtained include upstream and downstream throughput and noise margin To activate a test 1 Press the left right up down arrow keys on the keypad to select the desired test icon 2 Press to start the test ...

Страница 382: ...p of the screen Profile displays the name of the current profile that results were saved to You can change the Profile within a test once it is stopped Pressing the up arrow key opens a list of profiles from which you can select Use the on screen function buttons to navigate Select a new profile or Cancel and restore the test result screen Sync Time is a count up timer maximum 99 h that starts cou...

Страница 383: ... actual bit rate If the Operation Mode is bonded the 2 DSL line Max Bitrate is combined Aggregate Data Rate GVXAA and GVXAB models only displays a value of the gross bit rate if the Operation Mode is G fast or VDSL2 35b Otherwise the value is N A Downstream Upstream actual bit rates are displayed by graphic bars and the current actual values appear as numbers Downstream Upstream bit rate values ar...

Страница 384: ...hen set up over Ethernet the available test results are the following WAN LAN Port Line Status displays Booting GVXAA and GVXAB models only Connected or Disconnected for the particular line connection under test WAN LAN Port Link Speed is Auto negotiated during the link establishment 1000 GVXAA and GVXAB models only 100 or 10 Mbit s WAN LAN Port Connect Mode is Full or Half Duplex when Link Speed ...

Страница 385: ...dynamically assign an IP address for the client node on the network IPv6 DHCP is equivalent to the above but for Internet Protocol version 6 vs IPv4 Static IP is the current location assigned by the service provider or user IPoA stands for classical Internet Protocol over ATM WAN Status value changes as per the WAN state of the current test For Manual Test the following states may be displayed Idl...

Страница 386: ... the primary domain name server to be used by the unit DNS2 is the address of the secondary domain name server to be used by the unit VPI ATM mode only is the virtual path identifier value not available in PTM mode VCI ATM mode only is the virtual circuit identifier value not available in PTM mode VLAN ID is a virtual local area network VLAN tag ranging from 0 through 4094 The entry is available o...

Страница 387: ...AN setup is different between these 2 tests LAN Status The LAN Status tab allows you to view the pass fail status and parameters related to the LAN local area network The Total number of Received and Transmitted Bytes Packets and Errors counted on the unit s LAN interface are also displayed during the test Note The following 2 parameters are not displayed if IPv6 DHCP is set as the Access Mode in ...

Страница 388: ... Touch Tone Keypad Dial Hang Up button allows you to dial the selected or entered number or disconnect the dialed call Touch Tone Keypad button opens the DTMF keypad If the call is not in progress or connected this button is disabled Phone Book button opens a page where you can enter a new address access Recently Dialed numbers or Select From Phone Book Volume button adjusts the speaker volume Thr...

Страница 389: ...o select the parameter values 1 Press the up down arrow keys to highlight the desired parameter 2 Press the left right arrow keys to view and select the options OR 3 Press on a value to open a list box of options or the alphanumeric editor screen and use the navigation keys to scroll through 4 Press to confirm the value Enter Address The alphanumeric editor screen allows you to change parameter va...

Страница 390: ...e entered in the text box Phone Book The Phone Book page allows you to enter a new address access Recently Dialed numbers or Select From Phone Book VoIP Status shows the current status of the dialed number Enter Address displays the dialed number entered or selected from the Recent Dialed Numbers list or Phone Book When Enter Address is selected it opens the alphanumeric keypad to enter a SIP Addr...

Страница 391: ...ves the entered number to the Phone Book Mute Unmute Speaker changes the speaker status Volume adjusts the volume level DTMF opens the DTMF keypad If the call is not in progress or connected this button is disabled To dial a number 1 Use the up down arrow keys to highlight an entry or button and press 2 Enter a new number using the on screen keypad or select an existing one from the lists 3 Press ...

Страница 392: ...o select an entry 2 Press to confirm your choice The number is automatically entered in the Enter Address field of the VoIP Call page Select From Phone Book The Select From Phone Book page contains a selection of entries from the Phone Book to make a VoIP Call To select an entry 1 Use the up down arrow keys to select an entry 2 Press to confirm your choice The number is automatically entered in th...

Страница 393: ...cs including latency jitter and loss Avg Latency is the maximum average threshold time delay in ms allowed to deliver the data Avg Jitter the average variation in ms in the packet transit delay of received packets Type is a read only field displaying the threshold limit either Minimum or Maximum To set threshold values 1 Press the up down arrow keys to highlight the desired parameter 2 Press on a ...

Страница 394: ...ean Opinion Score which provides a relative measurement of VoIP call quality R Factor displays values for both the average and current R Factor score which is a VoIP transmission quality rating derived from multiple VoIP metrics including latency jitter and loss Latency displays the average current and maximum time delay experienced in ms to deliver VoIP packets Jitter displays the average current...

Страница 395: ...e for the IPTV service including all channels detected Total IP Packet Loss is the total number of packets lost with errors or out of sequence during the test period Current Stream lists a maximum of 5 live channel streams by name and IP Address Zap is the time between sending a request to join the stream and the start of receiving the video stream It is one of the key factors to be considered whe...

Страница 396: ...he Video Audio and Program Association Map Table s content for each MPEG video analyzed stream PID is a unique packet identifier that is assigned to the packet payload of the video stream Rate kbit s is the rate calculated of a given stream content Stream Error Indicator TS Packet Loss Counter is the number of packets lost with errors or out of sequence during the test period in the transport stre...

Страница 397: ...ist of IPTV channels from the alias table their activity measured Zap time and pass fail status Upon successful WAN connection the Join Leave Channel lists are shown To join leave channels 1 Press Join to send an IGMP report to join the specified multicast IP address 2 Press Leave to inform the network to stop sending the specified multicast stream ...

Страница 398: ...from Idle Activate Handshake Training Show Time for DSL mode Note When loading firmware into the Broadcom chipset the Line Status value displays Loading M SS where M SS is a count down timer Operation Mode is the DSL mode of operation as negotiated between the unit and the DSLAM CO Vendor ID Version is a unique 4 digit alphanumeric identifier of the DSL chipset manufacturer used on the CO central ...

Страница 399: ...it rate presented as a percentage A high value could mean that the link is nearing its maximum capabilities while a low value could mean the link is being under utilized sometimes intentionally verify your local DSLAM setup Maximum Data Rate displays the maximum attainable bit rates that the circuit can handle as determined by the remote terminal and CO during the training phase Values can be grea...

Страница 400: ... swapping mechanism Active or Not Active swapping bits from tone m to tone n to prevent modem retraining Trellis or Trellis Coded Modulation TCM is a type of convolutional code which utilizes parity bits on each symbol within a continuous data stream When the line is connected Trellis displays either On or Off Phy R is Broadcom proprietary Physical Layer Retransmission technology which is used to ...

Страница 401: ... following counters CRC is the cyclical redundancy check Interleaved Fast counter FEC is the Reed Solomon forward error correction Errored Seconds is the number of seconds when code violation is detected HEC is the header error check HEC Interleaved Fast counter Available only in ATM connection mode SES severely errored seconds GVXAA and GVXAB models only is the count of a one second period that c...

Страница 402: ...VXAA and GVXAB models only displays the following in Manual and Auto Test SRA seamless rate adaptation which adjusts the rate according to the current line conditions Received and transmitted counters are shown for example SRA DS US FRA fast rate adaptation which enables rapid 1 ms reconfiguration of the data rate Received and transmitted counters are shown for example FRA DS US N A means none use...

Страница 403: ...ay period The Local number is received by the CPE the Remote value received by the DSLAM Note The RTX_TX may not equal RTX_C RTX_UC because of the infrequent reboot nature of the DSLAM and the double counting that the RTX_TX counter might do Vector Err Samples Sent is the total number of error samples the CPE has sent to the DSLAM during the test A high number can indicate a network that is unstab...

Страница 404: ...between bands ADSL lists only 1 of each VDSL lists US0 to US3 and DS1 to DS4 possible bands depending on the band plan Parameter Downstream Upstream SNR Margin is the measured current signal to noise ratio margin across all active sub carriers as an amount of increased noise relative to the measured noise power that the system would be able to tolerate Only a value of 6 or above is able to support...

Страница 405: ...2 ADSL2 Frequency is shown in kHz If G fast the Frequency is shown in MHz There are 4 when in G fast mode separate graphs for each pair SNR per Tone presents the signal to noise ratio per tone ATTN Hlog per Tone shows the attenuation from Hlog Channel Response per tone QLN per Tone shows the PSD noise from quiet line noise per tone ALN per Tone defines the downstream active line noise per tone and...

Страница 406: ...ults 1 Press the up down navigation keys to select the desired test 2 Press to display the test result details Ping Test The Ping Test tab allows you to view the Pass Fail summary status of either a Ping Address or Ping Gateway Status is the status of the Ping test performed Ping IP URL is the IP Address or domain name of the destination being pinged Packet Size is the number of bytes sent in one ...

Страница 407: ...number of bytes sent in one packet ranging from 32 through 1200 default is 32 bytes Total Pings is the total number of Ping requests to be sent FTP Test The FTP Test tab displays the FTP download and upload results configured in the connection setup and a pass fail summary status of whether or not the file transfer protocol FTP was completed successfully or not Except for Auto Test FTP parameters ...

Страница 408: ...onfigured in the connection setup can be reconfigured from this tab and have information updated by using the on screen Download button iPerf3 Test The Throughput Test tab GVXAA and GVXAB models only displays the Download Upload Status and speed results of the iPerf3 Test configured in the connection setup and a pass fail summary status of whether or not the Throughput Test was completed successfu...

Страница 409: ...try the Location is in Sponsor is the name of the testing Host server Test Type displays which test was run Here you can switch to the iPerf3 Speed Test configure the parameters except for Auto Test and run the test Ookla Server displays the server used to run the test Automatic runs the Ookla test with the lowest latency server You can select a specific Ookla server from the list and rerun the te...

Страница 410: ...pplication that Ookla LLC may collect your IP address during the test and share it with selected third parties Trace Route Test The Trace Route Test tab allows you to view the pass fail status of the IP packet sent to a specified IP destination and the path and time taken to do so Except for Auto Test Traceroute parameters can be reconfigured and have information updated from this tab by using the...

Страница 411: ...led The results screen contains the following functions URL Box displays the current web address to be connected The Go button starts the specified URL or reloads the previous web page On screen function keys Back retrieves the previous web page if available If no web page was previously browsed this key is disabled Enter Text opens the editor screen allowing you to type an entry Bookmarks opens t...

Страница 412: ...ill not be saved as the Home URL To navigate the web browser page 1 Use the keypad arrow keys to move the on screen cursor When the cursor reaches the edge of the viewing area the web browser page scrolls up down left right The cursor turns into a text edit tool when scrolling over an editable box or a hand tool when hovering near a hyperlink 2 Press to start the desired outcomes 3 Press to load t...

Страница 413: ...t URL in the web browser page On screen function keys Add to Bookmarks copies the current URL to the Bookmarks list above the highlight When the list reaches the maximum 9 URLs the key is disabled Set as URL copies the highlighted URL to the URL box GO saves the bookmarks and starts the web connection using the address in URL box Press to exit from the Bookmarks page avoiding all actions and retur...

Страница 414: ......

Страница 415: ...ing Or you can Save your results to an internal memory file or Export results to an HTML MHTML or XML report using a USB key Alternately when a test is completed or stopped and you press Confirm Save Results dialogue box pops up Selecting Yes displays the Upload Save Result screen where the following information can be entered Identification Fields User Name User ID display the values set up in th...

Страница 416: ...uto naming parameters configured in Setup Application Settings File Name Out Band Upload Save button is enabled when test is stopped and out band upload method is not disabled in System Settings Upload Setup Save button confirms if the Result File Name is saved successfully Export to ECC Save button replaces the Save button when Export to EXFO Connect Client is enabled in System Settings Upload Se...

Страница 417: ...meters configured in Setup Application Settings File Name Export button confirms if the Report File Name is saved successfully If a USB device is not inserted the following warning dialogue box appears USB device not present EXFO Connect button is active only for Manual Test when DSL sync is established and WAN Status is Connected If Access Mode is IPv6 DHCP or Bridged EXFO Connect button is not a...

Страница 418: ...o confirm your selection Upload The Upload page allows you to upload the saved results to an FTP site or a USB memory stick Select a FileName or All files previously saved Files are uploaded via the existing in band DSL or Ethernet connection made during the test or an out band upload connection Wi Fi or Ethernet as shown by the corresponding icon in the top right hand corner of the navigation bar...

Страница 419: ...t to start and then exit the browser to upload files Alternately wait for files to complete uploading before pressing any keys To upload previously saved results 1 Press the left right arrow keys to highlight the desired Upload Location OR 2 Press to display the list and select the value 3 Press the down arrow key and select either None or All files 4 If None press the down arrow key to highlight ...

Страница 420: ...ously saved The page lists all saved result files by test date and time The format of Test Date Time is per the selection in System Settings Result files can be loaded from either the MT internal memory or a USB To open previously saved test results 1 Press the left right arrow keys to highlight the desired parameter OR 2 Press to display the list or select the value 3 Press the down arrow key to ...

Страница 421: ...selected Report Format Storage Location gives you the option of exporting your results to either the MT internal memory or USB device Select Files is either None or All None removes all check marks allowing you to select one or more files or All Export Report Report File Storage Location is dependent on whether Export to EXFO Connect Client is enabled or not in System Settings Upload Setup If enab...

Страница 422: ...to highlight the desired Storage Location OR 2 Press to display the list and select the value 3 Press the down arrow key and select either None or All files 4 If None press the down arrow key to highlight the list box and press to open the list 5 In the list press the up down arrows to select the desired files 6 Press to come out of the list 7 Press the down arrow key to highlight the Report Forma...

Страница 423: ...None removes all check marks allowing you to select one or more files or All Delete button removes the selected files To delete previously saved test results 1 Press the left right arrow keys to select either None or All files 2 If None press the down arrow key to highlight the list box and press to open the list 3 In the list press the up down arrows to select the desired files 4 Press to come ou...

Страница 424: ......

Страница 425: ... trouble free operation Keep the unit free of dust Clean the unit casing and front panel with a cloth slightly dampened with water Store unit at room temperature in a clean and dry area Keep the unit out of direct sunlight Avoid high humidity or significant temperature fluctuations Avoid unnecessary shocks and vibrations If any liquids are spilled on or into the unit turn off the power immediately...

Страница 426: ...nt The validity of specifications depends on operating conditions For example the calibration validity period can be longer or shorter depending on the intensity of use environmental conditions and unit maintenance as well as the specific requirements for your application All of these elements must be taken into consideration when determining the appropriate calibration interval of this particular...

Страница 427: ...calibration date be established according to the following equation Next calibration date Shipping date Recommended calibration period 2 years To ensure that your unit conforms to the published specifications calibration may be carried out at an EXFO service center or depending on the product at one of EXFO s certified service centers Calibrations at EXFO are performed using standards traceable to...

Страница 428: ...splay backlight level using the application found in Display and Language in the System Settings when the unit is used under low to medium light conditions 2 Disconnect any unused USB or SD accessories 3 Quit any running tests when the MaxTester is not in use 4 Whenever possible put the unit in suspend mode by pressing until the suspend notification sound plays about 2 seconds 5 When not in use tu...

Страница 429: ...s stop automatically when the battery temperature reaches 60 C Replacing the Single Battery Single battery replacement should only be done by a qualified technician with the appropriate tools on an electronic bench or similar environment To replace the single battery 1 Remove all 4 screws of the battery back panel using a 1 5 mm Allen key Put aside the screws and the panel keeping the inside foam ...

Страница 430: ...Replace the 4 screws with a moderate torque so the foam seal is evenly compressed without damaging the screws Battery Charging and Replacing Charging the MaxTester single battery can take up to 5 hours This battery was custom made for your unit replacement batteries must be ordered from EXFO Charging the dual battery can take up to 3 5 hours based on an ambient temperature of 23 o C and in suspend...

Страница 431: ... complete recycling disposal information visit the EXFO Web site at www exfo com recycle This symbol on the product means that you should recycle or dispose of your product including electric and electronic accessories properly in accordance with local regulations Do not dispose of it in ordinary garbage receptacles ...

Страница 432: ......

Страница 433: ...ttery and replace battery back panel Make sure that the unit is within the operation temperature range You might have to wait for the unit to warm up cool down Battery does not charge as expected Temperature is too high Battery is incorrectly connected Ensure temperature is within specifications Ensure battery is connected properly A battery status LED is red Battery temperature is too high Batter...

Страница 434: ...Troubleshooting 424 MAX 635G Solving Common Problems The unit is not responding Shut down the unit as above Turn the unit on again to reset it Problem Possible Cause Solution ...

Страница 435: ... Battery Pack Power LED Dual Battery Pack Battery LED ON DC Error N A Solid green Solid yellow Red Charging N A Green blinking Charged Full Solid green Battery N A 13 Solid yellow Solid yellow Red blinking 14 37 Yellow blinking 38 62 Yellow 63 Solid Green Fake suspenda a Fake Suspend When AC DC is plugged in MaxTester will simulate the suspend mode by turning off the display in order to facilitate...

Страница 436: ...rmation about technical support and for a list of other worldwide locations visit the EXFO Web site at www exfo com If you have comments or suggestions about this user documentation you can send them to customer feedback manual exfo com To accelerate the process please have information such as the name and the serial number see the product identification label as well as a description of your prob...

Страница 437: ...ns when transporting the unit Transportation damage can occur from improper handling The following steps are recommended to minimize the possibility of damage Pack the unit in its original packing material when shipping Avoid high humidity or large temperature fluctuations Keep the unit out of direct sunlight Avoid unnecessary shocks and vibrations ...

Страница 438: ......

Страница 439: ... calibration during the warranty period and found to meet all published specifications EXFO will charge standard calibration fees THIS WARRANTY IS IN LIEU OF ALL OTHER WARRANTIES EXPRESSED IMPLIED OR STATUTORY INCLUDING BUT NOT LIMITED TO THE IMPLIED WARRANTIES OF MERCHANTABILITY AND FITNESS FOR A PARTICULAR PURPOSE IN NO EVENT SHALL EXFO BE LIABLE FOR SPECIAL INCIDENTAL OR CONSEQUENTIAL DAMAGES I...

Страница 440: ...shall be responsible for any failure in the performance of other items to which the product is connected or the operation of any system of which the product may be a part EXFO shall not be liable for damages resulting from improper usage or unauthorized modification of the product its accompanying accessories and software ...

Страница 441: ...ith EXFO products are not covered by this warranty This warranty excludes failure resulting from improper use or installation normal wear and tear accident abuse neglect fire water lightning or other acts of nature causes external to the product or other factors beyond the control of EXFO Certification EXFO certifies that this equipment met its published specifications at the time of shipment from...

Страница 442: ...nditions under which it was observed 5 Return the equipment prepaid to the address given to you by support personnel Be sure to write the RMA number on the shipping slip EXFO will refuse and return any package that does not bear an RMA number Note A test setup fee will apply to any returned unit that after test is found to meet the applicable specifications After repair the equipment will be retur...

Страница 443: ...rt services instrument services exfo service centers EXFO Headquarters Service Center 400 Godin Avenue Quebec Quebec G1M 2K2 CANADA 1 866 683 0155 USA and Canada Tel 1 418 683 5498 Fax 1 418 683 9224 support exfo com EXFO Europe Service Center Winchester House School Lane Chandlers Ford Hampshire S053 4DG ENGLAND Tel 44 2380 246800 Fax 44 2380 246801 support europe exfo com EXFO Telecom Equipment ...

Страница 444: ......

Страница 445: ...62 C cable book add 76 clone 77 delete 78 details 74 select 73 capacitance measurement 81 caution of personal hazard 10 of product hazard 10 channel list 348 cleaning front panel 415 cold shutdown 18 configuring unit 23 connection 48 continuous AC current 123 voltage 118 continuous DC 124 voltage 115 controller 344 conventions safety 10 current 124 continuous AC 123 continuous DC 124 snapshot 121 ...

Страница 446: ...test 339 354 398 I identification label 426 IGMP 346 information 36 input current 14 iPerf3 340 355 398 IPTV 346 349 IPv6 337 341 352 396 IST 193 196 K keypad 19 L label identification 426 LAN 336 load coil 266 M main menu 19 maintenance front panel 415 general information 415 manual test 328 336 372 388 391 394 mask 219 masks 189 maximum input current 14 menus 19 modem 359 modem V2XAB 360 O Ookla...

Страница 447: ...er details 106 FED details 108 phone book 107 profile details 107 summary 105 return merchandise authorization RMA 432 S safety caution 10 conventions 10 warning 10 service and repairs 432 service centers 433 shipping to EXFO 432 short fault 260 shut down cold vs warm 18 unit 18 signal attenuation 394 single frequency 228 SIP address 367 368 snapshot current 121 resistance 127 resistive balance 13...

Страница 448: ... 415 427 U unit configuration 23 unit shutting down 18 user auto test DRP 316 frequency 311 multimeter 1 308 multimeter 2 309 noise 309 TDR 314 V VDSL2 2 23 VDSL2 35B 33 VoIP 342 359 VoIP phone book delete 370 details 367 load 368 menu 366 save 369 voltage continuous AC 118 continuous DC 115 snapshot 120 thresholds 117 W warm shutdown 18 warranty certification 431 exclusions 431 general 429 liabil...

Страница 449: ... 䈕ᴹᇣ 䍘㠣ቁ 䈕䜘ԦⲴḀа 䍘ᶀᯉѝⲴਜ਼䟿䎵ࠪ d ϮϲϱϳϮ ḷ 㿴ᇊⲴ䲀䟿㾱 DŽ ḷ䇠ĀyāⲴ䜘ԦˈⲶഐ ޘ ᢰᵟਁኅ ᒣ䲀ࡦ㘼ᰐ ᇎ ᴹᇣ 䍘ⲴᴯԓDŽ D I DSSOLFDEOH ྲ 䘲 DŽ 1 6 5 8 7 21 21 5 675 7 21 2 5 286 68 67 1 6 5R 6 Ḕ ṵডᇣ 䍘䲀ࡦⲴ㿴ᇊ 1 0 6 1 217 176 2 7 72 25 5 286 68 67 1 6 25 0 176 217 1 1 7 6 2 352 8 7 वਜ਼ ᵜ 2 ӗ ѝⲴᴹ ᴹᇣ 䍘ᡆ ݳ Ⲵ ਜ਼䟿 3DUW 1DPH 䜘Ԧ HDG 䫵 3E 0HUFXU J DGPLXP 䭹 G H DYDOHQW KURPLXP ޝ ԧ䬜 U 9 3RO EURPLQDWHG ELSKHQ OV ཊⓤ㚄㤟 3 3RO EURPLQDWHG GLSKHQ O HWKHUV ཊⓤҼ㤟...

Страница 450: ...Đƚ ӗ ŶǀŝƌŽŶŵĞŶƚĂů ƉƌŽƚĞĐƚŝŽŶ ƵƐĞ ƉĞƌŝŽĚ LJĞĂƌƐͿ ຳ ᣔ ᵏ䲀 ᒤ ŽŐŽ ḷᘇ dŚŝƐ y K ƉƌŽĚƵĐƚ ᵜ y K ӗ ϭϬ ĂƚƚĞƌLJD ϱ 0 5 1 5 48 5 0 176 ḷ 㾱 Ă Ĩ ĂƉƉůŝĐĂďůĞ ྲ 䘲 DŽ WƌŽĚƵĐƚ ӗ ŶǀŝƌŽŶŵĞŶƚĂů ƉƌŽƚĞĐƚŝŽŶ ƵƐĞ ƉĞƌŝŽĚ LJĞĂƌƐͿ ຳ ᣔ ᵏ䲀 ᒤ ŽŐŽ ḷᘇ dŚŝƐ y K ƉƌŽĚƵĐƚ ᵜ y K ӗ ϭϬ ĂƚƚĞƌLJD ϱ ...

Страница 451: ...o com P N 1076277 CORPORATE HEADQUARTERS 400 Godin Avenue Quebec Quebec G1M 2K2 CANADA Tel 1 418 683 0211 Fax 1 418 683 2170 TOLL FREE USA and Canada 1 800 663 3936 2019 EXFO Inc All rights reserved Printed in Canada 2019 10 ...

Отзывы: