LC-Series Una Quick Start Guide
LC-Series Una Quick Start Guide
www.e
x
acq.com
www.e
x
acq.com
Connections
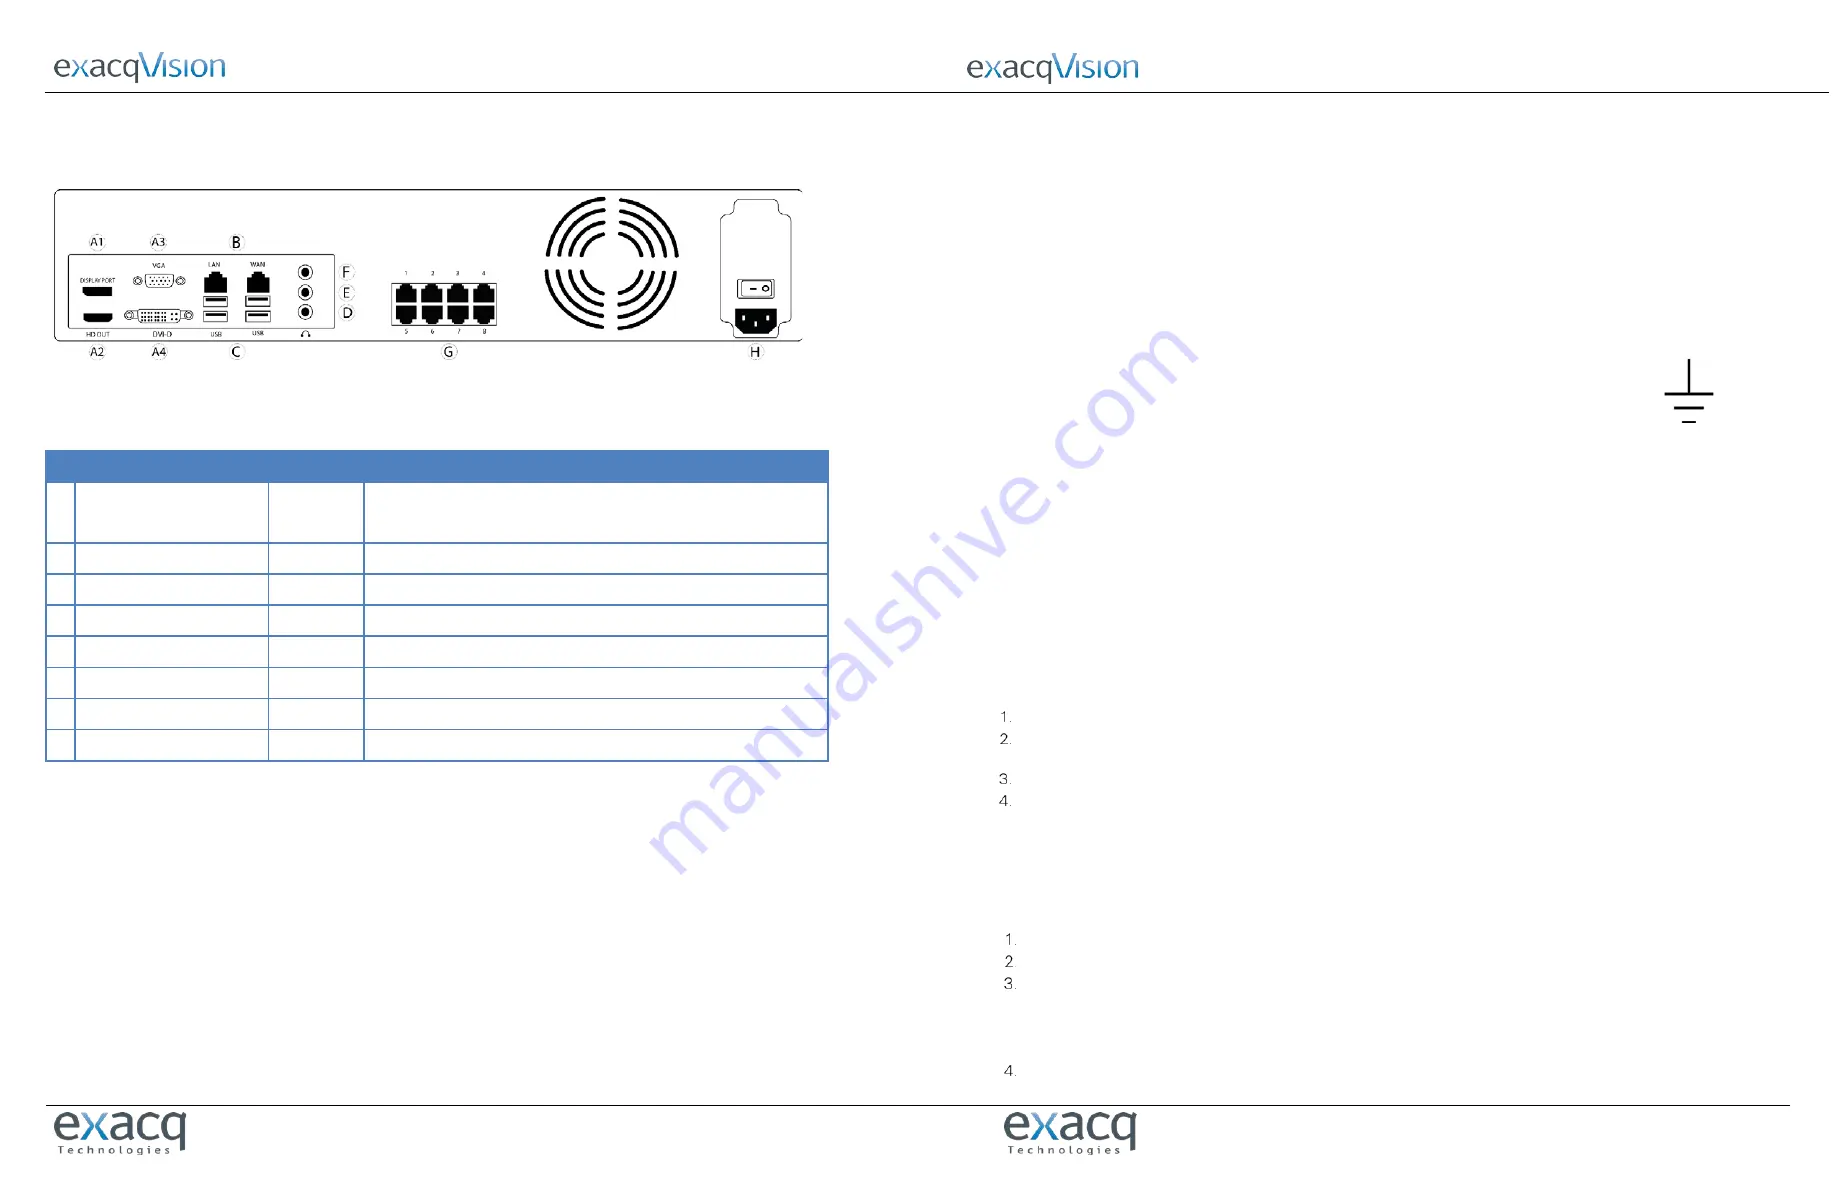
For information on the LC-Series Una server’s back panel, see the following figure and table.
Figure 1. LC-Series Una back panel
Warning: Do not connect any switches, routers, computers, printers, encoders, or any non-camera device to the PoE camera ports.
Name
No. of Ports
Description
A Video out
4
Display Port (A1), HDMI (A2), VGA (A3), DVI-D (A4)
You may use a maximum of two video outputs simultaneously.
B
10/100/1000 Ethernet
2
Dual on-board NICs
C
USB 3.0
4
USB keyboard, mouse, memory device, or DVD burner.
D Microphone input
1
Microphone (pink)
E
Audio output
1
Line out (green)
F
Line input
1
Line in (blue)
G 10/100 PoE camera ports
8
DHCP enables posts for IP based cameras only.
H Power
1
Use this port to connect the power plug to the server.
Table 2. LC-Series Una server back panel
February 21 2020, Rev E
©2020 ExacqTechnologies
Introduction
The exacqVision LC-Series is part of exacqVision’s series of network video recorders (NVR). The exacqVision LC-Series Una NVR
provides high performance hardware with an exacqVision surveillance video management software.
Installation
Before turning on the exacqVision LC-Series Una server, ensure that you meet the following requirements.
Mounting and operating environment requirements
•
Mount the exacqVision server in a dust-free, and climate controlled location where the temperature is less than 70°F, and the
humidity level is less than 80% non-condensing.
Caution: Dust can cause components of the server to overheat, and elevated temperatures can contribute to premature hard
drive failures.
•
Place a surge suppressor between the camera and the recorder of all outdoor cameras.
•
If you use an outdoor camera, the server must connect permanently to the ground wire. Ensure that
you use an 18 AWG wire or larger to make the connection, and that you label the grounding screw near
the power connector with the image in Figure 2.
Electrical environment requirements
•
For maximum reliability, connect the exacqVision server to an online UPS. An online UPS filters
power surges and dips that can damage the server.
•
Connect a mouse and a keyboard to the server.
•
Connect the exacqVision server’s Network Interface Card (NIC) to the appropriate network switch ports.
•
It is recommend to use cables with ferrite core for connecting to monitors. If the cable does not have a ferrite core, the unit still
performs as expected but may not meet CE safety regulation standards.
Initial startup
When you start the exacqVision LC-Series Una server for the first time, create a user name and password for the operating system, then
create a root user name and password for the Enterprise Manager.
Turn on the exacqVision server.
Create a user name and password for the operating system when the logon dialog box appears.Configure operating system
settings as required.
If prompted, log back on to the operating system with the user name and password you just created.
When you log back on, an exacqVision dialog box appears on the desktop. Create the exacqVision admin user name and
password.
Note: This is not the same as the credentials you created to log on to the operating system. Use these credentials to log on to the
exacqVision Server.
Configuring the server
To configure the exacqVision LC-Series Una server, complete the following steps:
Open the exacqVision client.
From the navigation tree, select System Setup, and select the Network tab.
In the Network window, choose one of the following options:
•
If you install the server on a network that uses static IP addressing, select Static and enter the IP address.
•
If you install the server on a network using DHCP, select Dynamic. If the information does not automatically configure,
contact your network administrator.
Click Apply.
Figure 2. Grounding wire


