Design and function
MIG/MAG welding
38
099-005542-EW501
24.03.2020
A prerequisite for the automatic inching process is the correct preparation of the wire guide,
especially in the capillary and wire guide tube area
> see 5.4.2 chapter
.
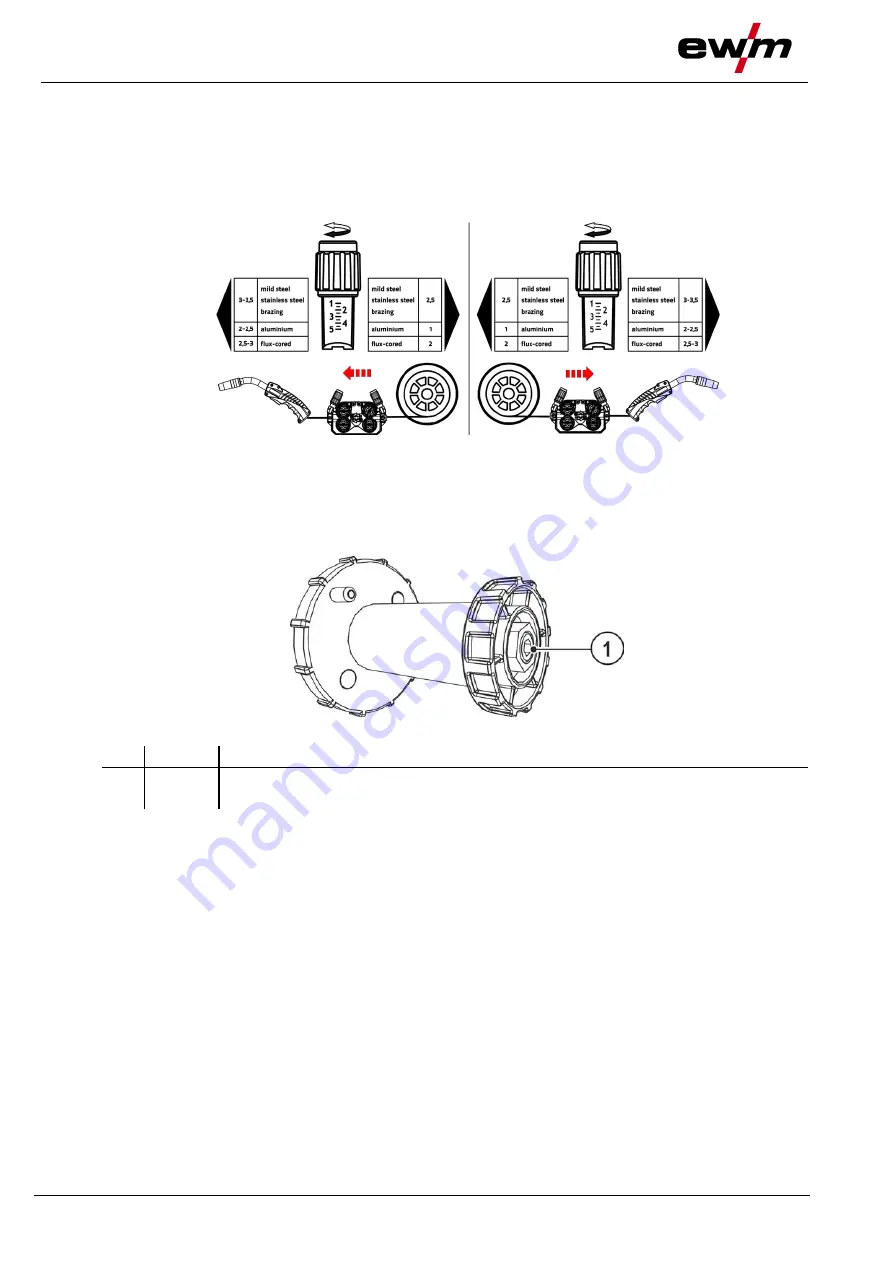
• The contact pressure has to be adjusted separately for each side (wire inlet/outlet) at the feed roll ten-
sioner setting nuts depending on the welding consumable used. A table with the setting values can be
found on a sticker near the wire drive.
Version 1: left hand mounting
Version 2: right hand mounting
Figure 5-18
Automatic inching stop
Touch the welding torch against the workpiece during inching. Inching of the welding wire will stop as
soon it touches the workpiece.
5.2.4.4 Spool brake setting
Figure 5-19
Item Symbol Description
0
1
Allen screw
Securing the wire spool retainer and adjustment of the spool brake
• Tighten the Allen screw (8 mm) in the clockwise direction to increase the braking effect.
Tighten the spool brake until the wire spool no longer turns when the wire feed motor stops but
without it jamming during operation!
5.2.5 Definition of MIG/MAG welding tasks
This machine range features simple operation with a very wide range of functions.
• JOBs (welding tasks consisting of welding process, type of material, wire diameter and type of shiel-
ding gas) are pre-defined for all common welding tasks.
• Simple JOB selection from a list of pre-defined JOBs (sticker on the machine).
• The required process parameters are calculated by the system depending on the operating point spe-
cified (single-dial operation via wire speed rotary dial).
• Conventional welding task definition using wire speed and welding voltage is also possible.
The welding task definition described below applies when defining MIG/MAG and cored wire
welding tasks.
Pay attention to the signal light for the polarity setting!
It may be necessary to change the welding current polarity depending on the JOB selected or the
welding process.
• Reconnect the polarity selction plug if necessary.


