background image

 
HD9690 Series HDTV Graticule Generator Manual  


Page 3-24


Revision 1.5 

FRONT PANEL


OPERATION 


3.8. 

CONTROLLING THE ELLIPSE OBJECT 

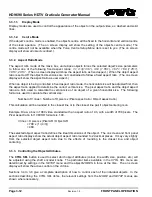
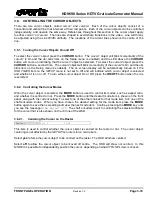
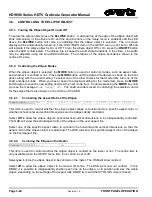
3.8.1.  Turning the Ellipse Object On and Off 

To select the 

ellipse

 object press the 

ELLIPSE 

button.  A dashed line at the edge of the 

ellipse

 object will 

blink momentarily (if the 

ellipse

 is On and the 

obj blink

 item on the 

Setup

 menu is enabled) and the LED 

above the 

ELLIPSE 

button will come on indicating that the 

ellipse

  object is selected.  The on screen 

display will be automatically turned on if the 

OSD TIMER

 item on the 

SETUP

 menu is not set to 

Off 

and 

will indicate it the 

ellipse

 object is On or Off. To turn the 

ellipse

 object Off or On, press the 

ON/OFF

 button 

when the LED is illuminated.  The ellipse line is shaped to avoid sharp transitions in the video.  Line width 
may be adjusted using the 

Line Width a

ttribute.  The locations of the ellipse boundaries shown is the 

centre of the line.   
 

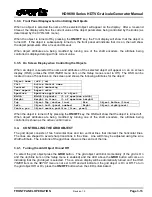
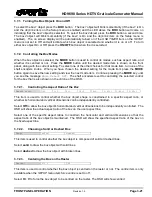
3.8.2.  Controlling the Ellipse Modes 

When the 

ellipse

 object is selected, the 

MODE

 button is used to control its modes, such as aspect ratio, 

and whether it is centred or not.  Press the 

MODE

 button until the desired mode item is shown on the front 

panel, along with the current setting. To select one of the other choices for that mode item, turn one of the 
shaft encoders knobs.  When you have chosen the desired setting for the mode item press the 

MODE


button again to save the new setting and view the next mode item.  Continue pressing the 

MODE

 key until 

you see the message 

Mode Select Off

.  The shaft encoders revert to controlling the selected 

control 

for the 

ellipse

 that is also shown on the 

ctrl

 line of the OSD. 


3.8.2.1. 

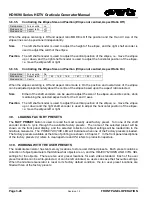
Controlling the Aspect Ratio of the Ellipse 

Aspect ratio 

Off 

1:1 

4:3 

14:9 

16:9 

1.67:1 

1.85:1 

2.35:1 

 
This item is used to control whether the 

ellipse

  object shape is constrained to a specific aspect ratio, or 

whether its horizontal and vertical dimensions can be independently controlled.  
 
Select 

Off

 to allow the 

ellipse

 object's horizontal and vertical dimensions to be independently controlled. 

The OSD will show the actual aspect ratio of the 

ellipse

 on the 

user aspect 

line. 

 
Select one of the specific aspect ratios to constrain the horizontal and vertical dimensions so that the 
aspect ratio of the 

ellipse

 object is maintained. The OSD will show the specified aspect ratio of the 

ellipse


on the 

fixed aspect 

line. 


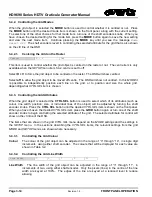
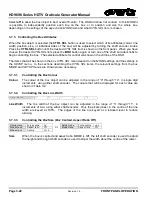
3.8.2.2. 

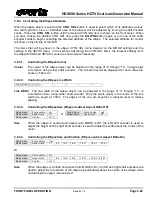
Centering the Ellipse on the Raster 

Centre: 

H + V 

Off 


This item is used to control whether the 

ellipse

 object is centred on the raster or not.  The 

centre

 item is 

only available when the 

SETUP

 menu item 

force centre

 is set to 

off.


Select 

yes

 to force the 

ellipse

 object to be centred on the raster. The OSD will show 

centred.


Select 

off

  to allow the 

ellipse

  object to be moved off centre.  The OSD will show 

not centred.

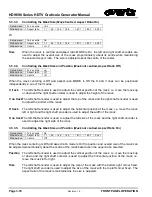
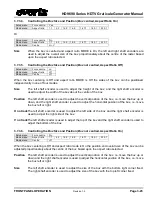
  In this 

MODE

 it is possible to independently position each line on the 

ellipse

, or to position and size the whole 

ellipse

, depending on the settings of the 

aspect ratio MODE item

 and what 

CTRL SEL

 item is chosen. 


Содержание HD9690 Series

Страница 1: ...pril 2011 The material contained in this manual consists of information that is the property of Evertz Microsystems and is intended solely for the use of purchasers of the Profanity Bypass Delay System Evertz Microsystems expressly prohibits the use of this manual for any purpose other than the operation of these units All rights reserved No part of this publication may be reproduced without the e...

Страница 2: ......

Страница 3: ...nding prong The wide blade or the third prong are provided for your safety If the provided plug does not fit into your outlet consult an electrician for replacement of the obsolete outlet Protect the power cord from being walked on or pinched particularly at plugs convenience receptacles and the point where they exit from the apparatus Only use attachments accessories specified by the manufacturer...

Страница 4: ...s for a Class A digital device pursuant to Part 15 of the FCC Rules These limits are designed to provide reasonable protection against harmful interference when the equipment is operated in a commercial environment This equipment generates uses and can radiate radio frequency energy and if not installed and used in accordance with the instruction manual may cause harmful interference to radio comm...

Страница 5: ...Video with 3D Option Apr 2011 Information contained in this manual is believed to be accurate and reliable However Evertz assumes no responsibility for the use thereof or for the rights of third parties which may be effected in any way by the use thereof Any representations in this document concerning performance of Evertz products are for informational use only and are not warranties of future pe...

Страница 6: ...HD9690 Series HDTV Graticule Generator Manual Revision 1 5 This page left intentionally blank ...

Страница 7: ... FUNCTIONS 3 1 3 1 1 The Object Pushbutton Group 3 2 3 1 2 The Setup Button Group 3 2 3 1 3 The Preset Button Group 3 3 3 1 4 Shaft Encoders Knobs 3 3 3 1 5 Status Indicators 3 4 3 1 6 Front Panel Display Messages 3 4 3 2 SETUP MENU 3 5 3 2 1 Choosing the Raster limits for the Mask Aspect Ratio and Size Calculation 3 6 3 2 2 Choosing the Raster limits for the Box Size Calculation 3 6 3 2 3 Choosin...

Страница 8: ... Centred Aspect Ratio On 3 18 3 5 3 4 Controlling the Mask Size and Position Mask not centred Aspect Ratio Off 3 18 3 5 3 5 Controlling the Mask Size and Position Mask not centred Aspect Ratio On 3 18 3 6 CONTROLLING THE CURSOR OBJECTS 3 19 3 6 1 Turning the Cursor Objects On and Off 3 19 3 6 2 Controlling the Cursor Modes 3 19 3 6 2 1 Centering the Cursor on the Raster 3 19 3 6 3 Controlling the ...

Страница 9: ...ont Panel Display Messages 4 4 4 2 SETUP MENU 4 4 4 2 1 Choosing the Raster limits for the Mask Aspect Ratio and Size Calculation 4 5 4 2 2 Choosing the Raster limits for the Box Size Calculation 4 6 4 2 3 Choosing the Object Blink Time 4 6 4 2 4 Choosing How Line Numbers are Displayed 4 6 4 2 5 Displaying Object Aspect Ratio or Position on the Front Panel 4 7 4 2 6 Forcing all Objects to be Cente...

Страница 10: ...entering the Box on the Raster 4 18 4 7 3 1 Controlling the Box Colour 4 18 4 7 4 Controlling the Box Size 4 19 4 7 4 1 Controlling the Box Size Objects centred Aspect Ratio Off 4 19 4 7 4 2 Controlling the Box Size Aspect Ratio On 4 19 4 7 4 3 Controlling the Box Size and Position Objects not centred Aspect Ratio Off 4 19 4 7 5 Controlling the Box Position 4 19 4 8 CONTROLLING THE ELLIPSE OBJECT ...

Страница 11: ...ator 5 10 5 4 2 Editing User Preset files 5 11 5 4 3 Uploading Preset Files to the Graticule Generator 5 11 5 5 WRITE PROTECTING THE USER PRESETS 5 12 5 6 RESTORING THE GRATICULE GENERATOR TO ITS FACTORY DEFAULTS 5 13 6 VIDEO STANDARD RASTER DEFINITIONS 6 1 6 1 HIGH DEFINITION VIDEO FORMAT SUMMARY 6 1 6 1 1 Interlaced and Segmented Frame HD formats 1080I 1035I 1080PsF 6 1 6 1 2 Progressive HD form...

Страница 12: ...90 444 Front Panel Layout 3 1 Figure 3 3 Overview of the HD9690 Setup Menu 3 5 Figure 3 4 Overview of the HD9690 444 Setup Menu 3 5 Figure 3 5 Mask Position and Size 3 15 Figure 4 1 Desktop Remote Panel Layout 4 1 Figure 4 2 Overview of the HD9690 Setup Menu 4 5 Figure 4 3 Overview of the HD9690 444 Setup Menu 4 5 Figure 4 4 Mask Position and Size 4 14 Figure 6 1 High Definition Interlaced Segment...

Страница 13: ...TV Graticule Generator Manual CONTENTS Revision 1 5 vii Table 3 1 4 4 4 Colour Mode Processing 3 11 Table 3 2 Object Colour Palettes 3 11 Table 4 1 4 4 4 Colour Mode Processing 4 9 Table 4 2 Object Colour Palettes 4 10 ...

Страница 14: ...HD9690 Series HDTV Graticule Generator Manual viii Revision 1 5 CONTENTS This page left intentionally blank ...

Страница 15: ...EW Revision 1 5 CHAPTER 1 OVERVIEW TABLE OF CONTENTS 1 OVERVIEW 1 1 1 1 HOW TO USE THIS MANUAL 1 3 1 2 GLOSSARY 1 4 1 2 1 Graticule Generator Terminology Definitions 1 7 Figures Figure 1 1 HD9690 Block Diagram 1 2 Figure 1 2 HD9690 444 Block Diagram 1 3 ...

Страница 16: ...HD9690 Series HDTV Graticule Generator Manual Page 1 2 Revision 1 5 OVERVIEW This page left intentionally blank ...

Страница 17: ...aticule Generator is also available in a remote control version which has a blank front panel and either a rack mountable or a desktop remote control panel Commonly used configurations stored as factory presets simplify routine operation to just a few pushbuttons The ability to customize these factory presets to your application and store them as USER PRESETS gives the Graticule Generator tremendo...

Страница 18: ...e to just a few preset buttons Factory Presets allow quick setup to common object placements on the raster Ten User definable presets with user definable labels and individual write protect allow unlimited customization to any requirement Optional Rack mount or Desktop remote control chassis HDSDI Input SMPTE 292M S P Timing Extraction Output Clock Adv_H_Reset Output Timing Resets Demux Cr Cb Y Mi...

Страница 19: ...nel Operation Desktop Remote Panel Operation Technical Description Video Raster Definitions and Factory Presets This chapter contains a quick summary of the features and a glossary to define concepts and terms used throughout the remainder of the manual Chapter 2 gives a detailed description of the rear panel connectors and how the unit should be connected into your system Chapter 3 gives a detail...

Страница 20: ...nds standards for the audio industries AES EBU Informal name for a digital audio standard established jointly by the Audio Engineering Society and the European Broadcasting Union organizations ANALOG An adjective describing any signal that varies continuously as opposed to a digital signal that contains discrete levels representing digits 0 and 1 A TO D CONVERTER ANALOG TO DIGITAL A circuit that u...

Страница 21: ...ros and a code word including F field frame V vertical H horizontal P3 P2 P1 and P0 parity bits which is used to designate the start of the horizontal blanking interval of the digital line See also SAV EBU European Broadcasting Union An organization of European broadcasters that among other activities provides technical recommendations for the 50 hz television systems EMBEDDED AUDIO Digital audio ...

Страница 22: ...nchronization sequence consisting of a sequence of four consecutive code words a code word of all ones a code word of all zeros another code word of all zeros and a code word including F field frame V vertical H horizontal P3 P2 P1 and P0 parity bits which is used to designate the end of the horizontal blanking interval The pixel immediately following the SAV is known as pixel 0 and designates the...

Страница 23: ...perture is substantially free from transient effects due to blanking and picture processing EDGE PROCESSING REGION The region of the production aperture that lies outside the clean aperture Blanking transitions should occur completely within the edge processing region IMAGE ASPECT RATIO Defines the ratio of the horizontal dimension to the vertical dimension of the production aperture when displaye...

Страница 24: ...r determining safe areas SAFE ACTION AREA Is the maximum image area within which all significant action shall be contained The image area defined by the Safe Action Area is concentric with the Production Aperture It is usually defined as a fixed percentage of the production aperture for a given video standard SAFE TITLE AREA Is the maximum image area within which all significant title and graphics...

Страница 25: ...ING 2 3 2 3 POWER REQUIREMENTS 2 3 2 4 CONNECTING THE VIDEO 2 4 2 4 1 Video Inputs 2 4 2 4 2 Video Outputs 2 4 2 5 CONNECTING TO AN ETHERNET NETWORK 2 5 2 6 CONNECTING THE GENERAL PURPOSE INPUTS 2 6 2 7 CONNECTING THE REMOTE CONTROL PANEL RCP AND DCP VERSIONS ONLY 2 6 Figures Figure 2 1 Model HD9690 Rear Panel Layout 2 1 Figure 2 2 Model HD9690 444 Rear Panel Layout 2 1 Figure 2 3 General Purpose ...

Страница 26: ...HD9690 Series HDTV Graticule Generator Manual INSTALLATION Revision 1 5 This page left intentionally blank ...

Страница 27: ...al link 10 bit serial digital video input signals compatible with the SMPTE ST 372 standard When operating the Graticule generator in the 4 2 2 mode connect the 4 2 2 input video compatible with the SMPTE ST 292 1 standard to the A 4 2 2 inputs When the 3D option is fitted and operating the Graticule generator in the 4 2 2 mode connect the stereoscopic 4 2 2 input video compatible with the SMPTE S...

Страница 28: ...VESA DVI I connector provides progressive RGBHV and DVI D outputs suitable for driving a computer video monitor The monitor must be capable of scanning at the line and pixel rate of the video input standard you are using Recommended maximum cable lengths DVI digital max length 3 meters or 10 feet VGA analog max length 5 meters or 15 feet 2 1 4 Serial I O and GPI O Connections UPGRADE COM1This 9 pi...

Страница 29: ...ser preset 4 6 GPI6 User preset 5 7 GPI7 User preset 6 8 GPI8 User preset 7 9 GND GND Table 2 3 GPI O Port Pin Definitions 2 1 5 Ethernet Network Connections ETHERNET This RJ 45 connector is an Ethernet port used for high speed FTP firmware upgrades See section 2 5 for information on connecting to an Ethernet network See section 5 3 1 for information on upgrading firmware using FTP 2 2 MOUNTING Th...

Страница 30: ...ticule generators support high definition digital video in the formats shown Table 2 4 In most cases the video standard is automatically detected Common Name Pixels Active Lines Frame Rate Progressive Interlace SMPTE Standard 1080i 60 1920 x 1080 30 I 274M 1080i 59 94 1920 x 1080 29 97 30 1 001 I 274M 1080i 50 1920 x 1080 25 I 274M 1080p 30sF 1920 x 1080 30 P sF 274M 1080p 29 97sF 1920 x 1080 29 9...

Страница 31: ...he straight through RJ 45 cable can be purchased or can be constructed using the pinout information in Table 2 5 A colour code wiring table is provided in Table 2 5 for the current RJ 45 standards AT T 258A or EIA TIA 258B colour coding shown Also refer to the notes following the table for additional wiring guide information Pin 1 Pin Signal EIA TIA 568A AT T 258A or EIA TIA 568B 10BaseT or 100Bas...

Страница 32: ...INPUTS The 9 pin GPI connector has 8 programmable general purpose inputs GPI as shown in Table 2 3 The schematic representation is in Figure 2 3 The GPI s are used as an additional way to activate the user presets The GPI inputs are active low which means a ground level on the input will activate the preset when the Opto isolator is normally powered GPI VDC to internal circuit 10 K Figure 2 3 Gene...

Страница 33: ... 7 Grat Gen End Remote Panel End 9 pin D Male Pin Belden 9729 9 pin D Female Pin 1 1 Tx 2 1a Rx 2 Rx 3 2b Tx 3 Rx Gnd 4 drain 2 RxGnd 4 5 Tx Gnd 6 drain 1 TxGnd 6 Tx 7 1b Rx 7 Rx 8 2a Tx 8 9 9 Frame Gnd Shield drain 1 Frame Gnd Shield Table 2 6 Remote Control Panel Extender Cable ...

Страница 34: ...HD9690 Series HDTV Graticule Generator Manual Page 2 8 Revision 1 5 INSTALLATION This page left intentionally blank ...

Страница 35: ... 8 3 2 10 Operating the HD9690 in Auto Video Standard Mode 3 8 3 2 11 Selecting the Video Type Model HD9690 444 only 3 9 3 2 12 Selecting the 4 4 4 Colour Space Model HD9690 444 only 3 9 3 3 CONTROLLING THE INDIVIDUAL OBJECTS 3 11 3 3 1 Controlling the Object Modes 3 11 3 3 1 1 Display Mode 3 12 3 3 1 2 Centre Mode 3 12 3 3 2 Aspect Ratio Mode 3 12 3 3 3 Controlling the Object Attributes 3 12 3 3 ...

Страница 36: ...3 21 3 7 3 Controlling the Box Attributes 3 22 3 7 3 1 Controlling the Box Colour 3 22 3 7 3 2 Controlling the Box Line Width 3 22 3 7 3 3 Controlling the Box Size Box Centred Aspect Ratio Off 3 22 3 7 3 4 Controlling the Box Size and Position Box centred Aspect Ratio On 3 23 3 7 3 5 Controlling the Box Size and Position Box not centred Aspect Ratio Off 3 23 3 7 3 6 Controlling the Box Size and Po...

Страница 37: ...D9690 Front Panel Layout 3 1 Figure 3 2 HD9690 444 Front Panel Layout 3 1 Figure 3 3 Overview of the HD9690 Setup Menu 3 5 Figure 3 4 Overview of the HD9690 444 Setup Menu 3 5 Figure 3 5 Mask Position and Size 3 15 Tables Table 3 1 4 4 4 Colour Mode Processing 3 11 Table 3 2 Object Colour Palettes 3 11 ...

Страница 38: ...HD9690 Series HDTV Graticule Generator Manual Revision 1 5 FRONT PANEL OPERATION This page left intentionally blank ...

Страница 39: ...remote control version which has a blank front panel and either a rack mountable or a desktop remote control panel Operation of the Graticule Generator from the integrated control panel or the rack mount control panel is identical and is described in this chapter For information on controlling the Graticule Generator from the desktop remote panel see chapter 4 For information about connecting the ...

Страница 40: ...ODES are automatically determined by the setup menu items and may be hidden if they are not applicable You must select the object before you can change its MODE CTRL SEL This button controls which attributes for a particular object colour line width position size or shape will be adjusted by turning the shaft encoder knobs Some of the object controls are affected by the setup menu items and the ob...

Страница 41: ...e then the desired the USER PRESET button You will be prompted to press the USER PRESET button a second time to confirm the operation Each of the user preset memory locations can be individually write protected See section 3 10 for a complete description of how to use the user presets User presets cannot be deleted directly from memory they can only be overwritten by another configuration saved to...

Страница 42: ...hat the unit is currently operating in a 1080 active line standard and there is 1080 active line HD video present on the input 720 Indicates that the unit is currently operating in a 720 active line standard and there is 720 active line HD video present on the input On the HD9690 444 version the video Standard LED s indicate what video type 4 2 2 or 4 4 4 the Graticule Generator is currently confi...

Страница 43: ...menu items are shown on the left with grey shading and the various choices are shown on the right with no background shading Mask apert prod clean Box apert prod clean Obj blink short long none Ln disp int rel int abs Feedback aspect pos Force centre yes no OSD Timer Off 2 secs 5 secs 10 secs 30 secs 1 min On OSD Posn Top l Top r Bot l Bot r center Safe Area 2046 RP218 Figure 3 3 Overview of the H...

Страница 44: ...ing the mask and grid objects can be positioned all the way out to the production aperture When you choose one of the automatic aspect ratios for the mask object its initial size and position will be calculated with respect to the mask aperture setting See section 3 5 2 1 for information on selecting the mask aspect ratio Select prod when you want to use the production aperture as the reference fo...

Страница 45: ...deo line 21 is the first line of active video in field 1 line 584 is the first line of active video in field 2 When the video standard uses a progressive non interlaced raster this menu item is not available Line numbering is always done in a progressive system referenced to the beginning of the frame 3 2 5 Displaying Object Aspect Ratio or Position on the Front Panel Feedback aspect pos This menu...

Страница 46: ...e the on screen display will be shown Turn the right shaft encoder to move the display to one of 5 positions on the screen 3 2 9 Selecting the SMPTE Safe Area Specification Safe Area 2046 RP218 SMPTE has recently published a new safe area specification in SMTPE ST 2046 1 based on fixed pixel matrix displays and are significantly larger than previously specified in RP218 The safe areas specified in...

Страница 47: ... 4 4 video signal to the Link A and Link B input BNC connectors The 444 Mode menu item must be set to match the colour space of the incoming video Select 422HD when you want the HD9690 444 to always operate with 4 2 2 HDSDI incoming video You must connect a valid 4 2 2 video signal to the Link A BNC connectors Any signal connected to the Link B BNC is ignored The 444 Mode menu item is ignored in t...

Страница 48: ...VI output will be disabled and graticule objects will have full scale colour values Select fsnorm when the incoming video is in the extended range 10 bit 4 4 4 FSRGB format and the 4 2 2 output is to be in the normal YCbCr format The FSRGB video has its three components scaled such that the extreme values are code words 04h 4 and 3FBh 1019 in a 10 bit representation The YCrCb video has the three c...

Страница 49: ...24 04h 4 300h 768 300h 768 Table 3 2 Object Colour Palettes 3 3 CONTROLLING THE INDIVIDUAL OBJECTS The Graticule Generator has separate controls for each of its seven objects grid mask box1 box2 cursor1 cursor2 and ellipse To select the object press the corresponding button as described in section 3 1 1 To select the second object of a particular type box2 or cursor2 press the corresponding button...

Страница 50: ...ct aspect ratio are both used to calculate the vertical size of an object of a given horizontal size The following formula is used to calculate the vertical size Number of V lines Number of H pixels x Pixel aspect ratio Object aspect ratio This calculation will be rounded to the closest line or to the closest line pair if object centering is on Example Draw a box in 1080 video standard with an asp...

Страница 51: ...g User aspect Aspect ratio Aperture Aperture applicable to object Width Width in pixels of aperture width Height Height in lines of aperture height Top Object Top raster line Btm Object Bottom line Left Object left pixel number Right Object right pixel Centre pos Object centre position line pixel When the object is turned off by pressing the ON OFF key the OSD will show that the object is turned o...

Страница 52: ... whole grid depending what CTRL SEL item is chosen 3 4 3 Controlling the Grid Attributes When the grid object is selected the CTRL SEL button is used to select which of its attributes such as colour line width position size or individual lines of the object will be adjusted by turning the shaft encoder knobs Press the CTRL SEL button until the desired CTRL SEL item is shown on the front panel When...

Страница 53: ...rack The left shaft encoder is used to adjust the horizontal position of the grid i e move the grid left or right and the right shaft encoder is used to adjust the width of the grid H no trackThe left shaft encoder is used to adjust the left side of the grid and the right shaft encoder is used to adjust the right side of the grid 3 5 CONTROLLING THE MASK OBJECT The mask object consists of a horizo...

Страница 54: ...atio of the Mask Aspect ratio Off 1 1 4 3 14 9 16 9 1 67 1 1 85 1 2 35 1 This item is used to control whether the mask object shape is constrained to a specific aspect ratio or whether its horizontal and vertical dimensions can be independently controlled Select Off to allow the mask object s horizontal and vertical dimensions to be independently controlled The OSD will show the actual aspect rati...

Страница 55: ...he desired CTRL SEL item is shown on the front panel When you have chosen the desired CTRL SEL item press the MASK button again or turn one of the shaft encoder knobs to begin controlling the selected attribute of the mask The selected attribute for control will show on the ctrl line of the OSD The items that are shown in the mask CTRL SEL menu depend on the MODE settings and the settings in the S...

Страница 56: ...der is used to adjust the top of the mask and the right shaft encoder is used to adjust the bottom of the mask H track The left shaft encoder is used to adjust the horizontal position of the mask i e move the mask left or right and the right shaft encoder is used to adjust the width of the mask H no trackThe left shaft encoder is used to adjust the left side of the mask and the right shaft encoder...

Страница 57: ...ETUP menu is not set to Off and will indicate which cursor object is selected and whether it is on or off To turn either cursor object On or Off press the ON OFF button when the it is is selected 3 6 2 Controlling the Cursor Modes When the cursor object is selected the MODE button is used to control its modes such as aspect ratio and whether it is centred or not Press the MODE button until the des...

Страница 58: ...at 100 The edges of the line are keyed at a reduced level to reduce aliasing 3 6 3 3 Controlling the Cursor Size Size The size of the cursor can be adjusted using either of the shaft encoders The size will change proportionately about the centre of the cursor H V Size The left shaft encoder is used to adjust the height of the CURSOR vertical line and the right shaft encoder is used to adjust the w...

Страница 59: ...ing and view the next mode item Continue pressing the MODE key until you see the message Mode Select Off The shaft encoders revert to controlling the selected control for the box that is also shown on the ctrl line of the OSD 3 7 2 1 Controlling the Aspect Ratio of the Box Aspect ratio Off 1 1 4 3 14 9 16 9 1 67 1 1 85 1 2 35 1 This item is used to control whether the box object shape is constrain...

Страница 60: ... SEL menu depend on the MODE settings and the settings in the SETUP menu In the sections describing the CTRL SEL items the relevant settings from the box MODE and SETUP menus are shown where necessary 3 7 3 1 Controlling the Box Colour Colour The colour of the box object can be adjusted in the range of 0 through 14 in single digit increments using either shaft encoder The colours that will be disp...

Страница 61: ... used to adjust the vertical position of the box i e move the box up or down and the right shaft encoder is used to adjust the horizontal position of the box i e move the box left or right H no trackThe left shaft encoder is used to adjust the left side of the box and the right shaft encoder is used to adjust the right side of the box V no trackThe left shaft encoder is used to adjust the top of t...

Страница 62: ... new setting and view the next mode item Continue pressing the MODE key until you see the message Mode Select Off The shaft encoders revert to controlling the selected control for the ellipse that is also shown on the ctrl line of the OSD 3 8 2 1 Controlling the Aspect Ratio of the Ellipse Aspect ratio Off 1 1 4 3 14 9 16 9 1 67 1 1 85 1 2 35 1 This item is used to control whether the ellipse obje...

Страница 63: ...t will be displayed for each value are shown in Table 3 2 3 8 3 2 Controlling the Ellipse Line Width Line Width 3 5 7 9 11 Line Width The line width of the ellipse object can be adjusted in the range of 3 through 11 in increments of two using either shaft encoder Only the pixels lines in the centre of the line width are keyed at 100 The edges of the line are keyed at a reduced level to reduce alia...

Страница 64: ...the selected aspect ratio for the H and V axes Position The left shaft encoder is used to adjust the vertical position of the ellipse i e move the ellipse up or down and the right shaft encoder is used to adjust the horizontal position of the ellipse i e move the ellipse left or right 3 9 LOADING FACTORY PRESETS The FACT PRESET button is used to recall the most recently used factory preset Turn on...

Страница 65: ...same memory location 3 10 2 Recalling User Presets To load the current object settings from one of the ten user preset memory locations press the USER PRESET button corresponding to the location you wish to restore the settings from Recalling one of the user presets will overwrite the current object settings and can not be undone Make sure you want to overwrite your current settings before you rec...

Страница 66: ...HD9690 Series HDTV Graticule Generator Manual Page 3 28 Revision 1 5 FRONT PANEL OPERATION This page left intentionally blank ...

Страница 67: ...ion 4 8 4 2 10 Operating the HD9690 in Auto Video Standard Mode 4 8 4 2 11 Selecting the Video Type Model HD9690 444 only 4 8 4 2 12 Selecting the 4 4 4 Colour Space Model HD9690 444 only 4 9 4 3 CONTROLLING THE INDIVIDUAL OBJECTS 4 10 4 3 1 Controlling the Object Aspect Ratios 4 10 4 3 2 Controlling the Object Size 4 11 4 3 3 Controlling the Object Position 4 11 4 3 4 Controlling the Object Colou...

Страница 68: ...the Box Size and Position Objects not centred Aspect Ratio Off 4 19 4 7 5 Controlling the Box Position 4 19 4 8 CONTROLLING THE ELLIPSE OBJECT 4 20 4 8 1 Turning the Ellipse Object On and Off 4 20 4 8 2 Controlling the Aspect Ratio of the Ellipse 4 20 4 8 2 1 Centering the Ellipse on the Raster 4 20 4 8 2 2 Controlling the Ellipse Colour 4 20 4 8 3 Controlling the Ellipse Size 4 20 4 8 3 1 Control...

Страница 69: ...her a rack mountable or a desktop remote control panel Operation of the Graticule Generator from the desktop remote panel is described in this chapter For information on controlling the Graticule Generator from the integrated control panel or the rack mount control panel see chapter 3 For information about connecting the desktop remote panel to the Graticule Generator electronics see section 2 7 4...

Страница 70: ...ted To turn off the object press the button a second time while it is blinking The selected object will be automatically de selected after two minutes of inactivity on the front panel Individual objects will also be deselected when another object is selected Objects that are turned On but not selected will have their corresponding button brightly illuminated GRID Pressing this button selects the g...

Страница 71: ...tton You will be prompted to press the USER PRESET button a second time to confirm the operation Each of the user preset memory locations can be individually write protected See section 3 10 for a complete description of how to use the user presets User presets cannot be deleted directly from memory they can only be overwritten by another configuration saved to the same memory location SHIFT LOCK ...

Страница 72: ...e Version 1 00 b 1 Firmware version Video 1080I Various messages indicating the video format detected Video Unknown Indicates there is no video connected or the video format is not supported by the Graticule generator 4 2 SETUP MENU The key to the operational flexibility of the Graticule Generator lies in the SETUP menu system The SETUP menu system uses the 16 digit alphanumeric display and provid...

Страница 73: ...rtically up and down the Setup menu tree The menu item is shown on the left of the front panel display and the current value for that menu item is shown on the right Turn the right shaft encoder knob to reveal the choices for the current menu item When you have selected the desired sub menu choice press the SETUP key to save your choice and advance to the next menu item The menu choice that is sho...

Страница 74: ...n aperture Select prod when you want to use the production aperture as the reference for the box object size calculation Select clean when you want to use the clean aperture as the reference for the box object size calculation 4 2 3 Choosing the Object Blink Time Obj blink short long none This menu item sets how long objects blink when they are selected Select long when you want a selected object ...

Страница 75: ...l Objects to be Centered on the Raster Force centre yes no This menu item sets whether the grid mask box ellipse and cursor objects are all always centred on the screen or whether object centering is controlled by the auto aspect ratio mode Select yes to force the grid mask box and ellipse objects to be centred on the raster The OSD will show all objects centred Select no to use the auto aspect ra...

Страница 76: ...ormats The new video standard will be displayed on the front panel Video standards changes will not occur while the Graticule Generator is in the Setup mode or while the on screen objects are being moved using the shaft encoder knobs Most of the supported standards can be detected but there are some exceptions The standards 1080I and 1080PSF are the same as far as the Graticule Generator is concer...

Страница 77: ...the extreme values are code words 040h 64 and 3ACh 940 in a 10 bit representation In the rgb mode the RGB to YCrCb colour transformation for the 4 2 2 MON output will be enabled the YCrCb to RGB colour transformation for the DVI output will be disabled and graticule objects will have normal colour values Select fsfull when the incoming video is in the extended range 10 bit 4 4 4 FSRGB format and t...

Страница 78: ...ty on the front panel Individual objects will also be deselected when another object is selected The object button will be illuminated brightly when it is On but not selected The on screen display will be automatically turned on if the OSD TIMER item on the SETUP menu is not set to Off and will show the object selected and whether it is on or off 4 3 1 Controlling the Object Aspect Ratios The AUTO...

Страница 79: ...trol the size of the selected object the one with its button blinking The horizontal and vertical size of the object can be controlled independently using the left and right shaft encoder knobs respectively if auto aspect ratio mode is Off If one of the auto aspect ratios is selected then either of the shaft encoder knobs will adjust the size of the abject about the centre of the raster while cons...

Страница 80: ...the display will indicate that it is on and then will show the object parameters after a 3 second timeout When object attributes are being modified by turning one of the shaft encoders the attribute being controlled is displayed along with its current value 4 3 6 On Screen Display when Controlling the Objects When an object is selected the name and attributes of the selected object will appear on ...

Страница 81: ... grid will be centred or not see section 4 2 6 for more information about auto aspect ratio mode When the force centre item is Off it is possible to independently position and size the grid using the SIZE and POS buttons and turning one of the shaft encoders as outlined in the following sections The OSD will show not centred 4 4 2 1 Controlling the Grid Colour Press the COLOUR button to adjust the...

Страница 82: ...n is selected 4 5 CONTROLLING THE MASK OBJECT The mask object consists of a horizontal masked area at the top and bottom of the raster and a vertical masked area at the left and right side of the raster Throughout the remainder of section 4 5 2 2 the mask dimensions refer to the boundaries between the masked and unmasked area as shown in Figure 4 4 The left side of the mask is the first unmasked p...

Страница 83: ...etermines whether they will be forced to the centre of the raster The on screen display will show the aspect ratio as user aspect and the centering as not centred See section 4 3 1 for more information about auto aspect ratio mode 4 5 2 1 Centering the Mask on the Raster When auto aspect ratio mode is On the mask object will always be centred on the raster The on screen display will show the objec...

Страница 84: ...d the right shaft encoder is used to adjust the right side of the mask 4 5 4 Controlling the Mask Position Press the POS button while the mask button is blinking to control the position of the mask When auto aspect ratio mode is Off and the Setup menu Force Centre item is set to no the left shaft encoder is used to adjust the vertical position of the mask i e move the mask up or down and the right...

Страница 85: ...coder The colours that will be displayed for each value are shown in Table 4 2 4 6 2 2 Controlling the Cursor Size Press the SIZE button when the cursor its button is blinking to adjust the cursor size The shaft encoders are used to adjust the size of the cursor The remote panel display will show the cursor size while the SIZE button is brightly illuminated The On screen display will show the curs...

Страница 86: ...x Auto Aspect ratio Off 1 1 4 3 14 9 16 9 1 67 1 85 2 35 The AUTO ASPECT button is used to control the aspect ratio of the mask the boxes and the ellipse objects and whether they are centred or not The auto aspect ratio mode forces the box objects to be centred and their size to follow one of the following fixed aspect ratios 1 1 4 3 1 33 14 9 1 55 16 9 1 78 1 67 1 85 1 2 35 1 The on screen displa...

Страница 87: ... overall size of the box proportionately about the centre of the raster based upon the aspect ratio selected The left knob adjusts the top right corner of the box and the right knob adjusts the bottom right corner of the box 4 7 4 3 Controlling the Box Size and Position Objects not centred Aspect Ratio Off Setup menu Force centre no Auto Aspect ratio off When Force Centre is Off and and auto aspec...

Страница 88: ...constrained to follow a fixed aspect ratio and the setup menu force centre item determines whether they will be forced to the centre of the raster See section 4 3 1 for more information about auto aspect ratio mode The on screen display will show the aspect ratio as user aspect and the centering as not centred 4 8 2 1 Centering the Ellipse on the Raster When auto aspect ratio mode is On the ellips...

Страница 89: ...olling the Ellipse Position Press the POS button while the ellipse button is blinking to control the position of the ellipse When auto aspect ratio mode is Off and the Setup menu Force Centre item is set to no the left shaft encoder is used to adjust the vertical position of the ellipse i e move the ellipse up or down and the right shaft encoder is used to adjust the horizontal position of the ell...

Страница 90: ...t Press the PRESET SAVE button a second time to confirm the operation The Front panel display will show Preset n stored or press the ESC button to abort the store operation If the user attempts to store a preset into a write protected location the front panel will display the message Preset n locked User Presets cannot be deleted directly from memory they can only be overwritten by another configu...

Страница 91: ...5 3 1 1 Step 1 Determine the IP Addresses 5 4 5 3 1 2 Step 2 Establishing a Valid Network Connection 5 6 5 3 1 3 Step 3 Upgrading the Application Code 5 6 5 3 1 4 Step 4 Completing the Upgrade 5 8 5 3 2 Upgrading the Firmware Using RS 232 Serial Cable 5 8 5 3 2 1 Step 1 Setup 5 8 5 3 2 2 Step 2 Invoke Upload Mode From The Terminal Program 5 8 5 3 2 3 Step 3 Uploading the New Firmware 5 9 5 3 2 4 S...

Страница 92: ...HD9690 Series HDTV Graticule Generator Manual Revision 1 5 TECHNICAL DESCRIPTION This page left intentionally blank ...

Страница 93: ...A 15 dB up to 1 0 Gb s 10dB at 1 5 Gb s Input B 15 dB up to 1 5 Gb s 5 1 2 Serial Digital Video Outputs Standard Same as Input Number of Outputs Model HD9690 3 outputs Model HD9690 444 2 dual link outputs 1 single link output Connector BNC per IEC 60169 8 Amendment 2 Signal Level 800mV nominal DC Offset 0V 0 5V Rise and Fall Time HD Video Stds 200ps nominal Overshoot 10 of amplitude Wide Band Jitt...

Страница 94: ...rd for 10 Mbps baseband CSMA CD local area network Connector RJ 45 Function Firmware upgrades via FTP Saving and recalling user presets via FTP 5 1 8 Electrical Main Unit Voltage Auto ranging 100 240 Volts AC 50 60 Hz Fuse Rating 250 V 1amp time delay Power 40 watts Rack Mount Control Panel Voltage 12 VDC Auto ranging 100 240 Volts AC 50 60 Hz adapter provided Fuse Rating internally fused Power 10...

Страница 95: ...le To change the fuses disconnect the line cord from the power entry module and pull out the fuse holder from the power entry module using a small screwdriver The fuse holder contains two fuses one for the line and one for the neutral side of the mains connection Pull out the blown fuse and place a fuse of the correct value in its place Use time delay 5 x 20 mm fuses rated for 250 Volts with a cur...

Страница 96: ...le Appropriate ethernet cable as outlined in section 2 5 Terminal program such as HyperTerminal New firmware supplied by Evertz 5 3 1 1 Step 1 Determine the IP Addresses Before any FTP file transfer protocol upgrades can be initiated the user must determine the IP address of the HD9690unit Both the PC laptop and the unit must be on the same subnet for the FTP upgrade to work properly 1 Connect a s...

Страница 97: ... Set Gateway 4 Set Broadcast Address 5 Use DHCP S Save and Exit X Exit 8 From the Network configuration menu selecting options 1 through 4 allows the user to set the networking parameters of the unit If this unit is running on a public LAN enabled with DHCP then option 5 allows the networking system to assign a non conflicting IP address for this module After completing the IP configurations save ...

Страница 98: ...ping xxx xxx xxx xxx Enter IP address of the module If a proper network connection has been established a reply is displayed on the DOS window If there is a faulty network connection a Destination Host Unreachable message is provided If this occurs either the IP addresses of the nodes should be verified or the network Ethernet cable is faulty For more information please see the INSTALLATION CONFIG...

Страница 99: ...the FTP prompt type put the name of the file bin to send the firmware to the unit For example put HD9690_1v0b310 bin 19 If the application file is not local to where you are performing the ftp then include the path with the name For example put c firmware HD9690_1v0b310 bin During this time it is mandatory that all power cycles of the unit be avoided The figure below displays a successful FTP sess...

Страница 100: ...t is capable of Xmodem file transfer protocol such as HyperTerminal New firmware supplied by Evertz 5 3 2 1 Step 1 Setup 1 Connect a straight through serial cable to the UPGRADE COM1 DB9 connector on the rear panel 2 Connect the 9 pin female connector on the end of the serial update cable to the PCs RS 232 communications port 3 Connect the 9 pin connector on the end of the serial update cable to t...

Страница 101: ... terminal program If you do not start the upload within 10 minutes the unit s Boot code will time out You can restart the upgrade process by power cycling the unit 13 When the transfer is complete can take up to 15 minutes the terminal will return to the PPCBOOT prompt For Example UPLOAD OKAY PPC BOOT 14 The following is a list of possible reasons for a failed upload If you get the message transfe...

Страница 102: ...ss of the module 2 Press the Enter key when prompted for a Username 3 Press the Enter key when prompted for a Password A message indicating that you logged in is displayed 4 At the FTP prompt type quote site createfile to create a text file in the Graticule generator that contains the values for the ten user presets The Graticule generator responds with 200 to indicate successful creation of the f...

Страница 103: ...he preset file as this will corrupt the preset values You must supply a name or the graticule generator will substitute a default name when it loads the file 5 4 3 Uploading Preset Files to the Graticule Generator To upload a preset file to the graticule generator from the local directory Presets that are protected may still be overwritten by uploading a user preset file Proceed with Caution 1 In ...

Страница 104: ...he user preset Presets that are protected may still be overwritten by uploading a user preset file as described in section 5 4 3 To lock one of the presets using the integrated front panel or the rack mount remote panel press the ESC and PRESET SAVE buttons at the same time The control panel will display Protect preset Press the USER PRESET button corresponding to the location you wish to lock The...

Страница 105: ...set press the PRESET SAVE button The control panel display will show the message Preset n unlockd 5 6 RESTORING THE GRATICULE GENERATOR TO ITS FACTORY DEFAULTS The HD9690 can be restored to its factory default condition using the following procedure All menu settings and user presets will be over written by this process Proceed with caution To reset the Graticule generator to its factory defaults ...

Страница 106: ...HD9690 Series HDTV Graticule Generator Manual Page 5 14 Revision 1 5 TECHNICAL DESCRIPTION This page left intentionally blank ...

Страница 107: ...MARY 6 1 6 1 1 Interlaced and Segmented Frame HD formats 1080I 1035I 1080PsF 6 1 6 1 2 Progressive HD formats 1080P 720P 6 2 6 1 3 Digital Cinema HD formats 2048x1080PsF 6 3 6 2 PRODUCTION AND CLEAN APERTURES 6 3 Figures Figure 6 1 High Definition Interlaced Segmented Frame Video Format Parameters 6 1 Figure 6 2 High Definition Progressive Video Format Parameters 6 2 Figure 6 3 Digital Cinema Vide...

Страница 108: ...HD9690 Series HDTV Graticule Generator Manual Revision 1 5 VIDEO RASTER DEFINITIONS This page left intentionally blank ...

Страница 109: ... 2200 0 to 2199 2200 0 to 2199 2640 0 to 2199 2640 0 to 2639 2750 0 to 2749 Production Aperture Aspect Ratio 16 9 16 9 16 9 Size pixels x lines 1920 x 1035 1920 x 1080 1920 x 1080 Vertical Extent Field 1 Field 2 41 to 557 21 to 560 21 to 560 603 to 1120 584 to 1123 584 to 1123 Horizontal Extent 0 to 1919 0 to 1919 0 to 1919 Clean Aperture Size pixels x lines 1888 x 1017 1888 x 1062 1888 x 1062 Ver...

Страница 110: ...3960 0 to 3959 2750 0 to 2749 4125 0 to 4124 Production Aperture Size pixels x lines 1920 x 1080 1280 x 720 Vertical Extent 42 to 1121 26 to 745 Horizontal Extent 0 to 1919 0 to 1279 Clean Aperture Size pixels x lines 1888 x 1062 1248 x 702 Vertical Extent 51 to 1112 35 to 736 Horizontal Extent 16 to 1903 16 to 1263 Center of Image Horizontal midway between pixels 959 and 960 639 and 640 Vertical ...

Страница 111: ...re Size pixels x lines 2014 x 1062 Vertical Extent Field 1 Field 2 25 to 556 588 to 1119 Horizontal Extent 17 to 2030 Center of Image Horizontal midway between pixels 1023 and 1024 Vertical midway between lines 844 segment 2 270 segment 1 Pixel Aspect Ratio Standard 1 1 Safe Area Dimensions standard Practice Safe Action 90 Safe Title 80 Figure 6 3 Digital Cinema Video Format Parameters 6 2 PRODUCT...

Страница 112: ...HD9690 Series HDTV Graticule Generator Manual Page 6 4 Revision 1 5 VIDEO RASTER DEFINITIONS This page left intentionally blank ...

Страница 113: ...ION APERTURE PRESETS 7 3 7 1 3 1 16 9 SA ST PA 7 3 7 1 3 2 4 3 SA ST PA 7 4 7 1 3 3 14 9 SA ST PA 7 4 7 1 3 4 1 66 MASK PA 7 4 7 1 3 5 1 85 MASK PA 7 5 7 1 3 6 2 35 MASK PA 7 5 7 2 LEGACY SAFE AREAS SPECIFIED IN SMPTE RP218 7 5 7 2 1 ALL OBJECT RESET 7 5 7 2 2 CLEAN APERTURE PRESETS 7 5 7 2 2 1 16 9 SA ST CA 7 5 7 2 2 2 4 3 SA ST CA 7 6 7 2 2 3 14 9 SA ST CA 7 6 7 2 2 4 1 66 MASK CA 7 7 7 2 2 5 1 ...

Страница 114: ...HD9690 Series HDTV Graticule Generator Manual Revision 1 5 FACTORY PRESETS This page left intentionally blank ...

Страница 115: ...owever video standard has its own set of factory presets as the vertical and horizontal positions of the clean and production apertures are different See the charts in section A 2 for a complete description of the size of the clean and production apertures for each video format 7 1 CURRENT SAFE AREAS SPECIFIED IN SMPTE ST 2046 1 2009 7 1 1 ALL OBJECT RESET All objects are off Objects are positione...

Страница 116: ... heights are set to 93 and 90 of clean aperture Centre cursor is turned on 14 9 Mask set at production aperture but turned Off Grid set to show 14 9 width from production aperture Object On V Pos H Pos Aspect Ratio Comments Grid CA 14 9 from CA Mask CA 14 9 from CA 14 9 Box1 93 of CA 14 9 Safe Action Box2 90 of CA 14 9 Safe Title Cursor1 Centre Centre Cursor2 Centre Centre Ellipse Same as Box 2 1 ...

Страница 117: ...ea and safe title box widths are set to 93 and 90 of clean aperture but turned off Object On V Pos H Pos Aspect Ratio Comments Grid 2 35 1 from CA CA Mask 2 35 1 from CA CA 2 35 1 Box1 93 of CA 2 35 1 Safe Action Box2 90 of CA 2 35 1 Safe Title Cursor1 Centre Centre Cursor2 Centre Centre Ellipse Same as Box 2 1 1 7 1 3 PRODUCTION APERTURE PRESETS 7 1 3 1 16 9 SA ST PA 16 9 aspect ratio safe area a...

Страница 118: ... heights are set to 93 and 90 of production aperture Centre cursor is turned on 14 9 Mask set at production aperture but turned Off Grid set to show 14 9 width from production aperture Object On V Pos H Pos Aspect Ratio Comments Grid PA 14 9 from PA Mask PA 14 9 from PA 14 9 Box1 93 of PA 14 9 Safe Action Box2 90 of PA 14 9 Safe Title Cursor1 Centre Centre Cursor2 Centre Centre Ellipse Same as Box...

Страница 119: ...on aperture but turned off Object On V Pos H Pos Aspect Ratio Comments Grid 2 35 1 from PA PA Mask 2 35 1 from PA PA 2 35 1 Box1 93 of PA 2 35 1 Safe Action Box2 90 of PA 2 35 1 Safe Title Cursor1 Centre Centre Cursor2 Centre Centre Ellipse Same as Box 2 1 1 7 2 LEGACY SAFE AREAS SPECIFIED IN SMPTE RP218 7 2 1 ALL OBJECT RESET All objects are off Objects are positioned the same as 16x9 SA ST CA pr...

Страница 120: ... 3 width from clean aperture Object On V Pos H Pos Aspect Ratio Comments Grid CA 4 3 from CA Mask CA 4 3 from CA 4 3 Box1 90 of CA 4 3 Safe Action Box2 80 of CA 4 3 Safe Title Cursor1 Centre Centre Cursor2 Centre Centre Ellipse Same as Box 2 1 1 7 2 2 3 14 9 SA ST CA 14 9 aspect ratio safe area and safe title box heights are set to 90 and 80 of clean aperture Centre cursor is turned on 14 9 Mask s...

Страница 121: ...ture 1 85 aspect ratio safe area and safe title box widths are set to 90 and 80 of clean aperture but turned off Object On V Pos H Pos Aspect Ratio Comments Grid 1 85 1 from CA CA Mask 1 85 1 from CA CA 1 85 1 Box1 90 of CA 1 85 1 Safe Action Box2 80 of CA 1 85 1 Safe Title Cursor1 Centre Centre Cursor2 Centre Centre Ellipse Same as Box 2 1 1 7 2 2 6 2 35 MASK CA 2 35 mask calculated from clean ap...

Страница 122: ...f production aperture Centre cursor is turned on 4 3 Mask set at production aperture but turned Off Grid set to show 4 3 width from production aperture Object On V Pos H Pos Aspect Ratio Comments Grid PA 4 3 from PA Mask PA 4 3 from PA 4 3 Box1 90 of PA 4 3 Safe Action Box2 80 of PA 4 3 Safe Title Cursor1 Centre Centre Cursor2 Centre Centre Ellipse Same as Box 2 1 1 7 2 3 3 14 9 SA ST PA 14 9 aspe...

Страница 123: ...ture 1 85 aspect ratio safe area and safe title box widths are set to 90 and 80 of production aperture but turned off Object On V Pos H Pos Aspect Ratio Comments Grid 1 85 1 from PA PA Mask 1 85 1 from PA PA 1 85 1 Box1 90 of PA 1 85 1 Safe Action Box2 80 of PA 1 85 1 Safe Title Cursor1 Centre Centre Cursor2 Centre Centre Ellipse Same as Box 2 1 1 7 2 3 6 2 35 MASK PA 2 35 mask calculated from pro...

Страница 124: ...HD9690 Series HDTV Graticule Generator Manual Page 7 10 Revision 1 5 FACTORY PRESETS This page left intentionally blank ...

Страница 125: ...RATION PRACTICE OP 36 8 1 8 1 1 HDTV SAFE ACTION AND SAFE GRAPHIC AREAS 8 1 8 2 720P OPERATIONAL PRACTICE 8 3 Figures Figure 8 1 Australian 1080i 16 9 HD transmission Safe Areas 8 2 Figure 8 2 Australian 16 9 Shoot and Protect 4 3 Safe Areas for SD Analog Transmission 8 2 Figure 8 3 Australian 16 9 Shoot and Protect 14 9 Safe Areas for SD Analog Transmission 8 3 Figure 8 4 720p 16 9 HD Transmissio...

Страница 126: ...HD9690 Series HDTV Graticule Generator Manual Revision 1 5 SAFE AREA OPERATIONAL PRACTICES This page left intentionally blank ...

Страница 127: ...AS The recommended HDTV Safe Action and Safe Graphic areas are defined by the following three diagrams Diagram 1 is the HD transmission situation 16 9 Shoot Protect 16 9 with a line length of 1920 pixels The safe areas are calculated to this base This will not be the normal situation for some time to come Diagrams 2 and 3 represent the situation where the HD signal has been down converted to SD fo...

Страница 128: ...e Figure 8 1 Australian 1080i 16 9 HD transmission Safe Areas 1080 1004 972 1920 1872 1404 38 54 283 192 pixels 15 of 16 9 image width pixels 17 5 of 16 9 image width 3 5 of 16 9 image height Action Safe Area Graphics Safe Area Action Safe Area lines 49 pixels 3 3 of 4 3 image width pixels 6 7 of 4 3 image width 98 1306 1208 Graphics Safe Area 5 of 16 9 image height lines 16 9 Frame Raster Edge 16...

Страница 129: ...idth 164 1498 1308 Graphics Safe Area 5 of 16 9 image height lines 281 16 9 Frame Raster Edge 16 9 Analog Central Zone Edge 14 9 Analog Central Zone Edge 4 3 Analog Central Zone Edge 234 24 24 117 1638 234 117 Figure 8 3 Australian 16 9 Shoot and Protect 14 9 Safe Areas for SD Analog Transmission 8 2 720P OPERATIONAL PRACTICE This Operational Practice recommends the format and quality of video and...

Страница 130: ...20 669 648 1280 1190 1153 25 37 45 192 pixels 3 5 of 16 9 image width pixels 10 of 16 9 image width 3 5 of 16 9 image height Action Safe Area Graphics Safe Area Action Safe Area lines Graphics Safe Area 5 of 16 9 image height lines 16 9 Frame Raster Edge Figure 8 4 720p 16 9 HD Transmission Safe Areas ...

Отзывы: