background image


EDN850H 

 15

 
Position: Select the position where the text will be displaying from Upper Left / 
Lower Right / Lower Left.   
 
Press 

Apply

 to apply the setting changes or 

Reset

 to reset without saving the 

change. 
 
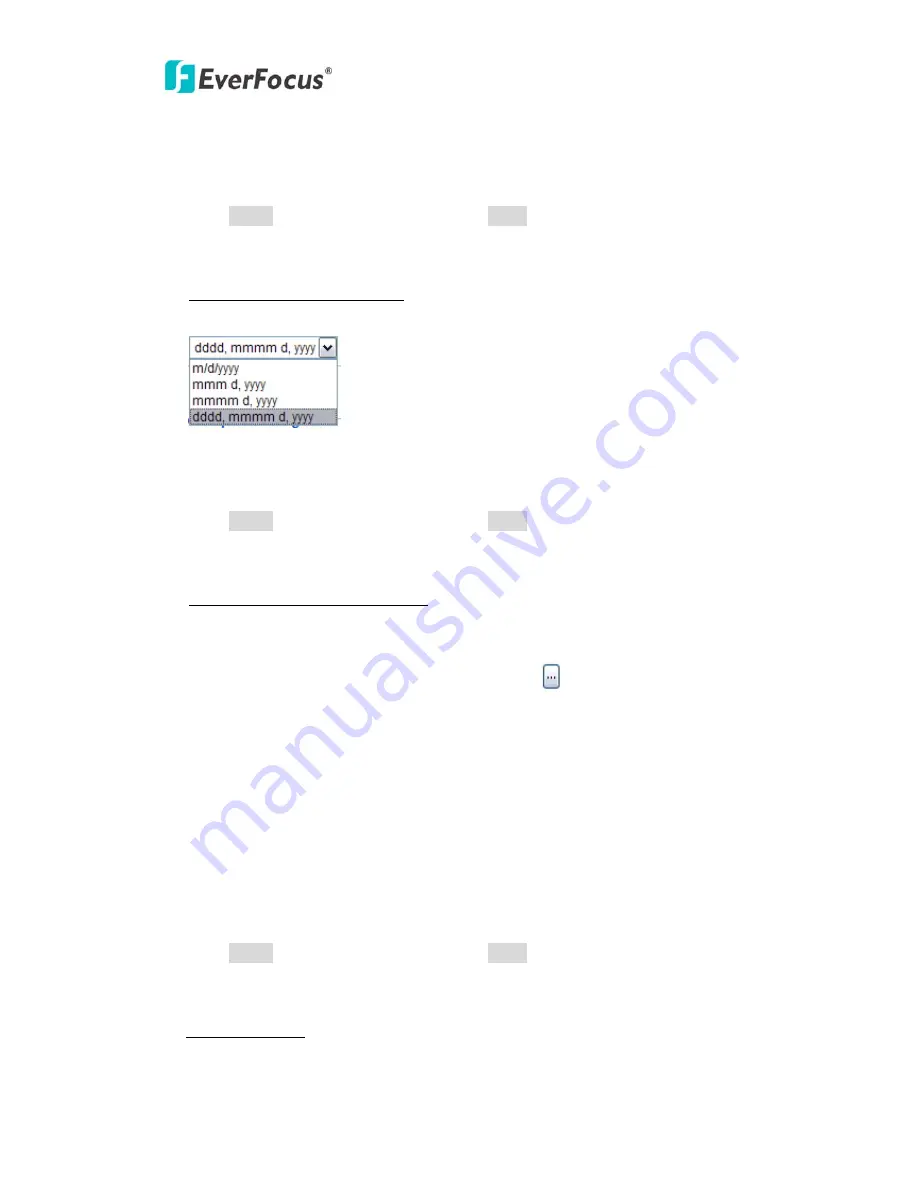
Date/Time Format Used in Text 
Select Date/Time Format from the following options: 


Time Format: 24 Hours or 12 Hours. 
 
Press 

Apply

 to apply the setting changes or 

Reset

 to reset without saving the 

change. 
 
Recording/Snapshot Export Setting 

Enable Event Recording to PC: Allow event video recorded to users' PC if any 
events have been set to record to PC. 

Export folder: Select Export folder by clicking on   

button, then direct to the 

folder to be exported.   
File size:


Able to limit the size of the single recording file in minutes.


When the 

single recording file size exceeds the time you set, system will create a new file to 
continue recording. 
Overwrite: Select “ON” for overwriting recording/snapshot file when the disk 
storage capacity is full.


If the remaining hard disk capacity is less than ____ MB (enter the value you wish 
to set between 50~2000), system will stop recording or start overwriting.   
 
Press 

Apply

 to apply the setting changes or 

Reset

 to reset without saving the 

change. 
 

Language Setting 


Содержание NeVio EDN850H

Страница 1: ...EDN850H User s Manual Copyright EverFocus Electronics Corp Release Dec 2009 Rev A ...

Страница 2: ...urning the equipment off and on the user is encouraged to try to correct the interference by one or more of the following measures Reorient or relocate the receiving antenna Increase the separation between the equipment and receiver Connect the equipment into an outlet on a circuit different from that to which the receiver is connected Consult the dealer or an experienced radio TV technician for h...

Страница 3: ...s encouraged to try to correct the interference by one or more of the following measures Reorient or relocate the receiving antenna Increase these separations between the equipment and receiver Connect the equipment into an outlet on a circuit different from that to which the receiver is connected Consult the dealer or an experienced radio TV technician for help The changes or modifications not ex...

Страница 4: ...ation should be performed by qualified service personnel only in accordance with the National Electrical Code or applicable local codes Terms and Trademark Ethernet Internet Explorer Linux Microsoft Windows WWW are registered trademarks of the respective holders Other product names appearing in this User s Guide may be trademarks or registered trademarks of their respective holders Java and all Ja...

Страница 5: ... 4 3 2 DDNS 18 4 3 3 Bandwidth 20 4 3 4 SMTP FTP 21 4 3 5 Network Alarm reserved for PowerCon 23 4 4 VIDEO 23 4 4 1 Multi Streaming 24 4 4 2 Camera 25 4 4 2 1 LENS 27 4 4 2 2 SHUTTER 27 4 4 2 3 WHITE BALANCE Control 29 4 4 2 4 BACKLIGHT 30 4 4 2 5 AGC Auto Gain Control 30 4 4 2 6 DNR Dynamic Noise Reduction 31 4 4 2 7 SENS UP 32 4 4 2 8 SPECIAL 33 4 4 2 9 EXIT 41 4 5AUDIO 42 4 6 USER 43 4 7 EVENT ...

Страница 6: ...EDN850H 6 4 8 SYSTEM 51 4 8 1 Date Time 51 4 8 2 Daylight Saving 53 4 8 3 SD Card 54 4 8 4 Maintenance 56 5 SPECIFICATIONS 58 ...

Страница 7: ...for the most demanding environments 2 FEATURES z Multi stream output at 4CIF resolution 30fps z H 264 MPEG4 MJPEG multi stream output for simultaneous live monitoring and high resolution recording z True Day Night function with ICR module z Built in DNR Dynamic Noise Reduction for noise reduction and a 70 saving of Disk storage z The starlight Super high sensitivity of 0 002 Lux F 1 2 is achieved ...

Страница 8: ...p 4 Click Login button Step 5 You might be required to download Active X which is required to view camera video Please click Yes Step 6 Congratulation You should be able to see the live image now 1 Press button to display the Live page Double click on the image to show a full screen display double click again or press ESC to return normal display 2 Press button to enter Setting page In Setting pag...

Страница 9: ... for live images from 704 480 640 480 352 240 320 240 176 120 6 Digital Zoom Press or button to enlarge reduce the displayed image max is X10 7 Record The record button is used to record the current video stream The location where the image file is saved can be specified in Setting User s Config Please refer to 4 2 User Config for further information Note Record segment is limited to 5 min If you ...

Страница 10: ...ge and event actions will be effective if they have been set in Event menu Please refer to 4 7 1 Event 12 Manual Control Reset Alarm Press Reset Alarm button to reset alarm output remotely 13 Status Display The name of the camera whose settings currently being configured current date time and current frame rate will be displayed 14 Event signals When an alarm or motion event is triggered a signal ...

Страница 11: ...EDN850H 11 4 SETTING Click this button to display the setup menu ...

Страница 12: ... system log check of the setup menu can be performed on this page The System Info page has 2 tabs Information tab and the Log tab 4 1 1 Information System Information Firmware version MAC address Video Type Model number unchangeable for reference only ...

Страница 13: ...information and event message including login user s IP reboot firmware upgrade load factory default configuration reset and event detected System will keep the newest 256 records Press button to export system log into txt file and select the location where the exported log file will be saved to ...

Страница 14: ...wn settings for the following items Text Setting Check the box for text of Machine name Date Time or Frame Rate to be displayed on the screen Text Color Foreground Color Select the foreground color of text to be displayed by moving the slide bar between Red Green and Blue until your desire color is obtained ...

Страница 15: ... users PC if any events have been set to record to PC Export folder Select Export folder by clicking on button then direct to the folder to be exported File size Able to limit the size of the single recording file in minutes When the single recording file size exceeds the time you set system will create a new file to continue recording Overwrite Select ON for overwriting recording snapshot file wh...

Страница 16: ...k The network settings and the settings relating to Network DDNS Bandwidth SMTP FTP and Network Alarm can be configured on this page The Network setup page has 5 tabs of the Network tab the DDNS tab the SMTP FTP tab and the Network alarm tab 4 3 1 Network The following information is required to configure the network settings Contact the network administrator or your Internet service provider Note...

Страница 17: ...ISP will ask user to input user name and password IP address When not using DHCP enter the IP address of the camera Do not enter the IP address already used for PC or other network cameras Subnet Mask This field is to set the netmask for your network so as the IP camera will be recognized within the network Example 255 255 255 000 When DHCP is selected the DHCP server will assign this value automa...

Страница 18: ... Username Enter User name of the account used only for PPPoE Password Enter Password of the account used only for PPPoE Press Apply to apply the setting changes or Reset to reset without saving the change Port Setting HTTP Port Port number for HTTP WEB communication Press Apply to apply the setting changes or Reset to reset without saving the change 4 3 2 DDNS ...

Страница 19: ...com www sitelutions com www dyndns com www no ip com Enable Check the box to enable DDNS setting Service ISP If you choose EverFocus DDNS server you can obtain a free account name from EverFocus www everfocusddns com Enter an IP Cam Account Name everfocusddns com Press button to register or update DDNS account If you wish to get a domain name from other DDNS provider it is necessary to configure R...

Страница 20: ... the network This is a useful function when connecting the camera to busy or heavily loaded networks The default setting is Unlimited Max Client Limit enter a value here to restrict the number of clients accessing the camera This is useful if you need to save on bandwidth Up to 32 clients is allowed to see live video simultaneously Subsequent viewers will see a blank image Press Apply to apply the...

Страница 21: ... Default is 25 Authentication Check the box if the SMTP server requires Authentication user password User name Input the login user ID if the SMTP server requires Authentication Password Input the password if the SMTP server requires authentication Receiver Address Input the e mail address for receiving e mail message when the EVENT is enabled and triggered Please use to separate address Sender Ad...

Страница 22: ...ver FTP Port Enter the port number for FTP server Default is 21 Recording Path Assign the recording path User Name Set FTP User s name Password Set FTP password PASV mode Check to enable Passive mode normally enable Passive mode When failed to establish the connection uncheck PASV mode Test FTP Server Press button to send a testing file to the assigned FTP server Press Apply to apply the setting c...

Страница 23: ...unction is reserved for PowerCon software for the detail setting please refer to PowerCon network alarm protocol 4 4 Video The settings relating video such as streaming camera OSD can be configured on this page The Video page has 2 tabs the Multi streaming tab and the Camera tab ...

Страница 24: ...r live view Check Enable box to enable other streams Format Select encode format from H 264 MPEG4 and MJPEG Resolution NTSC 4CIF 704 480 VGA 640 480 CIF 352 240 QVGA 320 240 QCIF 176 120 PAL 4CIF 704 576 VGA 640 480 CIF 352 288 QVGA 320 240 QCIF 176 144 Quality there are 8 types of quality please choose from Highest Higher High Middle Normal Low Lower Lowest Frame Rate select from NTSC 1 3 5 15 30...

Страница 25: ...ct video recording stream from any enabled stream Video File format Recording file will be saved as AVI or ARV select which file format to be used Press Apply to apply the setting changes or Reset to reset without saving the change 4 4 2 Camera Camera Settings The Camera OSD setting can be displayed on a video monitor and can be configured using the operation buttons on this page Note 1 Total fram...

Страница 26: ...guide of Camera OSD Setting SET button Click this button to move to the submenu Left button Right button Click these buttons to select the parameters Down button Up button Click these buttons to move the cursor ICR Switch Setting AUTO ICR switches automatically according to the illumination B W Select to keep B W image COLOR Select to keep color image ...

Страница 27: ...e LEFT or RIGHT button Three modes are available FLK ESC and Manual Ö FLK Please select FLK mode when flickering occurs on the screen which is caused by an irregular balance between illumination and frequency NTSC model 1 100 PAL model 1 120 SETUP LENS DC SHUTTER ___ WHITE BAL ATW BACKLIGHT OFF AGC MIDDLE DNR LOW SENS UP AUTO SPECIAL EXIT LENS LEVEL 20 Note Since DC lens is a built in lens for EDN...

Страница 28: ... DNR LOW SENS UP ___ SPECIAL EXIT BRIGHTNESS BRIGHTNESS 25 SHUTTER MANUAL 1 50 SETUP LENS MANUAL SHUTTER MANUAL WHITE BAL ATW BACKLIGHT OFF AGC MIDDLE DNR LOW SENS UP ___ SPECIAL EXIT SETUP LENS MANUAL SHUTTER ESC WHITE BAL ATW BACKLIGHT OFF AGC MIDDLE DNR LOW SENS UP AUTO SPECIAL EXIT Note With DC lens the shutter speed is fixed as 1 60 for NTSC and 1 50 for PAL ...

Страница 29: ...light source are changed you need to adjust the white balance again Ö MANUAL The manual adjustment mode enables a more precise adjustment Please select ATW or AWC first Then change to manual adjustment mode and press the SET button Set the suitable color temperature and increase or decrease the red and blue color values at the same time while checking the color changes of the object SETUP LENS DC ...

Страница 30: ...BACKLIGHT function does not operate 4 4 2 5 AGC Auto Gain Control 1 Please direct the arrow to point to AGC on the SETUP menu by using the UP and DOWN buttons 2 Select the mode you would like to operate by pressing the LEFT or RIGHT button The more the level of gain increases the brighter the screen and the level of noise increases as well Ö HIGH The gain increases from 6dB up to 42dB Ö MIDDLE The...

Страница 31: ...creases 1 Please direct the arrow to point to DNR on the SETUP menu by using the UP and DOWN buttons 2 Select the mode you would like to operate by pressing the LEFT or RIGHT button Ö OFF No reduction in noise level Ö LOW Little reduction in noise level with nearly no ghost image Default value is LOW Ö MIDDLE Just enough reduction in noise levels without causing much ghost imaging Ö HIGH Huge redu...

Страница 32: ... Default value is AUTO Up to X 10 Ö OFF The function is disabled 3 Press SET button when you finish all the settings LIMIT AUTO X 10 SETUP LENS DC SHUTTER ___ WHITE BAL ATW BACKLIGHT OFF AGC MIDDLE DNR LOW SENS UP AUTO SPECIAL EXIT Note 1 The maximum storage magnification in low light level movement situations can be adjusted by pressing the mini joystick in AUTO mode 2 The screen becomes brighter...

Страница 33: ...4 Maximum 15 letters can be used for the ID Use UP DOWN LEFT and RIGHT buttons to select the letters Press the SET key to lock in the letters 5 Once a name has been selected please choose a position where you would like to display the name Move the cursor onto POS and press the SET button The name will appear at the top left hand corner Please use the 4 directional buttons to find the desired posi...

Страница 34: ...t the Color Gain from 0 15 C A M E R A I D A B C D E F G H I J K L M N O P Q R S T U V W X Y Z a b c d e f g h i j k l m n o p q r s t u v w x y z 0 1 2 3 4 5 6 7 8 9 C L R P O S E N D COLOR GAIN LEVEL 8 SPECIAL CAMERA ID OFF COLOR ADJ SYNC INT MOTIION DET OFF PRIVACY OFF MIRROR OFF SHARPNESS ON RESET RETURN SPECIAL CAMERA ID ON COLOR ADJ SYNC INT MOTIION DET OFF PRIVACY OFF MIRROR OFF SHARPNESS O...

Страница 35: ...screen the message MOTION DETECTED appears on the screen when movement is detected therefore this helps to improve supervision efficiency The camera detects an object s movement by sensing discrepancy of outline 1 Please direct the arrow to point to MOTION DET by using the UP or DOWN button 2 Select ON by pressing the LEFT or RIGHT button 3 Press SET button z Please select the area you would like ...

Страница 36: ... for size of the area z Additionally it is possible to change the position of the area Please refer to the following example for detailed steps on moving AREA1 to center 1 The original position of AREA1 was TOP 10 DOWN 25 LEFT 20 and RIGHT 40 2 Increase DOWN scale value by 20 AREA1 position after change is TOP 10 DOWN 45 LEFT 20 and RIGHT 40 AREA1 AREA2 AREA3 AREA4 AREA1 AREA1 ...

Страница 37: ... by 20 AREA1 position after change is TOP 30 DOWN 45 LEFT 40 and RIGHT 60 z In order to save the changes and complete the setting press the SET button This allows you to return to the previous menu 4 4 2 8 5 PRIVACY This mode covers the areas you do not want to see on the screen 1 Please direct the arrow to point to PRIVACY by using the UP or DOWN button 2 Select ON by pressing the LEFT or RIGHT b...

Страница 38: ...djusting the size of the area to be covered z Please use the LEFT or RIGHT button to adjust the value for size of the area to be covered z Additionally it is possible to change the position of the area to be covered Please refer to the following example for detailed steps on moving AREA1 to center PRIVACY AEREA SEL AREA1 AREA STATE OFF AREA TONE 80 TOP 10 DOWN 25 LEFT 20 RIGHT 40 SPECIAL CAMERA ID...

Страница 39: ...e value by 20 AREA1 position after change is TOP 10 DOWN 45 LEFT 20 and RIGHT 40 3 Increase TOP scale value by 20 AREA1 position after change is TOP 30 DOWN 45 LEFT 20 and RIGHT 40 4 Increase RIGHT scale value by 20 AREA1 position after change is TOP 30 DOWN 45 LEFT 20 and RIGHT 60 AREA1 AREA1 AREA1 AREA1 ...

Страница 40: ...The contour of the video image becomes cleaner and more distinguishing as the level of SHARPNESS increases If the level goes up extremely it may affect the video image and cause noise ON Enable the SHARPNESS mode OFF Disable the SHARPNESS mode z Please press the SET button z The available range of level is 0 31 SHARPNESS LEVEL 8 SPECIAL CAMERA ID OFF COLOR ADJ SYNC INT MOTIION DET OFF PRIVACY OFF ...

Страница 41: ... Setup menu 4 4 2 9 EXIT Press the SET button on EXIT after you finish all the settings It will return to live image SPECIAL CAMERA ID OFF COLOR ADJ SYNC INT MOTIION DET OFF PRIVACY OFF MIRROR OFF SHARPNESS ON RESET RETURN SPECIAL CAMERA ID OFF COLOR ADJ SYNC INT MOTIION DET OFF PRIVACY OFF MIRROR OFF SHARPNESS ON RESET RETURN Note If you quit the Menu without pressing EXIT all the settings you pr...

Страница 42: ...x to enable audio function Audio Input Audio from an internal microphone or a line source can be connected to the Audio connector of EDN850H The audio source can be selected from Internal Microphone External Audio Input L and External Audio Input R Audio Input volume Adjust the Audio Input Volume for the audio input devices connected to the camera if there are problems with the sound input being t...

Страница 43: ...er users However administrator is not allowed to change supervisor s account and password User a user can view the Live View page system info network video audio and adjust user config settings The user does not have access to the user event and system pages Guest the lowest level of access which only allows the user access to the Live View page Press Apply to apply the setting changes or Reset to...

Страница 44: ... Input Manual Trigger Motion Detection Schedule Recording Pre Post Alarm Trigger Alarm x x x Send Mail notification x x x Upload to FTP x x x x Record to SD Card x x x x x Record to PC x x x x x Network Alarm x x x Re trigger x x x Note 1 Record to PC only works when PC and IP camera are connected 2 Either Upload to FTP or Record to Network Storage can be selected to record event video to remote s...

Страница 45: ...he Motion tab the Alarm tab and the Time Mask tab Press button to add an event condition To modify the event list click on the event and it will be highlighted Press button to modify the setting To remove an event from event list click on the event and it will be highlighted Press button to remove the event Check Enable checkbox to activate event actions when the event occurs in the specified time...

Страница 46: ...ll be activated first Press Apply to apply the setting changes or Reset to reset without saving the change This example describes how to set the camera to upload images to FTP when someone press Manual trigger button 1 Click button in Event page 2 Enter an event name for the event e g Event 1 3 Select Manual Trigger as event type 4 Select Upload to FTP as action type ...

Страница 47: ...on Motion Detection User can define the motion area to be detected by left clicking the mouse to draw lines Every click is an end point of the line When the detection area is formed double click the mouse to have all the lines connected To remove the selection simply right click the mouse the selected polygon will be deleted Press to update the current image Press to have the entire screen selecte...

Страница 48: ...4 5 6 7 8 9 to 10 high 4 7 3 Alarm Alarm Output Setting Contact Type Normal Close Normal Open Duration Time Select duration time of alarm output from 5 sec 10 sec 20 sec 30 sec 60 sec 2 min 3 min and 5 min Press Apply to apply the setting changes or Reset to reset without saving the change Pre Post Alarm Setting This function is used to check what happened immediately before and after a trigger e ...

Страница 49: ... to 120 seconds Press Apply to apply the setting changes or Reset to reset without saving the change Re trigger Filter Setting Re trigger Filter Set a re trigger filter time if another event is triggered during this time this triggered event will be ignored Press Apply to apply the setting changes or Reset to reset without saving the change 4 7 4 Time Mask Time Mask Setting Time mask setting allow...

Страница 50: ... time mask by clicking Up arrow or Down arrow Or simply press for a full day of event action Press button to remove a scheduled time period An example on how to set weekend as time mask is as follows 1 Click from time mask setting 2 Enter Mask name e g Weekend 3 Check Sun Sat boxes 4 Select Start time and End time or Full day Press Apply to apply the setting changes or Reset to reset without savin...

Страница 51: ...ab 4 8 1 Date Time Machine Name Setting Machine Name Enter the name of the camera The entered name will be displayed in the status display area Press Apply to apply the setting changes or Reset to reset without saving the change Set Time Zone Time Zone Select a time zone according to the location where the camera is in use Set Date Time Manually Date Click the calendar and pick the date Press to g...

Страница 52: ...e Set Date Time Sync Check Enable NTP checkbox to enable NTP server NTP server Time automatically adjusted by synchronizing with NTP server will be used as the standard time of the camera Sync Internal Select an interval 1 24 hours in 1 hour intervals of synchronization with the NTP server Time Zone Select a time zone according to the location where the camera is in use Press Apply to apply the se...

Страница 53: ...ne July August September October November December Set the starting time change of daylight saving time Choose the From time and End time when daylight saving starts Set the end time of daylight saving time Set the end week of daylight saving time 1st 2nd 3rd 4th Last Set the end date of daylight saving time Sunday Monday Tuesday Wednesday Thursday Friday Saturday Set the end month of daylight sav...

Страница 54: ...y card reached the value selected from the following 50 20 10 5 2 0 Event Recording FTP backup only Event video will record to SD card when network is disconnected Note 1 When 50 is selected e mail notification will be made each time the remaining space reaches 50 20 10 5 2 and 0 2 E mail notification may not always be made at a very moment when the remaining space of the SD memory card reached th...

Страница 55: ... memory card it is necessary to press button Once button is pressed button will be shown for user to insert the SD card back Press button to format SD card Obtain images on the SD memory card 1 Access the camera using the Windows command prompt or FTP client software The window with the user name and password entry fields will be displayed 2 Enter the user name whose access level is 1 Administrato...

Страница 56: ...etting Default The Default button should be used with caution Pressing this button will return all of the camera s settings including the IP address to the factory default values The camera will then have to be re installed Save Load Configuration Server To take a backup of all of the configurations press Save to save all configurations to a config file If necessary it is then possible to return t...

Страница 57: ...ress Browse button to search firmware file Press Upgrade button to upgrade the firmware Note 1 Do not disconnect power to the unit during the upgrade The unit reboots automatically after the upgrade has completed 1 5 minutes 2 During upgrading process all event recording actions will be stopped It will continue to record after the camera is rebooted ...

Страница 58: ...negotiation RJ 45 socket Support MDI MDI X auto crossover function Supported Protocols HTTP TCP IP UDP RTP RTSP FTP SMTP DHCP DNS DDNS NTP Bandwidth Control Min 64 kbps adjustable Max Client Limit 32 simultaneous clients TERMINAL I O Alarm Input 1 x input for dry contacts Normal Open Normal Closed adjustable Alarm Output 1 x dry relay contact Normal Open Normal Closed adjustable 70 VDC 200 mA max ...

Страница 59: ...50H 59 PHYSICAL Weight 0 74 kg 1 6 lbs Dimensions 123mm O D x 107 8mm H 4 8 O D x 4 2 H ENVIRONMENTAL Operating Temp 10 C 50 C 14 F 122 F Humidity 20 80 Humidity OTHERS Waterproof IP66 Vandal Resistant Yes ...

Страница 60: ...81 www everfocus co jp EverFocus Your EverFocus product is designed and manufactured with high quality materials and components which can be recycled and reused This symbol means that electrical and electronic equipment at their end of life should be disposed of separately from your household waste Please dispose of this equipment at your local community waste collection recycling centre In the Eu...

Отзывы: