132
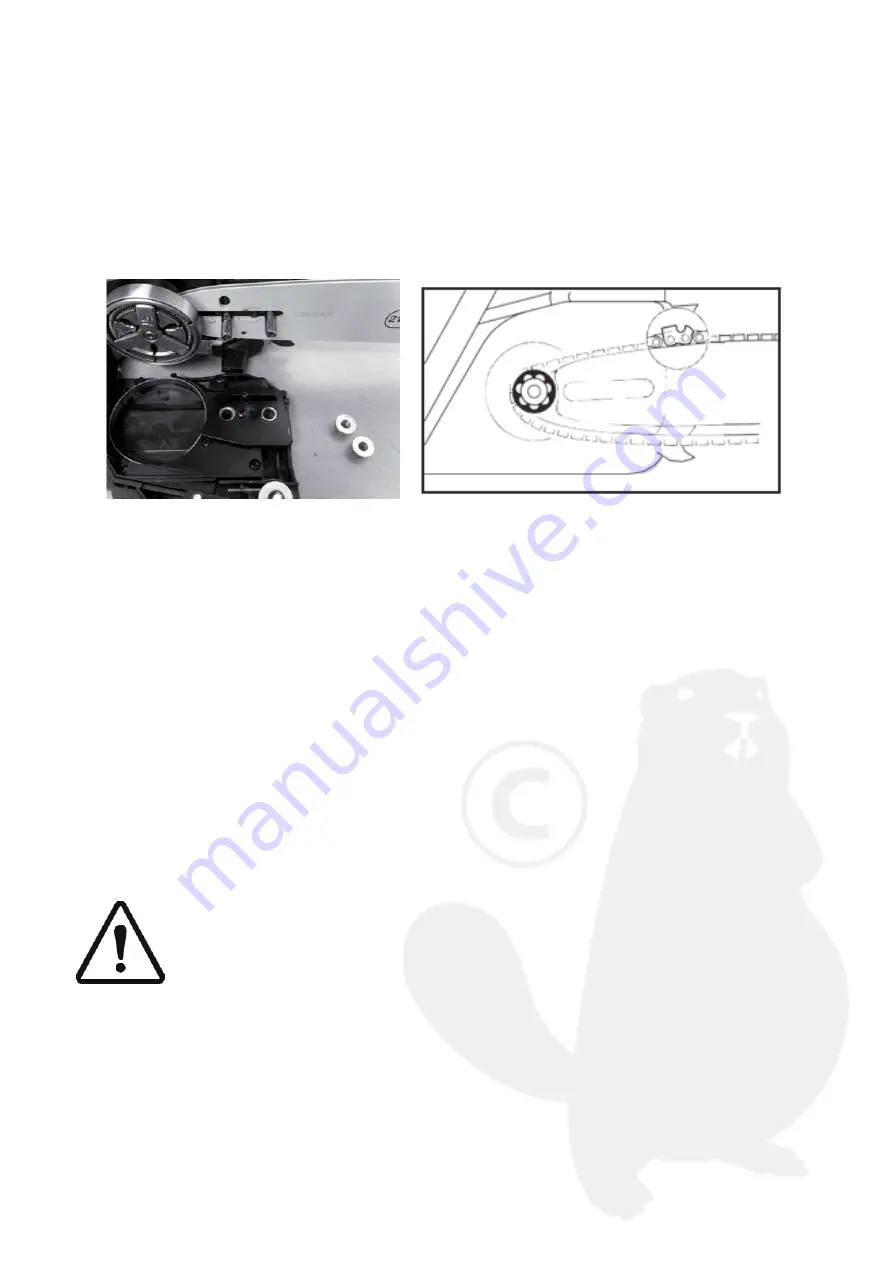
REPLACING THE CHAIN AND CHAIN GUIDE
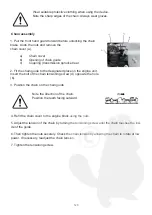
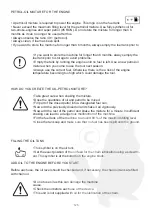
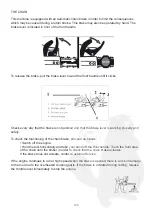
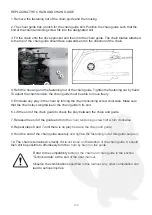
1. Remove the fastening nut of the chain guide and the housing.
2. The chain guide has a notch for the chain guide bolt. Position the chain guide such that the
bolt of the chain tensioning screw fits into the designated slot.
3. Fit the chain onto the drive sprocket and then into the chain guide. The chain blades attached
to the top of the chain guide should face outwards and in the direction of the chain.
4. Refit the housing and the fastening nut of the chain guide. Tighten the fastening nut by hand.
To adjust the chain tension, the chain guide must be able to move freely.
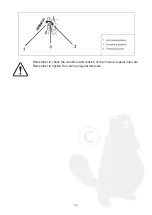
5. Eliminate any play in the chain by turning the chain tensioning screw clockwise. Make sure
that the chain stays lengthwise to the chain guide in its slot.
6. Lift the end of the chain guide to check the play between the chain and guide.
7. Release the end of the guide and turn the chain tensioning screw half a turn clockwise.
8. Repeat steps 6 and 7 until there is no play between the chain and guide.
9. Hold the end of the chain guide securely and tighten the fastening nut of this guide securely.
10. The chain is tensioned correctly if it is not loose on the bottom of the chain guide. It should
then still be possible to effortlessly turn the chain by hand on the guide.
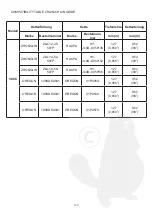
Refer to the compatibility table for the chain and chain guide in the section
“Technical data” at the end of the user manual.
Observe the combinations specified in this manual. Any other combination can
lead to serious injuries.
Содержание CN-38
Страница 2: ...2...
Страница 15: ...15 Deze machine is deels geassembleerd De volgende onderdelen dienen aanwezig te zijn bij het uit de doos halen...
Страница 34: ...34 3 TECHNISCHE GEGEVENS Uitgeklapte tekening van het product met nummering van de afzonderlijke onderdelen...
Страница 37: ...37...
Страница 50: ...50 Cet appareil est partiellement assembl Les pi ces suivantes doivent tre pr sentes la sortie du carton...
Страница 68: ...68 3 CARACT RISTIQUES TECHNIQUES Vue clat e du produit et num rotation des pi ces...
Страница 71: ...71...
Страница 103: ...103 3 TECHNISCHE DATEN Explosionszeichnung des Produktes mit Nummerierung der Einzelteile...
Страница 106: ...106...
Страница 119: ...119 This machine is partly assembled The following items should be present at the out of the box...
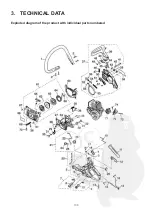
Страница 138: ...138 3 TECHNICAL DATA Exploded diagram of the product with individual parts numbered...
Страница 141: ......
Страница 142: ...142...
Страница 143: ...143...
Страница 144: ...IMPORTED BY EUROGARDEN NV SA SINT TRUIDENSESTEENWEG 252 3300 TIENEN BELGIUM info eurogaren be www eurogarden be...

