18
We need to point out that this is only an indication and not a certainly that the magnet will not
release from the material. Euroboor accepts no liability ensuring from the magnet indicator not
functioning or functioning poorly.
Make sure that the magnet attaches tightly to the work piece before turning on the motor unit of the
magnetic drilling machine. Euroboor magnets have 2 coils; make sure that both coils are in contact
with the material. Do not connect any other machines to the electrical outlet the magnetic drilling
machine is plugged into, as it may result in the loss of magnetic force.
Always use the safety chain included. Drilling above your head is extremely dangerous and is not
recommended. For the use of magnetic drilling machines on pipes, not-flat or non-magnetic
materials, we refer to our brochure or our website www.euroboor.com where several vacuum
tightening systems and pipe clamping systems are mentioned.
4.5 Switching motor on and off
The motor unit can only be switched ON when the magnet is activated. To switch the motor ON,
press the green button with marking “I”. To switch the motor OFF, press the red button with marking
“O”.
4.6 Motor rotation
ECO.55-T only
The rotational direction of the motor can be changed.
-
Switch in up position (R) will make the motor rotate clockwise
-
Switch in down position (L) will make the motor rotate anticlockwise
-
Switch in middle position will not make the motor rotate (neutral position)
Before switching the rotational direction of the motor and spindle, make sure the motor is switched
off first to prevent machine and tool damage.
4.7 Motor speed control
ECO.55-T only
The speed control knob (potentiometer) allows you to electronically control the speed of the motor
(in both clockwise and anticlockwise direction).
-
The indicator of the potentiometer in bottom left corner is minimum speed
-
The indicator of the potentiometer in bottom right corner is maximum speed
The electronic motor speed control works for both mechanical gears.
Be careful not to overturn the knob.
Содержание ECO.55-A
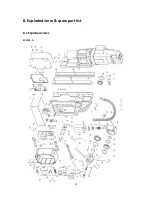
Страница 32: ...32 8 Exploded view spare part list 8 1 Exploded views ECO 55 A ...
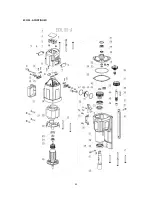
Страница 33: ...33 ECO 55 A CONTINUED ...
Страница 34: ...34 ECO 55 TA ...
Страница 35: ...35 ECO 55 TA CONTINUED ...
Страница 38: ...38 8 3 Wiring diagrams ECO 55 A ...
Страница 39: ...39 ECO 55 TA ...


