5.9.
Light projecting unit assy.
Remove the back cover and top cover.
(Refer to ‘4. Assembly and Disassembly of External Facing’.)
1)
Replacement of Measurement Light Board Assy.
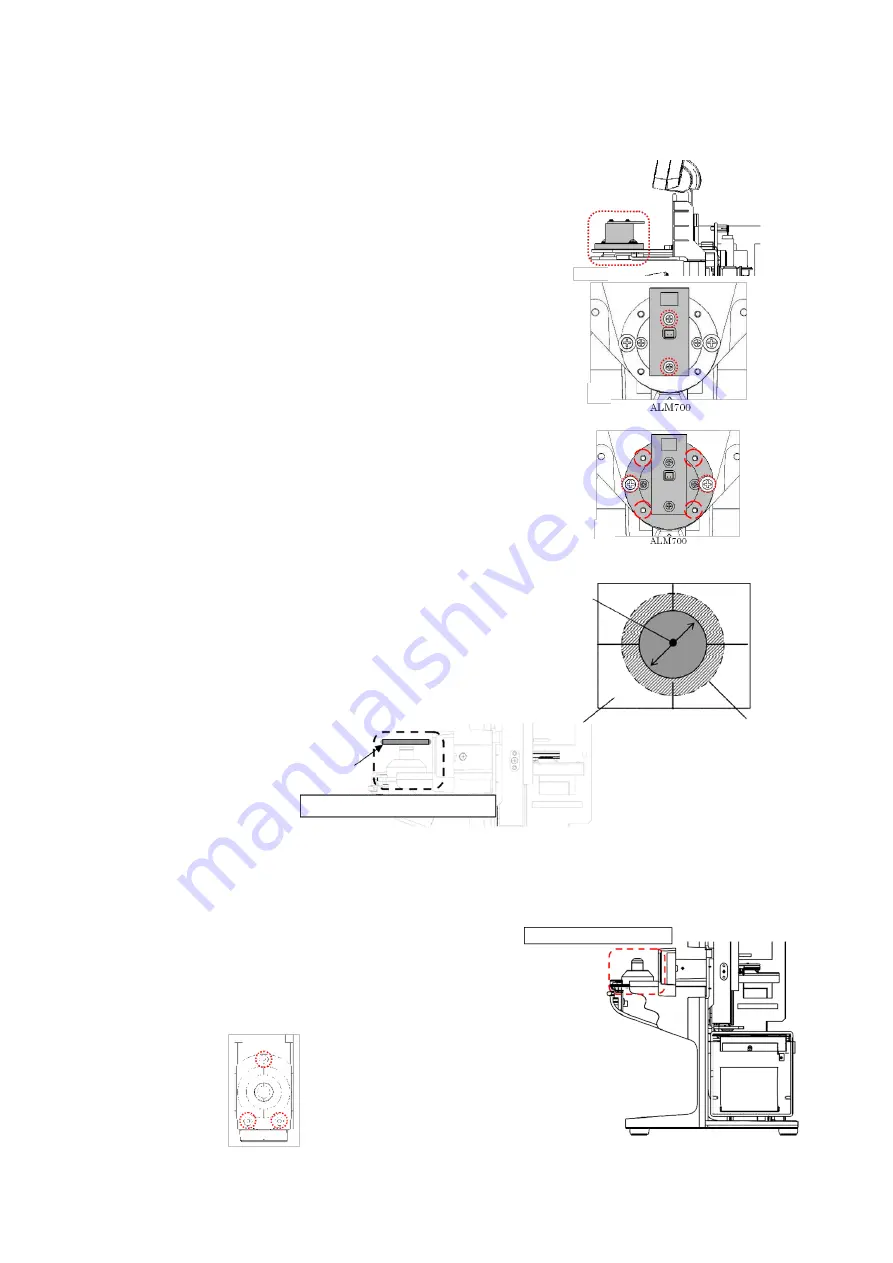
Unscrew 2 screws (cross-recessed bind screw M2×L6 black)
fixing the measurement light board Assy., and place the
replacement measurement light board Assy. roughly in the
center.
After that, place each cover and perform calibration.
(Refer to ‘8. Calibration’.)
[Fig.1]
2)
Replacement of Light Projecting Unit Assy.
Unscrew 2 screws (cross-recessed bind screw (P3) M3×10
black), and place the replacement light projecting unit
Assy. temporarily. :Fig. 2
Then, align with the optical axis of the light receiving
Assy. by using 4 M3 set screws.
【
Adjustment Criteria
】
Place the perforated screen on the light receiving unit
Assy. Confirm visually that the scribing line and light
from the light projecting unit match. :Fig. 3
[Fig.2]
5.10.
Light receiving unit assy.
Remove the light receiving unit cover.
(Refer to ‘4-4. Removal of Light Receiving Unit Cover’.)
Remove 3 screws (hexagonal socket cap low head bolt M3×6)
fixing the light receiving unit and harnesses connected, and
place the replacement light receiving unit Assy. roughly in
the center.
Light projecting unit assy.
Lens stand aperture (
φ6)
Perforated screen
Scribing line
ALM700:
φ13
Perforated screen
Light receiving unit assy.
Light receiving unit assy.
Содержание ALM 700
Страница 1: ...Maintenance manual Auto Lensmeter ALM700 V1 10 2016...
Страница 36: ......


