MAGPRO16 Addressable Fire Alarm Panel – Installation and Programming Manual
39
7.4. Addressing Menus
Attention: The addressing menus are available only from access level 3!
This menu allows the installer to set or change the device address or to perform self-addressing procedure. The type of
addressing depends on the installer’s preferences and the system capacity and configuration.
The installer can use two approaches for adding devices to the system configuration.
- The devices are directly connected to the panel Loop 1 and/ or Loop 2. The panel will recognize them and
gives automatically addresses according the order of the devices in the line. The panel will start with the first free
address in the system configuration. The installer can SAVE the new devices one-by-one or all at the time from the
Menu 3. Devices Setup.
- SELF ADDRESSING. The new devices are prepared for connection to the system configuration - the loop
line is ready but the devices are not installed (the detectors and sounders are not mounted to the bases, the call points
and modules are not connected to the loop). The installer enters 4. Addressing - 4.3. Self addressing menu. The panel
shows the first free address for every of the loops. Now the installer can start mounting detectors and modules one by-
one. The panel will set the displayed address number to the mounted device and automatically proceeds with next free
address in the system.
7.4.1 Set Address
In this submenu the installer can directly set addresses to new devices in the system. The procedure is same with that
for self addressing. It is suitable when the installer needs to add single devices to the system configuration at free
addresses. The detectors and sounders must not be mounted to the bases; the call points and modules must not be
connected to the loop.
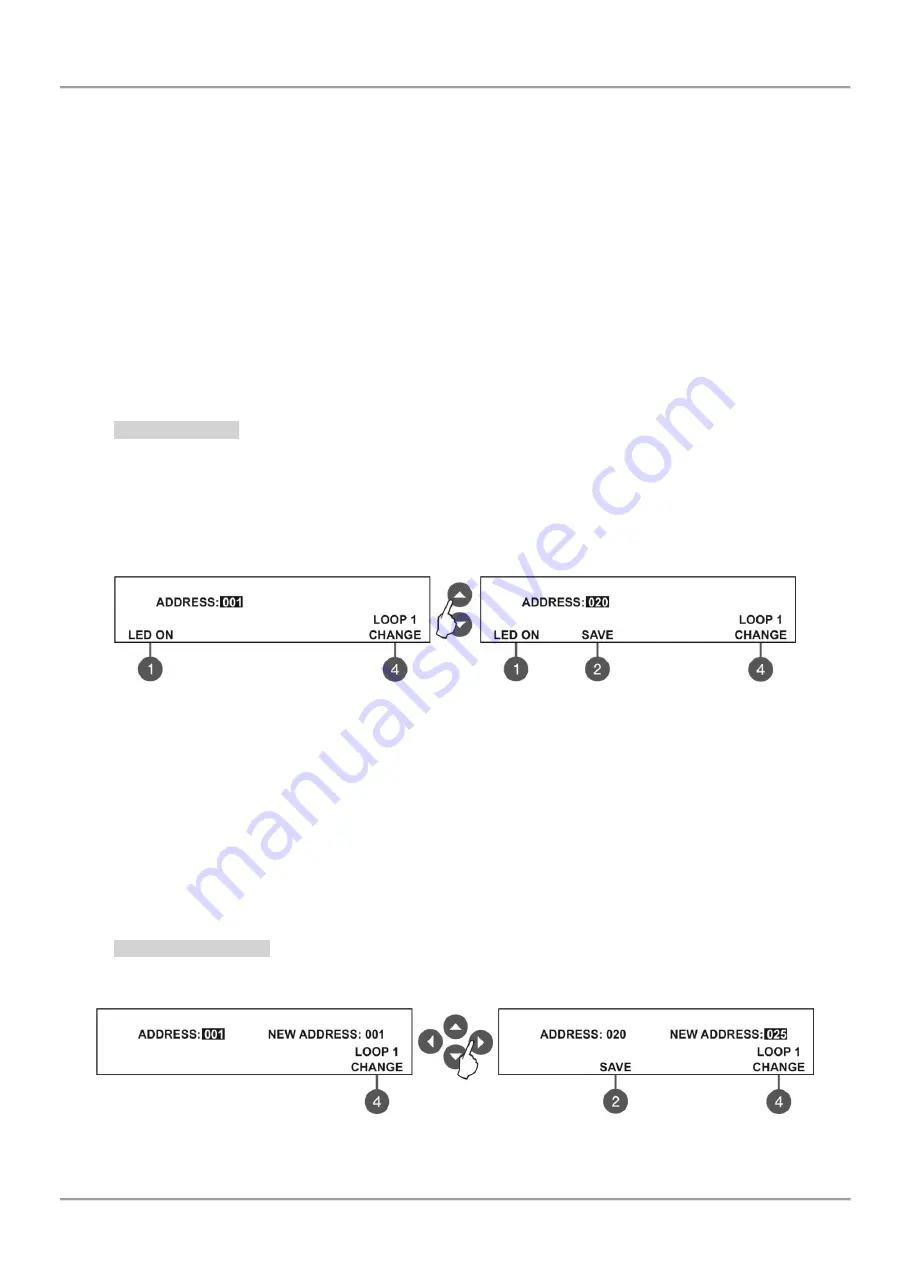
To set address to a device, enter in the
installer’s menu - 4. ADDRESSING - 4.1. SET ADDRESS. The device must be
prepared for connection to the panel (loop 1 or loop 2).
The system automatically shows the first address in the system. You can check the device assigned at this address
with pressing the ‘LED ON’ button - the LED(s) of the device will lighting on permanently. Next pressing of the same
button will off the LED.
Use the button ‘CHANGE’ to switch to loop 2 if present in the system
. The address is free if
‘SAVE’ button is active.
To find a free address use the up and down arrows to scroll over the address numbers.
The free address in the system configuration is recognized with active ‘SAVE’ functional button (2) in the last row of the
screen. Take the new device and connect it to the system - mount the detector or siren to the base or connect the
module to the loop. Press the ‘SAVE’ button and wait for a couple of seconds. If the addressing is successful the
message ‘SUCCESSFUL’ starts blinking on the screen. If the message is ‘ERROR’ then there is a problem - the device
is not properly connected; there is no communication with the panel. You can proceed with setting the next address or
escape with ‘CANCEL’ button.
7.4.2 Change Address
In this submenu the installer can change the address number of a device. To change address of a device, enter in the
installer’s menu - 4. ADDRESSING - 4.2. CHANGE ADDRESS.
The system automatically shows the first address in the system. Use the up and down arrows to select the address of
the device you want to change.


