技术要求:
尺寸:200*145mm;
材质:128克铜版纸,单色正反面印刷,
边框不用印刷,仅作边界示意。
正面
背面
Product advantages
Technical Parameters
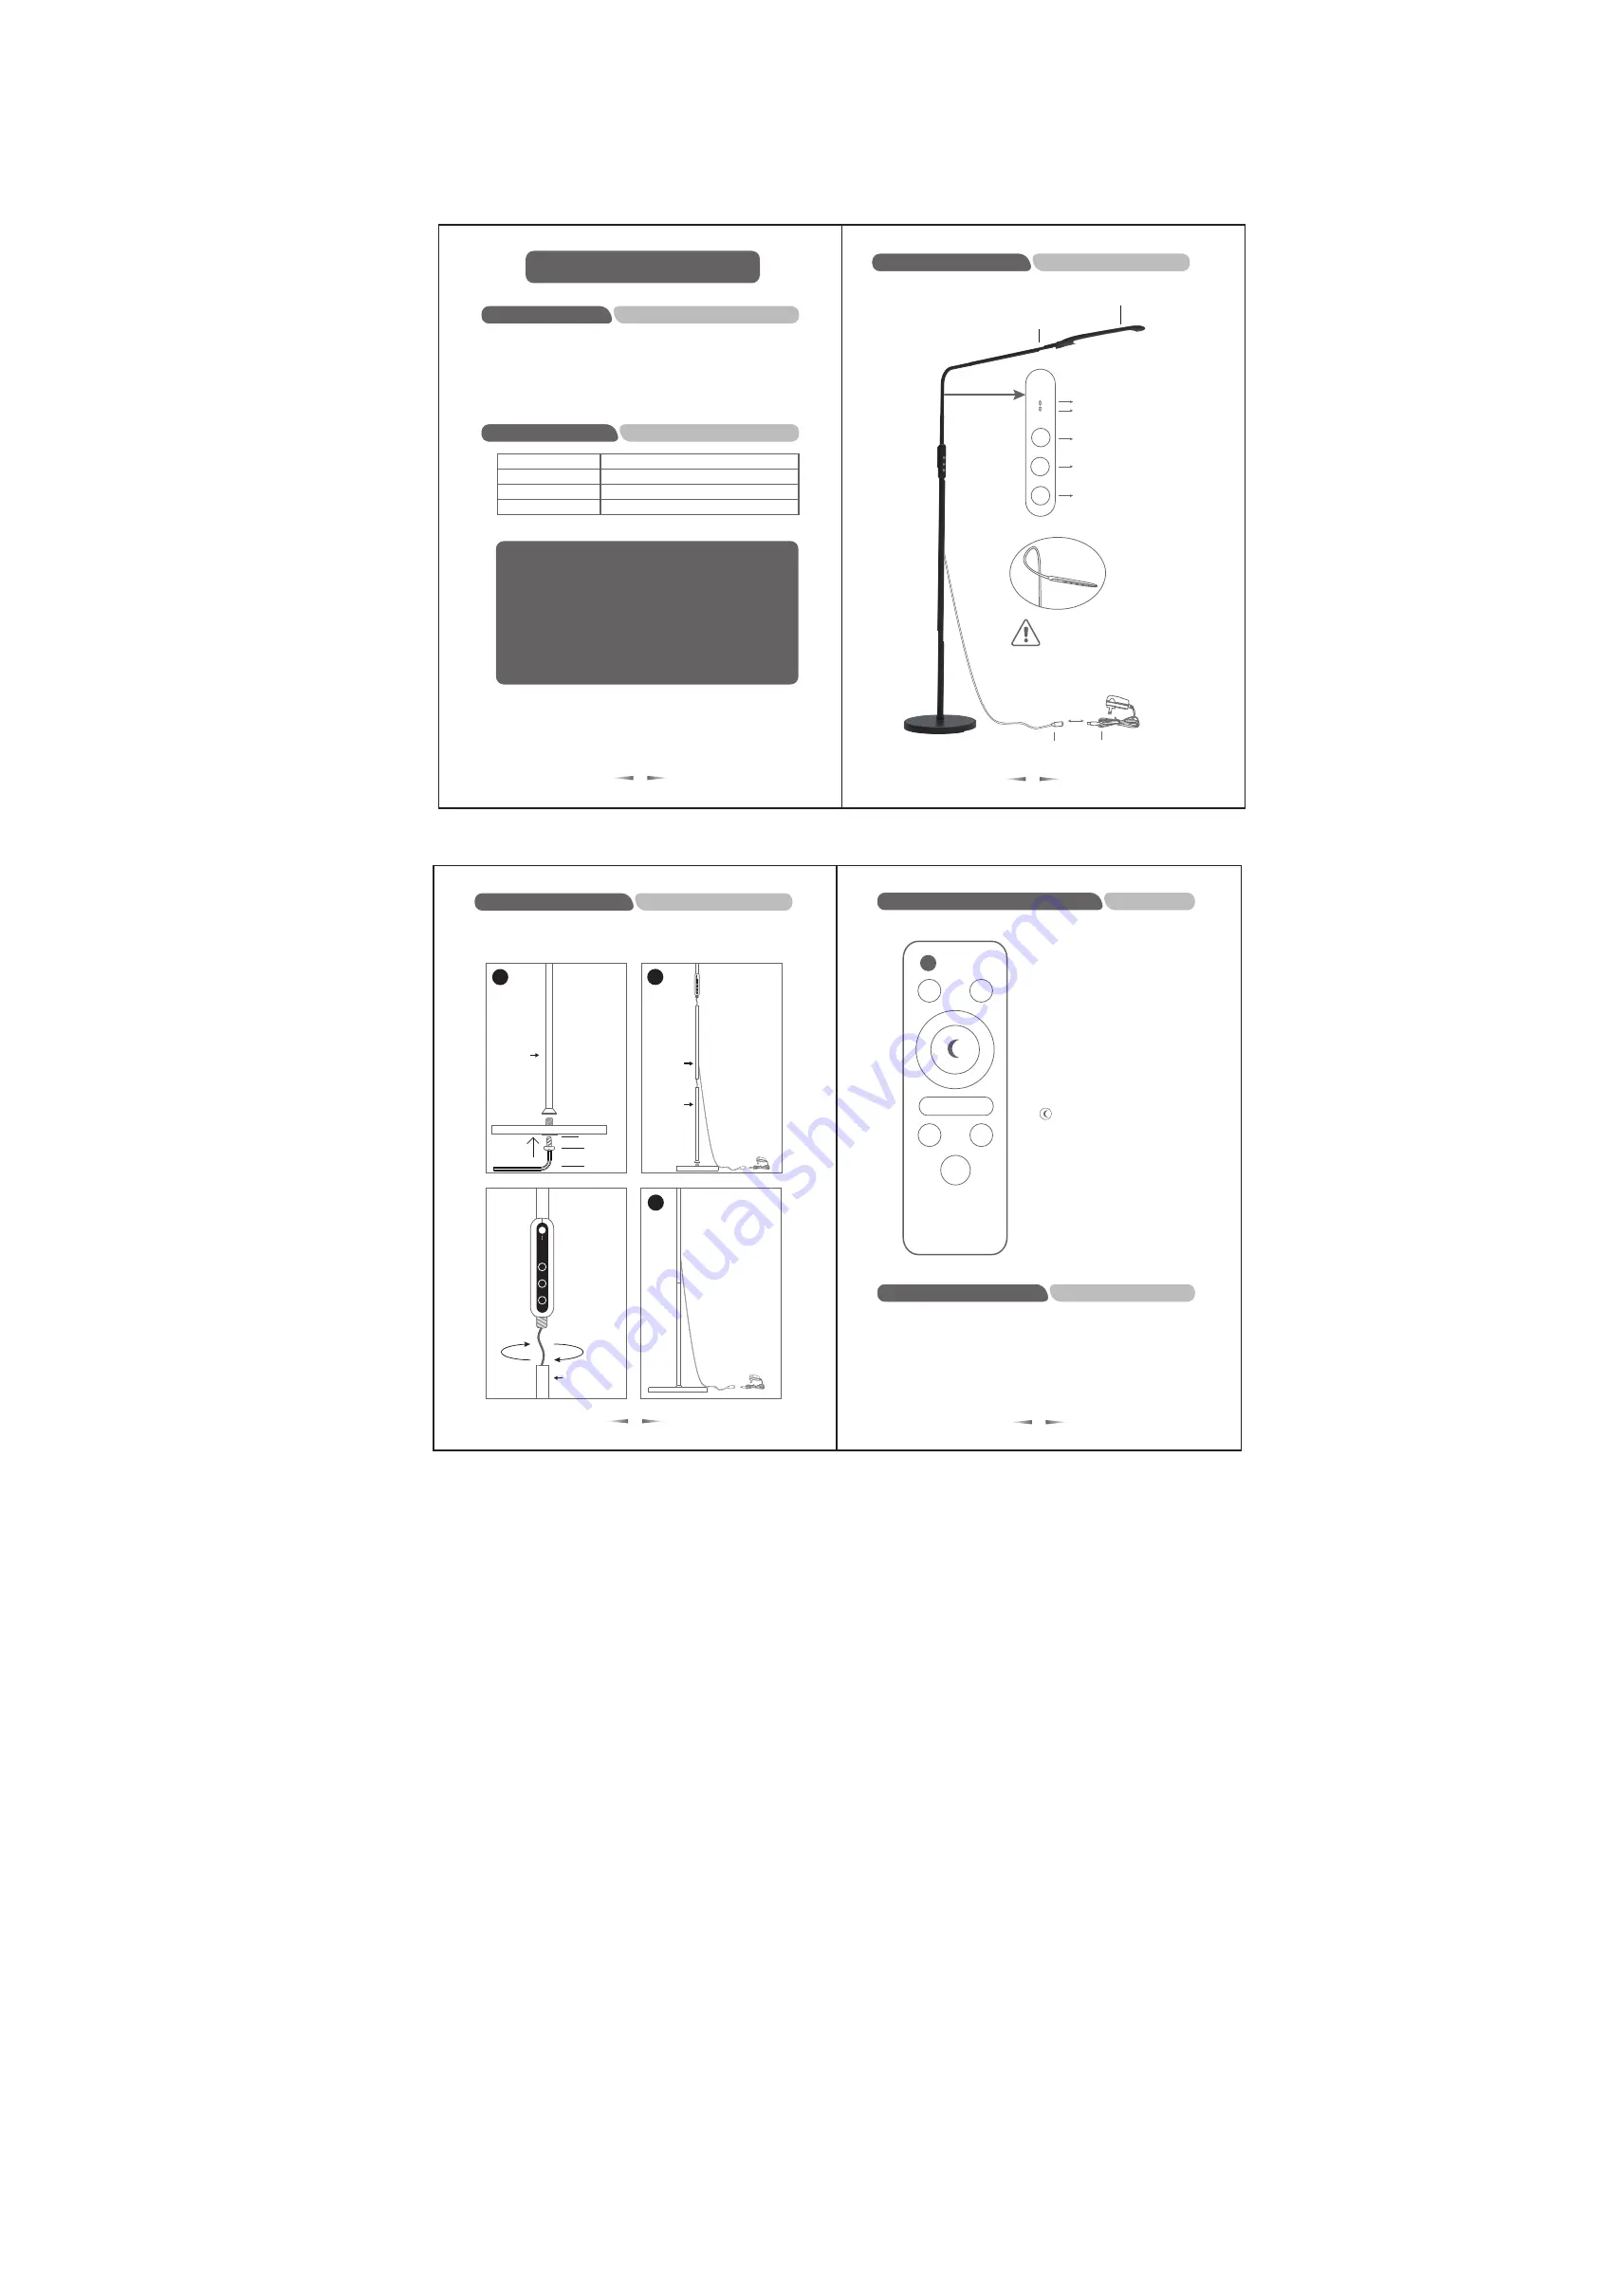
Magno Lumina Max Floor
※
Instructions
1
Product description
◆
Powerful LED light source, long lasting, sustainable, and safe.
◆
Choose from a variety of brightness levels and color temperature combinations,
to create the perfect light for any setting .
◆
User-friendly design, versatile adjustable lighting.
◆
Remote control design, improve the quality of life.
Name
Input Power
Power Source
Color Temperature
Magno Lumina Max Floor
10W MAX
90×0.2W/LED
3000K-6500K
Precautions
:
please read the following carefully before use
2
LED light source
Hose
ON/OFF Switch
Brightness adjustment
(5 step)
Color temperature
adjustment (5 step)
control panel
10 minute delay indicator
60 second delay indicator
power
color
bright
Dedicated power adapter
Interface
When the angle is adjusted, do not
bend the hose excessively so as not
to damage the hose.
4
Exception and solution
◆
If the lamp is not lit or flashing, please check or deal with the following methods:
① Check whether the adapter used for the lamp is a special power adapter for the lamp.
② Please try to change a socket (to exclude the reasons for the socket).
③ Check the DC plug with the lamp power hole is fully inserted in place.
After the above attempts, the problem has not been resolved,
you can contact the purchase.
×
1- Make sure to only power the lamp with the included power supply adapter. Use with
other adapters may damage the lamp.
2- Do not use this product in extreme temperatures, moist environments, or on
flammable surfaces.
3- Lamps are made for indoor use only, do not use outdoors.
4- Please ensure lamps are level on the floor, if the lamp is tilted, it may not work as
intended
5- If experiencing issues, for your safety, please turn lamp off before conducting any
inspection. Please contact Brightech for assistance, do not disassemble the lamp
yourself.
6- When adjusting the lamp head, please take care not to play with or over adjust the neck.
It will hold up to adjustment during normal usage, but excessive adjustment may result
in loss of neck tension.
3
Assembly Instructions
Middle pole
Bottom pole
Lamp head
Connect lamp head
to middle pole, and
middle pole to
bottom pole. Gently
pull the excess power
cord out through the
bottom pole so that
it does not get
caught in the
threading
Insert flat
washer, nut, and
screw
underneath base.
Line the bottom
pole up over the
screw head and
use the hex
wrench (turning
clockwise) to
tighten screw
and pole into
place
Connect power
supply adapter,
plug into outlet,
then you can
power and
control the
lamp either on
the control
panel or using
the included
remote
Bottom pole
color
power
bright
2
3
1
Note - Do not try to push the extra cord into the pole by force, this will
damage the cord.
Screw washer
screw
Hex wrench
Connect head and
poles by lining up
the threading
carefully. Turn the
second section
(middle and then
bottom pole) in
counterclockwise
direction.
Light pole 2
color
power
bright
Remote Control Settings
⒈
(On/Off) – Power Button
⒉
(60S) – 60 seconds delay to turn off lights
⒊
(10M) – 10 minute delay to turn off lights
⒋
() – Increase brightness, 5 steps
⒌
(Bright -) – Decrease brightness, 5 steps
⒍
(Color +) – Increase color temperature, 5 steps
⒎
(Color -) – Decrease color temperature, 5 steps
⒏
( ): Night light function
⒐
(Set Brightness) – 20%
⒑
(Set Brightness) – 50%
⒒
(Set Brightness) – 100%
⒓
(Warm) – Warm light – 3000K
⒔
(Cool) – Cool light – 6500K
⒕
(Mix) – approximately 4500K
7
4
6
5
8
1
2
3
9
10
11
12
13
14
Power Supply
Adapter
Power Cord


