background image

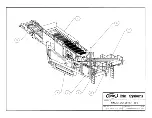
TRACK-TYPE FINGERSCREENER FS206T:  PARTS CATALOG

GENERAL ASSEMBLY
Drawing number SAB00A0000A-0

No Description

Drawing number

1

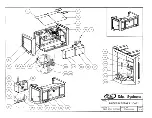
Screen Box

FT26TV000C

2

Reject Stacker

SAB10A0000A-0

3

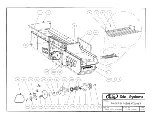
Power Pack

FT26PP000C

4

Main Frame

FT26SP000C

5

Fine Stacker

FT26CF000C

6

Exhaust System**

SAB40A0000A-0

7

Catwalk, right side**

SAB20A0000A-0

8

Catwalk, left side**

SAB20A0000M-0

** Refer to Erin Service Department

Serial number 3010

May 2006

Содержание Fingerscreener 206T

Страница 1: ... Erin Systems Ltd 2006 O Op pe er ra at ti in ng g a an nd d M Ma ai in nt te en na an nc ce e M Ma an nu ua al l ISSUE 2006 05 ERIN SYSTEMS 2006 International 3010 ...

Страница 2: ...standing this manual first 2 Make sure that the Main Power Supply is OFF before any maintenance or cleaning operations are carried out 3 Never use this equipment for functions other than those for which it was designed The information in this document was the most up to date available at the time of printing Because of Erin Systems policy of ongoing improvement the company reserves the right to di...

Страница 3: ... 1 8 1 3 10 Fire Prevention 1 8 1 4 Glossary of Pictograms 1 9 2 DESCRIPTION 2 1 2 1 Processing Materials 2 1 2 2 Equipment Description 2 2 2 2 1 Description of the Screen Box 2 2 2 2 2 Description of Stockpile Conveyors 2 2 2 2 3 Description of the Main Frame 2 3 2 3 Technical File 2 3 3 OPERATION 3 1 3 1 Safety Recommendations 3 1 3 2 Description of Controls 3 2 3 3 Operation Procedure 3 6 3 3 1...

Страница 4: ...nce Table 5 5 5 5 Erin Bolts and Nuts 5 8 5 5 1 Bolts and Nuts Tables Imperial System 5 8 5 5 2 Bolts and Nuts Tables SI Units 5 9 5 6 Maintenance prior to Transport 5 11 5 7 Maintenance Summary 5 12 6 TROUBLESHOOTING 6 1 6 1 Controller Warnings 6 1 6 2 Troubleshooting Table 6 2 7 PARTS LIST 7 1 7 1 Return of Parts 7 1 7 2 Parts Ordering 7 1 7 3 Warranty 7 1 7 4 Suggested Parts List 7 2 7 5 Mechan...

Страница 5: ...igure 3 13 Reject Stacker raising system 3 product model only 3 11 Figure 3 14 Panel view Screening mode 3 11 Figure 3 15 Panel view Traction mode 3 11 Figure 3 16 Radio remote control 3 16 Figure 3 17 Wire remote control 3 17 Figure 3 18 Fine Stacker retaining belt 3 18 Figure 3 19 Middle Stacker retaining belt 3 19 Figure 3 20 FS206T Transport Position 3 20 Figure 4 1 Fingers at lowest angle 4 2...

Страница 6: ...ystems Please select the ones that apply to the purchased equipment 1 1 General CAUTION Do not operate Erin equipment under the influence of drug alcohol or medication Though equipment is fitted with guards to protect operators from moving parts such shielding is not always possible and does not always provide complete protection The operator must take the necessary precautions in order to avoid i...

Страница 7: ...nsible for keeping the workstation clean and in good order Water oil or another liquid can make a floor slippery and cause falls or serious injury Use appropriate absorbent to sponge up oil spills and then dispose of the absorbent in a controlled way Check local state and federal laws for the disposal of oil 1 1 4 Hand Tools and Power Tools Do not use a pipe to extend a wrench handle Try penetrati...

Страница 8: ...ing Parts Never touch moving parts such as a conveyor or crank with hands feet or any other part of your body for any reason Never step on a conveyor or screen while operating the machine Always stop the machine completely before maintenance or cleaning work Never stay on the machine while moving it If a tool or piece of material gets caught in moving equipment let go immediately and shut down the...

Страница 9: ...ld remain in position is held by blocks posts stays or beams for example in the event of a power failure Do not place yourself under a load supported by wheels unless the wheels are blocked to prevent movements Whenever the centre of gravity of a load could shift relative to the device used to hoist it or hold it in place fix the load securely to the lifting device before moving it 1 3 5 Risks rel...

Страница 10: ...r ground conditions Before turning the remote key make sure that the stop button is pulled A 5 second buzzer starts as soon as the remote is activated Watch the machine from an angle providing a clear view of the machine path and all the obstacles that might arise Do not make the machine run over obstructions Always keep the machine into sight during the whole operation Do not stand directly in fr...

Страница 11: ...ot for frequent road travels on trailers Road performances have not been optimized Therefore the machine must be transported with great care and precautions Make sure that the hauling equipment is safe and compliant with applicable transport regulations Make sure that the machine is properly secured to the trailer and that overall dimensions and signalling complies with the applicable regulations ...

Страница 12: ...me time even briefly Keep the ladder close to your work Do not overreach or try to push or pull objects off to the side Never try to walk or shift a ladder when standing on it Do not stand on or above the third step from the top of the ladder and never climb above the top support point Do not use a ladder if you tire easily are subject to fainting spells or are currently on medication 1 3 8 Lockou...

Страница 13: ...the equipment Make sure that the system works properly before using it for regular operating purposes 1 3 9 Electrical Components Every housing containing electrical components of voltage exceeding 24 volts must be closed at all times Access should be authorized only to qualified persons i e certified electricians 1 3 10 Fire Prevention Operations Smoking is strictly prohibited around and near Eri...

Страница 14: ...ACTIONS Read and understand the Operating and Maintenance Manual before using this equipment GENERAL MANDATORY ACTIONS PROHIBITIONS KEEP CAUTION Risk of injury Stay clear PROHIBITIONS KEEP CAUTION Do not enter Authorized personnel only DANGER KEEP CAUTION Moving parts from side can crush and cut ...

Страница 15: ... serial no 3010 1 10 May 2006 WARNING BE AWARE Emergency stop button nearby CAUTION DO NOT TOUCH Hands could get caught in belt DANGER KEEP CAUTION Moving parts from top can crush and cut GREASE EVERY 200 HOURS WEAR EAR PROTECTION ...

Страница 16: ...al no 3010 1 11 May 2006 WEAR EYE PROTECTION WEAR HELMET WEAR STEEL CAP BOOTS CAUTION Flying debris Wear eye protection CAUTION DO NOT TOUCH Hands could get caught in chain CAUTION DO NOT TOUCH Hands could get caught in rotating stars ...

Страница 17: ...serial no 3010 1 12 May 2006 CAUTION DO NOT TOUCH Hot surface CAUTION DO NOT TOUCH Hands could get caught in rotating stars DANGER DO NOT TOUCH Moving parts can crush and cut GREASE EVERY 40 HOURS LUBRICATE EVERY 40 HOURS 40 Hours ...

Страница 18: ...duction and eliminate costly double handling of material The Fine Stacker can load a dump truck directly or create a large stockpile At the other end of the machine the extra wide overs conveyor Reject Stacker can feed a crusher or create a stockpile The Middle Stacker can feed a separate stockpiler or create a small stockpile The Fingerscreener FS206T has the advantage of being extremely mobile o...

Страница 19: ...structure the top deck is fitted with heavy duty Grizzly fingers and the bottom deck with medium duty Cascade fingers with openings to suit customer requirements You can hydraulically raise or lower the Screen Box at 10 13 or 16 to retain less or more of the material that is being screened Finger sections can also be moved up and down to control material flow and clearance You can adjust the Casca...

Страница 20: ...or waste Please note that all tons are metric 1000 kg or 2200 lb Serial number location Refer to Figure 2 1 FS 206T General view Traveling length 17 37 m 57 0 Traveling height 3 41 m 11 2 Traveling width 3 44 m 11 3 Operating length max 18 75 m 61 5 Operating height max 5 30 m 17 4 Loading height max 4 94 m 16 2 Operating width 3 44 m 11 3 Total weight 87 200 pounds 39 553 kg approx Tracks Width o...

Страница 21: ...g m 100 lb ft3 Material composition the material to screen must be composed of about 40 of fines minimum Max material size regular 600 mm x 600 mm x 600 mm 2 x 2 x 2 Max material size heavy 400 mm x 400 mm x 400 mm 16 x 16 x 16 rocks stones etc Loading equipment to achieve high screening capacity with high separation the Fingerscreener FS206T must be mechanically fed by an excavator of 40 tons or ...

Страница 22: ...tive signification For more information about the safety recommendations see Safety chapter DANGER Indicates that serious physical injuries or death may occur if procedures and safety recommendations are not followed CAUTION Indicates a strong potential for workers to be injured if procedures and safety recommendations are not followed INSTRUCTIONS Indicates that equipment damage may occur if proc...

Страница 23: ... panel the control levers and the emergency stop buttons There are six emergency stop buttons on this machine one at each corner of the machine and one on each catwalk Pictures may be slightly different from your equipment Figure 3 1 Emergency stop button near Screen Box raising system Figure 3 2 Emergency stop button near Screen Box raising system ...

Страница 24: ...Operation Rev 0 3 international serial no 3010 3 3 May 2006 Figure 3 3 Emergency stop button in Power Pack Figure 3 4 Emergency stop button in Power Pack ...

Страница 25: ...stop lower to fold C Reject Stacker raise for 3 products middle to stop lower for 2 products D Reject Stacker raise to uptilt middle to stop lower to downtilt E Remote cord plug Padlocking disconnect switch Reject Stacker raise to start middle to stop lower other valves H Screen box raise to start middle to stop lower for track I Fine Stacker raise to start middle to stop lower for track G Middle ...

Страница 26: ...r and Screen box levers Figure 3 8 Control panel Ignition switch Glow plug switch Mode switch Traction wire Screening Traction radio Panel lock Controller display Screen box raise to uptilt middle to stop lower to downtilt K Fine Stacker raise to unfold middle to stop lower to fold J ...

Страница 27: ... and that the ground is hard enough 2 Move the machine safely towards the parking area Refer to section 3 3 6 Moving the Machine for more details 3 Turn the remote key to off 4 Turn the ignition key to off 5 Padlock the electrical disconnect switch to avoid using up the battery 6 Clean the machine thoroughly to remove soil and dust 7 If the machine is to be stored for a long time in this position ...

Страница 28: ...or gauge to determine if the air cleaner needs to be serviced Refer to your Caterpillar operator s guide for further details Unit Make sure that all safety devices work properly Make sure nothing interferes with the operation of any part of the Erin Fingerscreener FS206T Clean out all dirt in the engine and hydraulic system compartment Check all conveyor belts for excessive wear and tear Check the...

Страница 29: ...gine with the glow plug by turning the ignition key to ON and raising the glow plug switch for a few seconds If the temperature is lower than 5 C 41 F hold the switch for a few minutes 7 Start the engine by turning the ignition key to START 8 Raise the throttle to 1 200 RPM and let the machine warm up Note While doing the next steps the engine should warm up enough to operate the machine if the te...

Страница 30: ...o attach a chain or a nylon sling to the hook and lift it using proper equipment Then pin the panels in the unfolded position Be very careful during these steps and make sure no one is standing near the machine during the lifting operation Figure 3 10 Hopper side extensions 16 Raise the Reject Stacker panels Never fold the Middle Stacker if these panels are not folded 3 product model only INSTRUCT...

Страница 31: ...ox at maximum transport position before folding the Middle Stacker 19 Use lever D to set up the machine to get two or three products 20 If the Reject Conveyor is set in three product mode use lever E to raise the Reject Stacker Do not use or move the machine without the Reject Stacker safety pin If the Reject Stacker is set in two product mode it must remain in its lowest setting Figure 3 11 Scree...

Страница 32: ...iew The controller usually displays the current operation mode Whenever irregularities are detected a warning is triggered and a message pops up on the panel view Refer to Troubleshooting chapter for more details Here are the regular screen displays Figure 3 14 Panel view Screening mode Figure 3 15 Panel view Traction mode Removable pin ...

Страница 33: ...tart the Middle Stacker if in 3 product mode with lever F 4 Start the Reject Stacker with lever H 5 Start the Fine Stacker with lever G 6 Run material through the machine by loading the Screen Box Make sure not to hit the Screen Box with loading equipment This would damage the machine and void the warranty Moreover the material should be dropped no higher than 0 6 m 24 from the Screen Box fingers ...

Страница 34: ... guide the operator Refer to Safety chapter for more details Use the mode selector on the control panel to select the required remote control DANGER Make sure nobody stands within a 75 feet 23 m range from the machine before moving it 1 Advise people nearby that the machine is about to be moved 2 Shut all regular screening functions off 3 Close all doors and panels The Screen Box doors must be clo...

Страница 35: ...n the radio signal range 10 Make sure that the stop button of the remote is pulled Turn the key on the remote control A buzzer starts as a warning of imminent move of the machine All functions of the remote will remain inactive as long as the key has not been activated and the stop button pulled 11 Make sure there are no risks for people on the site 12 Make sure the machine destination is safe eno...

Страница 36: ...only be made at slow speed To slew you can activate one track forwards and the other one backwards Slewing might be difficult depending on the ground condition Hold two of the individual function buttons both in the same direction and release the one corresponding to the inner track at times This method makes a wider turn but is easier for the machine For example Right turn Press buttons 3 and 4 R...

Страница 37: ...ts the diesel engine off LED Indicator When turning the remote on the led light flashes during a few seconds When the radio contact is established it goes from red to green and remains lit If the indicator remains red the remote battery is low See Adjustment chapter for battery change procedure Both key switch and stop button are connected in series Whenever one or the other is deactivated the rad...

Страница 38: ...e key switch off and then do the regular starting procedure Do not leave the engine key switch on This would use up the machine battery 3 3 8 Wire Remote Functions option This optional remote control must only be used when the regular radio remote control is out of order Pay special attention to safety recommendations related to the use of this wire remote Move far enough from the machine and keep...

Страница 39: ... machine diesel engine off To start the machine turn the engine key switch off and then do the regular starting procedure Do not leave the engine key switch on This would use up the machine battery 3 3 9 Preparing for Transport INSTRUCTIONS Proceed with the maintenance prior to transport Section 5 5 1 Stop the Screen Box with lever I middle position Hold throttle at maximum speed until the screen ...

Страница 40: ...ing lever K 10 Shut the engine off and proceed with the lockout procedure 11 Fold the Hopper side extensions and back panel Refer to section 3 3 3 step 12 for more details 12 Fold the Reject Stacker chutes INSTRUCTIONS Always fold the Reject Stacker chutes before folding the Middle Stacker Not doing so will result in Middle Stacker damages 13 Start the engine and raise throttle to 1 200 RPM 14 Put...

Страница 41: ...g lever K unfold the Middle Stacker first Always keep a straight path Be very careful when doing this Steel tracks tend to slip on metal surfaces especially when wet Make sure that the trailer bed and ramp are clean of oil mud or ice Use a slow engine speed Stop whenever the machine gets off balance Load the machine so that the Power Pack is over the semi trailer wheels 18 Turn the remote control ...

Страница 42: ...Screen Box pressure This might damage the cylinder 4 1 1 Fingers Adjustments Fingers can be moved up to slow down material or down to speed it up To adjust fingers angle unscrew angle adjustment bolts using an impact gun Because of the Loctite used at the factory it might be necessary to heat up the nuts with a torch Move the fingers up or down and tighten in place using new nuts grade 8 16 UNF ny...

Страница 43: ...6 Screen Box angle FINGERS ANGLE SETTING CHART 10 13 16 Min 1 4 7 GrizzlyTM fingers angle Max 9 6 3 Min 2 5 8 CascadeTM fingers angle Max 10 7 4 Figure 4 1 Fingers at lowest angle Figure 4 2 Fingers at highest angle Here the Screen Box is at the highest setting ...

Страница 44: ...r contact surface e Replace finger in the bushing and make sure that the square part of the finger is in horizontal position see figures below f Install the taper lock washers and the plastic nuts with Loctite 271 Tighten between 470 and 490 Nm 350 and 360 ft lb Keep Loctite away from plastic surfaces g Hit several times the tip of the finger with a 4 5 kg 10 lb sledge hammer This will push the fi...

Страница 45: ... b Unscrew securing bolts c Use a metal rod and a hammer to push the block out through the holes in the back of the block holder d Insert new rod block Make sure it is fully inserted all the way through e Tighten securing bolts It is recommended to add anti seize to the bolts in order to make next installation easier f Tighten counter nuts Figure 4 5 Rod block installation To replace broken or dam...

Страница 46: ...he Rosta unit will automatically take up the belt tension If there is not enough tension increase the belt tension by turning the rod holding the Rosta tensioner To check the belt tension apply a force of 11 kg 25 lb in the middle of the lower belt span The belt should have a deflection of a 13 mm Do not over tighten the belt 4 2 Tracks Adjustment Refer to the manufacturer s file at the end of thi...

Страница 47: ...emote battery hold the remote face down Push the battery on its centre and pull the battery end up Take the battery out and install it on the charger Follow the same procedure to put the new battery in To take a battery out of the charger or to put it back in follow the same steps as for the remote Note Always switched off the remote control when changing the battery otherwise an electrical strike...

Страница 48: ... the 3 highest uptilt settings Never raise the Screen Box in its 3 highest uptilt settings if the Middle Stacker is folded Always make sure that there is enough tension in the belt The driven and the drive rollers are mounted directly on pillow blocks that can be moved to stretch or slacken the belt On the Fine and Reject Stackers make sure to have a sag of 25 to 38 mm 1 to 1 inch between the two ...

Страница 49: ...f not the belt is too tight Note Belt overstretch or misalignment will cause premature belt wear To slacken the conveyor belt Move forward the driven roller by screwing adjustment bolts To align the conveyor belt Move back or forward only one of the adjustments of the drive roller by screwing or unscrewing the adjustment bolt until the belt moves correctly When adjusting a fast turning short conve...

Страница 50: ... two to three products 3 product model only 1 Make sure that the Middle Stacker is unfolded 2 Put the Reject Stacker in 3 product position using lever D 3 Adjust the Reject Stacker angle raise Remove pressure on the Reject Stacker pin by slightly raising lever E see Figure 3 13 Reject Stacker raising system Remove the pin Use lever E to raise the stacker top hole of the raising system Put the pin ...

Страница 51: ...ng system Put the pin back on Never use the machine if a pin is missing Lock the pin on Apply hydraulic pressure on the pin with lever E Make sure the cylinder does not support the Reject Stacker pressure This might damage the cylinder 3 Use lever D to set the Reject Stacker in two product position 4 Adjust the angle of the Screen Box if required Refer to Section 4 1 Screen Box To adjust Reject St...

Страница 52: ... lever F Then wait for the Screen Box to reach its full speed To check if the Screen Box is properly balanced look at the Screen Box action to see if it makes circular movements These must have perfect circular form For example pay attention to the movement around a bolt near the housing When the Screen Box is balanced its vibrating action should make the bolt moves in circle Another way to check ...

Страница 53: ... counter weights are at the same position on both counter weights proceed with the same adjustment on both sides of the Screen Box Improper adjustment may result in a loss of the warranty To change the throw of the track type Fingerscreener the eccentric shaft and the counter weights must be replaced ...

Страница 54: ...ntenance We suggest performing Daily Maintenance after every 8 to 12 hours of operation Weekly Maintenance including Daily Maintenance steps should be performed once a week or every 40 hours of work whichever comes first Monthly Maintenance including Daily and Weekly Maintenance should be performed once a month or every 200 hours of work whichever comes first Yearly Maintenance including all other...

Страница 55: ...hell Albida LC EP2 Q8 Rubens WB US Shell Retinax LC Texaco Star Plex 2 Furthermore the grease for the Screen Box bearings must respect these specifications Viscosity cSt 40 C 180 220 100 C 13 8 21 Dropping point C 232 260 Soap type Lithium complex NLGI Grade 2 It is very important to grease properly the Screen Box bearings Before doing any greasing make sure the grease fittings are clean of debris...

Страница 56: ...ature must not exceed 70 C 158 F Use Shell Tellus 32 oil Do not mix different oils The warranty on new Erin equipment no longer applies if hydraulic oils have been mixed The oil level must be between and of hydraulic tank thermometer window Figure 5 2 Hydraulic oil level indicator Furthermore hydraulic oil must respect these specifications Kinematic viscosity cSt mm2 s 40 C 32 2 mm2 s 100 C 5 52 V...

Страница 57: ...raulic flow interruption 1 Install the ball valve handle stored in the electrical panel 2 Close the ball valve The handle must be perpendicular to the valve 3 Do the necessary repairs 4 Open the ball valve The handle must be parallel to the valve 5 Remove the ball valve handle and put it back in the electrical panel 5 3 Maintenance upon Delivery of a New Machine Check the oil level with the dipsti...

Страница 58: ...fering information in this manual regarding the diesel engine supplied with the machine Part Action Frequency Make sure that both acoustic warning signals work properly Do not use the machine if these signals are disabled Check the air filter indicator Clean or replace if required Check engine radiator Clean with compressed air if necessary Check the coolant level Add some if necessary Check the o...

Страница 59: ...ce if worn or defective Make sure the hoses don t touch any moving parts Replace hydraulic filters and breather the oil must be warm Monthly Inspect all hydraulic and electrical components for damaged or worn parts Hydraulic System Change hydraulic oil and clean the inside of the tank and strainers Use filtering unit to fill the tank 10 microns filters Yearly Clean accumulated material from finger...

Страница 60: ...anged Daily Check rollers for proper functioning Change if necessary Weekly Check the condition of all hydraulic motors Grease bearings if necessary Make sure the grease fitting is clean before doing this operation Do not over grease the bearings 1 grease gun shot Grease pins and pivots Monthly Inspect all mechanical parts for defects or wear Conveyors Check the normal wear and tear of the belts C...

Страница 61: ... always replace them by the same grade Refer to the following tables 5 5 1 Bolts and Nuts Tables Imperial System Diameter inches Thread Grade Min tightening torque Max tightening torque Unit of measurement 1 UNF 5 705 750 ft lb 1 UNC 5 645 685 ft lb 0 875 UNF 5 475 505 ft lb 0 875 UNC 5 430 455 ft lb 0 75 UNF 5 300 315 ft lb 0 75 UNC 5 270 285 ft lb 0 625 UNF 5 170 180 ft lb 0 625 UNC 5 175 190 ft...

Страница 62: ...8 49 53 ft lb 0 375 UNC 8 43 46 ft lb 0 3125 UNF 8 325 350 in lb 0 3125 UNC 8 295 315 in lb 0 25 UNF 8 165 175 in lb 0 25 UNC 8 140 150 in lb 5 5 2 Bolts and Nuts Tables SI Units Diameter inches Thread Grade Min tightening torque Max tightening torque Unit of measurement 1 UNF 5 956 1017 Nm 1 UNC 5 875 929 Nm 0 875 UNF 5 644 685 Nm 0 875 UNC 5 583 617 Nm 0 75 UNF 5 407 427 Nm 0 75 UNC 5 366 386 Nm...

Страница 63: ...ement 1 UNF 8 1349 1437 Nm 1 UNC 8 1234 1315 Nm 0 875 UNF 8 909 963 Nm 0 875 UNC 8 827 875 Nm 0 75 UNF 8 570 603 Nm 0 75 UNC 8 510 542 Nm 0 625 UNF 8 325 346 Nm 0 625 UNC 8 339 359 Nm 0 5 UNF 8 163 176 Nm 0 5 UNC 8 142 156 Nm 0 375 UNF 8 66 72 Nm 0 375 UNC 8 58 62 Nm 0 3125 UNF 8 37 40 Nm 0 3125 UNC 8 33 36 Nm 0 25 UNF 8 19 20 Nm 0 25 UNC 8 16 17 Nm ...

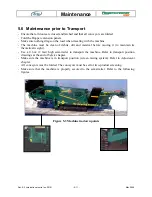
Страница 64: ...ris dirt and material before moving it to maintain its theoretical weight Use a 0 6 m 2 feet high semi trailer to transport the machine Refer to transport position drawings at the end of Safety chapter Make sure the machine is in transport position screen raising system Refer to Adjustment chapter All conveyors must be folded The conveyors must be set for two product screening Make sure that the m...

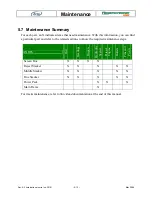
Страница 65: ... a particular part and refer to the related sections to know the required maintenance steps PARTS Belt Bearings Fingers Hydraulic System Diesel Engine Rollers Pins and Pivots Screen Box X X X X Reject Stacker X X X X X Middle Stacker X X X X X Fine Stacker X X X X X Power Pack X X X Main Frame X For tracks maintenance refer to Strickland documentation at the end of this manual ...

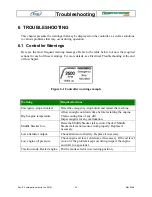
Страница 66: ...ing Required actions Emergency stop activated Reset the emergency stop button and restart the machine High engine temperature Allow enough cool down time before restarting the engine Clean cooling fins of any dirt Inspect engine for any malfunction Middle Stacker low Raise the Middle Stacker tail section Check if Middle Stacker tail section sensor work properly Replace if necessary Low alternator ...

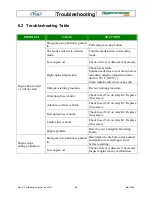
Страница 67: ...mproper starting procedure Review starting procedure Glow plug fuse is burnt Check fuse 15A on relay K4 Replace if necessary Advance coil fuse is burnt Check fuse 15A on relay K3 Replace if necessary Fuel pump fuse is burnt Check fuse 15A on relay K2 Replace if necessary Control fuse is burnt Check fuse 15A on relay K1 Replace if necessary Engine hard to start or will not start Engine problem Refe...

Страница 68: ...tarting procedure Activating levers not charged with hydraulic oil Push down the lever H on Power Pack before activating levers Fine Reject and Middle Stackers and Screen Box will not move Hydraulic leakage or ruptured hose Tighten the fittings or replace the hydraulic hose Engine is not running Review starting procedure The hydraulic flow control is closed Turn the flow control next to the contro...

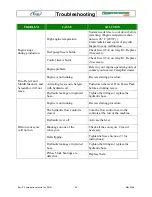
Страница 69: ... or down the decks to slow down or speed up material see Section 4 1 1 Fingers Adjustments Add or remove fingers to change the opening Set the angle of the fingers The shaft is unbalanced Clean the Screen Box and refer to Adjustment chapter Screen Box is bumping the Hopper Dampers may be worn Replace dampers Skirting may be displaced Check skirting and replace it if necessary see skirting under an...

Страница 70: ...achine over and remain within the required range for proper radio signal between the remote and the machine max 90 m 300 feet The engine RPM is too low Raise engine RPM to 2 400 The machine does not follow a straight path The hydraulic oil is cold Let the machine work for a while before moving it The fuse is burnt Check alarm fuse 15A on relay K8 Replace if necessary The warning system or other de...

Страница 71: ...UTION Hydraulic cooler is clogged with dirt Clean cooler of any dirt Hydraulic oil runs hot 70 C 158 F and over Hydraulic cooler fans are not working Check fan fuses 20A on relay K5 and 15A on relay K6 Replace fuses if necessary See also Belt conveyor troubleshooting on the next pages ...

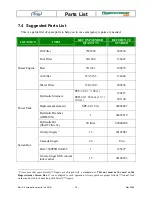
Страница 72: ...o make the ordering easier and faster 2 Complete your mailing address for invoicing purposes on the order form and complete your shipping address only if it s different from the mailing address 3 Indicate the type of machine and its serial number see the serial number plate on the side of the machine 4 Write the part number a short description and the required quantity 5 Send us a copy by fax We w...

Страница 73: ......

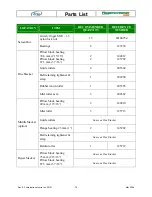
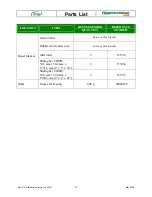
Страница 74: ... 1 100 1 SEH 20 1 32 mm 1 100 1 124213 201190 Replacement element SPE 60 10 1 24204847 Hydraulic Breather GBB 10N 1 24203919 Power Pack Hydraulic Oil Shell Tellus 32 20 litres 42000208 Grizzly fingers1 15 24107081 Cascade fingers 24 Erin Belt 3500PTH14M 65 1 125697 Screen Box Grizzly finger M20 conical lock washer 15 24104953 1 Please note that spare Grizzly fingers are shipped with a standard nut...

Страница 75: ...ide rollers 4 205384 Belt retaining tightener strap 1 202260 Rubber return roller 1 205385 Fine Stacker Idler roller asm 3 204382 Pillow block bearing 49 mm 1 15 16 2 144810 Idler roller 3 125713 Guide rollers Same as Fine Stacker Flange bearing 25 mm 1 2 145282 Belt retaining tightener strap Same as Fine Stacker Middle Stacker option Return roller 1 125712 Same as Fine Stacker Reject Stacker Pill...

Страница 76: ...ENCE NUMBER Guide rollers Same as Fine Stacker Rubber return roller asm Same as Fine Stacker Idler roller 2 125714 Sliding bar UHMW 50 8 mm x 50 8 mm x 1371 6 mm 2 x 2 x 54 2 153634 Reject Stacker Sliding bar UHMW 50 8 mm x 50 8 mm x 1066 8 mm 2 x 2 x 42 2 125719 Other Grease for bearing 400 g 42000219 ...

Страница 77: ...Parts List Rev 0 3 international serial no 3010 7 5 May 2006 7 5 Mechanical Parts See following pages ...

Страница 78: ...on Drawing number 1 Screen Box FT26TV000C 2 Reject Stacker SAB10A0000A 0 3 Power Pack FT26PP000C 4 Main Frame FT26SP000C 5 Fine Stacker FT26CF000C 6 Exhaust System SAB40A0000A 0 7 Catwalk right side SAB20A0000A 0 8 Catwalk left side SAB20A0000M 0 Refer to Erin Service Department Serial number 3010 May 2006 ...

Страница 79: ......

Страница 80: ... 16 shaft SAB10A0701P 0 2 14 Dowell pin 203016 4 15 Coupling guard SAB10A0401P 0 2 16 Motor base SAB10A0410A 0 2 17 Hydraulic motor OMV 500 124320 2 18 Belt beater SAB10A0510A 0 1 19 Belt beater support SAB10A550A 0 1 20 Flange bearing 145282 2 21 Plastic support 1372mm 54 SAB10A3600A 0 6 22 Anti nip guard SAB10A0602P 0 1 23 Return roll rubber 127 mm 5 roll dia 1524 mm 60 belt 205385 1 24 V plow r...

Страница 81: ......

Страница 82: ...1 60 204382 11 13 Rubber skirting FT26CF006P 206125 2 14 Rubber skirting FT26CF004P 206126 2 15 Rubber skirting FT26SF003P 206175 1 16 Tail pulley shaft FC01CF171N2 62 mm 2 7 16 x 1 65 m 65 driven roll 204599 1 17 Tail pulley 305 mm 12 dia x 1600 mm 63 lg 62 mm 2 15 16 shaft XTH25 125716 1 18 Pillow block bearing 75 mm 2 15 16 dia 144812 2 19 V plow rubber scraper PECH62102N 201974 1 20 V plow rub...

Страница 83: ......

Страница 84: ...m FT26IR000A 206135 1 8 Retaining pin DA5050 26 Reject raising system 200288 2 9 Bottom pin FT26IR060A 206137 2 10 Hydraulic cylinder for reject stacker Cusson 63 5mm x 660mm 2 1 2 x 26 24205261 2 11 Track assembly FT26SP700A 1 12 Bottom pin FT26SP030A 206140 2 13 Retaining pin for screen box FT26IF300A 206132 2 14 Hydraulic cylinder for fine stacker 101mm x 1320mm 4 x 52 126061 2 15 Screen Box cy...

Страница 85: ......

Страница 86: ...em 2 FT26GV100A 206155 1 3 Mesh system 3 FT26GV100A 206156 1 4 Mesh system 4 FT26GV100A 206157 1 5 Mesh system 5 FT26GV100A 206158 1 6 Mesh screen 1638 mm 64 1 2 IH 1117 mm 44 wide E 6 both edges type 3 5 7 Screen mesh support rubber 1640 mm 64 562 FT26GV103N 206159 10 8 Mesh tensioner FT26GV152P 206160 5 9 Side shim FT26GV104P 206162 10 Refer to Erin Service Department Serial number 3010 May 2006...

Страница 87: ......

Страница 88: ...ystem housing FC01RO001P2 FT26RO001P 206084 1 17 Flange plate FT26RO002P 206085 2 18 Excentric bushing FT26AR003P 206086 1 19 Screen Box bearing 22334CAME4C4U15 VS 127274 2 20 Inner labyrinth seal FT26RO004P 206087 2 21 Adjustment counter weight FT26AR102P 206088 2 22 Driven pulley tapered hub 100 mm 3 15 16 shaft type M 24102890 1 23 Driven pulley 168 PTH14 65M Type F 125694 1 24 Hydraulic motor ...

Страница 89: ...eft nut 203124 1 35 Bender arm retaining pin FT26MO050A 206096 1 36 Belt 3500PTH14M 65 125697 1 37 Hopper door motor side FT26SV030A 206098 1 38 Side plate extensions motor side FT26BV080A 206115 1 39 Anti vibration rubber units AB 50 2 24109279 16 40 Foldable side plate extension FT26SV600A 206183 1 Not shown on drawing Refer to Erin Service Department Serial number 3010 May 2006 ...

Страница 90: ......

Страница 91: ... cap 133758 1 18 Flexible intake hose 127 mm 5 dia x 1336 mm 52 1 2 with turbo engine 206167 1 19 Filter unit assembly SP60 NAGN1 24205202 1 20 Hydraulic filter part of item 24205202 24204847 3 21 Main door SAB40A1000A 1 22 Main door handle assembly SAB40A1300A 0 1 23 Front left panel FT26PP050A 206169 2 24 Left door handle assembly 206173 1 25 Left door FT26PP100A 206173 1 26 Ball valve 1 1 2 242...

Страница 92: ...1 S N 24106712 4 36 Right door FT26PP100M 143769 1 37 Right door handle assembly 206173 1 38 Front right panel FT26PP040A 143765 1 39 Filter unit assembly SP120 NAGN1 24204922 1 Not shown on drawing Serial number 3010 May 2006 ...

Страница 93: ......

Страница 94: ...Parts List Rev 0 3 international serial no 3010 7 6 May 2006 7 6 Electrical Parts See following pages ...

Страница 95: ...relay PRAN 205336 2 Display module 3801 11 PRAN 143103 1 Logic module 3172 PRAN 205335 1 Grote or Velvac buzzer beeping when moving machine 697112 112 dB 24504628 2 Diode 1N4007 24501744 2 Diode 41893 RCP 6 AMP 24504766 1 Control panel inside plate 24504786 1 Control panel box 24504785 1 Control panel locking handle 24504784 1 Battery box 201038 1 Traction alarm 204774 1 Battery disconnect switch ...

Страница 96: ......

Страница 97: ...Parts List Rev 0 3 international serial no 3010 7 7 May 2006 7 7 Hydraulic Parts See following pages ...

Страница 98: ... traction valve 125692 2 18 Check valve CV 08P 65 201194 2 19 Hydraulic gauge for filter 24200475 2 20 Hydraulic breather GBB 10 N 24203919 1 21 Hydraulic tank end cap 24200442 1 22 Hydraulic motor OMV500 Fine Stacker 124320 2 23 Check valve CV 08 S 05 124321 1 24 Valve hyd SD16 Fine Stacker 128046 1 25 Valve hyd SD11 Reject Stacker 125690 1 26 Flow control Danfoss Reject Stacker 201708 1 27 Ckeck...

Страница 99: ...ulic valve 505 1 P Middle Stacker 128079 1 41 Relief valve RV 4 Middle Stacker 127191 1 42 Ckeck valve LT 50 OW with hole 200243 2 43 Hydraulic tank end cap adapter 24204694 1 44 Hydraulic thermometer 135777 1 Not shown on the diagram Refer to the Erin service departement Serial number 3010 May 2006 ...

Страница 100: ......

Страница 101: ...06 7 8 Manufacturers Specifications Included in that section or supplied with the machine Caterpillar engine parts manual Caterpillar engine operation and maintenance manual Remote control manual Recommended lubricants specifications Trackline Operation Manual ...

Страница 102: ......

Страница 103: ......

Страница 104: ......

Страница 105: ......

Страница 106: ......

Страница 107: ......

Страница 108: ......

Страница 109: ......

Страница 110: ......

Страница 111: ......

Страница 112: ......

Страница 113: ......

Страница 114: ......

Страница 115: ......

Страница 116: ......

Страница 117: ......

Страница 118: ......

Страница 119: ......

Страница 120: ......

Страница 121: ...cation covers Track Frames of the following Types VZ2134P Identification numbers 01 2003 and Upwards I N D E X Page General Description 1 Pre Operation Checks 2 Lubrication 2 Maintenance Gear Box 2 Track adjustment 2 Lubrication chart 8 Warranty Statement 9 ...

Страница 122: ...e sprocket is bolted to the gearbox 3 Bottom Rollers A quantity of rollers are attached to the under side of each frame The entire weight of the machine is carried on these rollers 4 Front Idler Mounted at the opposite end of the frame to the sprocket the idler slides on guides The track is adjusted by a hydraulic cylinder attached to the idler arrangement Between the idler and the track adjusting...

Страница 123: ... Gearboxes are shipped from the factory WITHOUT lubricant It is essential that the correct grade of oil is used to fill the gearboxes before the machine is used for the first time See Maintenance for method of filling and draining These Track Frames are fitted with Transmital Bonfiglioli gearboxes Please use the appropriate lubricant see page 8 2 TRACK ADJUSTMENT The track adjustment is maintained...

Страница 124: ...tension the track too tightly as this places unacceptable loads on the gearbox bearings and idler bearings It will lead to accelerated wear and premature failures The adjustment for the track is accessed via an inspection cover on the side of the frame fig 1 Remove the cover using a 6 mm Allen Key The adjustment is carried out as follows To release the track tension Slacken the grease fitting on t...

Страница 125: ...rect adjustment When the track droop appears to be correct move the machine backwards and forwards and recheck the droop Add more grease if required Replace the inspection cover when the correct adjustment has been obtained 2 GEARBOX See Lubrication page 8 for the correct grade of oil to use Cleanliness is absolutely essential Use only clean oil in clean containers Gearbox life will be dramaticall...

Страница 126: ...king hours Method of Checking and Filling See lubrication chart for correct grade of oil page 8 Move the machine on level ground until the filler plugs are in the positions shown in fig 2 Clean the area around the plugs to remove any loose debris Remove both plugs and fill through the upper plug hole until oil runs from the level plug hole Wait for a few minutes until the any trapped air has escap...

Страница 127: ...xes Oil Change Periods The oil should be drained from the gearboxes after the first 200 hours of use and re filled with the correct lubricant see lubrication chart page 11 Following this initial oil change the oil should then be replaced after 2000 hours of use or at least once per year 3 LEAKAGE Check daily for any signs of oil leakage particularly front idler seals roller seals and gearbox If an...

Страница 128: ... BOLTS It is the responsibility of the operator to check the machine on a daily basis for any loose bolts or signs of undue wear In the event that any bolts are found to be loose they should be re tightened to the following torque Bottom Roller Bolts 350 ft lbs Sprocket Mounting Bolts 350 ft lbs Gearbox Mounting Bolts 430 ft lbs Motion Valve if fitted 33 ft lbs Track Shoes 120 ft lbs plus 1 3 turn...

Страница 129: ...or API GL5 Grade 80W 90 Examples of oil to these specification are Texaco Geartex EP B 80W 90 Century Oils BOA 80W 90 All leading lubricating oil suppliers offer equivalents Track Adjustment A good quality All Purpose grease should be used e g Texaco EP2 All Purpose Grease All leading lubricating oil suppliers offer equivalents ...

Страница 130: ...machine commissioning date whichever be the sooner The Company shall in no circumstances be liable for damages of any kind whether direct or consequential including but not limited to loss of profit expenditure incurred or delay in the execution of any work being carried out by or for the customer arising out of or in connection with the manufacture or servicing or failure to perform the servicing...

Страница 131: ...7C 13 3 B 31 C 142 H6 HU VS MH HYDROMATIK A2FE 125 61W PZL100 MT713C033 23 06 2006 ...

Страница 132: ...5 2004 Da matr From serial nbr A matricola To serial nbr Lista ricambi n Spare part list No 1 63900243B 7 13 C 3 B 31 C 142 H6 HU VS Rev 0 RAPPORTO TOTALE TOTAL RATIO 1 142 CODICE DI ORDINAZIONE PRODOTTO PRODUCT ORDERING CODE 2T263900243B COPPIA FRENANTE BRAKING TORQUE 63 daNm PRED MOTORE MOTOR CONNECTION HYDROMATIK A2FE 107 125 DIN 5480 z18 40x2 ...

Страница 133: ...OLLA DISC PUSHING POUSSE RESSORT FEDERDRUCKSCH 17 6632590780 1 MOZZO FLANGIATO HUB MOYEU NABE 18 715303026 1 O RING O RING O RING O RING 2 62x12 37 19 6633031111 1 ALBERO FRENO BRAKE SHAFT ARBRE FREIN BREMSEWELLE 20 718299031A 1 ANELLO ELASTICO CIRCLIP ANNEAU ELASTIQUE SICHERUNGSRING UNI 7437 36 21 722369038 1 AN ANTIESTRUSIONE BACKUP RING ANN SPIRAL SPIRALRING W 4 65x172 16 PK 22 722369039 1 AN A...

Страница 134: ...ROTARY GROUP 3 R902042335 1 ST HOUSING 4 R909419211 1 ST PORT PLATE 5 R909084163 1 ST CYLINDER PIN 6 R909154986 1 ST D O RING 7 R909083087 6 ST SOCKET HEAD SCREW 19 R902014486 1 ST L LOCKING SCREW 98 R902002219 1 ST L DICHTSATZ KOMPL A2FM O 107 125 61 Page 1 Date 03 08 2004 L Assembly group D Sealing element Status of version 3 2004 Brueninghaus Hydromatik GmbH Werk Elchingen Glockeraustraße 2 D 8...

Страница 135: ...ton Units Drawing no R909702540 Spare parts list Part No R909420292 Designation A2FE125 61W VZL100 Page 2 Date 03 08 2004 L Assembly group D Sealing element Status of version 3 2004 Brueninghaus Hydromatik GmbH Werk Elchingen Glockeraustraße 2 D 89275 Elchingen ...

Страница 136: ...TARY GROUP HYDR SECTION 2 R902030596 1 ST L DRIVE SHAFT WITH BEARING ASSY 4 R909409482 1 ST D COVER 12 R909152143 1 ST RETAINING RING 14 R909831178 1 ST D SHAFT SEAL RING 15 R909086636 1 ST D O RING 17 R909154359 2 ST SHIM 18 R909154360 1 ST SHIM Page 3 Date 03 08 2004 L Assembly group D Sealing element Status of version 3 2004 Brueninghaus Hydromatik GmbH Werk Elchingen Glockeraustraße 2 D 89275 ...

Страница 137: ...Piston Units Drawing no R902028914 Spare parts list Part No R902031615 Designation ROTARY GROUP Page 4 Date 03 08 2004 L Assembly group D Sealing element Status of version 3 2004 Brueninghaus Hydromatik GmbH Werk Elchingen Glockeraustraße 2 D 89275 Elchingen ...

Страница 138: ... 7 ST L PISTON WITH PISTON RINGS 5 R909409612 1 ST WASHER 6 R902027329 1 ST ADJUSTMENT SHIM 6 R902027330 1 ST ADJUSTMENT SHIM 6 R902027331 1 ST ADJUSTMENT SHIM 6 R902027332 1 ST ADJUSTMENT SHIM 6 R902027333 1 ST ADJUSTMENT SHIM 7 R902027353 1 ST PRESSURE SPRING 11 R909444064 1 ST RETAINING PLATE 12 R909831108 7 ST PAN HEAD SCREW W TORX Page 5 Date 03 08 2004 L Assembly group D Sealing element Stat...

Страница 139: ... Units Drawing no R902027408 Spare parts list Part No R902027407 Designation ROTARY GROUP HYDR SECTION Page 6 Date 03 08 2004 L Assembly group D Sealing element Status of version 3 2004 Brueninghaus Hydromatik GmbH Werk Elchingen Glockeraustraße 2 D 89275 Elchingen ...

Страница 140: ...art No R902031679 Designation PISTON WITH PISTON RINGS Pos Designation Part No Quantity 1 R902028625 1 ST PISTON 2 R909831892 2 ST STEEL SEALING RING Page 7 Date 03 08 2004 L Assembly group D Sealing element Status of version 3 2004 Brueninghaus Hydromatik GmbH Werk Elchingen Glockeraustraße 2 D 89275 Elchingen ...

Страница 141: ... Units Drawing no R902021888 Spare parts list Part No R902031679 Designation PISTON WITH PISTON RINGS Page 8 Date 03 08 2004 L Assembly group D Sealing element Status of version 3 2004 Brueninghaus Hydromatik GmbH Werk Elchingen Glockeraustraße 2 D 89275 Elchingen ...

Страница 142: ...rt No Quantity 2 R902028923 1 ST DRIVE SHAFT 3 R909430091 1 ST BEARING RING 6 R902027403 1 ST L BACK UP PLATE 7 R909083365 1 ST RETAINING RING 10 R909154382 1 ST TAPERED ROLLER BEARING 11 R909154293 1 ST TAPERED ROLLER BEARING Page 9 Date 03 08 2004 L Assembly group D Sealing element Status of version 3 2004 Brueninghaus Hydromatik GmbH Werk Elchingen Glockeraustraße 2 D 89275 Elchingen ...

Страница 143: ...its Drawing no R902027405 Spare parts list Part No R902030596 Designation DRIVE SHAFT WITH BEARING ASSY Page 10 Date 03 08 2004 L Assembly group D Sealing element Status of version 3 2004 Brueninghaus Hydromatik GmbH Werk Elchingen Glockeraustraße 2 D 89275 Elchingen ...

Страница 144: ...ATE 4 R909921491 1 ST BACK UP PLATE 5 R909921490 1 ST BACK UP PLATE 6 R909921489 1 ST BACK UP PLATE 7 R909921488 1 ST BACK UP PLATE 8 R902027334 1 ST BACK UP PLATE 9 R902027335 1 ST BACK UP PLATE 10 R902027336 1 ST BACK UP PLATE 11 R902027337 1 ST BACK UP PLATE 12 R909085045 1 ST BACK UP PLATE Page 11 Date 03 08 2004 L Assembly group D Sealing element Status of version 3 2004 Brueninghaus Hydromat...

Страница 145: ... R909153815 1 ST D LOCKING SCREW 3 R909156654 1 ST D LOCKING SCREW 4 R909151694 1 ST D LOCKING SCREW 6 R909157618 1 ST D LOCKING SCREW 7 R909153338 1 ST D LOCKING SCREW 8 R909157038 1 ST D LOCKING SCREW 20 R909153339 1 ST D LOCKING SCREW Page 12 Date 03 08 2004 L Assembly group D Sealing element Status of version 3 2004 Brueninghaus Hydromatik GmbH Werk Elchingen Glockeraustraße 2 D 89275 Elchinge...

Страница 146: ... No Quantity 1 R909831178 1 ST D SHAFT SEAL RING 2 R909086636 1 ST D O RING 3 R909154986 1 ST D O RING 4 R909087891 2 ST D O RING 5 R909087938 1 ST D O RING 6 R909152688 2 ST D O RING 7 R909086765 1 ST D O RING Page 13 Date 03 08 2004 L Assembly group D Sealing element Status of version 3 2004 Brueninghaus Hydromatik GmbH Werk Elchingen Glockeraustraße 2 D 89275 Elchingen ...

Страница 147: ... VRFMC2037 S MOTION CONTROL VALVE 2 5B M14120SCCB VALVE MOUNTING BOLT 12 5C M14HDSW VALVE MOUNTING SPRING WASHER 12 7 Z2015 SPROCKET 2 7A M2060HTB SPROCKET MOUNTING BOLT 48 7B M20HDSW SPROCKET MOUNTING WASHER 48 8 VCR2105 56 500 TRACK GROUP COMPLETE 8A VCR1739 56 LINK ASSEMBLY 56 LINK 2 8B VCR1620 MASTER PIN 2 8C VCR3226 500 TRACK SHOE 500MM WIDE 112 8D VIN2760 TRACK SHOE BOLT 448 8E VFT888 TRACK ...

Отзывы: