background image

The ‘Special functions’ menu now appears.

Ž

Press

YES

to enter the ‘Special functions’ menu.



Press the navigation key until ‘Send Id’ appears.



Press

YES

to make the call.

Keeping Your Phone Book Up to Date

As the people you know change jobs, move, marry etc.,
you might want to change the names and numbers in
your Phone Book, or perhaps delete some of the
entries.

To Edit an Entry in the Phone Book

There are two ways of finding the Phone Book entry you
wish to edit. You can use either the storage position or
the name.

To edit the entry using the position:

Œ

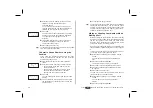
From the ‘Phone book’ menu, select ‘Edit’.



Enter the position number for the entry you
wish to edit.
• For a position in the card memory, simply

enter the number.

• For a position in the phone memory, press

and hold the # key until the ‘¤’ character
appears and then enter the number.

Ž

To select the entry, press

YES

.

You will now see:
• the name (displayed on the middle row),
• the phone number (displayed on the bottom

row),

• the storage position (displayed on the top

row).



To select the row you wish to edit, press the
navigation key

RIGHT

.

You will see the cursor on the right of the row
you selected.



Edit the row by using:
• the

CLR

key to erase,

• the numeric keys to enter letters or digits,
• the navigation key to move the cursor left (or

right when it is positioned in a row).

‘

If needed, press the navigation key

RIGHT

to

select another row and continue editing.

’

To save the changes, press

YES

.

To edit the entry using the name:

Œ

From the ‘Phone book’ menu, select ‘Edit’.



Press the navigation key

LEFT

.

The display now shows ‘Find name’ in the
middle row.

Ž

Enter the name for the entry you wish to edit,
using the numeric keys. The more letters you
enter, the better the match.

To select the entry, press

YES

.



You can now continue from number 4 above.

Erasing a Phone Number

To erase a phone number from the Phone Book:

Œ

Recall the number using ‘Name recall’ or ‘Posi-
tion recall’.



Press and hold

CLR

. The question ‘Erase?’

appears.

Ž

To erase the number, press

YES

.

Note!

You can also select ‘Erase’ from the ‘Phone book’ menu
and then enter the storage position.

If you want to erase all numbers from the phone
memory (not possible for the card memory), you can do
this as follows:

Œ

From the ‘Phone book’ menu, select ‘Erase all
from phone’.



To erase all phone numbers from the phone
memory, press

YES

.

Press

to enter the menu system. See inside the cover.

19

EDIT

L Find name R

Name:

Emma_

EDIT

7

Emma Limetree_

+464612345

EDIT

L

Find pos

R

Position:

7

Содержание SH888

Страница 1: ...Ericsson SH888 GSM 900 1800 Dual Band Mobile Phone User s Guide Contents The Menu System The Phone Keypad Display Congratulations Index Click below ...

Страница 2: ...e Alarm The Cal culator Guidelines for Safe and Efficient Use 59 Warranty Conditions 62 Contents General Information 2 Operators Subscription GSM 900 1800 Dual Band SIM PIN Preparing Your Phone for Use 3 The SIM Card The Battery Turning On the Phone 7 When No Network Name Is Displayed To Turn Off the Phone Initial Set tings Making and Receiving Calls 9 Emergency Calls Making Calls Receiving a Call...

Страница 3: ...ck all Barring Call Waiting Unlock card Change PIN code Change PIN2 code Phone lock Phone lock Change code Call cards security Fixed dial Set alarm Set clock Set date Clock mode Date mode Select net Search mode Edit list New search Last call Tot calls MENU Next L call type R MENU L Networks R MENU L Access R MENU Activate L IR port R MENU Speech L then Fax R MENU L Info R Speech Speech FAX FAX Spe...

Страница 4: ... to enter the character enter a pause character p if held down HASH used to enter the characters or recall a phone number from the Phone Book VOLUME KEYS on the side of the phone used to change the earpiece volume during a call reject an incoming call if pressed twice Indicators in the Display Signal strength The more bars that are shown the higher the signal strength Battery meter The fuller the ...

Страница 5: ...he Guidelines for Safe and Efficient Use Please note that some of the functions and services de scribed in this user s guide are depending on your choice of network operator Should you need additional information on how to use them contact your operator Mobile Internet When you are on the move and in need of communica tion and information Mobile Internet is the answer Mobile Internet is a service ...

Страница 6: ...ching between the two systems is done auto matically and seamlessly which means that you can use your phone without ever having to consider which system is best at the time This is taken care of by the networks However you should note that the functions offered and the network coverage differ depending on your choice of operator and or subscription SIM PIN You will obtain a SIM Subscriber Identity...

Страница 7: ...rs deliver credit card sized SIM cards which have a perforated smaller card that you can take out easily Before you can use your phone you must insert the SIM card into the phone To Insert the SIM Card To insert the SIM card remove the battery if attached and follow these steps Release the SIM card holder by sliding it in the direction of the arrow Open the holder Slide the SIM card into the holde...

Страница 8: ...he Phone Place the battery on the back of the phone Press the battery upwards and against the phone until it snaps into place To Remove the Battery Make sure that the phone is turned off before removing the battery see next chapter Then Press the catch on the bottom of the battery Lift the battery up and away from the phone To Charge the Battery Make sure that the battery is attached to the phone ...

Страница 9: ...e battery is fully charged the battery meter in the display will show full and the indicator on top of the phone will show a steady green light Note It is possible to use the phone while the battery is being charged This will however increase the charging time To Disconnect the Charger l Twist the plug con nected to the phone upwards and pull it out When to Charge the Battery The nickel metal hydr...

Страница 10: ...t turned on the low battery alarm will be repeated several times and finally the phone will turn itself off when the battery is no longer able to power it satisfactorily It might be possible to turn the phone on again but you will not be able to make or re ceive any calls You should charge the battery or re place it with a charged one 6 Press to enter the menu system See inside the cover ...

Страница 11: ...network but you are not allowed to use it However in an emergency you can call the international emergency number 112 See chapter Making and Receiving Calls If the message No network is displayed there is no network within range or the received signal is too weak You have to move to obtain a sufficiently strong signal To Turn Off the Phone l In standby mode press and hold the NO ON OFF key until t...

Страница 12: ... Personalizing Your Phone To Set the Ring Signal Level Press the navigation key RIGHT The text Ring level and a bar representing the ring signal level appears in the display Press YES to enter the Ring level menu Use the navigation key to set the ring signal level Pressing RIGHT increases the volume Pressing LEFT decreases the volume The phone rings once with the actual setting as you press the na...

Страница 13: ...t the call See Redialling a Number below If the number is busy you can redial it auto matically See Redialling a Number below When you want to end the call press NO The Call Time meter shows the duration of the call for three seconds Tip It is possible to check the duration of the call later on See Other Useful Features International calls Press and hold the 0 key until is displayed The will autom...

Страница 14: ...ill hear a ring signal If you do not want to retry press NO 10 Press to enter the menu system See inside the cover Receiving a Call When you receive a call the phone rings and the indica tor light on top of the phone blinks green rapidly The display shows Answer If your subscription includes the Calling Line Identifica tion service and the caller s network sends the number you will see the caller ...

Страница 15: ...the Calling Line Identification service and the caller s network sends the number you can also find out who called To Find Out Who Called and When Press the navigation key to the LEFT repeatedly until the Mail menu appears Press YES to enter the Mail menu Press the navigation key repeatedly until the Missed calls function appears Press YES to enter the Missed calls function The last caller s numbe...

Страница 16: ...sh to call Press the navigation key RIGHT The Special functions menu now appears Press YES to enter the Special functions menu Press the navigation key repeatedly until Hide Id appears Press YES to make the call To Show Your Number for a Particular Call Enter the phone number you wish to call Press the navigation key RIGHT The Special functions menu now appears Press YES to enter the Special funct...

Страница 17: ... using the numeric keys When you end the call the number remains in the dis play You can now call the number by pressing YES or save it in the Phone Book see chapter The Phone Book Note If you press any numeric key while on the phone the person on the other end of the line will hear a tone To Send Tone Signals To use telephone banking services or control a phone answering machine you need to use c...

Страница 18: ...r RIGHT until you reach the desired menu or function Press YES to enter the menu or to select the function Press the navigation key to find the desired sub menu or to select a setting alternative Press YES to enter the submenu or to confirm the setting Note If you enter the menu system but do not press any keys in 60 seconds the phone will return to standby mode Tip Instead of pressing the navigat...

Страница 19: ...o this when you follow the in structions later on Phone Book Memories You can store your phone numbers in two different memories the card memory on the SIM card the phone memory Storing your numbers in the card memory allows you to use the numbers stored on the SIM card even when you change phones i e when you insert your SIM card into another phone On the other hand by storing your numbers in the...

Страница 20: ...gain To Check the First Characters If you enter more characters than can be seen in the dis play the first characters will be replaced by the l sym bol To check the first characters you have entered l press the navigation key LEFT Creating Your Personal Phone Book To Store a Phone Number From the Phone book menu select Store Enter a name to accompany the phone number Use the numeric keys as descri...

Страница 21: ...one signals also called DTMF tones or touch tones If you want to save the phone number in the Phone Book with the codes Follow the instructions on how to store a phone number until you enter the number After entering the phone number press and hold the key until the pause character p appears Enter the code If needed insert another pause another code and so on Continue following the instructions on...

Страница 22: ...o call the number press YES Tip You can also enter the position directly in the standby display and then press the key to recall the phone number Do not forget the before the position if the number is stored in the phone memory to get the character press and hold the key Hiding or Showing Your Number When Making a Call With most common subscriptions the caller s number is sent when a call is made ...

Страница 23: ...u selected Edit the row by using the CLR key to erase the numeric keys to enter letters or digits the navigation key to move the cursor left or right when it is positioned in a row If needed press the navigation key RIGHT to select another row and continue editing To save the changes press YES To edit the entry using the name From the Phone book menu select Edit Press the navigation key LEFT The d...

Страница 24: ...ct Copy Scroll to CardrPhone and press YES Enter the number of the first position in the card memory you wish to copy and press YES Enter the number of the first position in the phone memory you wish to copy to and press YES To start copying press YES The starting position in the card memory is dis played and the next empty position in the phone memory is suggested For every entry on the card from...

Страница 25: ...e Suite Note The Short Message Service may not be available in all networks Two Memories The Messages Memory If you do not want to read an incoming message at once it is automatically stored in the Messages memory in the phone This allows you to read it later on If there are any unread incoming messages in the messages memory a letter icon Mm will appear to the left at the bottom of the display Th...

Страница 26: ...l to the desired duration and press YES Changing Message Types The phone is prepared for sending other types of messages Your network operator s Service Centre may offer the facility to convert a text message into a format fax telex voice etc that suits the equipment that is going to receive the message Consult your operator for further information about the formats you can use To set the message ...

Страница 27: ... number or recall it from the phone book To access the Phone book menu press LEFT You now have two options To send the message now press YES To store the message for later use press NO The message is now stored in the messages memory If you decide to send the message later the message is labelled To Send instead of Sent when you access the message in the Read messages menu Note The same procedure ...

Страница 28: ...s in the message list Note You can press CLR anywhere within the menu that handles your message to erase it When Erase appears press YES Storing a Received Message All incoming messages are stored temporarily in the messages memory until the memory space is needed for other purposes such as storing new messages Even so sometimes you may receive an important message that you want to store more safe...

Страница 29: ...ndard messages are not erased when the messages memory becomes full you should store them in the SIM card memory To do this From the Mail menu select Read messages The messages saved in your Messages memory appear Scroll to the message you wish to store in the SIM card memory using the navigation key and press YES Press YES again Erase appears Press NO Store appears Press YES The message is now mo...

Страница 30: ...igured but if this is not the case please see your computer s user manual for more detailed information Secondly you need to install the Microsoft IrDA driver and the Ericsson SH 888 modem script on your computer These are found on the CD and or the diskettes that came with your phone Detailed instructions are found in the section Installing the Infrared Modem below For you to be able to use the a...

Страница 31: ...on process than provided by this User s Guide we suggest that you consult your PC supplier or your computer s manuals Installation Flowchart for Windows 95 We recommend that you use step 1 4 in the flowchart below as a checklist in order to assure that your com puter has been configured properly for a successful in stallation of the infrared modem The boxes in the flowchart apply to the sections w...

Страница 32: ...elect Control Panel Select the Add Remove Programs applet Select the Microsoft Infrared Support for Win dows version 1 0 Click the Add Remove button Click OK Go to Step 3 Install Infrared Support to continue the installation of the infrared modem Step 3 Install Infrared Support Insert the CD into your computer s CD drive or the diskette containing the Infrared support into the diskette drive If yo...

Страница 33: ...the infrared modem has been installed successfully go to Control Panel and select Modems Ericsson SH 888 should appear in the list under the General tab Installation Windows CE Make sure that you have Microsoft H PC Ex plorer or Windows CE Services installed on your laptop Also make sure that communication be tween your H PC and your PC is established Insert the CD into your PC s CD drive or inser...

Страница 34: ...commu nication application on your PC To Connect Using the RS232 Cable Using the RS232 cable provided is the most power effi cient way to to use your SH 888 together with a computer To enable use of the IrDA protocol using the RS232 cable Connect the cable according to the picture below Under the tab Options in the Infrared Monitor found in the Control Panel folder select infrared communication on...

Страница 35: ...port multi numbering the SH 888 will display the type of in coming call There are four possible types apart from speech calls Fax calls Data calls Speech then fax calls Fax then speech calls The display shows the type of call on the middle row To receive a fax or data call Connect your computer to the phone Answer the call from within the software appli cation if it does not answer automatically T...

Страница 36: ...ill be handled as a fax call If you select Data the next call will be handled as a data call Receive the call according to the instructions above Note The next call setting remains until you change it The current setting if not a speech call is shown on the middle row of the standby display see picture in the margin 32 Press to enter the menu system See inside the cover ERICSSON Speech Fax 16 44 ...

Страница 37: ... your computer Connect your mobile phone to the computer using the IR port or the RS232 cable do not for get to start the Infrared application in the Con trol Panel Installation from a Diskette Under Settings in the Start menu select Control Panel Select Add Remove programs and click the Install button Insert the first installation disk Follow the instructions given on the screen If a modem other ...

Страница 38: ...ngs in the Start menu select Control Panel Click Add Remove Programs Select Ericsson Mobile Office Suite from the list of applications Click Add Remove Follow the instructions given on the screen 34 Press to enter the menu system See inside the cover ...

Страница 39: ... press YES The phone is now set to Automatic search mode To return to standby mode press CLR Note The order of preference in which the phone selects a network is determined by a list of preferred networks on your SIM card which you can edit at any time Manual Search Mode The manual search mode means that when you turn on your phone it searches for its home network first and then for the network th...

Страница 40: ...works are stored on your SIM card If such a forbidden network is within range it will be omitted when the phone searches for a network automatic search mode If your home network and a forbidden network come to an agreement that allows you to use the forbidden net work you can select this network even though the message Forbidden is displayed List of Preferred Networks You can create a list that de...

Страница 41: ...Erasing a Network from the List From the Networks menu select Edit list Scroll to the network you wish to erase and press YES Scroll until Erase appears To delete the network from the list press YES Rearranging the List From the Networks menu select Edit list Scroll to the network you wish to move and press YES Move is displayed Press YES and enter the new position within the list Press to enter t...

Страница 42: ...ge Matching error appears this means you entered the new PIN incorrectly If the message Wrong PIN appears followed by Enter Old PIN you entered your old PIN incorrectly To Change Your PIN2 Depending on the network you use some services require that you enter a second PIN the PIN2 l Select Change PIN2 code from the Access menu Follow the same procedure as described in To Change Your PIN above To Lo...

Страница 43: ...ard or a different SIM card is inserted To Change the Security Code l From the Access menu select Phone lock Change code and follow the steps described in To Change Your PIN To Lock Unlock the Phone From the Access menu select Phone lock The current setting Full lock Autolock or Unlocked is shown in brackets Select the required setting Enter the security code and press YES Phone Lock is displayed ...

Страница 44: ...nt password and press YES Enter the new password and press YES Enter the new password a second time and press YES The message Please wait appears followed by a message that confirms that the password has been changed The Keypad Lock The Keypad Lock feature helps you to avoid accidental dialling which can happen if you keep your phone in your pocket You can choose between manual and automatic keylo...

Страница 45: ...n does not prohibit calls to the international emergency number 112 and the Service Centre of your network operator Net work services such as Call Divert and Call Barring cannot be used The maximum fixed numbers that can be stored depends on your SIM card To Activate Fixed Dialling From the Access menu select Fixed dial Enter the PIN2 and press YES Scroll to On using the navigation key and press Y...

Страница 46: ... are All calls On busy No reply and Unreachable depending on your operator Scroll to the divert option you want and press YES To select Activate press YES Enter the phone number to which you want your calls to be diverted including the area code and then press YES Note If you used the divert option earlier and then cancelled it the phone number to which the calls were diverted will be suggested Pr...

Страница 47: ...e message Please wait appears followed by infor mation about all call diverts i e whether they are activated or not Cancelling Call Diverts To Cancel a Certain Call Divert From the Divert menu scroll to the required call divert using the navigation key and press YES Scroll to Cancel To cancel the divert press YES The message Please wait appears followed by a message which informs you that the call...

Страница 48: ... Call Waiting press YES With the Get status option you can check whether the call waiting service is activated or not Receiving a Second Call If the Call Waiting function is activated you will hear a tone in the earpiece when a second call is received and the message Call wait will appear in the display To End Current Call and Accept Wait ing Call Press NO to end the current call The question Answ...

Страница 49: ...ler s network supports this function the caller will hear a busy tone Note If Divert On busy is activated the waiting call is diverted to the number you have specified To Make a Second Call While the first call is in progress clear the display by pressing CLR To put the current call on hold press YES The message 1 on hold is displayed Enter the number you wish to call or recall it from the phone b...

Страница 50: ...ve a private conversation with For example if you wish to talk to member number three press 3 Press YES To join the member to the conference call again l Press 3 and then YES To Release one of the Members in a Conference Call Press 1 Press the number of the member you want to release For example if you wish to release member number three press 3 To release the member press YES Making a Call while ...

Страница 51: ...th hands free equipment To select Answering Mode From the Settings menu select Answering mode Choose Any key or Auto using the navigation key To change the setting of the function you have chosen press YES To confirm your setting press YES again Other Handsfree Related Settings Apart from the settings mentioned above you can change the following settings when using handsfree equipment Ring level E...

Страница 52: ... volume settings when you use the phone as a handheld unit and when you use it with various handsfree equipment This means that if you set the earpiece volume when the phone is connected to handsfree equipment the volume setting when the phone is handheld is not affected and vice versa To Reset the Phone It is possible to reset all menu settings to default To do this From the Settings menu select ...

Страница 53: ...und You can choose whether to hear clicks tones or nothing silent when you press the keys From the Settings menu select Key sound Scroll to the desired key sound using the navigation key and press YES Note The only sound available for the side keys is the click sound Changing the Message Signal You can choose whether to hear clicks tones or nothing silent when you receive a text message SMS From t...

Страница 54: ... Pressing RIGHT increases the volume Pressing LEFT decreases the volume The phone will ring once with the actual setting as you press the navigation key except for the Off and Step settings To save the setting press YES Tip Use the side keys to change the ring level silently Time and Date The Clock menu lets you set the time and date It also lets you activate the alarm function The time is shown c...

Страница 55: ...t you want using the navigation key To select a date format press YES To set the date From the Clock menu select Set date Enter the year two digits Press YES Enter the month and day in the same way To confirm your setting press YES Press to enter the menu system See inside the cover 51 ...

Страница 56: ...ess YES To activate the Voice Mail function From the Mail menu select Set VoiceM Scroll to On using the navigation key and press YES Enter the number of your answering service To activate the function press YES To change the number of the answering service From the Mail menu select Set VoiceM Scroll to New number using the navigation key and press YES Enter the new number and press YES To Call the...

Страница 57: ...oing call The elapsed time of the last incoming call provided you have chosen the Time All option in the Call info function in the Settings menu To Check Total Call Time or Call Cost From the Info menu select Tot calls Press YES Depending on the settings in the Call info function in the Settings menu you can check The elapsed time of all outgoing calls The elapsed time of all incoming and outgoing...

Страница 58: ... voice lines with different phone numbers Line 1 and Line 2 may be assigned to your phone This is use ful if you for example want to have one number for your business calls and one for your private The ability to receive and send text messages SMS is only available on Line 1 The Two Line service also called Alternate Line Service ALS may not be available on all networks and may require a separate ...

Страница 59: ...git security code that you choose yourself The default code is 0000 In order to be able to make Calling card calls you have to activate this function Activating the Calling Card Feature From the Access menu select Call cards security and press YES Enter your security code and press YES The default code is 0000 Scroll to Call cards using the navigation key and press YES Scroll to On using the navig...

Страница 60: ...ion will not have to be repeated every time you wish to make a Calling Credit card call Making a Credit or Calling Card Call Enter the number you wish to dial or retrieve it from the Phone book To set up the call as a Credit Calling Card Call press and hold YES The access number to the calling card server is called and during the connecting phase you are prompted to send the called number the numb...

Страница 61: ...Scroll to Edit list using the navigation key and press YES The digits to the left indicate the position in the list You can scroll forwards and backwards through the list with the navigation key To insert a code scroll to the first empty location using the navigation key Press YES Enter the new code You only need to enter 40 for 040 since the phone adds the leading zero automatically To erase or r...

Страница 62: ...nutes Press YES Note If you choose the 12 hour format in the Clock mode function you can alternate between am and pm by pressing and To turn the alarm off Press any key to turn the alarm off when it sounds If you do not want the alarm to be repeated press YES To turn the alarm function off From the Clock menu select Set alarm Scroll to Off using the navigation key Press YES The Calculator The phon...

Страница 63: ...want to limit RF exposure even further you may choose to control the duration of your calls and operate your phone in the most power efficient manner Efficient Phone Operation How to use your phone for optimum performance with minimum power consumption Hold the phone as you would any other telephone While speaking directly into the mouthpiece angle the antenna in a direction up and over your shoul...

Страница 64: ...acing the phone over the pacemaker i e in your breast pocket When using the phone place it at your ear opposite the pacemaker If a minimum distance of 15 cm is kept between the phone and the pacemaker the risk of interference is limited Contact your cardi ologist for more information Aircraft Turn off your phone before boarding any aircraft Do not use it on the ground without crew permis sion To p...

Страница 65: ...r contains chemicals or particles such as grain dust or metal powders Do not transport or store flammable gas liquid or ex plosives in the compartment of your vehicle which con tains your phone and accessories Product Care Do not expose your mobile phone to moisture or extreme temperatures Do not use any other accessories than Ericsson originals Failure to do so may result in loss of per formance ...

Страница 66: ...in this event a similar product will be de livered Conditions The warranty will be granted only if the original warranty certificate issued to the purchaser by the dealer is presented and if the said warranty certificate stipulates the serial number of the purchased product and the date of purchase of the product Ericsson reserves the right to ref use warranty service if this information has been ...

Страница 67: ...anual without the prior written consent of Ericsson Repair or replacement under the terms of this warranty shall not give a right to an extension to or a new commencement of the period of warranty Repair or replacement under the terms of this warranty may be fulfilled with functionally equivalent reconditioned units Re placed faulty parts or components will become the property of Ericsson This war...

Страница 68: ...54 Price per Call Unit 53 Call Waiting Service 44 Activate Call Waiting Service 44 Cancel Call Waiting Service 44 Calling Line Identification CLI service 12 18 hide your phone number 12 18 show your phone number 12 18 Calls 9 Answer 10 Domestic 9 International 9 Making 9 Receiving 10 Rejecting 10 Capacity 2 Charger 4 Connect 4 Disconnect 5 Children 60 Clock 50 Conference Calls 45 Connecting Two Ca...

Страница 69: ...ng the Mobile Office Suite 34 Mute Microphone 13 ring signal 10 N Networks 35 Search 35 Select 35 O Operators 2 P PCN 2 Personal Identity Number PIN 2 Personal Unblocking Key PUK 2 Phone Book 15 Edit 19 Entering Characters 16 Ericsson Mobile Office Suite software 15 name recall 17 Phone Book Memories 15 position recall 18 Store a Phone Number 16 PIN 2 Change PIN 38 PIN2 2 Change PIN2 38 Potentiall...

Страница 70: ...38 Speech then Fax Calls 31 speed dialling 17 Subscriber Identity Module SIM 2 Subscription 2 T Text Messages 21 Changing Message Types 22 Enter Letters 22 Messages Memory 21 Read 25 Send 25 Setting the Phone for Text Messaging 22 SIM Card Memory 21 Store 24 Write 22 Tone Signals 13 touch tones 13 Turning Off the Phone 7 Turning On the Phone 7 Two Line Service 54 Selecting a Line 54 U Unanswered C...

Страница 71: ...ons AB 1998 Publication number EN LZT 126 1396 R2A Printed in Sweden The symbol on our products signifies that they have been certi fied according to the EMC directive 89 336 EEC the Telecommuni cations directive 91 263 EEC and the Low Voltage directive 73 23 EEC when applicable The products fulfil the requirements according to the following standards Cellular Phones and Accessories in Combination...

Отзывы: