QX1000 Manual II: Administrator's Guide
Administrator’s Menus
QX1000; (SW Version 5.3.x)
39
On the
Change Access Rights
page,
Grant Access
/
Deny
Access
functional buttons are used to grant or deny access to
certain GUI page(s) for the selected user.
When access to a certain GUI page is denied for a user, the
“You are not authorized to access this page!” warning message
will be displayed.
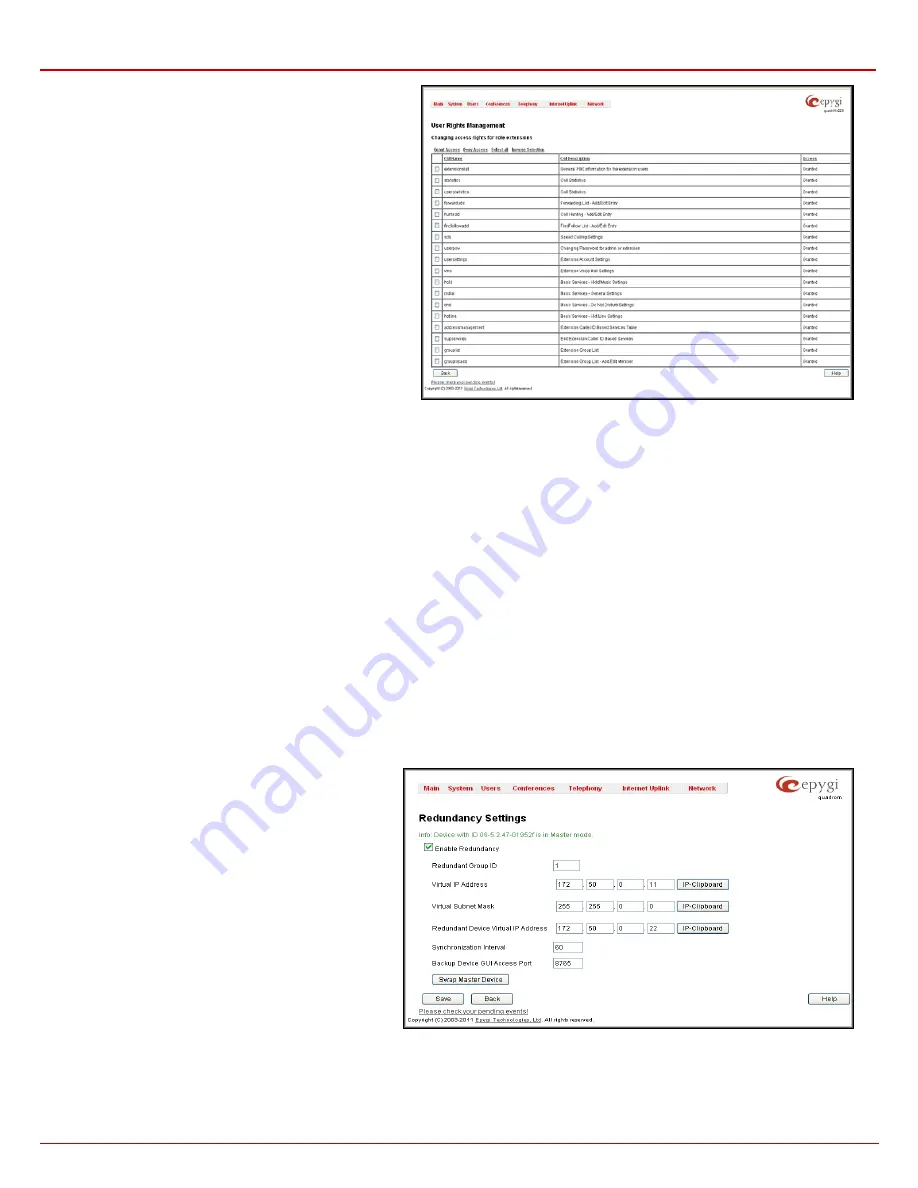
Fig. II-65: Edit Roles page at User Rights Management
Redundancy Settings
Redundancy feature is used to increase QX1000 device availability using second QX1000 as a backup unit. This requires two units running the same
firmware version and connected to each other through Ethernet or LAN ports, depending on the device model.
The idea of redundancy is to ensure uninterrupted functionality of the QX1000. The Redundancy Settings should be configured on both QX1000s.
One of the QX1000s is configured as a master, the second one as a backup unit.
Please Note:
To setup a redundant network, you should first startup the master device with all attached IP phones and other devices, make sure it
works normally and then startup the backup device.
If the master device becomes unavailable, which can be caused by power loss, reboot or network malconfiguration, the second QX1000 becomes
automatically available and starts to run as a master device. Depending on the configuration, the second QX1000 can remain master or go to the
backup mode once the first device becomes available again.
Attention:
During failover procedure all active calls will be disconnected and the system will be out of service during 2-5 minutes (depending on the
number of IP phones connected to the system), which is needed for running the applications and rebooting the phones. If there are IP phones in the
network that are not auto configured by QX1000 (IP phones not supported by Epygi) or IP phones with the changed login name and password, you
will need to reboot them manually. After failover the license keys, firmware and language pack are not being transferred from the master to backup
QX1000 therefore, so make sure both QX1000s are configured identically in the redundant network before enabling redundancy mechanism.
When you login to the device which runs in a backup mode, only
Redundancy Settings
are available. All other GUI configuration settings are non
editable and automatically synchronized with the master device's configuration.
To ensure the interaction between the master and slave devices, corresponding configuration should be done in the Redundancy Settings on both
devices.
Enable Redundancy
checkbox is used to enable/disable
the redundancy functionality on the QX1000.
Active Device Mode
drop down list is only present on
backup device and is used to adjust the behavior of the
backup device during unavailability of master device. When
Active
is selected, backup device will become master once
the original master device became unavailable. When
Passive
is selected, backup device stops its synchronization
with the master device and will not take over the control
even when the original master got failed unless
Swap
Master Device
button is pressed on the master QX1000.
The
Passive
mode is used for Firmware Update, Language
Pack and License Key updates on master device when a
reboot is required. After the reboot of master device, the
Active Device Mode
on the backup device should be
changed back to
Active
to restore the redundant network
functionality.
Fig. II-66: Redundancy Settings list
Redundant Group ID
text field unique ID (values 1 and up) identifying master and backup devices. The same value must be set on both QX1000s.
Virtual IP Address
text fields require the virtual IP address of the device where the configuration is done.
Virtual Subnet Mask
text fields require
the virtual subnet mask of the device where the configuration is done. These two parameters identify an alternate IP network of the LAN interface


