background image

2.

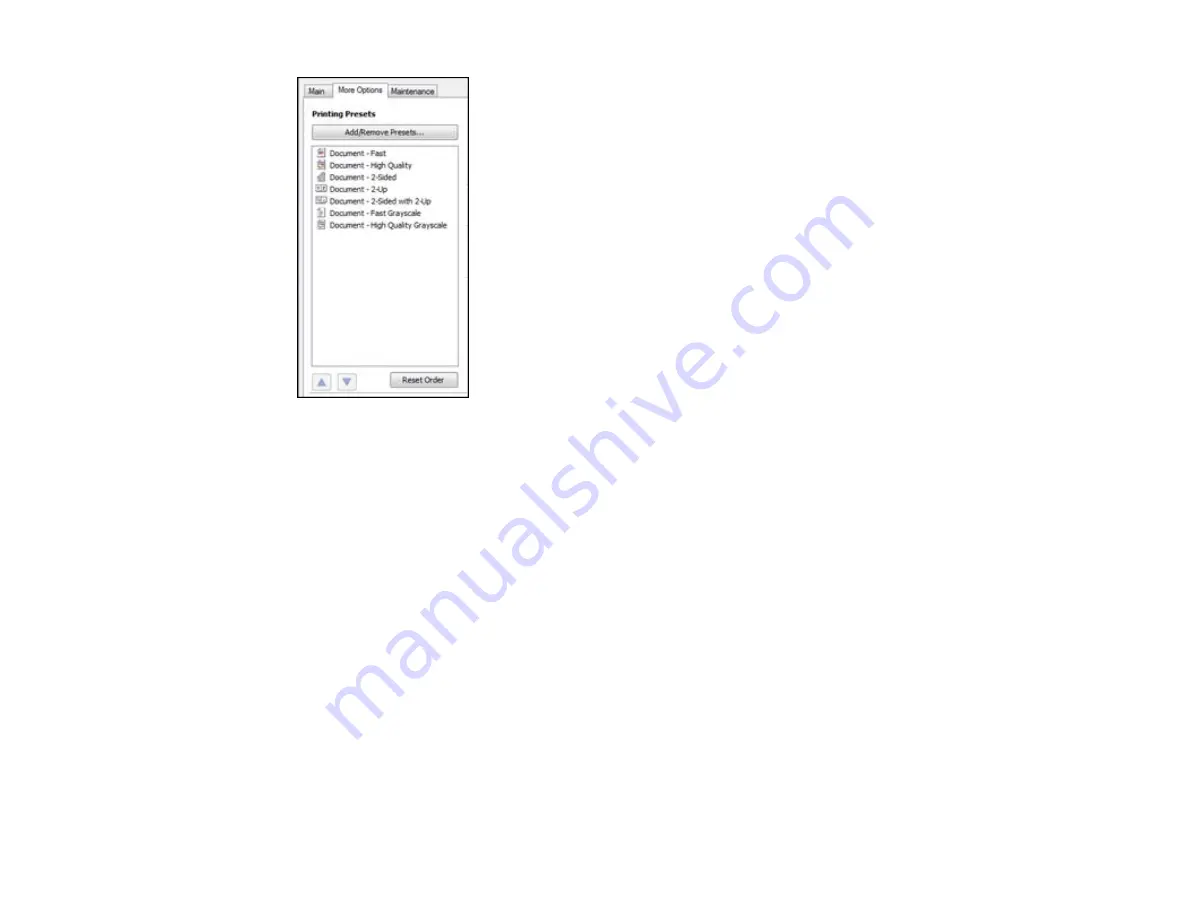
Place your cursor over a

Printing Presets

option to view its list of settings.

3.

Use any of the available options on the screen to control your printing presets.

4.

To choose an option for printing, select it.

5.

Click

OK

.

Parent topic:

Printing with Windows

Printing Your Document or Photo - Windows

Once you have selected your print settings, you are ready to save your settings and print.

1.

Click

OK

to save your settings.

You see your application's Print window, such as this one:

67

Содержание WorkForce Pro WP-4520

Страница 1: ...WorkForce Pro WP 4520 WP 4533 User s Guide ...

Страница 2: ......

Страница 3: ...anel 22 Wireless Printing from a Mobile Device 25 Using EPSON Connect Email Print 25 Loading Paper 26 Loading Paper in the Cassette 26 Loading Paper in the Rear MP Multipurpose Tray 31 Loading Envelopes 34 Paper Loading Capacity 37 Available EPSON Papers 38 Paper or Media Type Settings 39 Setting the Paper Size for Each Source 40 Setting the Paper Size for Each Source Control Panel 40 Setting the ...

Страница 4: ...ndows 64 Additional Settings Options Windows 66 Selecting a Printing Preset Windows 66 Printing Your Document or Photo Windows 67 Selecting Default Print Settings Windows 68 Changing the Language of the Printer Software Screens 69 Changing Automatic Update Options 70 Printing with Mac OS X 10 5 10 6 or 10 7 71 Selecting Basic Print Settings Mac OS X 10 5 10 6 10 7 72 Paper Source Options Mac OS X ...

Страница 5: ...tions Mac OS X 10 4 91 Sizing Printed Images Mac OS X 10 4 91 Selecting Double sided Printing Settings Mac OS X 10 4 92 Managing Color Mac OS X 10 4 93 Color Options Mac OS X 10 4 94 Selecting Printing Preferences Mac OS X 10 4 94 Printing Preferences Mac OS X 10 4 95 Printing Your Document or Photo Mac OS X 10 4 95 Checking Print Status Mac OS X 10 4 96 Cancelling Printing Using a Product Button ...

Страница 6: ...ile Settings 134 Available Scanned File Types and Optional Settings 135 Scanning with Mac OS X 10 6 10 7 Using Image Capture 136 Available Scan Settings Mac OS X 10 6 10 7 Image Capture 137 Scanning Special Projects 137 Scanning to a PDF File 138 Restoring Photo Colors as You Scan 141 Convert Scanned Documents to Editable Text OCR 142 Scanning Using OCR Windows 142 Scanning Using OCR Mac OS X 144 ...

Страница 7: ...al List 169 Creating Group Dial List Entries 171 Printing Your Group Dial List 174 Setting Up Speed Group Dial Lists Using the Fax Utility Windows 175 Setting Up Speed Group Dial Lists Using the Fax Utility Mac OS X 179 Sending Faxes 180 Sending Faxes from the Product Control Panel 181 Manually Dialing or Redialing Fax Numbers 181 Selecting Fax Numbers From Speed or Group Dial Lists 182 Dialing Fa...

Страница 8: ...ing the Product Control Panel 206 Checking the Nozzles Using a Computer Utility 209 Print Head Cleaning 211 Cleaning the Print Head Using the Product Control Panel 211 Cleaning the Print Head Using a Computer Utility 213 Print Head Alignment 216 Aligning the Print Head Using the Product Control Panel 216 Aligning the Print Head Using a Computer Utility 218 Cleaning the Paper Path 221 Cleaning and ...

Страница 9: ... Inside the Product 237 Paper Jam Problems in the Cassette 239 Paper Jam Problems in the Duplexer 241 Document Jams in the Automatic Document Feeder 244 Paper Ejection Problems 247 Solving Problems Printing from a Computer 248 Nothing Prints 248 Product Icon Does Not Appear in Windows Taskbar 249 Error After Cartridge Replacement 250 Printing is Slow 250 Solving Page Layout and Content Problems 25...

Страница 10: ...62 Ripple Patterns Appear in an Image 263 Scanned Image Colors Do Not Match Original Colors 263 Scan Area is Not Adjustable in Thumbnail Preview 263 Scanned Image Edges are Cropped 264 Solving Faxing Problems 264 Cannot Send or Receive Faxes 264 Cannot Receive Faxes with a Telephone Connected to Your Product 265 When to Uninstall Your Product Software 265 Uninstalling Product Software Windows 266 ...

Страница 11: ...fications 278 Safety and Approvals Specifications 278 Notices 280 Telephone Equipment Safety Instructions 280 FCC Compliance Statement 280 Software Notices WorkForce Pro WP 4520 283 Software Notices WorkForce Pro WP 4533 288 Trademarks 293 Copyright Notice 293 libTIFF Software Acknowledgment 294 A Note Concerning Responsible Use of Copyrighted Materials 294 Default Delay Times for Power Management...

Страница 12: ......

Страница 13: ...WorkForce Pro WP 4520 WP 4533 User s Guide Welcome to the WorkForce Pro WP 4520 WP 4533 User s Guide 13 ...

Страница 14: ...Sided Printing Scanning Copying and Faxing Selecting Wireless Network Settings From the Control Panel Wireless Printing from a Mobile Device Using EPSON Connect Email Print Setting Up the Control Panel See these sections to set up the control panel for use Printer Parts Control Panel Buttons and Lights Changing LCD Screen Language Turning Off Control Panel Sounds Parent topic Product Basics Printe...

Страница 15: ...WP 4533 1 The power light 2 The power button 3 The Fax button 4 The Scan button 5 The Copy button 6 The Auto Answer button 7 The LCD screen 15 ...

Страница 16: ...reen Language You can change the language used on the LCD screen 1 Press the Setup button 2 Press the arrow buttons to select Printer Setup and press the OK button 3 Select Language and press the OK button 4 Select a language and press the OK button 5 Press the Copy button to exit Parent topic Setting Up the Control Panel Turning Off Control Panel Sounds You can turn off the sound heard when you p...

Страница 17: ...tton to exit Parent topic Setting Up the Control Panel Product Parts Locations See these sections to identify the parts on your product Printer Parts Paper Path Printer Parts Front Printer Parts Inside Printer Parts Back Parent topic Product Basics Printer Parts Paper Path 1 Edge guides on paper cassette 17 ...

Страница 18: ...extension 4 Output tray 5 Edge guides on rear MP tray 6 Rear MP multipurpose tray 7 Feeder guard 1 Automatic document feeder ADF cover 2 Edge guide 3 Automatic document feeder 4 Paper cassette Parent topic Product Parts Locations 18 ...

Страница 19: ...Printer Parts Front 1 Document cover 2 Scanner glass 3 Control panel 4 USB port for external devices Parent topic Product Parts Locations 19 ...

Страница 20: ...Printer Parts Inside 1 Ink cartridge slots 2 Front cover 3 Print head Parent topic Product Parts Locations 20 ...

Страница 21: ... both sides of the page automatically using the product s built in duplexer By loading your pages in the automatic document feeder ADF you can also scan copy and fax double sided documents on plain paper in these sizes Letter 8 5 11 inches 216 279 mm and A4 8 3 11 7 inches 210 297 mm To print on both sides of the page from your computer select 2 Sided Printing Windows or one of the Two sided Print...

Страница 22: ...lecting Double sided Printing Settings Mac OS X 10 5 10 6 10 7 Selecting Double sided Printing Settings Mac OS X 10 4 Placing Originals in the Automatic Document Feeder Scanning in Office Mode Scanning in Professional Mode Selecting Wireless Network Settings From the Control Panel You can select or change wireless network settings using your product control panel WorkForce Pro WP 4533 To install y...

Страница 23: ...llow the instructions on the Start Here sheet to set up your product on a wired network and install the necessary software from the product CD The installer program guides you through network setup 5 Select the name of your wireless network SSID or enter the name manually Note To enter the wireless network name manually select Other SSIDs and press the OK button Use the displayed keypad to enter y...

Страница 24: ...r Symbol and press the OK button Then highlight an option and press the OK button to select it To enter a space select Space and press the OK button To delete characters select the back arrow and press the OK button When you finish entering characters select Done and press the OK button 7 Confirm the displayed network settings and press the OK button to save them Note If you need to change a setti...

Страница 25: ...nt topic Product Basics Using EPSON Connect Email Print With EPSON Connect Email Print you can print from any device that can send email such as your smartphone tablet or laptop Email Print features a unique email address assigned to your EPSON product similar to having a dedicated fax number When you want to print just send an email with attachments to your product s email address 1 Set up your p...

Страница 26: ...apacity Available EPSON Papers Paper or Media Type Settings Setting the Paper Size for Each Source Setting Additional Paper Options Installing the Optional Second Paper Cassette Loading Paper in the Cassette You can load Letter 8 5 11 inches 216 279 mm A4 8 3 11 7 inches 210 297 mm and Legal 8 5 14 inches 216 357 mm plain paper in the paper cassette 1 Close the output tray if necessary 26 ...

Страница 27: ...2 Pull out the paper cassette 3 Slide the edge guides outward Note If you are using legal size paper squeeze the tab to extend the paper cassette 27 ...

Страница 28: ...4 Load a stack of paper printable side down in the cassette as shown 28 ...

Страница 29: ...5 Slide the edge guides against the paper but not too tightly Note Make sure the paper fits beneath the top edges of the guide and is not sticking out from the end of the cassette 29 ...

Страница 30: ...Caution To prevent paper feeding problems make sure you do not load too much paper in the cassette 6 Gently replace the paper cassette 7 Extend the output tray and open the paper stopper 30 ...

Страница 31: ...r Related references Paper Loading Capacity Related tasks Loading Paper in the Rear MP Multipurpose Tray Loading Envelopes Loading Paper in the Rear MP Multipurpose Tray You can print documents on a variety of paper types and sizes 1 Extend the output tray and open the paper stopper Note If you are using legal size or longer paper do not open the paper stopper 31 ...

Страница 32: ...2 Pull up the rear MP tray 3 Flip the feeder guard forward then slide the edge guides outward 32 ...

Страница 33: ...ke sure you do not load too much paper in the tray 5 Slide the edge guides against the paper but not too tightly Always follow these paper loading guidelines Load only the recommended number of sheets Load paper short edge first no matter which way your document faces Load letterhead or pre printed paper top edge first Do not load paper above the arrow mark inside the edge guides Check the paper p...

Страница 34: ... 5 14 inches 216 357 mm The holes must be within 0 74 inch 19 mm of the left edge of the page Parent topic Loading Paper Related references Paper Loading Capacity Related tasks Loading Paper in the Cassette Loading Envelopes Loading Envelopes You can print on plain paper envelopes in this size No 10 4 1 9 5 inches 105 241 mm 1 Extend the output tray and open the paper stopper 34 ...

Страница 35: ...2 Pull up the rear MP tray 3 Flip the feeder guard forward then slide the edge guides outward 35 ...

Страница 36: ...ouble loading a stack of envelopes press each envelope flat before loading it or load one envelope at a time If print quality declines when printing multiple envelopes try loading one envelope at a time Do not load envelopes that are curled folded or too thin Parent topic Loading Paper Related references Paper Loading Capacity Related tasks Loading Paper in the Cassette Loading Paper in the Rear M...

Страница 37: ...entation Paper Matte 80 sheets Thick paper cardstock up to 68 lb 10 sheets Letter 8 5 11 inches 216 279 mm and A4 8 3 11 7 inches 210 297 mm 5 sheets for manual two sided printing EPSON Premium Presentation 20 sheets Paper Matte EPSON Premium Presentation Paper Matte Double sided EPSON Ultra Premium Presentation Paper Matte EPSON Brochure Flyer Paper Matte Double sided EPSON Photo Paper Glossy EPS...

Страница 38: ...hes S041586 500 216 279 mm EPSON Brochure Flyer Paper Letter 8 5 11 inches S042384 150 Matte Double sided 216 279 mm EPSON Presentation Paper Matte Letter 8 5 11 inches S041062 100 216 279 mm Legal 8 5 14 inches S041067 100 216 357 mm EPSON Premium Presentation 8 10 inches 203 254 mm S041467 50 Paper Matte Letter 8 5 11 inches S041257 50 216 279 mm S042180 100 EPSON Premium Presentation Letter 8 5...

Страница 39: ... S042181 60 Paper Glossy S042174 100 5 7 inches 127 178 mm S041945 20 8 10 inches 203 254 mm S041946 20 Letter 8 5 11 inches S042182 25 216 279 mm S042175 50 EPSON Premium Photo Paper 4 6 inches 102 152 mm S041982 40 Semi gloss Letter 8 5 11 inches S041331 20 216 279 mm Parent topic Loading Paper Paper or Media Type Settings For this paper Select this paper Type or Media Type setting Plain paper P...

Страница 40: ...Envelope Cardstock up to 68 lb Thick Paper Parent topic Loading Paper Setting the Paper Size for Each Source You can set the paper size for each paper source using the control panel or your printer software The settings apply to all print jobs sent to the product Setting the Paper Size for Each Source Control Panel Setting the Paper Size for Each Source Windows Setting the Paper Size for Each Sour...

Страница 41: ... Copy button to exit Parent topic Setting the Paper Size for Each Source Setting the Paper Size for Each Source Windows You can change the default paper size for each source in Windows 1 Do one of the following Windows 7 Click and select Devices and Printers Right click your product name and select Printer properties Windows Vista Click and select Control Panel Click Printer under Hardware and Sou...

Страница 42: ...ndow 4 Select the paper size you loaded in each paper source as the Paper Size Loaded If your paper doesn t match any of the sizes listed for the rear MP tray select Others Note If you have not installed a second paper cassette you cannot change the settings for Cassette 2 42 ...

Страница 43: ...click Yes 8 Close the Printer Settings window Parent topic Setting the Paper Size for Each Source Setting the Paper Size for Each Source Mac OS X You can change the default paper size for each source in Mac OS X 1 Do one of the following Mac OS X 10 6 10 7 In the Apple menu or the Dock select System Preferences Select Print Fax or Print Scan select your product and select Options Supplies Select U...

Страница 44: ...per Size Notice the printer will prevent you from printing with the wrong paper size settings If you turn this option off and you try to print with the wrong settings the printer will print even if the image size exceeds the printable area and your printout may be smudged 5 Click Apply 6 Close the Printer Settings window Parent topic Setting the Paper Size for Each Source Setting Additional Paper ...

Страница 45: ...k drying time when you print double sided on special paper 4 Press the Copy button to exit Parent topic Loading Paper Installing the Optional Second Paper Cassette You can install the optional paper cassette to provide more paper capacity 1 Turn off the product and unplug the power cord and any connected cables Caution To avoid electric shock make sure you unplug the power cord 2 Remove the paper ...

Страница 46: ...t as shown then gently lower it onto the paper cassette Make sure the connectors and pins align correctly 4 Reconnect the power cord and connector cables and plug in the product 5 Turn on the product Parent topic Loading Paper 46 ...

Страница 47: ...e Scanner Glass You can place originals up to this size on the scanner glass Letter 8 5 11 inches 216 279 mm or A4 8 3 11 7 inches 210 297 mm 1 Open the document cover 2 Place your original facedown on the scanner glass with the top facing as shown Slide the original to the edges of the indicated corner Note You can place multiple originals on the scanner glass Just make sure they are at least 0 8...

Страница 48: ...ADF Make sure the originals meet the Automatic Document Feeder specifications before loading them Caution Make sure your originals are not creased or folded and do not contain holes staples tape or other materials that could obstruct the feeder 1 Slide the ADF edge guide outward 2 Fan your stack of originals and tap them gently on a flat surface to even the edges 48 ...

Страница 49: ...the originals into the ADF faceup and top edge first 4 Slide the ADF edge guide against the originals but not too tightly Note If you re using the 2 up Copy layout make sure the originals are loaded as shown 49 ...

Страница 50: ...Parent topic Placing Originals on the Product 50 ...

Страница 51: ...Related references Automatic Document Feeder ADF Specifications Related topics Copying Scanning Faxing 51 ...

Страница 52: ...rences Paper Type Settings Copying Paper Size Settings Copying Copying Options Related topics Placing Originals on the Product Loading Paper Copying Documents or Photos You can copy documents or photos onto various sizes and types of paper including Epson special papers 1 Place your original document or photo on the scanner glass or place multi page documents in the ADF 2 Load the paper you want t...

Страница 53: ...he LCD screen press the Menu button select Paper and Copy Settings press the OK button and select the necessary settings 7 When you are ready to copy press either of the Start buttons Note To cancel printing press the Stop Reset button Parent topic Copying Paper Type Settings Copying Select a Paper Type setting that matches the paper you loaded Paper type loaded Paper Type setting Plain paper Plai...

Страница 54: ...er Glossy Ultra Glossy EPSON Photo Paper Glossy Glossy Parent topic Copying Paper Size Settings Copying Select the Paper Size setting that matches the paper you loaded 4 6 inches 102 152 mm 5 7 inches 127 178 mm 8 10 inches 203 254 mm Letter 8 5 11 inches 216 279 mm Legal 8 5 14 inches 216 357 mm A4 8 3 11 7 inches 210 297 mm Parent topic Copying Copying Options Select the copying options you want...

Страница 55: ...the Custom Size setting Auto Fit Page Automatically sizes the image to fit the selected paper size setting Legal Letter and Automatically converts from one size to another other conversions Quality Standard Quality Provides good quality for most copies Best Provides the highest quality for special copies Document Portrait Specifies the orientaton of your originals only available Orientation when 2...

Страница 56: ...Mac OS X 10 5 10 6 or 10 7 Printing with Mac OS X 10 4 Cancelling Printing Using a Product Button Related tasks Checking for Software Updates Printing with Windows You can print with your product using any Windows printing program as described in these sections Selecting Basic Print Settings Windows Selecting Double sided Printing Settings Windows Selecting Additional Layout and Print Options Wind...

Страница 57: ...roduct name as the printer you want to use Note You may also need to select Properties or Preferences to view your print settings You see the Main tab of your printer settings window 4 Select the Paper Source setting that indicates where you loaded the paper you want to print on 5 Select the size of the paper you loaded as the Document Size setting Note You can also select the User Defined setting...

Страница 58: ...e sheet of paper or print one image on multiple sheets of paper select one of the settings in the Multi Page menu and select the printing options you want 12 To print multiple copies and arrange their print order select the Copies options 13 To preview your job before printing select Print Preview 14 To save your print job as a project that can be modified and combined with other print jobs select...

Страница 59: ... Print Settings Windows Print Quality Options Windows You can select any of the available Quality options to fine tune the quality of your print Some settings may be unavailable depending on the paper type you have chosen Economy For fast printing with reduced quality Normal For everyday text and image printing Fine For text and graphics with good quality and print speed Quality For photos and gra...

Страница 60: ...nting is only available if you have loaded plain paper in these sizes Letter 8 5 11 inches 216 279 mm and A4 8 3 11 7 inches 210 297 mm Note Some options may be pre selected or unavailable depending on other settings you have chosen or if you are accessing the product over a network 1 Select the 2 Sided Printing checkbox 2 If the Auto checkbox is not automatically selected do one of the following ...

Страница 61: ...4 Select the double sided printing options you want to use 5 Click OK to return to the Main tab 6 Click the Print Density button You see this window 61 ...

Страница 62: ...ouble sided Printing Options Windows Print Density Adjustments Windows Parent topic Printing with Windows Double sided Printing Options Windows You can select any of the available options on the 2 Sided Printing Settings window to set up your double sided print job Binding Edge Options Select a setting that orients double sided print binding in the desired direction Binding Margin Options Select o...

Страница 63: ...age for double sided printing Increased Ink Drying Time Sets the amount of time required for drying ink after printing on one side of the paper before printing the other side in double sided printing to prevent ink smearing Parent topic Selecting Double sided Printing Settings Windows Selecting Additional Layout and Print Options Windows You can select a variety of additional layout and printing o...

Страница 64: ...ns Select Automatic to automatically adjust the sharpness brightness contrast and color saturation for your image Select Custom and click the Advanced button to manually adjust the color correction settings or turn off color management in your printer software 3 To add a watermark to your printout select Watermark settings 4 Select any of the Additional Settings options to customize your print Cus...

Страница 65: ...Fix Photo uses a sophisticated face recognition technology to optimize photos that include faces For this to work both eyes and the nose must be visible in the subject s face If your photo includes a face with an intentional color cast such as a statue you may want to turn off Fix Photo to retain the special color effects ICM Lets you manage color using installed color printing profiles No Color A...

Страница 66: ... Mirror Image Flips the printed image left to right Edge Smoothing Smooths jagged edges in low resolution images such as screen captures or images from the Web Fix Red Eye Reduces or removes red eye in photos Parent topic Selecting Additional Layout and Print Options Windows Selecting a Printing Preset Windows For quick access to common groups of print settings you can select a printing preset on ...

Страница 67: ...rol your printing presets 4 To choose an option for printing select it 5 Click OK Parent topic Printing with Windows Printing Your Document or Photo Windows Once you have selected your print settings you are ready to save your settings and print 1 Click OK to save your settings You see your application s Print window such as this one 67 ...

Страница 68: ...print settings in a program the changes apply only while you are printing in that program session If you want to change the print settings you use in all your Windows programs you can select new default print settings 1 Right click the product icon in the Windows taskbar 2 Select Printer Settings You see the printer settings window 68 ...

Страница 69: ... printing in any program session Changing the Language of the Printer Software Screens Parent topic Printing with Windows Changing the Language of the Printer Software Screens You can change the language used on the Windows printer software screens 1 Right click the product icon in the Windows taskbar 2 Select Printer Settings You see the printer settings window 3 Click the Maintenance tab 69 ...

Страница 70: ... next time you access them Parent topic Selecting Default Print Settings Windows Changing Automatic Update Options Your printer software for Windows automatically checks for updates to the product driver and firmware You can change how often the software checks for updates or disable this feature 1 Right click the product icon in the Windows taskbar 2 Select Auto Update Settings You see a window l...

Страница 71: ...ck Apply 5 Click OK to exit Note If you choose to disable the automatic update feature it s a good idea to periodically check for updates Parent topic Printing with Windows Related tasks Checking for Software Updates Printing with Mac OS X 10 5 10 6 or 10 7 You can print with your product using any Mac OS X printing program as described in these sections Selecting Basic Print Settings Mac OS X 10 ...

Страница 72: ...Computer Selecting Basic Print Settings Mac OS X 10 5 10 6 10 7 Select the basic settings for the document or photo you want to print 1 Open a photo or document for printing 2 Select the print command in your application Note You may need to select a print icon on your screen the Print option in the File menu or another command See your application s help utility for details 3 Select your product ...

Страница 73: ...ent depending on the version of Mac OS X and the application you are using 5 Select the Copies and Pages settings as necessary Note If you do not see these settings in the print window check for them in your application before printing 73 ...

Страница 74: ...eck for them in your application before printing They may be accessible by selecting Page Setup from the File menu 7 Select any application specific settings that appear on the screen such as those shown in the image above for the Preview application 8 Select Print Settings from the pop up menu You see these settings 74 ...

Страница 75: ... the available print options Paper Source Options Mac OS X 10 5 10 6 10 7 Print Quality Options Mac OS X 10 5 10 6 10 7 Print Options Mac OS X 10 5 10 6 10 7 Parent topic Printing with Mac OS X 10 5 10 6 or 10 7 Related references Paper or Media Type Settings Related tasks Selecting Page Setup Settings Mac OS X 10 5 10 6 10 7 Printing Your Document or Photo Mac OS X 10 5 10 6 10 7 75 ...

Страница 76: ...be available Parent topic Selecting Basic Print Settings Mac OS X 10 5 10 6 10 7 Print Quality Options Mac OS X 10 5 10 6 10 7 You can select any of the available Print Quality options to fine tune the quality of your print Some settings may be unavailable depending on the paper type and border setting you have chosen Economy For fast printing with reduced quality Normal For everyday text and imag...

Страница 77: ...int window check for them in your application before printing They may be accessible by selecting Page Setup from the File menu 1 Select the size of the paper you loaded as the Paper Size setting You can also select a custom setting to create a custom paper size 2 Select the orientation of your document or photo as shown in the print window Note If you are printing an envelope select the icon Note...

Страница 78: ...rint borders around each page on the sheet select a line setting from the Border pop up menu To rotate the printed image select the Reverse page orientation setting Parent topic Printing with Mac OS X 10 5 10 6 or 10 7 Sizing Printed Images Mac OS X 10 5 10 6 10 7 You can adjust the size of the image as you print it by selecting Paper Handling from the pop up menu on the Print window 78 ...

Страница 79: ...o scale the image to fit on a specific paper size select the Scale to fit paper size checkbox and select a paper size from the Destination Paper Size pop up menu Parent topic Printing with Mac OS X 10 5 10 6 or 10 7 Selecting Double sided Printing Settings Mac OS X 10 5 10 6 10 7 You can print on both sides of the paper by selecting Two sided Printing Settings from the pop up menu on the print win...

Страница 80: ...ssing the product over a network This screen may be different depending on the version of Mac OS X you are using 1 Select one of the Two sided Printing options 2 Select the type of document you are printing as the Document Type setting The software automatically sets the Adjustments options for that document type 80 ...

Страница 81: ...ble sided printed pages to be bound on the long edge of the paper Short Edge binding Orients double sided printed pages to be bound on the short edge of the paper Adjustments Print Density Sets the level of ink coverage for double sided printing Increased Ink Drying Time Sets the amount of time required for drying ink after printing on one side of the paper before printing the other side in double...

Страница 82: ...r using controls in your printer software or turn off color management ColorSync Prints using standard color profiles for your product and paper to help match image colors You can customize the conversion method and filter settings on the ColorSync pop up menu in the print window Color Options Settings Manual Settings Lets you select manual color adjustments Click the arrow next to Advanced Settin...

Страница 83: ...o to retain the special color effects Fix Red Eye Reduces or removes red eye in photos Off No Color Adjustment Turns off color management in your printer software so you can manage color using only your application software Parent topic Managing Color Mac OS X 10 5 10 6 10 7 Printing Your Document or Photo Mac OS X 10 5 10 6 10 7 Once you have selected your print settings you are ready to print Cl...

Страница 84: ...tions as necessary To cancel printing click the print job and click Delete To pause printing click the print job and click Hold To resume printing click the print job marked Hold and click Resume To pause printing for all queued print jobs click Pause Printer To check ink status click Supply Levels Parent topic Printing Your Document or Photo Mac OS X 10 5 10 6 10 7 Selecting Printing Preferences ...

Страница 85: ...references 5 Click OK Printing Preferences Mac OS X 10 5 10 6 10 7 Parent topic Printing with Mac OS X 10 5 10 6 or 10 7 Printing Preferences Mac OS X 10 5 10 6 10 7 You can select from these settings on the Driver tab Thick paper and envelopes Prevents ink from smearing when you print on envelopes or other thick paper Skip Blank Page Ensures that your product does not print pages that contain no ...

Страница 86: ... 10 4 Selecting Print Layout Options Mac OS X 10 4 Sizing Printed Images Mac OS X 10 4 Selecting Double sided Printing Settings Mac OS X 10 4 Managing Color Mac OS X 10 4 Selecting Printing Preferences Mac OS X 10 4 Printing Your Document or Photo Mac OS X 10 4 Parent topic Printing From a Computer Selecting Page Setup Settings Mac OS X 10 4 Select the page setup settings for the document or photo...

Страница 87: ... photo as shown in the page setup window Note If you are printing an envelope select the icon 6 To reduce or enlarge the size of the printed image select a different Scale setting 7 Click OK to close the window Parent topic Printing with Mac OS X 10 4 Related tasks Selecting Basic Print Settings Mac OS X 10 4 Selecting Basic Print Settings Mac OS X 10 4 Select the basic settings for the document o...

Страница 88: ...e Print option in the File menu or another command See your application s help utility for details 2 Select your product as the Printer setting 3 Select the Copies and Pages settings as necessary Note If you do not see these settings in the print window check for them in your application before printing 88 ...

Страница 89: ...ting Note Check the paper type settings list for details 7 Select the Print Quality setting you want to use 8 Select any of the available print options Paper Source Options Mac OS X 10 4 Print Quality Options Mac OS X 10 4 Print Options Mac OS X 10 4 Parent topic Printing with Mac OS X 10 4 Related references Paper or Media Type Settings Related tasks Printing Your Document or Photo Mac OS X 10 4 ...

Страница 90: ... will not be available Parent topic Selecting Basic Print Settings Mac OS X 10 4 Print Quality Options Mac OS X 10 4 You can select any of the available Print Quality options to fine tune the quality of your print Some settings may be unavailable depending on the paper type and border setting you have chosen Economy For fast printing with reduced quality Normal For everyday text and image printing...

Страница 91: ...an select layout options for multi page documents by selecting Layout from the pop up menu on the print window To print multiple pages on one sheet of paper select the number of pages in the Pages per Sheet pop up menu To arrange the print order of the pages select a Layout Direction setting To print borders around each page on the sheet select a line setting from the Border pop up menu Parent top...

Страница 92: ...ptions To scale the image to fit on a specific paper size select the Scale to fit paper size option and select a paper size from the pop up menu Parent topic Printing with Mac OS X 10 4 Selecting Double sided Printing Settings Mac OS X 10 4 You can print on both sides of the paper by selecting Two sided Printing Settings from the pop up menu on the print window 92 ...

Страница 93: ...or that document type 3 If necessary customize the Adjustments settings as instructed on the screen 4 Print a test copy of your double sided document to test the selected settings 5 Follow any instructions displayed on the screen during printing Parent topic Printing with Mac OS X 10 4 Related references Double sided Printing Options and Adjustments Mac OS X Managing Color Mac OS X 10 4 You can ad...

Страница 94: ...lor Mode setting for printing photos and graphics If you select the Adobe RGB color mode you can also adjust the midtone density using the Gamma setting ColorSync Prints using standard color profiles for your product and paper to help match image colors You can customize the conversion method and filter settings on the ColorSync pop up menu in the print window Off No Color Adjustment Turns off col...

Страница 95: ...print on envelopes or other thick paper Skip Blank Page Ensures that your product does not print pages that contain no text or images Quiet Mode Lessens noise during printing when you select Plain Paper Bright White Paper as the paper Type or Media Type setting High Speed Printing Speeds up printing but may reduce print quality Parent topic Selecting Printing Preferences Mac OS X 10 4 Printing You...

Страница 96: ...ting with Mac OS X 10 4 Checking Print Status Mac OS X 10 4 During printing you can view the progress of your print job control printing and check ink cartridge status 1 Click the printer icon when it appears in the Dock You see the print status window 96 ...

Страница 97: ...ick Hold To resume printing click the print job marked Hold and click Resume To check ink status click Supply Levels Parent topic Printing Your Document or Photo Mac OS X 10 4 Cancelling Printing Using a Product Button If you need to cancel a print job you can press the Stop Reset button on your product Parent topic Printing From a Computer 97 ...

Страница 98: ... 10 6 10 7 Using Image Capture Scanning Special Projects Connecting a USB Thumb Drive or External Device To save scanned images on a USB thumb drive or other USB device you must first connect the device to your product Note Epson cannot guarantee the compatibility of your drive 1 Make sure the product is turned on but not printing 2 Insert your USB thumb drive or the USB cable that came with your ...

Страница 99: ...g a Scan Using the Product Control Panel Starting a Scan Using the EPSON Scan Icon Starting a Scan from a Scanning Program Parent topic Scanning Starting a Scan Using the Product Control Panel You can scan an image to your computer or to a USB device using your product s control panel buttons Your product automatically selects suitable default scan settings but you can view or change them as neces...

Страница 100: ...ge in your e mail program You can select the e mail program you want to use and resize your image if necessary from an option screen on your computer Note This works with MAPI type email such as Microsoft Outlook Windows Live Mail Mac Mail and Entourage but not web based email such as Gmail Scan to PC WSD lets you manage network scanning in Windows 7 or Windows Vista English only Note To use this ...

Страница 101: ...c Starting a Scan Scan to USB Device Options Select the Scan to USB Device options you want to use Scan to USB Device Available options Description setting Format JPEG JPEG for photos PDF PDF for documents 2 Sided Scanning Off Automatic 2 sided scanning for documents in the ADF On Scan Area Letter Selects the page size for documents or special settings for photos Legal Auto Cropping for photos wit...

Страница 102: ...g the Event Manager program Note You cannot change default scan button settings with Mac OS X 10 6 10 7 1 Do one of the following to open Event Manager Windows Click or Start All Programs or Programs EPSON Software Event Manager Mac OS X 10 4 10 5 Open the Applications folder click Epson Software and click Event Manager 2 Open the Scanner Windows or Select Scanner Mac OS X drop down list and selec...

Страница 103: ...lick the EPSON Scan icon Note With Mac OS X 10 6 or 10 7 in addition to scanning with Image Capture you can download and install EPSON Scan scanning software EPSON Scan provides additional image adjustment and photo correction features for enhancing scanned images and provides an interface for TWAIN compliant OCR scanning software such as ABBYY FineReader To download EPSON Scan visit Epson s drive...

Страница 104: ...Parent topic Starting a Scan Related tasks Scanning with Mac OS X 10 6 10 7 Using Image Capture Related topics Selecting EPSON Scan Settings 104 ...

Страница 105: ...ages and provides an interface for TWAIN compliant OCR scanning software such as ABBYY FineReader To download EPSON Scan visit Epson s driver download site U S downloads or Canadian downloads 1 Open your scanning program and select its scanning option See your scanning program help for instructions 2 Select your product Note In certain programs you may need to select your product as the source fir...

Страница 106: ...Parent topic Starting a Scan Related tasks Scanning with Mac OS X 10 6 10 7 Using Image Capture Related topics Selecting EPSON Scan Settings 106 ...

Страница 107: ...st them on a preview screen You can also select various image adjustment options and preview your scanned image Home Mode You can select setting groups based on the type of content you are scanning You can also select various image adjustment options and preview and size your scanned image Professional Mode You can manually customize all available settings and preview and size your scanned image N...

Страница 108: ...an automatically saves your scanned file in JPEG format in your operating system s Pictures or My Pictures folder or opens it in your scanning program You can select settings preview and change the scanned file settings as necessary Note You must place your original on the scanner glass when using Home mode 1 Start EPSON Scan and select Home Mode as the Mode setting You see this window 108 ...

Страница 109: ...2 Select the Document Type setting that matches your original such as Photograph or Text Line Art 3 Select the Image Type setting that matches your original 109 ...

Страница 110: ...area in your preview image that you want to scan scan area 8 Select any of the image adjustment settings you want to use Before making adjustments click the image or scan area in the Preview window 9 If you want to reduce or enlarge your image as you scan select the Target Size setting you want to use 10 Click Scan You see the File Save Settings window 11 Change any of the necessary file save sett...

Страница 111: ...y You can also use the scan area to select specific Image Adjustments settings for a scanned image Just be sure to click inside the scan area before selecting the settings 1 Do one of the following to select your scan area in the Preview image Thumbnail preview Your scan area is selected automatically but you can change it Place your cursor in one corner of the desired scan area then click and dra...

Страница 112: ... Normal preview Click the Auto Locate icon to create a marquee dotted line on the preview image 112 ...

Страница 113: ...step To move the marquee click inside the scan area and drag the marquee where you want it To resize the scan area place your cursor over the edge or corner of the marquee then click and drag the edges where you want them Hold down the Shift key as you resize the marquee to retain the same width height proportions 113 ...

Страница 114: ...Option checkbox if you need to set any of the grayed out image adjustments Not all adjustment settings may be available depending on the Document Type and Image Type setting Click the Brightness button to access additional settings Descreening Removes the ripple pattern that might appear in subtly shaded image areas such as skin tones This option improves results when scanning magazines or newspap...

Страница 115: ...tion programs Parent topic Scanning in Home Mode Selecting a Scan Size Home Mode You can reduce or enlarge the size of your image as you scan You can also select a specific scan size such as a common photo size like 4 6 inches 102 152 mm This places a scan area of that size on the preview image so you can use it to help crop the image in the correct proportions 1 Click the Preview button to previe...

Страница 116: ...th the selected scan area To move the marquee click inside the scan area and drag the marquee where you want it To resize the scan area place your cursor over the edge or corner of the marquee then click and drag the edge where you want it 116 ...

Страница 117: ...rtioned for your custom scan size Parent topic Scanning in Home Mode Scanning in Office Mode When you scan in Office Mode EPSON Scan automatically saves your scanned file in JPEG format in your operating system s Pictures or My Pictures folder or opens it in your scanning program You can select settings preview and change the scanned file settings as necessary 1 Start EPSON Scan and select Office ...

Страница 118: ...Document Source setting indicating where you placed your original To scan a 2 sided document in the ADF select ADF Double sided Note If you are using the ADF remove any documents from the scanner glass 4 Select the Size and Orientation settings that match your original 118 ...

Страница 119: ...ans your original and saves the file in the selected folder or opens it in your scanning program If the file was saved directly to your computer you see the file in the Windows Explorer or Mac OS X Finder where you can view and print the image if desired Selecting a Scan Area Office Mode Available Image Adjustments Office Mode Parent topic Selecting EPSON Scan Settings Related concepts Scan Resolu...

Страница 120: ...ate a marquee dotted line on the preview image 2 Do the following as necessary to work with the selected scan area If the marquee is correct continue with the next step To move the marquee click inside the scan area and drag the marquee where you want it 120 ...

Страница 121: ...EPSON Scan window Parent topic Scanning in Office Mode Available Image Adjustments Office Mode You can select these Image Adjustments options in EPSON Scan Office Mode Note Select the Image Option checkbox if you need to set any of the grayed out image adjustments Not all adjustment settings may be available depending on the Image Type setting Unsharp Mask Makes the edges of certain image areas cl...

Страница 122: ...the overall scanned image Threshold Adjusts the level at which black areas in text and line art are delineated improving text recognition in OCR Optical Character Recognition programs Parent topic Scanning in Office Mode Scanning in Professional Mode When you scan in Professional Mode EPSON Scan automatically saves your scanned file in JPEG format in your operating system s Pictures or My Pictures...

Страница 123: ...123 ...

Страница 124: ... the area in your preview image that you want to scan scan area Note You cannot select a scan area if you chose ADF Double sided as the Document Source setting 9 Select any of the image adjustment settings you want to use Before making adjustments click the image or scanned image area in the Preview window 10 If you want to reduce or enlarge your image as you scan select the Target Size setting yo...

Страница 125: ...ecting a Scan Area Professional Mode You can select a specific area in your preview image to include in your scanned image You can select the entire image area or a portion of it You can even select multiple scan areas to create multiple scanned images of different areas Normal Preview mode only You can also use the scan area to select specific Image Adjustments settings for a scanned image Just b...

Страница 126: ...scan area is selected automatically but you can change it Place your cursor in one corner of the desired scan area then click and drag the cursor to the opposite corner to create a marquee dotted line on the preview image 126 ...

Страница 127: ...step To move the marquee click inside the scan area and drag the marquee where you want it To resize the scan area place your cursor over the edge or corner of the marquee then click and drag the edges where you want them Hold down the Shift key as you resize the marquee to retain the same width height proportions 127 ...

Страница 128: ...Scanning in Professional Mode Related concepts Image Preview Guidelines Available Image Adjustments Professional Mode You can select these Adjustments options in EPSON Scan Professional Mode Note Not all adjustment settings may be available depending on the Image Type setting Click the image adjustment icon to access additional settings Click the Windows or Mac OS X icon next to a setting to chang...

Страница 129: ...n adjust the level of exposure adjustment using a slider Histogram Adjustment Provides a graphical interface for adjusting highlight shadow and gamma levels individually For advanced users only Click the histogram icon to access the settings Tone Correction Provides a graphical interface for adjusting tone levels individually For advanced users only Click the tone correction icon to access the set...

Страница 130: ...n size such as a common photo size like 4 6 inches 102 152 mm This places a scan area of that size on the preview image so you can use it to help crop the image in the correct proportions 1 Click the Preview button to preview your image 2 In the EPSON Scan window select the size you want your scanned image to be from the Target Size list Note If you need to rotate the orientation of the target siz...

Страница 131: ...th the selected scan area To move the marquee click inside the scan area and drag the marquee where you want it To resize the scan area place your cursor over the edge or corner of the marquee then click and drag the edge where you want it 131 ...

Страница 132: ... OK Then create a scan area on the preview image The marquee is automatically proportioned for your custom scan size 6 To use additional sizing tools click the Windows or Mac OS X icon next to the Target Size setting and select options as desired Scale Reduces or enlarges your image by the percentage you enter Trimming Turns automatic image cropping on or off 132 ...

Страница 133: ... Scan Resolution Guidelines If you plan to enlarge a scanned image so you can print it at a larger size you may need to increase the resolution from the default resolution set by EPSON Scan Follow these guidelines to determine the resolution setting you need You will enlarge the image as you scan it If you will enlarge the image using EPSON Scan s Target Size setting Home and Professional modes on...

Страница 134: ...n file on the File Save Settings window You can also select various optional settings that control how EPSON Scan behaves when you scan and save files The File Save Settings window may appear after you click Scan on the EPSON Scan window You may also be able to access the window by clicking the icon on the EPSON Scan window 134 ...

Страница 135: ...Optional Settings Parent topic Selecting EPSON Scan Settings Available Scanned File Types and Optional Settings You can select from a variety scanned file types and optional settings on the File Save Settings window in EPSON Scan File Formats Bitmap bmp A standard image file format for most Windows programs JPEG jpg An image format that lets you highly compress image data However the higher the co...

Страница 136: ...ti Tiff format select to display a prompt for scanning additional pages after the first page is scanned Parent topic Selecting Scan File Settings Scanning with Mac OS X 10 6 10 7 Using Image Capture With Mac OS X 10 6 10 7 you can scan with your product using an image editing application such as Image Capture Note With Mac OS X 10 6 or 10 7 in addition to scanning with Image Capture you can downlo...

Страница 137: ... edges Descreening Removes the ripple pattern that might appear in subtly shaded image areas such as skin tones This option improves results when scanning magazines or newspapers The results of descreening do not appear in the preview image only in your scanned image Backlight Correction Removes shadows from photos that have too much background light Dust Removal Removes dust marks from your origi...

Страница 138: ... Document Format file on your computer 1 Place your original on your product for scanning 2 Start EPSON Scan 3 Select the scan mode you want to use 4 Select the scan settings for your scan 5 Preview your image 6 When you finish selecting all your settings click Scan You see the File Save Settings window 138 ...

Страница 139: ...the Type setting 8 Select any other settings you want to use on the File Save Settings window Click the Options button to access additional settings 9 Click OK EPSON Scan scans your document and you see this window 139 ...

Страница 140: ...u are finished click OK Note If you installed an OCR Optical Character Recognition program you may see a screen indicating the program is converting your page to text Wait until the program re scans the page and close the program if necessary 11 Click Close to exit the EPSON Scan window if necessary EPSON Scan scans your original and saves the PDF file in the selected folder or opens it in your sc...

Страница 141: ...can settings for your scan 5 Preview your image 6 Locate or access the image adjustment settings 7 Select the Color Restoration checkbox 8 When you finish selecting all your settings click Scan 9 Click Close to exit the EPSON Scan window if necessary EPSON Scan scans your original and saves the color restored file in the selected folder or opens it in your scanning program If the file was saved di...

Страница 142: ...canned file and follow the instructions on the screen Note With Mac OS X 10 6 or 10 7 in addition to scanning with Image Capture you can download and install EPSON Scan scanning software EPSON Scan provides additional image adjustment and photo correction features for enhancing scanned images and provides an interface for TWAIN compliant OCR scanning software such as ABBYY FineReader To download E...

Страница 143: ...on for your product it will not work correctly You see the scan settings window 6 Select your scan settings 7 Click Preview and adjust the area you want to scan if necessary 8 Click Scan Note To scan a multi page document select settings in the Multi Page Scanning section and click Scan for each page 9 When you are finished scanning click Close Your document is scanned and processed into editable ...

Страница 144: ...en open ABBYY FineReader open the Get Images From pop up menu and select File Select the conversion option you want to use then select your scanned file and follow the instructions on the screen Note With Mac OS X 10 6 or 10 7 in addition to scanning with Image Capture you can download and install EPSON Scan scanning software EPSON Scan provides additional image adjustment and photo correction fea...

Страница 145: ...nguage setting 5 Select the type of document you are going to scan EPSON Scan starts in the last scan mode you used 6 Select your scan settings and click Scan Your document is scanned and you see the EPSON Scan window while your document is converted to editable text 7 Click Close to close the EPSON Scan window and Preview window if necessary 145 ...

Страница 146: ...d File As window 8 Click the Save button The file is saved and then opened in an application associated with the file type you selected if available on your system Parent topic Convert Scanned Documents to Editable Text OCR 146 ...

Страница 147: ... a Telephone or Answering Machine Setting Up Fax Features Setting Up Speed Dial and Group Dial Lists Sending Faxes Receiving Faxes Connecting a Telephone or Answering Machine You must connect your product to a telephone wall jack to send or receive faxes If you want to use the same telephone line to receive calls you can connect a telephone or answering machine to your product using an additional ...

Страница 148: ...e LINE port on your product Note If your telephone line included a DSL Internet connection you must connect a DSL filter to the wall jack to be able to use the line for faxing or voice calls using your product Contact your DSL provider for the necessary filter 148 ...

Страница 149: ...1 Telephone wall jack 2 DSL filter 3 DSL modem 2 If you are connecting a telephone or answering machine to your product using a second phone cable remove the cap from the EXT port on your product 149 ...

Страница 150: ...ect an incoming fax call when the phone is picked up Epson cannot guarantee compatibility with VoIP cable phone systems or fiberoptic digital services such as FIOS Parent topic Faxing Setting Up Fax Features Before faxing with your product set up your fax header and select the fax features you want to use Note If you leave your product unplugged for a long period of time you may need to reset the ...

Страница 151: ...ngs Printing Fax Reports Restoring Default Fax Settings Fax Sending Options Fax Receive Options Fax Communications Options Fax Report Options Restore Default Settings Options Parent topic Setting Up Fax Features Selecting Your Country or Region Before faxing select the country or region in which you are using your product Note If you change the country or region your fax settings return to their d...

Страница 152: ...hanging the country or region will restore the fax settings to the default settings Parent topic Setting Up Fax Features Using the Product Control Panel Selecting the Date and Time Before faxing select the current date time and daylight saving phase in your area and choose your preferred date and time format 1 Press the Setup button 2 Press the arrow buttons to select Printer Setup and press the O...

Страница 153: ...tons on the control panel to enter the current date then press the OK button 6 Select the time format you want to use and press the OK button 7 Use the number buttons on the control panel to enter the current time select AM or PM if you selected a 12 hour time format then press the OK button 8 Select Daylight Saving Time and press the OK button 153 ...

Страница 154: ...ge from Winter to Summer your product automatically sets its clock ahead one hour When you change from Summer to Winter it sets the clock back one hour Parent topic Setting Up Fax Features Using the Product Control Panel Entering Fax Header Information Before faxing add your sender name and fax number to the fax header to identify the source of the faxes you send 1 Press the Setup button 2 Press t...

Страница 155: ... your fax number up to 20 characters You do not need to use dashes 10 Press the OK button to return to the Header menu 11 Press the Copy button to exit Parent topic Setting Up Fax Features Using the Product Control Panel Related tasks Entering Numbers and Characters for Faxing Entering Numbers and Characters for Faxing Follow these guidelines to enter numbers and characters for setting up your fax...

Страница 156: ...n To delete characters select the back arrow and press the OK button When you finish entering characters select Done and press the OK button Parent topic Setting Up Fax Features Using the Product Control Panel Selecting Fax Send and Receive Settings You can select the paper source fax quality and other settings for incoming and outgoing faxes Note You can also select settings for faxing by pressin...

Страница 157: ...p Fax Features Using the Product Control Panel Related references Fax Send Options Fax Sending Options Fax Receive Options Selecting Fax Communication Settings You can customize how your product sends and receives faxes over your phone line 1 Press the Setup button 2 Press the arrow buttons to select Fax Settings and press the OK button You see this screen 157 ...

Страница 158: ...erences Fax Communications Options Printing Fax Reports You can run a variety of reports on your fax transmissions and print your speed and group dial lists Note You can also select to print a report automatically after a fax is sent by pressing the Setup button and selecting Fax Settings Send Settings Last Transmission Report 1 Make sure you loaded letter size or larger paper in your product 158 ...

Страница 159: ...w buttons to select Fax Report and press the OK button You see this screen 5 Select one of the available reports and press the OK button 6 Press either of the Start buttons to print the report Parent topic Setting Up Fax Features Using the Product Control Panel 159 ...

Страница 160: ...tton You see a confirmation screen 4 Select Yes or No and press the OK button Parent topic Setting Up Fax Features Using the Product Control Panel Fax Sending Options Set the options you want to use for outgoing faxes Setting Options Description Quality Standard Provides good scan resolution and print quality for most faxes Fine Provides best scan resolution and print quality for faxes of small pr...

Страница 161: ...atures Using the Product Control Panel Fax Receive Options Set the printing options you want to use for incoming faxes Setting Options Description Paper Source to Print Cassette 1 Sets the paper source for incoming faxes Rear MP Tray Auto Reduction On Reduces size of incoming faxes to fit on the paper in the selected Paper Source to Print Off Prints incoming faxes in original size or on multiple s...

Страница 162: ... 33 6 Kbps default setting Off Transmits faxes at 14 4 Kbps Rings to Answer 1 to 9 Sets the number of rings before your product receives a fax The default setting is 4 If Auto Answer is turned on and an answering machine is connected to the product make sure this setting is set higher than the number of rings your answering machine is set to answer a call Dial Tone Detection On Automatically dials...

Страница 163: ... on the Send Settings Receive Settings and Communication screens Fax Data Settings Erases the speed dial list group dial list header and fax log Wi Fi Network Setting WorkForce Pro WP 4533 Restores all of the default network settings All except Wi Fi Network Fax Settings WorkForce Pro WP 4533 Restores all of the default settings on the control panel except for the network and fax settings Network ...

Страница 164: ...n set up your fax header and select your fax settings using the FAX Utility for Windows 1 Click or Start 2 Select Programs or All Programs 3 Select EPSON Software 4 Select FAX Utility You see this window 5 Select Fax Settings for Printer You see this window 164 ...

Страница 165: ...Parent topic Setting Up Fax Features Setting Up Fax Features Using the Fax Utility Mac OS X You can set up your fax header and select your fax settings using the FAX Utility for Mac OS X 1 Do one of the following Mac OS X 10 6 10 7 In the Apple menu or the Dock select System Preferences Select Print Fax or Print Scan select the FAX option for your product and select Options Supplies Select Utility...

Страница 166: ...er your fax header information and select your fax settings Note For detailed information select the FAX Utility icon Parent topic Setting Up Fax Features Setting Up Speed Dial and Group Dial Lists You can set up a speed dial list of fax numbers so you can quickly select them for faxing You can also set up a group dial list to send a fax message to multiple speed dial numbers See these sections to...

Страница 167: ...uct Creating Speed Dial List Entries Printing Your Speed Dial List Creating Group Dial List Entries Printing Your Group Dial List Parent topic Setting Up Speed Dial and Group Dial Lists Creating Speed Dial List Entries You can create a speed dial list of fax numbers to help you quickly send faxes Note You can create up to 60 speed dial and group dial entries combined 1 Press the Fax button 2 Press...

Страница 168: ...te and press the OK button You see this screen 5 Select the number you want to use for the fax number you are adding and press the OK button 6 Use the numeric buttons on the control panel to enter the fax number You can enter up to 64 characters 7 Press the OK button You see this screen 168 ...

Страница 169: ...bove To edit an existing entry select Edit select the entry and change the information To delete an entry select Delete select the entry press the OK button and confirm the deletion Parent topic Setting Up Speed Group Dial Lists Using the Product Control Panel Related tasks Entering Numbers and Characters for Faxing Printing Your Speed Dial List You can print your speed dial list for easy referenc...

Страница 170: ...2 Press the Fax button 3 Press the Menu button You see this screen 4 Press the arrow buttons to select Fax Report and press the OK button You see this screen 170 ...

Страница 171: ... Setting Up Speed Group Dial Lists Using the Product Control Panel Creating Group Dial List Entries You can create a group dial list after creating a speed dial list Each group dial list can include up to 30 fax numbers Note You can create up to 60 speed dial and group dial entries combined 1 Press the Fax button 171 ...

Страница 172: ...u see this screen 3 Select Group Dial Setup 4 Select Create and press the OK button You see this screen 5 Select the number you want to use for the group dial entry you are adding and press the OK button You see this screen 172 ...

Страница 173: ...ne and press the OK button You see a screen similar to this 8 Highlight the speed dial entry you want to add to the group and press the right arrow to select it 9 Continue selecting speed dial entries as necessary 10 When you are finished press the OK button You return to the group dial setup screen 173 ...

Страница 174: ...n and confirm the deletion Parent topic Setting Up Speed Group Dial Lists Using the Product Control Panel Related tasks Entering Numbers and Characters for Faxing Printing Your Group Dial List You can print your group dial list for easy reference 1 Make sure you loaded letter size or larger paper in your product 2 Press the Fax button 3 Press the Menu button 4 Press the arrow buttons to select Fax...

Страница 175: ... Fax Utility Windows You can set up your speed dial and group dial lists using the FAX Utility for Windows The utility also lets you import fax numbers from the Windows Address Book and back up fax numbers stored in your product s memory Note You can create up to 60 speed dial and group dial entries combined 1 Click or Start 2 Select Programs or All Programs 3 Select EPSON Software 4 Select FAX Ut...

Страница 176: ...5 Select Fax Settings for Printer You see this window 176 ...

Страница 177: ...6 Select your product if necessary 7 Select Speed Dial Group Dial List You see this window 177 ...

Страница 178: ...ry select Speed Dial enter a name and fax number and click OK To create a group dial entry select Group enter a name select your desired fax numbers and click OK 10 Repeat the previous step as necessary to add all your speed dial or group dial entries 11 When you are finished click the icon to save the entries to your product s memory Parent topic Setting Up Speed Dial and Group Dial Lists 178 ...

Страница 179: ... 10 6 10 7 In the Apple menu or the Dock select System Preferences Select Print Fax or Print Scan select the FAX option for your product and select Options Supplies Select Utility and select Open Printer Utility Mac OS X 10 4 10 5 In the Apple menu or the Dock select System Preferences Select Print Fax select the FAX option for your product and select Open Print Queue or Print Queue Select Utility...

Страница 180: ... a group dial entry select Group Dial enter a name select your desired fax numbers and click OK 7 Repeat the previous steps as necessary to add all your speed dial or group dial entries 8 To import entries from your MacAddress book click the icon 9 When you are finished click the icon to save the entries to your product s memory Parent topic Setting Up Speed Dial and Group Dial Lists Sending Faxes...

Страница 181: ... Fax Numbers Selecting Fax Numbers From Speed or Group Dial Lists Dialing Fax Numbers from a Connected Telephone Broadcasting a Fax Sending a Fax at a Specified Time Fax Send Options Parent topic Sending Faxes Manually Dialing or Redialing Fax Numbers You can send a fax from your product control panel by manually dialing the fax number or redialing the last dialed fax number 1 Place your original ...

Страница 182: ...y sent in black and white To cancel faxing press the Stop Reset button Your product scans your original and prompts you to place additional pages if necessary After scanning your originals your product dials the number and sends the fax Note If the number is busy or there is a communication problem your product displays a redialing message and will redial the number in a few minutes Parent topic S...

Страница 183: ...n black and white To cancel faxing press the Stop Reset button Your product scans your original and prompts you to place additional pages if necessary After scanning your originals your product dials the number and sends the fax Note If the number is busy or there is a communication problem your product displays a redialing message and will redial the number in a few minutes Parent topic Sending F...

Страница 184: ...the Start buttons Note If your recipient s fax machine does not print in color your fax is automatically sent in black and white To cancel faxing press the Stop Reset button Your product scans your original and prompts you to place additional pages if necessary 7 Hang up the telephone After scanning your originals your product sends the fax Parent topic Sending Faxes from the Product Control Panel...

Страница 185: ...peed or group dial entry press the Menu button Use the up and down arrows to highlight an entry the right arrow button to select an entry and the left arrow button to deselect an entry 5 When you have finished selecting your recipients press the OK button 6 Press the B W Start button If prompted select where you placed your document Automatic Document Feeder or scanner glass Note To cancel faxing ...

Страница 186: ...ou use this option 1 Place your original on the product for faxing 2 Press the Fax button 3 Enter a phone number or select a number from a speed or group dial list 4 Press the Menu button press the arrow buttons to select Send Fax Later and press the OK button 5 Select On use the number pad to enter your desired time press the OK button then press the Back button 6 Press the B W Start button If pr...

Страница 187: ...ting Options Description Quality Standard Provides good scan resolution and print quality for most faxes Fine Provides best scan resolution and print quality for faxes of small print and line art Photo Provides best scan resolution and print quality for faxed photos Contrast 4 to 4 Adjusts the contrast for faxes negative settings make faxes lighter and positive settings make faxes darker 2 Sided F...

Страница 188: ...nces or Properties button Note If you see a Setup Printer or Options button click it Then click Preferences or Properties on the next screen For more information about selecting fax print settings click Help 4 Select the Page Range as necessary Leave the Number of copies set to 1 5 Click Print If you re faxing for the first time you see a window like this one 188 ...

Страница 189: ... For detailed instructions on using the EPSON FAX Utility click Help 8 If you added a cover sheet to your fax select a cover sheet style enter your subject and comment information then click Next 9 Click Send to transmit your fax Parent topic Sending Faxes Sending Faxes Using the Fax Utility Mac OS X You can send a fax from a Mac OS X printing program using the FAX Utility You can fax up to 100 pa...

Страница 190: ...n the Print option in the File menu or another command See your application s help utility for details 3 Select your product FAX option as the Printer setting 4 Select the number of pages you are faxing as the Pages setting Note Leave the Copies setting set to 1 5 Select Recipient Settings from the pop up menu You see this window 190 ...

Страница 191: ... recipient Select a name or group from the Recipient List Enter a name company and fax number and click the button Click the icon and select a recipient from your address book 7 Select Fax Settings from the pop up menu You see this window 191 ...

Страница 192: ...ax reception mode to Auto Answer If you connected a telephone to your product so you can use the same phone line for faxes and voice calls you can also set your product to receive faxes manually This allows you to check for a fax tone using the telephone and press a button on your product to receive the fax Make sure to load paper in your product and select your fax settings before receiving a fax...

Страница 193: ...ine is set to pick up on the fourth ring set the product to pick up on the fifth ring or later If a telephone is connected and you use it to answer a call that turns out to be a fax wait until the product s LCD screen displays a message that a connection has been made before hanging up Parent topic Receiving Faxes Related tasks Connecting a Telephone or Answering Machine Receiving Faxes Manually Y...

Страница 194: ...eave the answered call active as you receive the fax transmission 3 Follow the instructions on the screen to receive the fax When fax transmission is finished you see the previous LCD screen 4 Press the OK button to print the fax 5 Hang up the phone Parent topic Receiving Faxes 194 ...

Страница 195: ...sposal please go to www epson com recycle for more information Check Cartridge and Maintenance Box Status Purchase EPSON Ink Cartridges and Maintenance Box Removing and Installing Ink Cartridges Replacing the Maintenance Box Check Cartridge and Maintenance Box Status Your printer and its software will let you know when an ink cartridge is low or expended or when the maintenance box needs to be rep...

Страница 196: ...ridge and Maintenance Box Status Checking Cartridge and Maintenance Box Status With Windows A low ink reminder appears if you try to print when ink is low and you can check your cartridge or maintenance box status at any time using a utility on your Windows computer 1 To check your status double click the product icon in the Windows taskbar then click Details You see this window 196 ...

Страница 197: ...rtridges installed in the product is broken incompatible with the product model or improperly installed EPSON Status Monitor will not display an accurate cartridge status 3 To disable the low ink reminder right click the product icon in the Windows taskbar and select Monitoring Preferences You see this window 197 ...

Страница 198: ...er alerts checkbox at the bottom of the screen 5 To disable promotional offers deselect the Display Epson Offers checkbox Parent topic Check Cartridge and Maintenance Box Status Related tasks Removing and Installing Ink Cartridges 198 ...

Страница 199: ...ing Update Replace or reinstall the maintenance box or any ink cartridge as indicated on the screen Note If any of the cartridges installed in the product is broken incompatible with the product model or improperly installed EPSON Status Monitor will not display an accurate cartridge status Parent topic Check Cartridge and Maintenance Box Status Related tasks Removing and Installing Ink Cartridges...

Страница 200: ...them Ink color Part number High capacity Part number Super High capacity Black cartridge 676XL 711XXL Cyan cartridge 676XL 711XXL Magenta cartridge 676XL 711XXL Yellow cartridge 676XL 711XXL Part Part number Maintenance box T671000 Parent topic Purchase EPSON Ink Cartridges and Maintenance Box Removing and Installing Ink Cartridges Make sure you have your replacement cartridges handy before you be...

Страница 201: ...3 Open the front cover 4 Push the ink cartridge in then pull it out of the slot 201 ...

Страница 202: ... water If ink gets into your mouth spit it out and see a doctor right away Keep ink cartridges out of the reach of children 5 Remove the cartridge from the package Caution Do not touch the green chip on the cartridge Install the new cartridge immediately after removing the old one if you do not the print head may dry out and be unable to print 6 Gently shake the ink cartridge horizontally for abou...

Страница 203: ... Insert the new cartridge into the holder and push it in until it clicks into place 8 When you are finished close the front cover After the product checks the cartridges ink replacement is complete Remove the ink cartridge and reinstall it to clear the error 203 ...

Страница 204: ... begin Caution Do not reuse a maintenance box that has been removed and left uninstalled for more than a week Keep the maintenance box away from direct sunlight 1 Make sure the product is not printing 2 Remove the new maintenance box from its package Caution Do not touch the green chip on the maintenance box 3 Press the buttons on the sides of the duplexer rear unit and remove it 4 Grasp the maint...

Страница 205: ...e holder and push it all the way in 7 Press the buttons on the sides of the duplexer rear unit and reattach it Parent topic Replacing Ink Cartridges and Maintenance Boxes Related concepts Purchase EPSON Ink Cartridges and Maintenance Box 205 ...

Страница 206: ...n t clean them unnecessarily Note You cannot clean the print head if an ink cartridge is expended and may not be able to clean it when a cartridge is low You must replace the cartridge first Print Head Nozzle Check Print Head Cleaning Parent topic Adjusting Print Quality Related topics Replacing Ink Cartridges and Maintenance Boxes Print Head Nozzle Check You can print a nozzle check pattern to ch...

Страница 207: ...arrow buttons to select Maintenance and press the OK button You see this screen 4 Press the OK button You see this screen 5 Press either of the Start buttons After the nozzle pattern prints you see this screen 207 ...

Страница 208: ...ollowing If there are no gaps select Finish Nozzle Check and press the OK button Press the Copy button to exit If there are gaps or the pattern is faint select Head Cleaning and press the OK button to continue 8 Follow the instructions on the screen to clean the print head check the nozzles and repeat the process as necessary 208 ...

Страница 209: ...ows or Mac computer 1 Load a few sheets of plain paper in the product 2 Do one of the following Windows Right click the product icon in the Windows taskbar Mac OS X 10 6 10 7 In the Apple menu or the Dock select System Preferences Select Print Fax or Print Scan select your product and select Options Supplies Select Utility and select Open Printer Utility Mac OS X 10 4 10 5 In the Apple menu or the...

Страница 210: ... 5 Check the printed pattern to see if there are gaps in the lines Print head is clean Print head needs cleaning 6 If there are no gaps click Finish If there are gaps or the pattern is faint clean the print head 210 ...

Страница 211: ...You must replace the cartridge first Cleaning the Print Head Using the Product Control Panel Cleaning the Print Head Using a Computer Utility Parent topic Print Head Maintenance Related topics Replacing Ink Cartridges and Maintenance Boxes Cleaning the Print Head Using the Product Control Panel You can clean the print head using the control panel on your product 1 Make sure plain paper is loaded i...

Страница 212: ...the cleaning cycle you want to run then press either of the Start buttons to clean the print head You see a message on the LCD screen during the cleaning cycle Caution Never turn off the product during a cleaning cycle or you may damage it When the cleaning cycle is finished you see this screen 212 ...

Страница 213: ...ing the Print Head Using a Computer Utility You can clean the print head using a utility on your Windows computer or Mac 1 Load a few sheets of plain paper in the product 2 Do one of the following Windows Right click the product icon in the Windows taskbar Mac OS X 10 6 10 7 In the Apple menu or the Dock select System Preferences Select Print Fax or Print Scan select your product and select Option...

Страница 214: ...You see one of these windows 214 ...

Страница 215: ...ycle and stays on when the cleaning cycle is finished Caution Never turn off the product during a cleaning cycle or you may damage it 6 When the power light stops flashing and remains on you can check to see if the nozzles are clean click Print Nozzle Check Pattern and click Print 7 Check the printed pattern to see if there are gaps in the lines Print head is clean 215 ...

Страница 216: ...nds you may need to align the print head Note Banding may also occur if your print head nozzles need cleaning Aligning the Print Head Using the Product Control Panel Aligning the Print Head Using a Computer Utility Parent topic Adjusting Print Quality Related concepts Print Head Cleaning Aligning the Print Head Using the Product Control Panel You can align the print head using the control panel on...

Страница 217: ...lignment and press the OK button You see this screen 5 Press either of the Start buttons to print an alignment sheet Note Do not cancel printing while you are printing a head alignment pattern You see this screen 217 ...

Страница 218: ...e of the following Windows Right click the product icon in the Windows taskbar Mac OS X 10 6 10 7 In the Apple menu or the Dock select System Preferences Select Print Fax or Print Scan select your product and select Options Supplies Select Utility and select Open Printer Utility Mac OS X 10 4 10 5 In the Apple menu or the Dock select System Preferences Select Print Fax or Print Scan select your pr...

Страница 219: ...You see one of these windows 219 ...

Страница 220: ...choosing each pattern number click Next If no patterns are aligned in one or more of the sets choose the closest one in each set and click Realignment Then print another alignment sheet and check it Note Click Skip where available if you want to skip a particular alignment sheet 6 When you are done click Finish Parent topic Print Head Alignment 220 ...

Страница 221: ...oad a few sheets of plain paper in the product 2 Use the product control panel to make a copy but without placing a document on the scanner glass 3 Check the back of the ejected paper to see if it is clean 4 Repeat as necessary until the paper comes out clean Parent topic Adjusting Print Quality Related topics Copying 221 ...

Страница 222: ...ricants inside the product or let water get inside it 1 Turn off the product 2 Unplug the power cable 3 Disconnect any connected cables 4 Remove all the paper from the rear MP tray 5 Clean the rear MP tray using a soft brush 6 Clean the scanner glass with a soft lint free cloth microfiber is recommended moistened with a little glass cleaner Caution Do not spray glass cleaner directly on the glass ...

Страница 223: ...ed here Caution During transportation and storage follow these guidelines Avoid tilting the product placing it vertically or turning it upside down otherwise ink may leak Leave the ink cartridges installed Removing the cartridges can dry out the print head and may prevent the product from printing 1 Turn off the product 2 Remove all the paper from the product 3 Unplug the power cable 4 Disconnect ...

Страница 224: ... the product Make sure the box adequately protects the product control panel Keep the product level during transportation If print quality has declined when you print again clean and align the print head Parent topic Cleaning and Transporting Your Product Related concepts Print Head Cleaning Print Head Alignment 224 ...

Страница 225: ...Scanned Image Quality Problems Solving Faxing Problems When to Uninstall Your Product Software Where to Get Help Checking for Software Updates Periodically it s a good idea to check Epson s support website for free updates to your product software Visit the driver download site at U S downloads or Canadian downloads With Windows your printer software automatically checks for updates You can also m...

Страница 226: ...n error has occurred during firmware updating Connect your product using a USB cable and try updating the firmware again If you still receive this error message contact Epson for support Cannot recognize USB Make sure the USB thumb drive or other device has been inserted correctly device No dial tone detected Make sure the phone cable is connected correctly and the phone line works Try Check Fax I...

Страница 227: ...Features Running a Product Check Running a product check helps you determine if your product is operating properly 1 Disconnect any interface cables connected to your product 2 Load plain paper in the product 3 Press the button 4 Press the arrow buttons to select Maintenance and press the OK button You see this screen 5 Press the OK button You see this screen 227 ...

Страница 228: ...ts and the nozzle check pattern is complete the product is operating properly Any operation problem you may have could be caused by your computer cable software or selected settings Check the other solutions in this book or try uninstalling and reinstalling your printer software If the page prints but the nozzle check pattern has gaps clean or align the print head 228 ...

Страница 229: ...nel Defaults If you have a problem with settings on the product control panel you can reset them to their factory defaults You can choose which settings to reset or reset them all 1 Press the Setup button 2 Press the arrow buttons to select Restore Default Settings and press the OK button You see this screen 3 Select one of these options and press the OK button Fax Send Receive Settings Resets all...

Страница 230: ... foam and plastic protective materials from inside the product The first time you install ink cartridges the product must prime its print head Wait until priming finishes before you turn off the product or it may prime improperly and use excess ink the next time you turn it on Your product is finished priming the print head when the power light stops flashing If the product s print head stops movi...

Страница 231: ...s If you have problems setting up the control panel try these solutions To view LCD screen text in a different language you can select a different Language setting To turn off the beep heard when you press a button turn off the Sound setting This also turns off the dialing sound for sending faxes Parent topic Solving Setup Problems Related tasks Changing LCD Screen Language Turning Off Control Pan...

Страница 232: ...o obtain your product s MAC address print a network status sheet Then follow the instructions in your router or access point documentation to add the address to the list If your router or access point does not broadcast its network name SSID follow the instructions that came with your product to enter your wireless network name manually If your router or access point has security enabled determine...

Страница 233: ...t If the network status is Disconnected check any cable connections and turn your product off and then on again If you are using TCP IP make sure the product s IP address is set correctly for your network If your network does not assign IP addresses using DHCP set the IP address manually Make sure your computer and product are both using the same wireless network If network printing is slow print ...

Страница 234: ...able the firewall and any anti virus software on your wireless router or access point Note With Mac OS X 10 6 or 10 7 in addition to scanning with Image Capture you can download and install EPSON Scan scanning software EPSON Scan provides additional image adjustment and photo correction features for enhancing scanned images and provides an interface for TWAIN compliant OCR scanning software such a...

Страница 235: ...utions if you have problems copying with your product Product Makes Noise But Nothing Copies Product Makes Noise When It Sits for a While Parent topic Solving Problems Product Makes Noise But Nothing Copies If your product makes a noise but nothing copies try these solutions Run a nozzle check to see if any of the print head nozzles are clogged Then clean the print head if necessary If the nozzle ...

Страница 236: ...eding paper try these solutions If paper does not feed for printing remove it from the tray or cassette Reload it against the right side then adjust the edge guides Make sure the paper stack is not above the tab on the edge guides inside the cassette If multiple pages feed at once remove the paper fan the edges to separate the sheets and reload it Do not load more than the recommended number of sh...

Страница 237: ...ems in the Duplexer Document Jams in the Automatic Document Feeder Paper Loading Capacity Related topics Loading Paper Paper Jam Problems Inside the Product If paper has jammed inside the product try these solutions 1 Cancel the print job from your computer if necessary 2 Open the front cover 3 Remove any paper inside including torn pieces 237 ...

Страница 238: ...4 Close the front cover 5 If any jammed paper remains near the output tray carefully remove it 6 Press either of the Start buttons to resume printing Parent topic Solving Paper Problems 238 ...

Страница 239: ...lems in the Duplexer Paper Jam Problems in the Cassette If paper has jammed in the cassette try this solution 1 Close the output tray 2 Pull out the paper cassette 3 Remove any jammed paper inside the cassette 4 Remove any paper jammed inside the paper cassette slot 239 ...

Страница 240: ...5 Carefully follow all paper loading instructions when you load new paper 6 Replace the paper cassette 240 ...

Страница 241: ...erences Paper Jam Problems Inside the Product Paper Jam Problems in the Duplexer Paper Jam Problems in the Duplexer If paper has jammed in the duplexer rear unit try these solutions 1 Cancel the print job from your computer if necessary 2 Press the buttons on the sides of the duplexer and remove it 241 ...

Страница 242: ...3 Carefully remove the jammed paper 4 If paper is jammed in the duplexer remove the paper as shown 242 ...

Страница 243: ...xer as you press it into place on your product 6 Press either of the Start buttons to resume printing Parent topic Solving Paper Problems Related references Paper Jam Problems Inside the Product Paper Jam Problems in the Cassette 243 ...

Страница 244: ...c Document Feeder Document Jams in the Automatic Document Feeder If you have problems with document jams in the automatic document feeder ADF try these solutions 1 Remove your originals from the ADF 2 Open the ADF cover 3 Remove any jammed pages 244 ...

Страница 245: ...Caution Do not remove pages jammed inside the ADF without opening the cover or you could damage the ADF 4 Leave the ADF cover open then raise the document cover 5 Remove any jammed pages 245 ...

Страница 246: ...6 Lower the document cover 7 Raise the ADF input tray 8 Carefully remove the jammed pages 246 ...

Страница 247: ...to clear any error messages Parent topic Solving Paper Problems Related tasks Placing Originals in the Automatic Document Feeder Paper Ejection Problems If you have problems with paper ejecting properly try these solutions If paper does not eject fully you may have set the wrong paper size Cancel printing to eject the paper Select the correct paper size when you reprint If paper is wrinkled when i...

Страница 248: ... Taskbar Error After Cartridge Replacement Printing is Slow Parent topic Solving Problems Nothing Prints If you have sent a print job and nothing prints try these solutions Make sure your product is turned on Make sure any interface cables are connected securely at both ends If you connected your product to a USB hub make sure it is a first tier hub If it still does not print connect your product ...

Страница 249: ...rent topic Solving Problems Printing from a Computer Related tasks Running a Product Check Product Icon Does Not Appear in Windows Taskbar If you do not see your product icon in the Windows taskbar first try restarting your computer If that does not work try this solution 1 Do one of the following Windows 7 Click and select Devices and Printers Windows Vista Click select Control Panel and click Pr...

Страница 250: ...Devices and Printers window before you print Clear space on your hard drive or run a defragmentation utility to free up existing space Close any programs you are not using when you print If your product is connected to a USB hub connect it directly to your computer instead If printing becomes slower after printing continuously for a long time the product may have automatically slowed down to prote...

Страница 251: ... Copies Print Blank Pages Print Incorrect Margins on Printout Incorrect Characters Print Incorrect Image Size or Position Slanted Printout Parent topic Solving Problems Inverted Image If your printed image is inverted unexpectedly try these solutions Turn off any mirror or inversion settings in your printing application Turn off the Mirror Image Flip horizontally or Reverse page orientation settin...

Страница 252: ... sure you selected the correct paper size settings in your printing program and printer software If a blank page exists in a document you are printing and you want to skip printing it select the Skip Blank Page setting in your printer software Run a print head nozzle check to see if any of the nozzles are clogged Then clean the print head if necessary Make sure your product is selected as the prin...

Страница 253: ...ing Make sure any cables are securely connected at both ends In Windows delete all print jobs from the Windows Spooler Windows 7 Click and select Devices and Printers Right click your product name select See what s printing select your product name again if necessary right click the stalled print job click Cancel and click Yes Windows Vista Click and select Control Panel Click Printer under Hardwa...

Страница 254: ...Settings Mac OS X 10 4 Selecting Additional Layout and Print Options Windows Selecting Print Layout Options Mac OS X 10 5 10 6 10 7 Selecting Page Setup Settings Mac OS X 10 4 Slanted Printout If your printouts are slanted try these solutions Select a higher print quality setting in your printer software Align the print head Make sure the product is not printing while tilted or at an angle Parent ...

Страница 255: ... the paper type setting matches the type of paper you loaded Turn off any high speed settings in your product software Align the print head You may need to replace the ink cartridges Parent topic Solving Print Quality Problems Related concepts Print Head Cleaning Print Head Alignment Related references Paper or Media Type Settings Related tasks Selecting Additional Layout and Print Options Windows...

Страница 256: ...ny of the print head nozzles are clogged Then clean the print head if necessary Align the print head Clean the paper path Note Your product will not operate properly while tilted at an angle Place it on a flat stable surface that extends beyond the base of the product in all directions Parent topic Solving Print Quality Problems Related concepts Print Head Cleaning Print Head Alignment Related ref...

Страница 257: ... Align the print head Clean the paper path Parent topic Solving Print Quality Problems Related concepts Print Head Cleaning Related tasks Selecting Basic Print Settings Windows Selecting Basic Print Settings Mac OS X 10 5 10 6 10 7 Selecting Basic Print Settings Mac OS X 10 4 Cleaning the Paper Path Related topics Replacing Ink Cartridges and Maintenance Boxes Grainy Printout If your printouts are...

Страница 258: ...ke sure the Black Grayscale or Grayscale setting is not selected in your printer software Run a nozzle check to see if any of the print head nozzles are clogged Then clean the print head if necessary The ink cartridges may be old or low on ink and you may need to replace them Your printed colors can never exactly match your on screen colors However you can use a color management system to get as c...

Страница 259: ...graded your operating system but did not reinstall your scanning software try reinstalling it Note With Mac OS X 10 6 or 10 7 in addition to scanning with Image Capture you can download and install EPSON Scan scanning software EPSON Scan provides additional image adjustment and photo correction features for enhancing scanned images and provides an interface for TWAIN compliant OCR scanning softwar...

Страница 260: ...nning software such as ABBYY FineReader To download EPSON Scan visit Epson s driver download site U S downloads or Canadian downloads Parent topic Solving Scanning Problems Related tasks Scanning with Mac OS X 10 6 10 7 Using Image Capture Related topics Starting a Scan Solving Scanned Image Quality Problems Check these sections if a scanned image on your computer screen has a quality problem Imag...

Страница 261: ...loth or use a small amount of glass cleaner on the cloth if necessary Paper towels are not recommended Caution Do not spray glass cleaner directly on the scanner glass Parent topic Solving Scanned Image Quality Problems Straight Lines in an Image Appear Crooked If straight lines in an original appear crooked in a scanned image make sure to place your original straight when you scan it Parent topic...

Страница 262: ...ts edges with paper to block external light as you scan it Parent topic Solving Scanned Image Quality Problems Image is Too Dark If your scanned image is too dark try these solutions Adjust these EPSON Scan settings if available and try scanning again Auto Exposure Brightness Histogram Adjustment Check the brightness and contrast settings of your computer monitor Parent topic Solving Scanned Image...

Страница 263: ...low and black Check the color matching and color management capabilities of your computer display adapter and the software you are using to see if they are affecting the palette of colors you see on your screen To adjust the colors in your scanned image adjust these EPSON Scan settings if available and try scanning again Change the Image Type setting and experiment with different combinations of t...

Страница 264: ...rent topic Solving Problems Cannot Send or Receive Faxes If you cannot send or receive faxes try these solutions Make sure the recipient s fax machine is turned on and working Make sure paper is loaded correctly in your product Make sure Auto Answer mode is turned on to receive faxes automatically Check your product control panel to see if this mode is turned on Check that the cable connecting you...

Страница 265: ...Answer Connecting a Telephone or Answering Machine Printing Fax Reports Selecting Fax Communication Settings Related topics Loading Paper Cannot Receive Faxes with a Telephone Connected to Your Product Make sure your telephone is connected to your product s EXT port Note When answering a call that is a fax wait until the product s LCD screen displays a message that a connection has been made befor...

Страница 266: ...nt Manager and click Uninstall Change Windows XP Double click Add or Remove Programs Select Epson Event Manager and click Change Remove 8 Do one of the following to uninstall EPSON Scan then follow any on screen instructions Windows 7 or Windows Vista Select Epson Scan and click Uninstall Change Windows XP Select Epson Scan and click Change Remove 9 Restart your computer then see the Start Here sh...

Страница 267: ... it Parent topic When to Uninstall Your Product Software Where to Get Help If you need to contact Epson for technical support services use the following support options Internet Support Visit Epson s support website at www epson com support U S or www epson ca support Canada for solutions to common problems You can download drivers and documentation get FAQs and troubleshooting advice or e mail Ep...

Страница 268: ...istance charges may apply Purchase Supplies and Accessories You can purchase genuine EPSON ink and paper at EPSON Supplies Central at www epson com ink3 U S sales or www epson ca Canadian sales You can also purchase supplies from an EPSON authorized reseller To find the nearest one call 800 GO EPSON 800 463 7766 Parent topic Solving Problems 268 ...

Страница 269: ...F Specifications Fax Specifications Paper Specifications Printable Area Specifications Ink Cartridge Specifications Dimension Specifications Electrical Specifications Environmental Specifications Interface Specifications External USB Device Specifications Network Interface Specifications Safety and Approvals Specifications Windows System Requirements To use your product and its software your compu...

Страница 270: ...ne of these operating systems Mac OS X 10 4 11 Mac OS X 10 5 8 Mac OS X 10 6 x Mac OS X 10 7 x Note Visit Epson s support website at www epson com support U S or www epson ca support Canada for the latest in compatibility and drivers for your product Parent topic Technical Specifications Printing Specifications Paper path Rear MP tray top entry Paper cassette front entry Rear MP tray capacity Appr...

Страница 271: ... Grayscale 16 bits per pixel internal 8 bits per pixel external Black and white 16 bits per pixel internal 1 bit per pixel external Light source LED Parent topic Technical Specifications Automatic Document Feeder ADF Specifications Paper input Faceup loading Paper output Facedown ejection Paper size US letter legal or A4 size Paper type Plain paper Paper weight 17 lb 64 g m2 to 24 lb 95 g m2 Sheet...

Страница 272: ...ombined Page memory Up to 180 ITU T No 1 chart Redial 2 times with 1 minute interval Interface RJ 11 Phone Line RJ 11 Telephone set connection Parent topic Technical Specifications Paper Specifications Use paper under normal conditions Temperature 59 to 77 ºF 15 to 25 ºC Humidity 40 to 60 RH Note Since the quality of any particular brand or type of paper may be changed by the manufacturer at any t...

Страница 273: ...4 g m2 to 24 lb 90 g m2 Note You can load binder paper with holes in the rear MP tray The paper must be one of the following sizes Letter 8 5 11 inches 216 279 mm A4 8 3 11 7 inches 210 297 mm or Legal 8 5 14 inches 216 357 mm The holes must be within 0 74 inch 19 mm of the left edge of the page Envelopes Size No 10 4 1 9 5 inches 105 241 mm Paper types Plain paper Weight 20 lb 75 g m2 to 24 lb 90...

Страница 274: ...Single sheets 1 Top 0 12 inch 3 mm minimum 2 Left 0 12 inch 3 mm minimum 3 Right 0 12 inch 3 mm minimum 4 Bottom 0 12 inch 3 mm minimum Envelopes 274 ...

Страница 275: ...d on images printed print settings paper type frequency of use and temperature For print quality a variable amount of ink remains in the cartridge after the replace cartridge indicator comes on Color Cyan Magenta Yellow Black Cartridge life Opened package 6 months Unopened package do not use if the date on the package has expired Temperature Storage 4 to 104 ºF 20 to 40 ºC 1 month at 104 ºF 40 ºC ...

Страница 276: ...ply rating 100 to 240 V Input voltage range 90 to 264 V Rated frequency range 50 60 Hz Input frequency range 49 5 60 5 Hz Rated current 0 7 0 35 A Power consumption WorkForce Pro WP 4520 Standalone copying mode 17 W ISO IEC24712 Ready mode 7 W Sleep mode 2 4 W Power off mode 0 3 W WorkForce Pro WP 4533 Standalone copying mode 19 W ISO IEC24712 Ready mode 8 W Sleep mode 3 8 W Power off mode 0 3 W P...

Страница 277: ...ass for computers Hi Speed USB Mass storage class for external storage Note Epson cannot guarantee the operation of externally connected devices Parent topic Technical Specifications External USB Device Specifications Note Use only external storage devices with independent AC power sources External storage devices that are powered via USB are not recommended Magneto optical drive 1 3GB Hard disk a...

Страница 278: ...on Parent topic Technical Specifications Safety and Approvals Specifications United States Safety UL60950 1 EMC FCC part 15 Subpart B Class B Canada Safety CAN CSA C22 2 No 60950 1 EMC CAN CSA CEI IEC CISPR 22 Class B WorkForce Pro WP 4533 This equipment contains the following wireless module Manufacturer Marvell Semiconductor Inc Type SP88W8786 MD0 2C2T00 This product conforms to Part 15 of FCC R...

Страница 279: ...ause undesired operation of the device To prevent radio interference to the licensed service this device is intended to be operated indoors and away from windows to provide maximum shielding Equipment or its transmit antenna that is installed outdoors is subject to licensing Parent topic Technical Specifications 279 ...

Страница 280: ...ot use the EPSON product near water Avoid using a telephone during an electrical storm There may be a remote risk of electric shock from lightning Do not use a telephone to report a gas leak in the vicinity of the leak Caution To reduce the risk of fire use only a No 26 AWG or larger telecommunication line cord Parent topic Notices FCC Compliance Statement For United States Users This equipment co...

Страница 281: ...to give you an opportunity to maintain uninterrupted telephone service This product is not intended to be repaired If you experience trouble with this equipment please contact Name Epson America Inc Address 3840 Kilroy Airport Way Long Beach CA 90806 U S A Telephone 562 981 3840 The telephone company may ask that you disconnect this equipment from the network until the problem has been corrected o...

Страница 282: ...ing measures Reorient or relocate the receiving antenna Increase the separation between the equipment and receiver Connect the equipment into an outlet on a circuit different from that to which the receiver is connected Consult the dealer or an experienced radio TV technician for help WARNING The connection of a non shielded equipment interface cable to this equipment will invalidate the FCC Certi...

Страница 283: ...o receive the source code above please contact Epson customer support for your region You shall comply with the license terms of each open source software program 3 The open source software programs are WITHOUT ANY WARRANTY without even the implied warranty of MERCHANTABILITY AND FITNESS FOR A PARTICULAR PURPOSE See the license agreements of each open source software program for more details which...

Страница 284: ...cps_3 1 14 sysvinit 2 85 telnetd_0 17 21 udhcp 0 9 8cvs20050124 5 util linux 2 12 GNU LGPL This printer product includes the open source software programs which apply the GNU Lesser General Public License Version 2 or later version LGPL Programs The list of LGPL Programs inetutils ftpd_1 4 2 libc6_2 3 6 procps_3 1 14 sysvinit 2 85 zeroconf 0 6 1 1 iksemel 1 4 Apple Public Source License 284 ...

Страница 285: ...en source software program OpenSSL toolkit which applies the license terms of OpenSSL License and Original SSLeay License BSD License Berkeley Software Distribution License This printer product includes the open source software programs which apply the Berkeley Software Distribution License BSD Programs The list of BSD Programs busybox_1 7 2 coreutils_5 2 1 ftp_0 17 libc6_2 3 6 inetutils ftpd_1 4 ...

Страница 286: ...ap0_7 6 libncurses license This printer product includes the open source software program libncurses which applies the terms and conditions provided by owner of the copyright to the libncurses libncurses Program libncurses5_5 busybox license This printer product includes the open source software program busybox which applies the terms and conditions provided by owner of the copyright to the busybo...

Страница 287: ...s and conditions provided by owner of the copyright to the telnetd telnetd Program telnetd_0 17 21 ARC4 license This printer product includes the open source software program ARC4 which applies the terms and conditions provided by owner of the copyright to the ARC4 ARC4 Program ARC4 json_parser license This printer product includes the open source software program json_parser which applies the ter...

Страница 288: ... each open source software program 3 The open source software programs are WITHOUT ANY WARRANTY without even the implied warranty of MERCHANTABILITY AND FITNESS FOR A PARTICULAR PURPOSE See the license agreements of each open source software program for more details which are described in OSS pdf on your Printer Software CD 4 OpenSSL toolkit This printer product includes software developed by the ...

Страница 289: ...e_4 14 procps_3 1 14 sysvinit 2 85 telnetd_0 17 21 udhcp 0 9 8cvs20050124 5 util linux 2 12 usb8786 GNU LGPL This printer product includes the open source software programs which apply the GNU Lesser General Public License Version 2 or later version LGPL Programs The list of LGPL Programs inetutils ftpd_1 4 2 libc6_2 3 6 procps_3 1 14 sysvinit 2 85 zeroconf 0 6 1 1 iksemel 1 4 289 ...

Страница 290: ...uct includes t he open source software program OpenSSL toolkit which applies the license terms of OpenSSL License and Original SSLeay License BSD License Berkeley Software Distribution License This printer product includes the open source software programs which apply the Berkeley Software Distribution License BSD Programs The list of BSD Programs busybox_1 7 2 coreutils_5 2 1 ftp_0 17 libc6_2 3 6...

Страница 291: ... libwrap0_7 6 libncurses license This printer product includes the open source software program libncurses which applies the terms and conditions provided by owner of the copyright to the libncurses libncurses Program libncurses5_5 busybox license This printer product includes the open source software program busybox which applies the terms and conditions provided by owner of the copyright to the ...

Страница 292: ...s and conditions provided by owner of the copyright to the telnetd telnetd Program telnetd_0 17 21 ARC4 license This printer product includes the open source software program ARC4 which applies the terms and conditions provided by owner of the copyright to the ARC4 ARC4 Program ARC4 json_parser license This printer product includes the open source software program json_parser which applies the ter...

Страница 293: ...n contained herein is designed only for use with this EPSON product Epson is not responsible for any use of this information as applied to other products Neither Seiko Epson Corporation nor its affiliates shall be liable to the purchaser of this product or third parties for damages losses costs or expenses incurred by purchaser or third parties as a result of accident misuse or abuse of this produ...

Страница 294: ...s THE SOFTWARE IS PROVIDED AS IS AND WITHOUT WARRANTY OF ANY KIND EXPRESS IMPLIED OR OTHERWISE INCLUDING WITHOUT LIMITATION ANY WARRANTY OF MERCHANTABILITY OR FITNESS FOR A PARTICULAR PURPOSE IN NO EVENT SHALL SAM LEFFLER OR SILICON GRAPHICS BE LIABLE FOR ANY SPECIAL INCIDENTAL INDIRECT OR CONSEQUENTIAL DAMAGES OF ANY KIND OR ANY DAMAGES WHATSOEVER RESULTING FROM LOSS OF USE DATA OR PROFITS WHETHE...

Страница 295: ...a period of nonuse The time interval has been set at the factory to ensure that the product meets Energy Star standards of energy efficiency and cannot be modified by the consumer Parent topic Copyright Notice Copyright Attribution 2012 Epson America Inc 2 12 CPD 36123 Parent topic Copyright Notice 295 ...

Отзывы: